How To Feed A Loon

  • About Us
  • Recipe Index
    • Appetizers
    • Asian
    • Breads and Doughs
    • Cajun / Creole / Louisiana
    • Breakfast / Brunch
    • Comfort Food
    • Delectable Desserts
    • Entrees / Mains
    • Instant Pot
    • Italian
    • Pizza
    • Rubs, Spices and Sauces
    • Soups & Salads
    • Sides
    • Seafood
    • Southern
    • Mexican / Tex-Mex / Cal-Mex
    • Thanksgiving
    • Vegetarian
  • Videos
    • Recipe Videos
    • Web Stories
  • Work With Us
  • Contact
  • **Premium Access**
  • Recipes
menu icon
go to homepage
  • Summer Favorites
  • Recipes
  • About Us
  • Work With Us
  • Join Our Community
subscribe
search icon
Homepage link
  • Summer Favorites
  • Recipes
  • About Us
  • Work With Us
  • Join Our Community
×
Home » Recipe Index

Best-Ever Grilled BBQ Chicken

June 25, 2025 by Kris Longwell 2 Comments

Grilled BBQ Chicken with visible grill marks resting on a metal sheet pan with a small white bowl of homemade BBQ sauce with a spoon in it nearby.

Best-Ever Grilled BBQ Chicken is juicy, flavorful, and perfectly charred, making it a standout dish for any cookout. Serve it alongside a creamy Classic Potato Salad and Diner-Style Coleslaw for the ultimate backyard meal everyone will love.
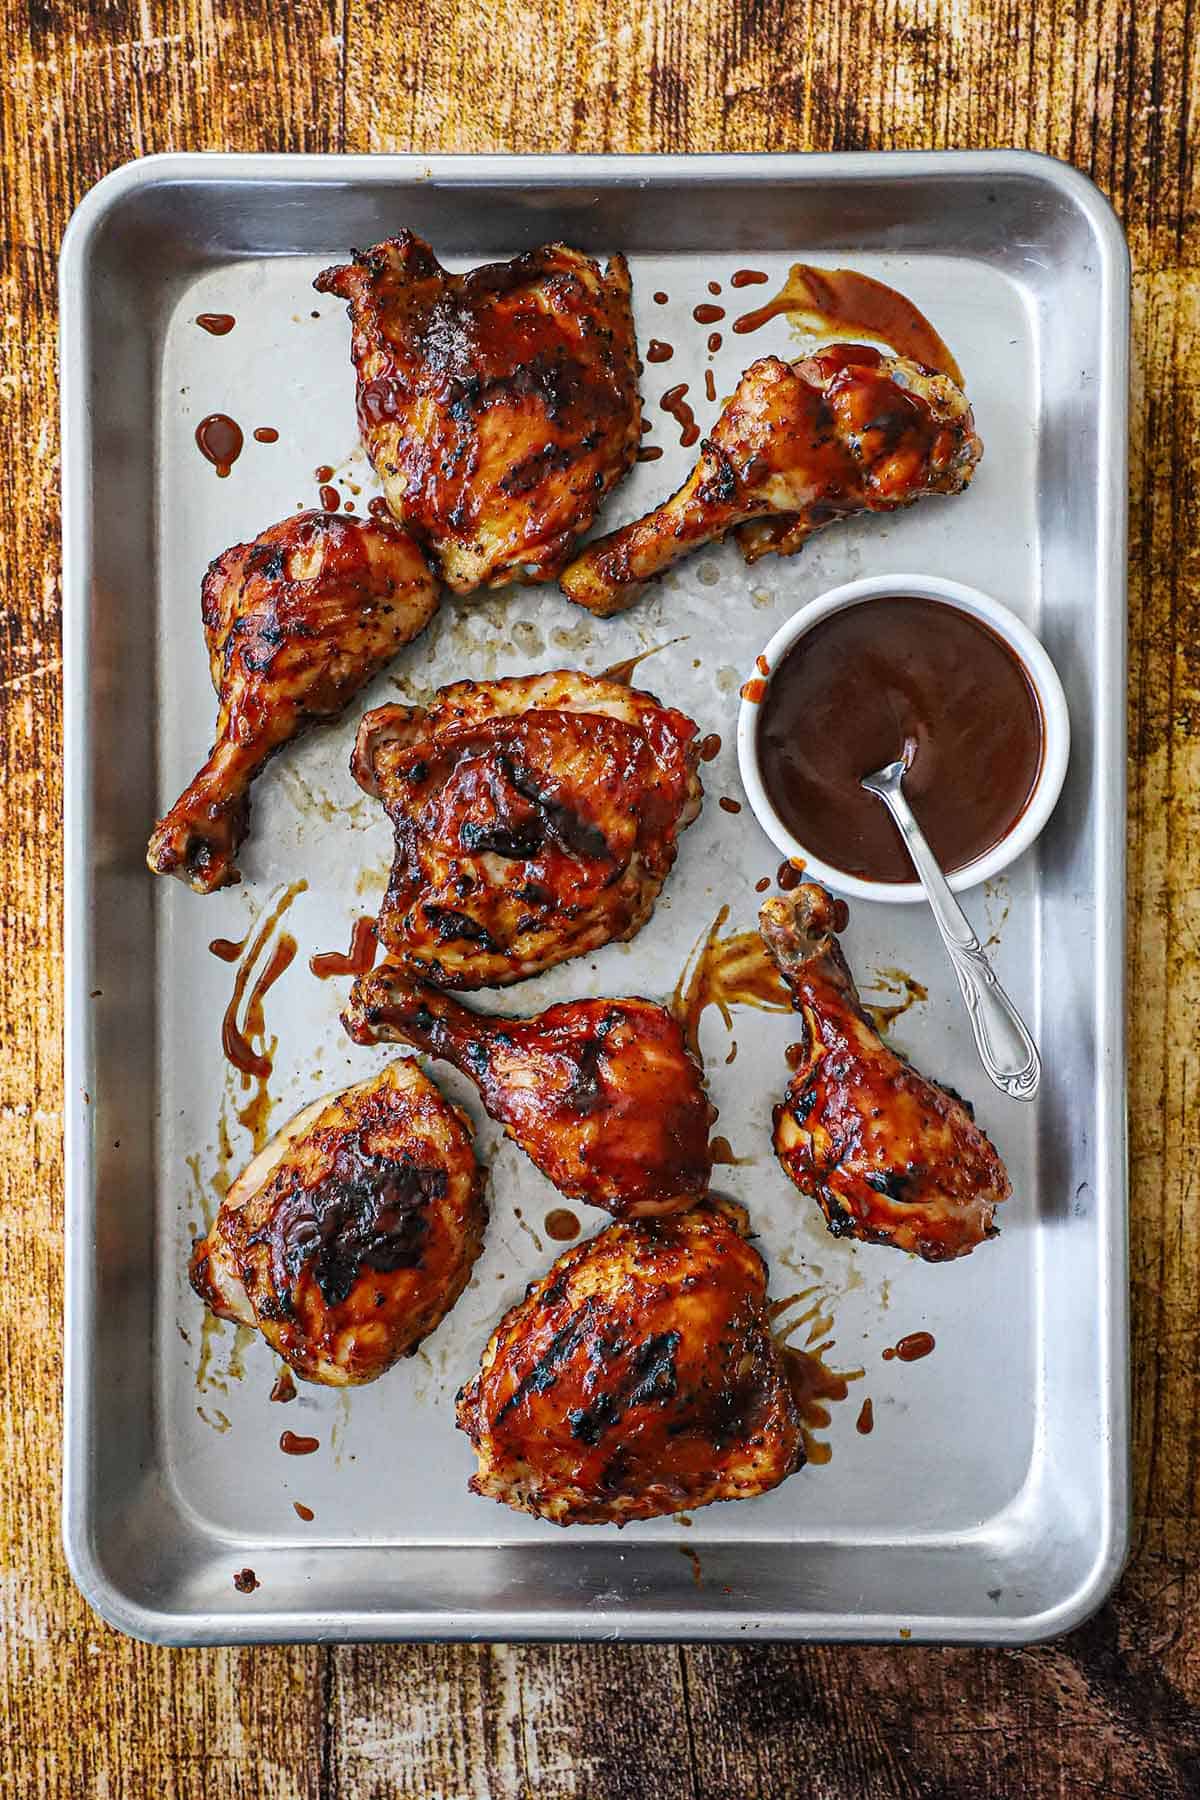
Grilled BBQ Chicken with visible grill marks resting on a metal sheet pan with a small white bowl of homemade BBQ sauce with a spoon in it nearby.
[feast_advanced_jump_to]

🍗 The Ingredients

With just a handful of simple ingredients, this grilled BBQ chicken delivers incredible flavor, and the Easy Homemade BBQ Sauce is an absolute must for that authentic, mouthwatering taste. Find ingredient notes (including substitutions and variations) below.
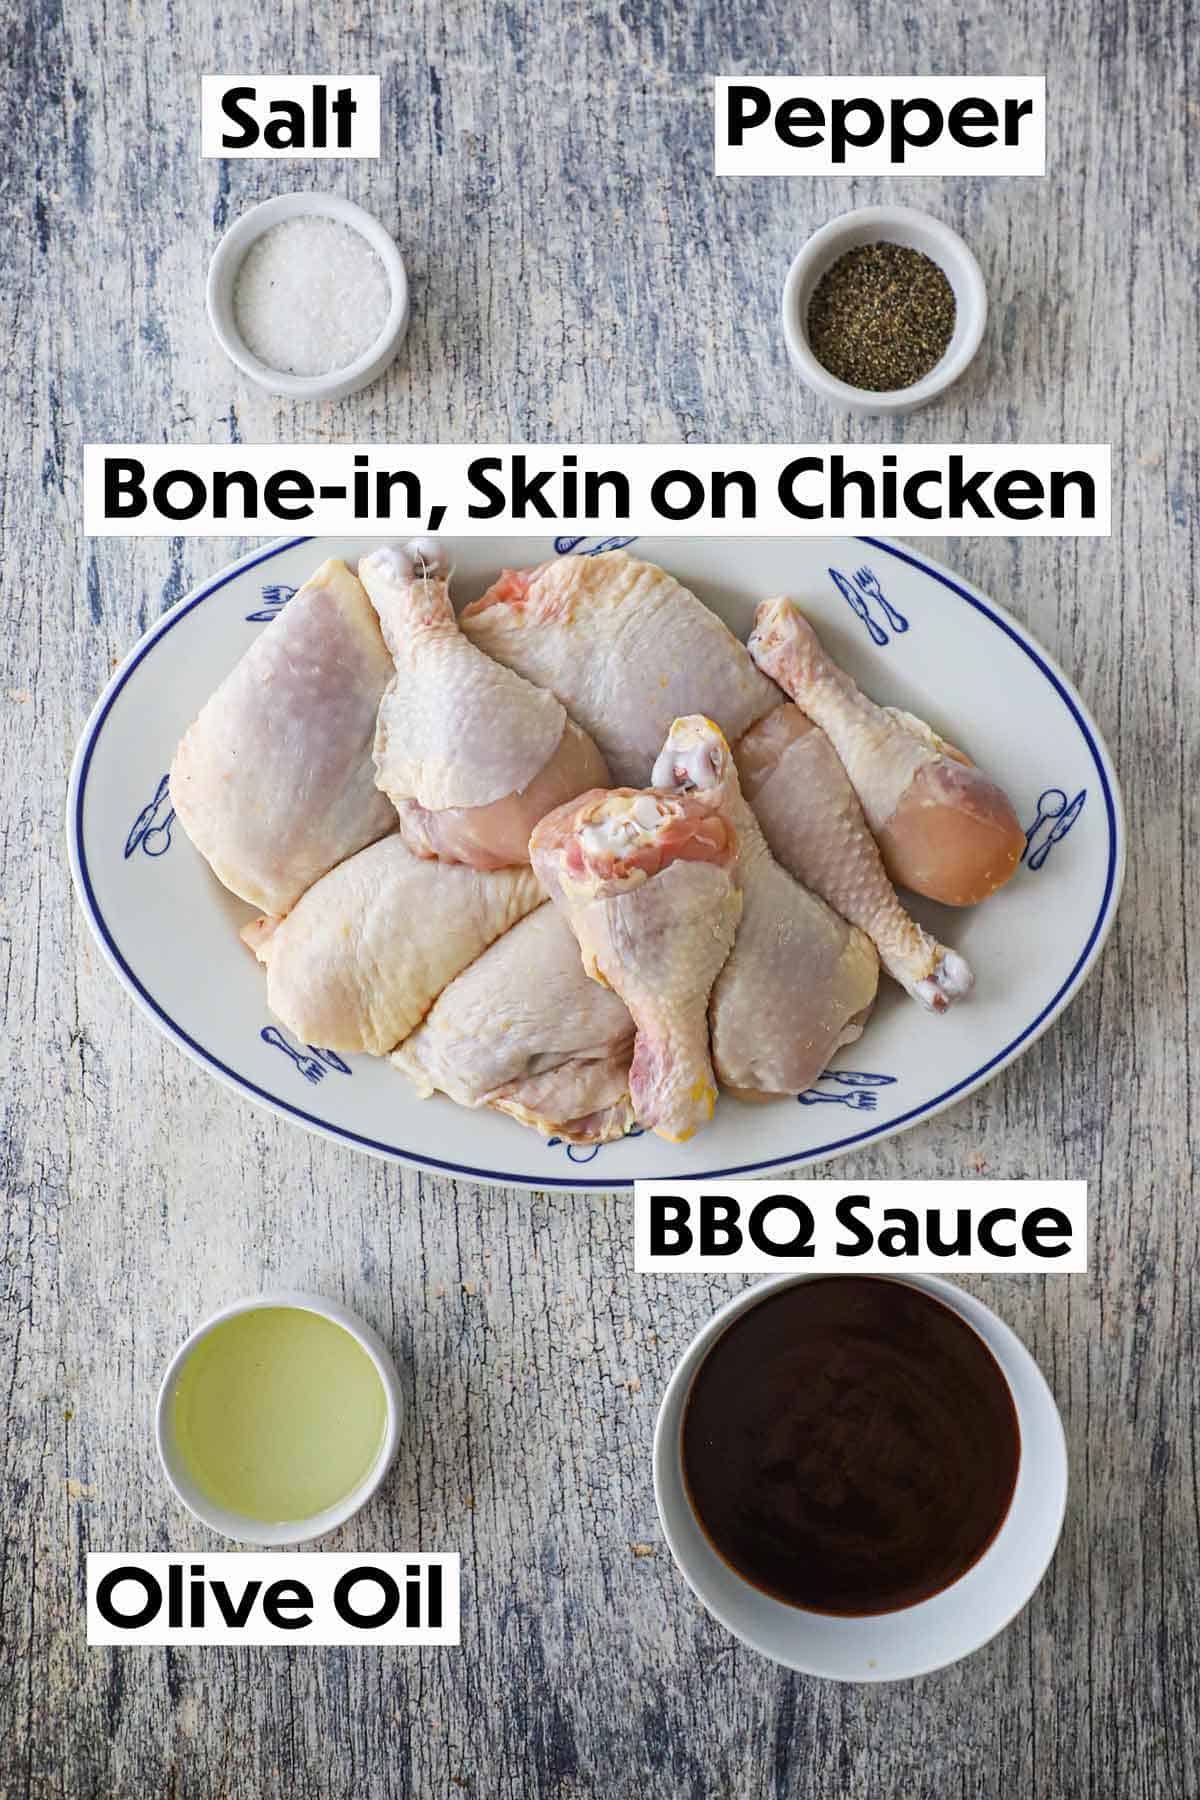
An arrangement of ingredients for grilled BBQ chicken on a grey wooden background including uncooked chicken pieces, salt, pepper, olive oil, and BBQ sauce.

👉 Substitutions and Variations

  • Chicken – We recommend bone-in, skin-on chicken pieces because the process of salt brining makes the skin crisp. However, you can certainly go with boneless chicken breasts or thighs. They will cook in less time.
  • BBQ Sauce – Homemade is easy, can be made days in advance, and takes this dish to the next level. However, top-notch bottle sauce can be substituted in a pinch. Another delicious variation is to use Alabama White Sauce instead of BBQ. Both are amazingly yummy.
  • Seasoning – Salt and pepper are really all you need. The salt brine will also make the chicken very juicy and flavorful. For even more flavor, consider sprinkling on our Perfect BBQ Rub just before placing the chicken on the grill.

See the recipe card (with video) below for a full list of ingredients and measurements.

👩🏼‍🍳 How to Make the Best Grilled BBQ Chicken
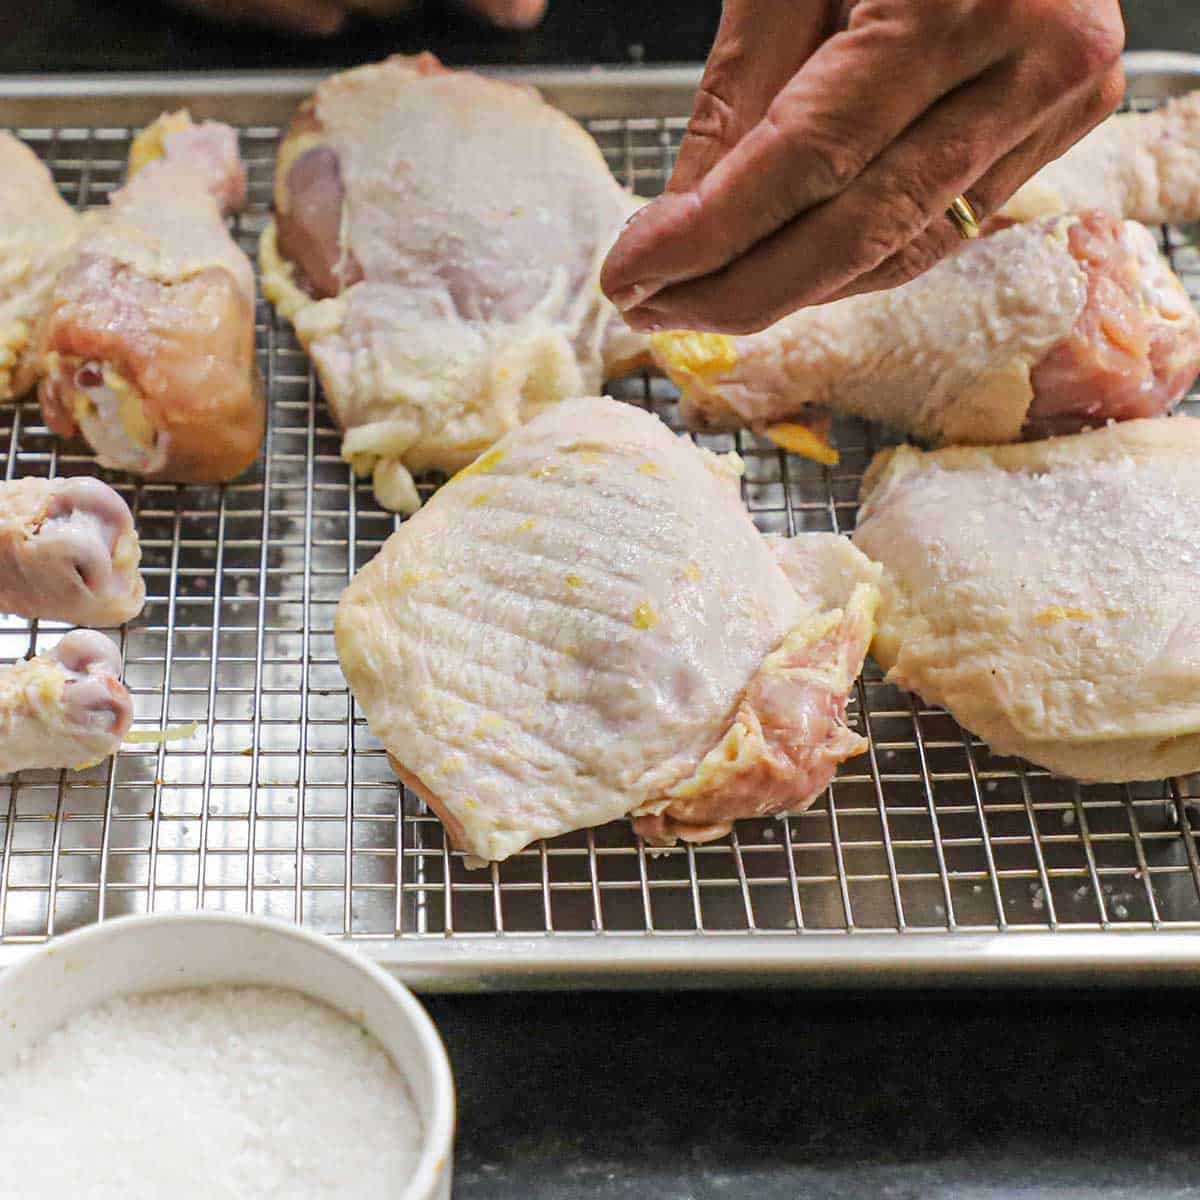
A person sprinkling salt over raw bone-in, skin on chicken pieces that are sitting on baking rack on a sheet pan.
  1. Step 1: Season the chicken with salt and chill for 2 hours, or preferably 24 to 48 hours.
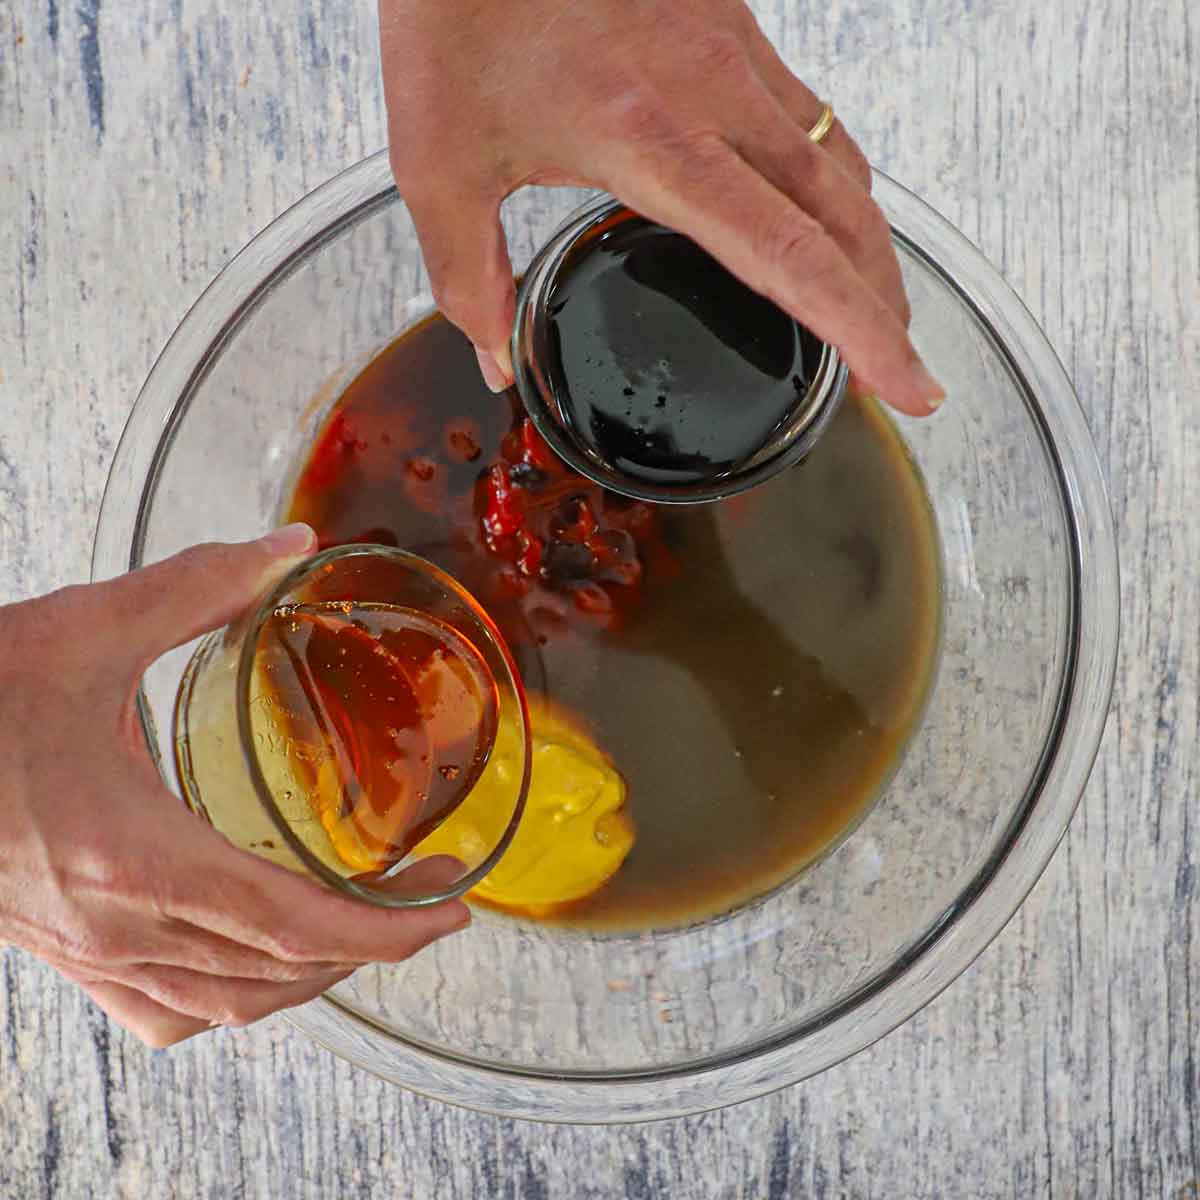
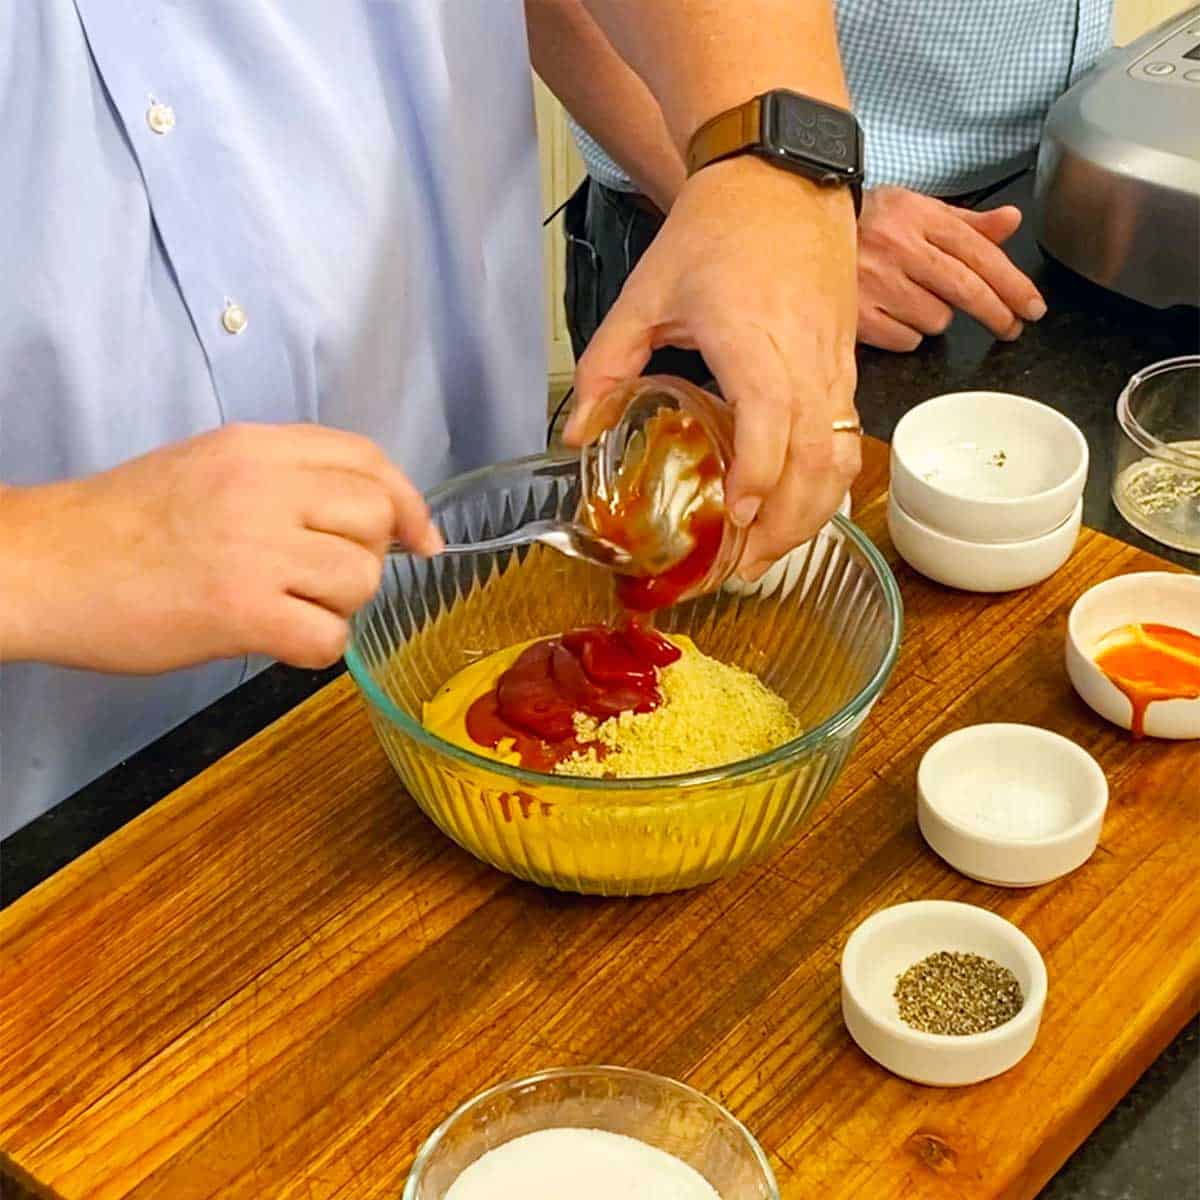
A person holding a small bowl of molasses in one hand and the other hand holding a small bowl of honey over a large glass bowl filled ketchup, mustard and other ingredients for homemade BBQ sauce.
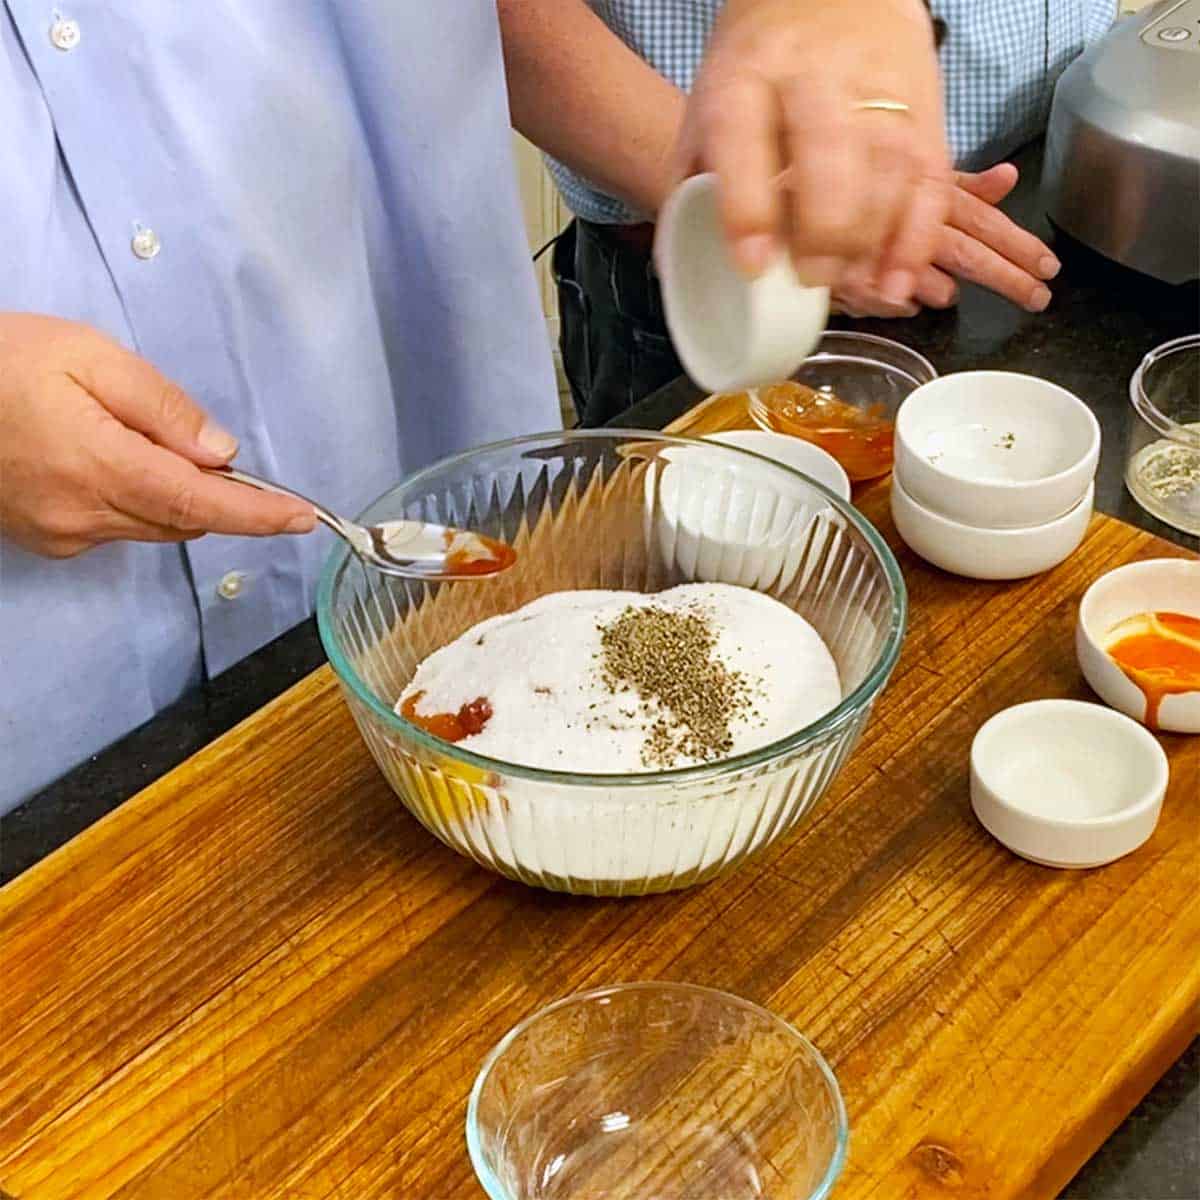
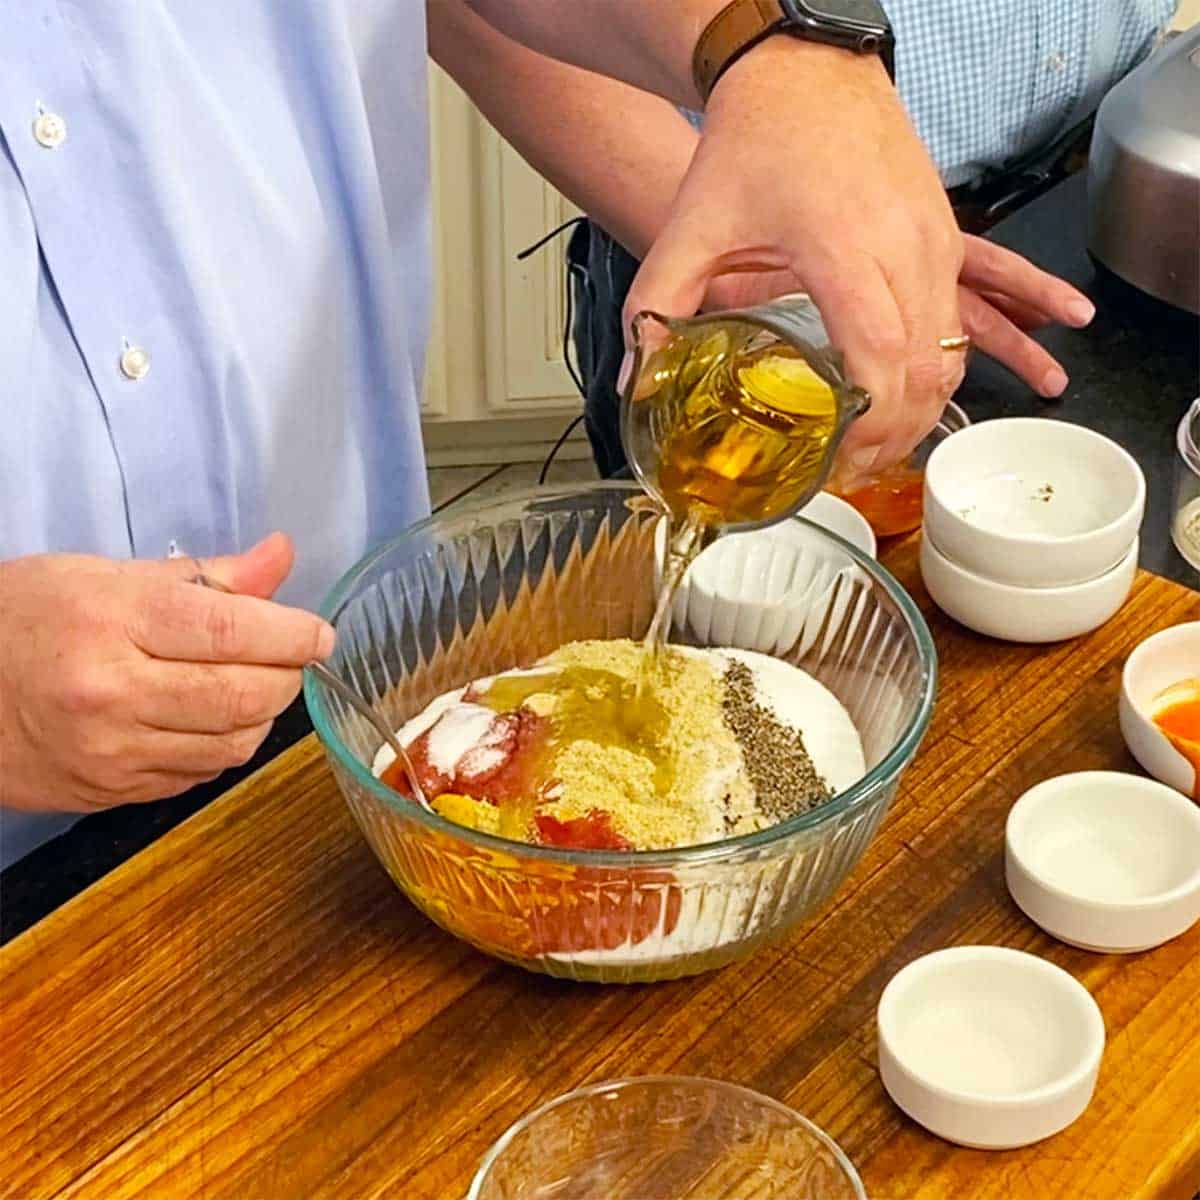
  1. Step 2: In a large bowl, add the ketchup, brown sugar, mustard, vinegar, Worcestershire, lemon juice, steak sauce, molasses, honey, and hot sauce. Stir to combine.
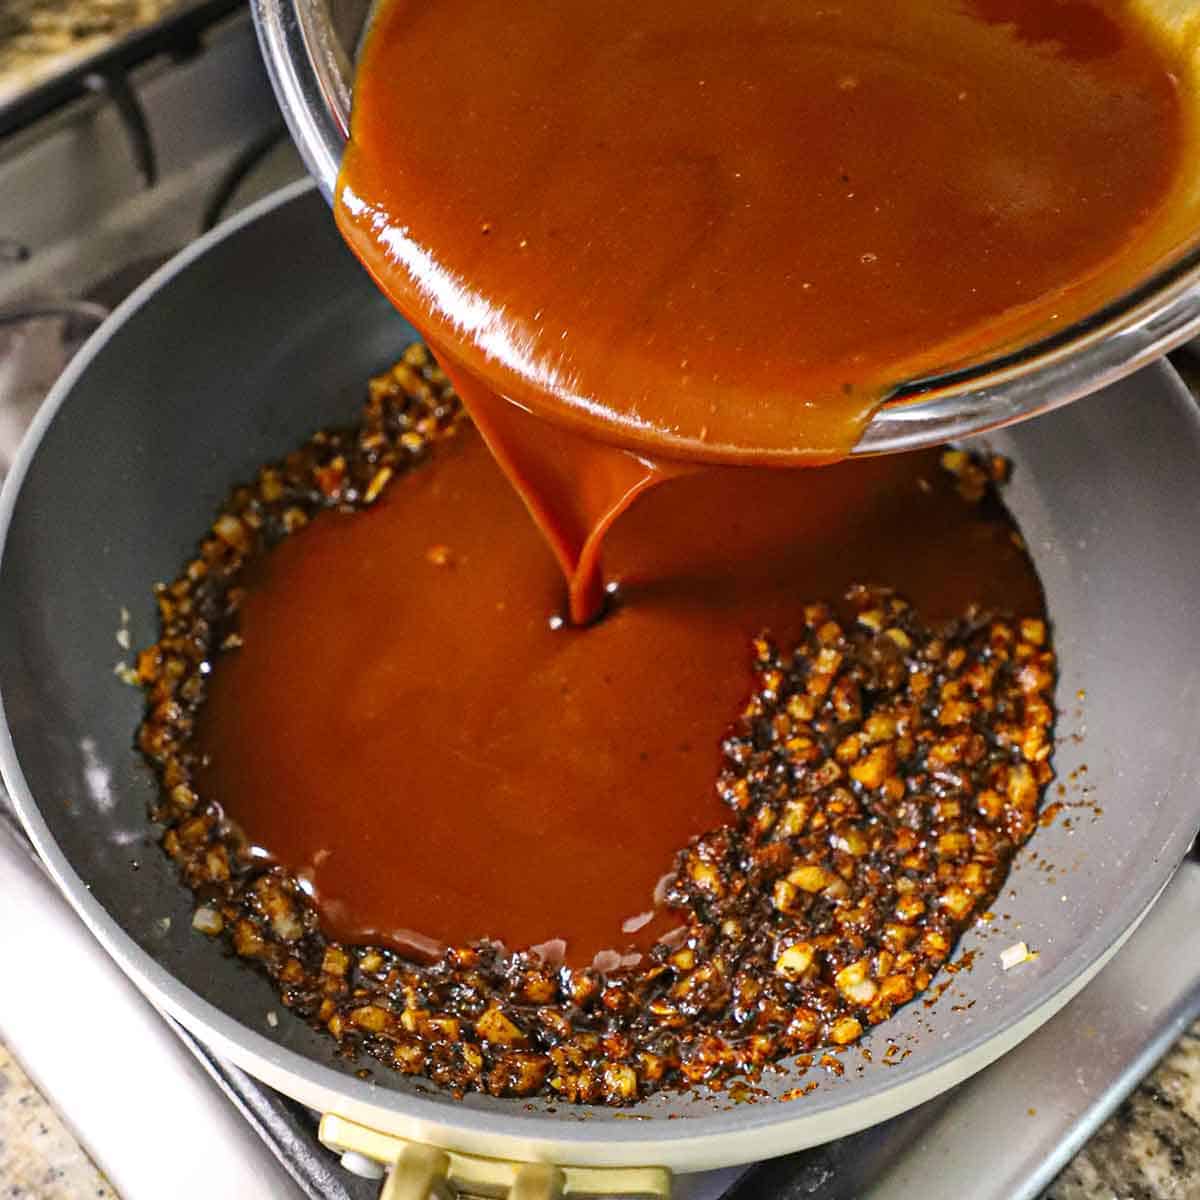
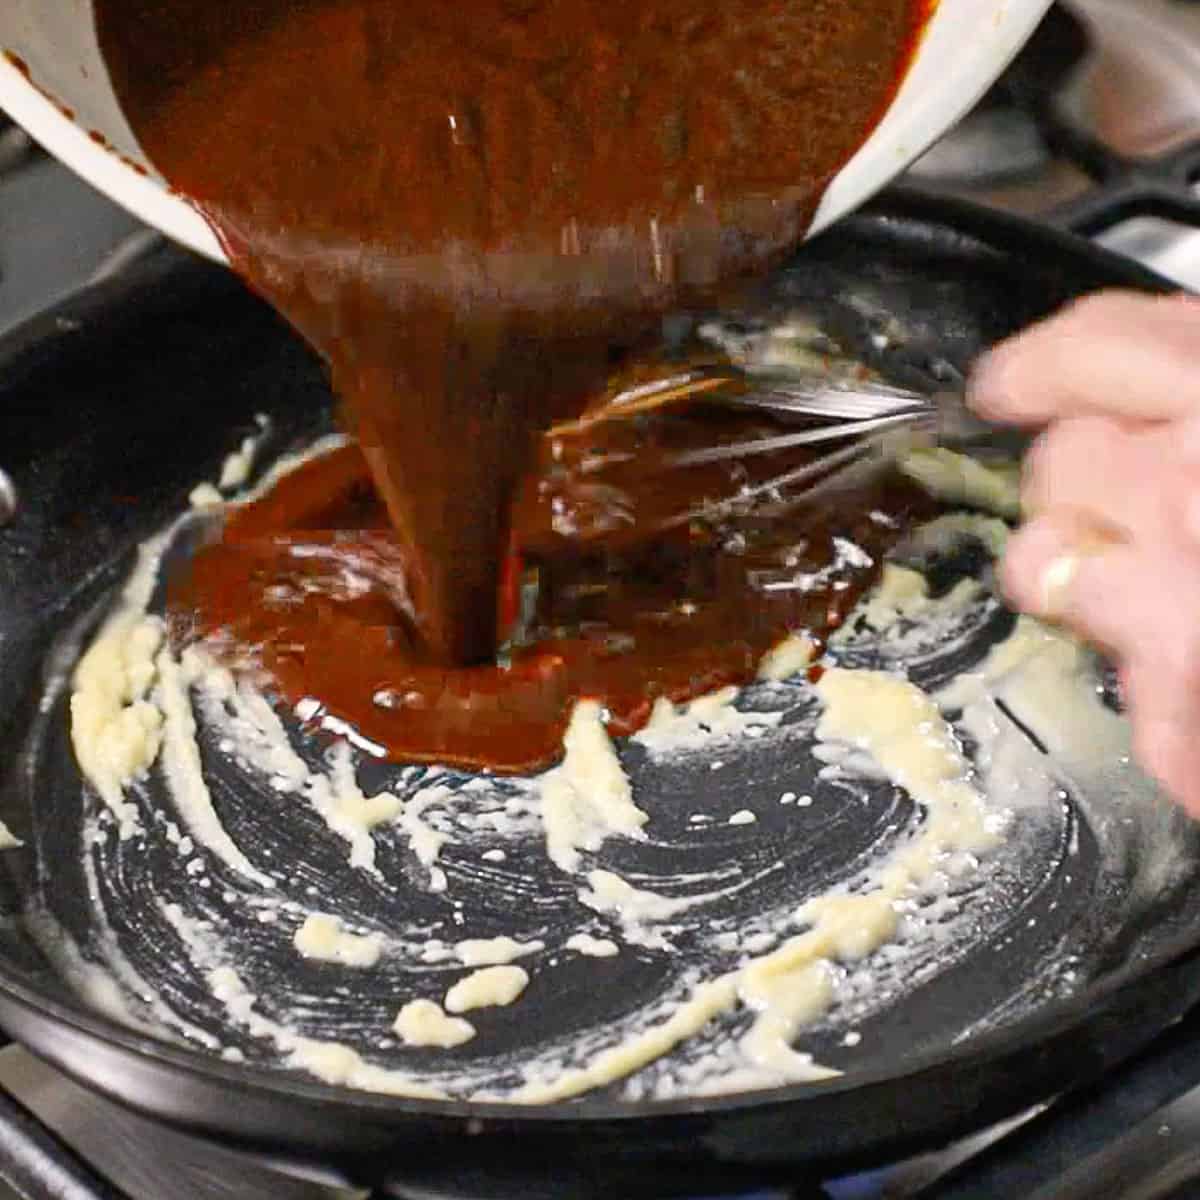
A person pouring a brown sauce into a large skillet filled with sautéed onions and spices.
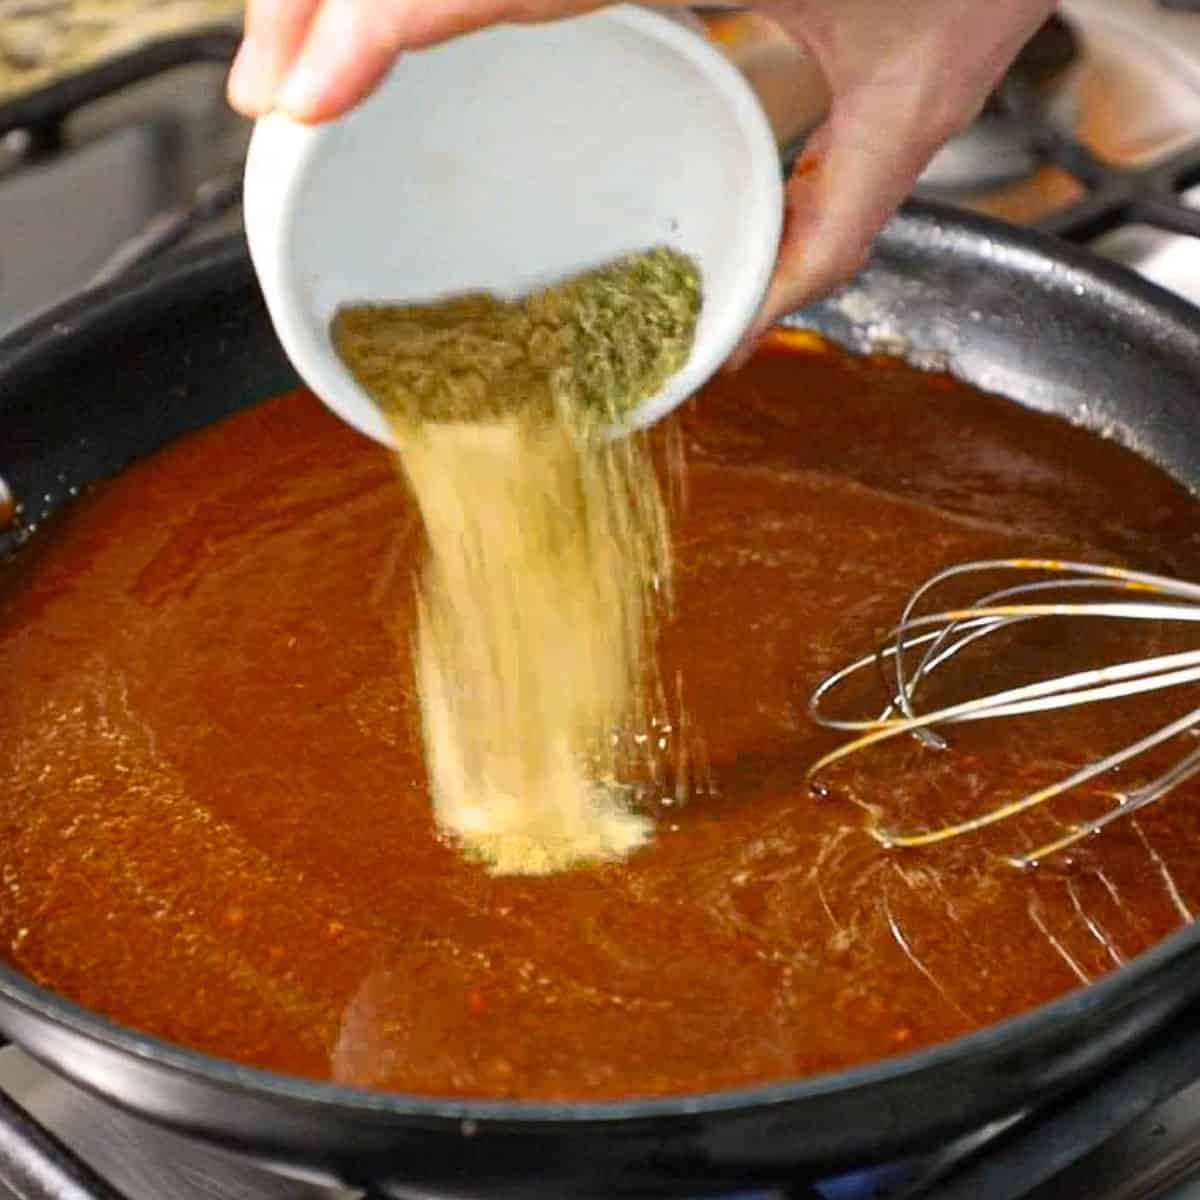
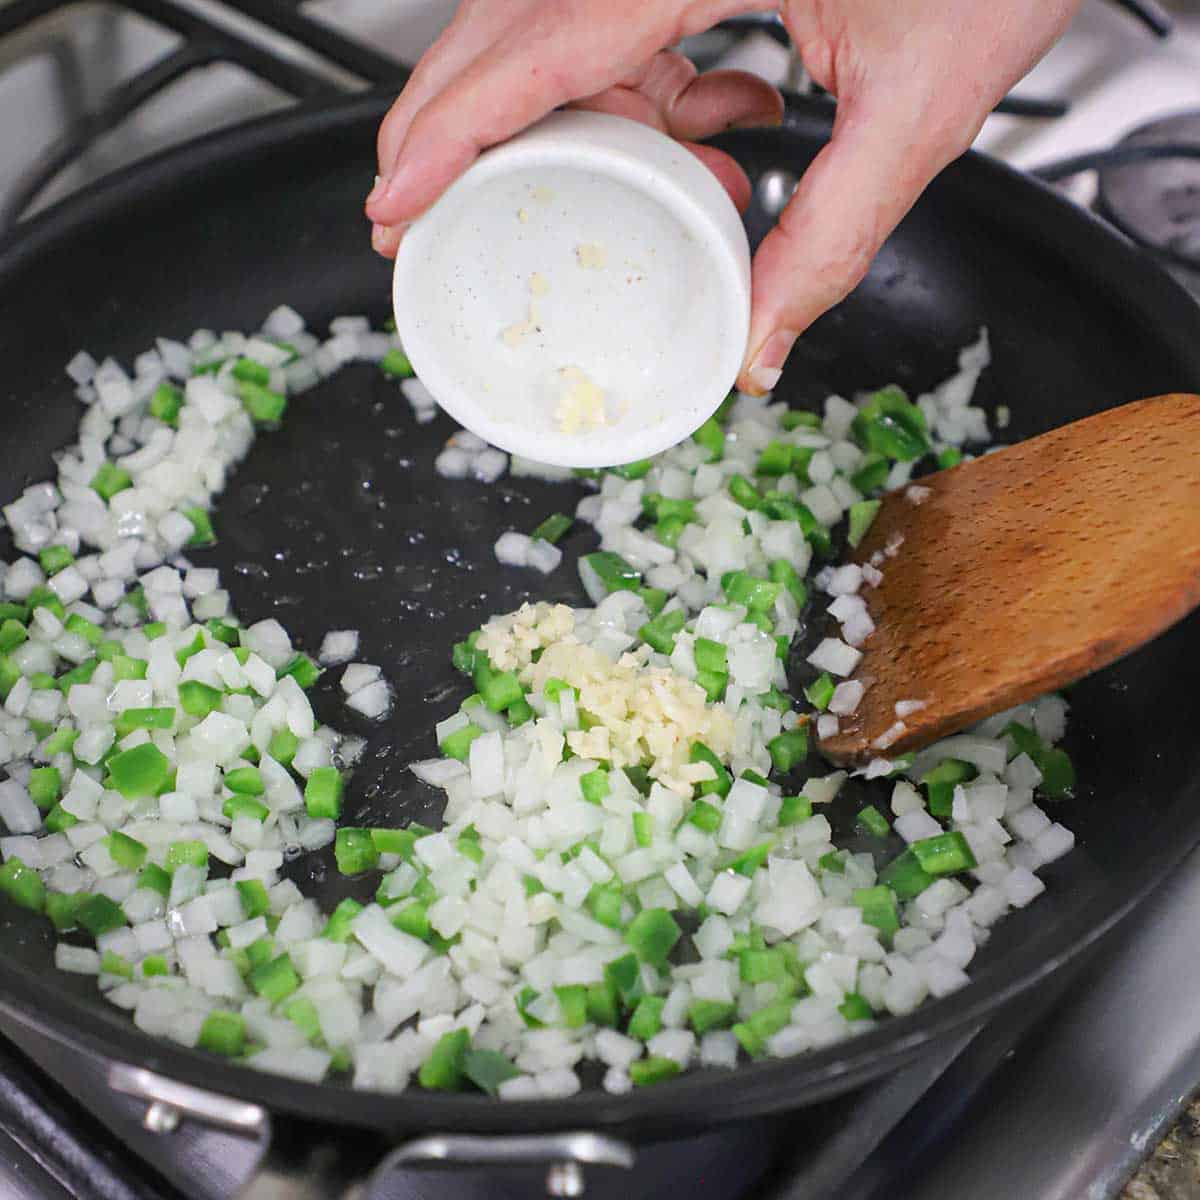
  1. Step 3: Sauté the onion and garlic, then add the chili powder mixture. Then pour in the sauce.
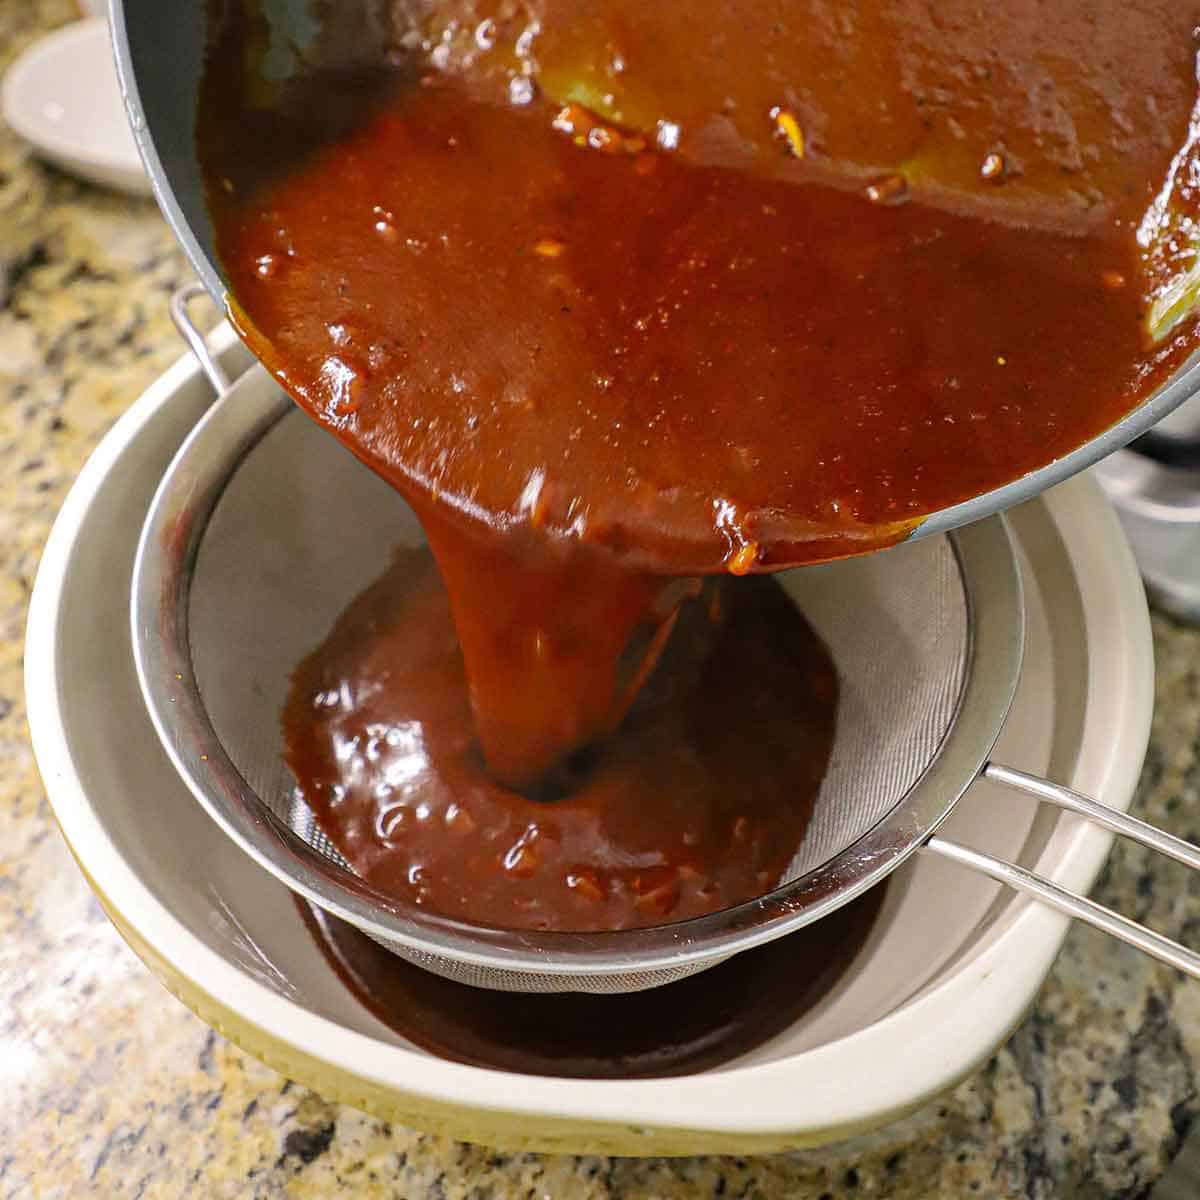
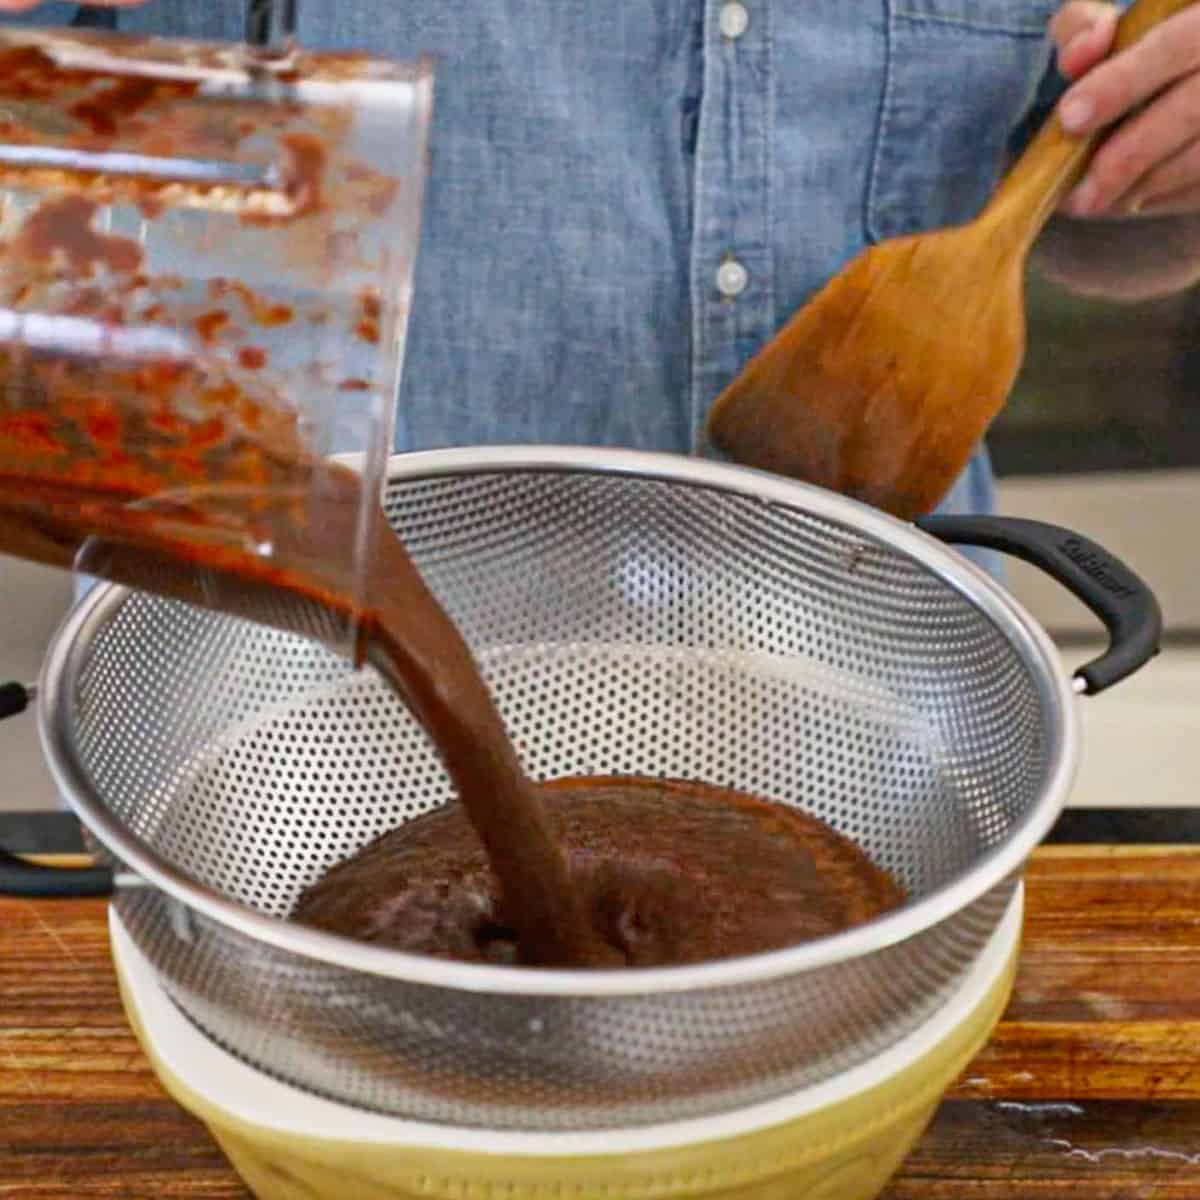
A person pouring homemade BBQ sauce through a sieve that is resting over a ceramic bowl on a marble counter.
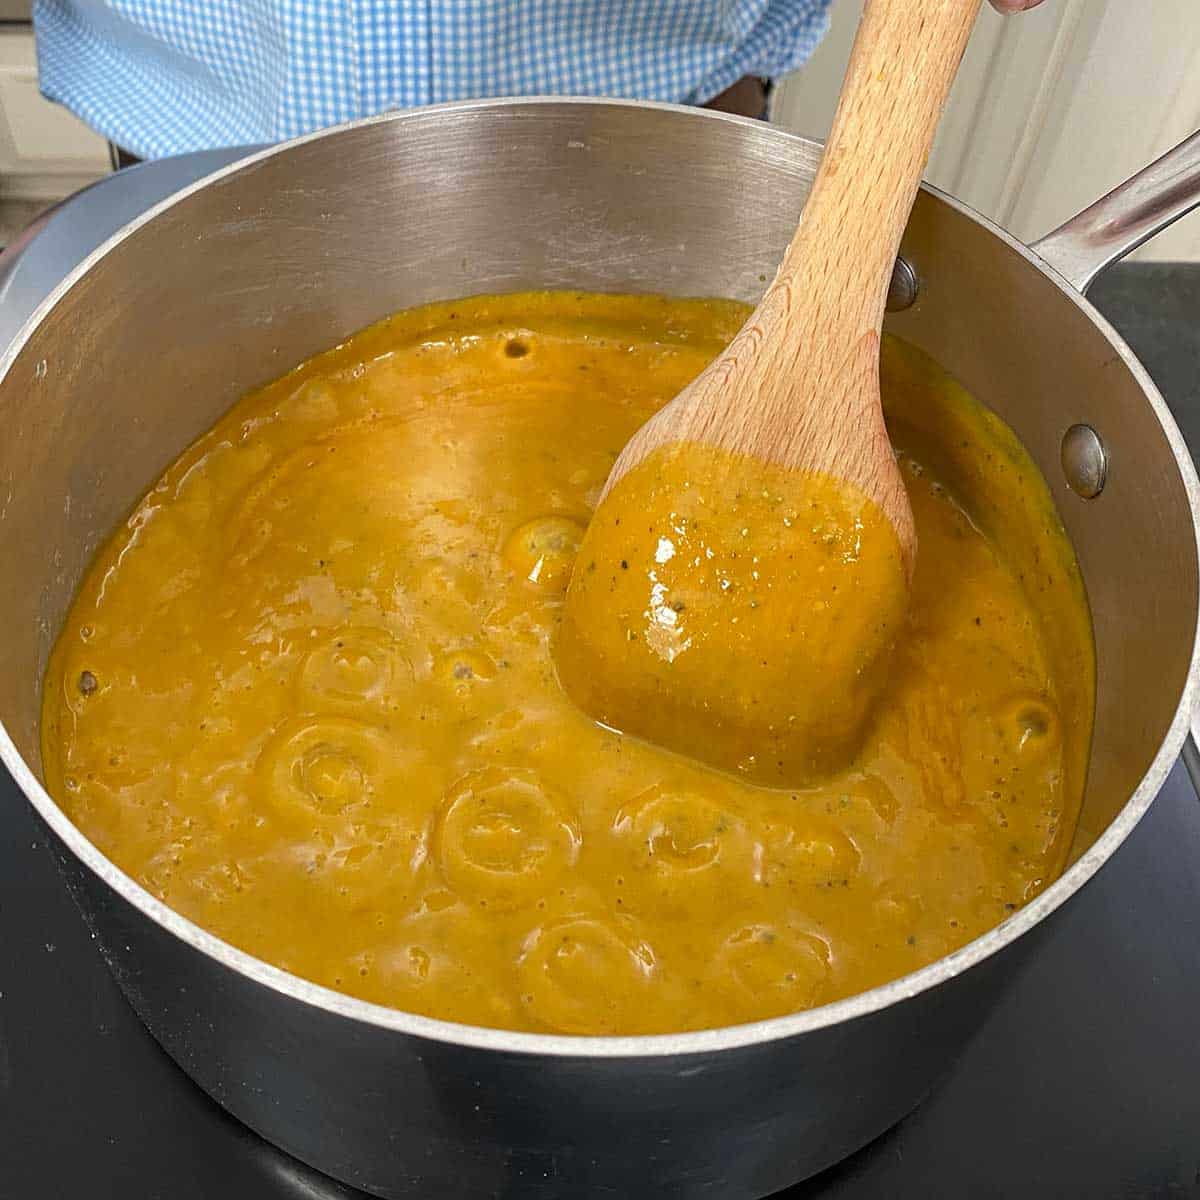
  1. Step 4: Simmer for 15 minutes, strain, and let cool.
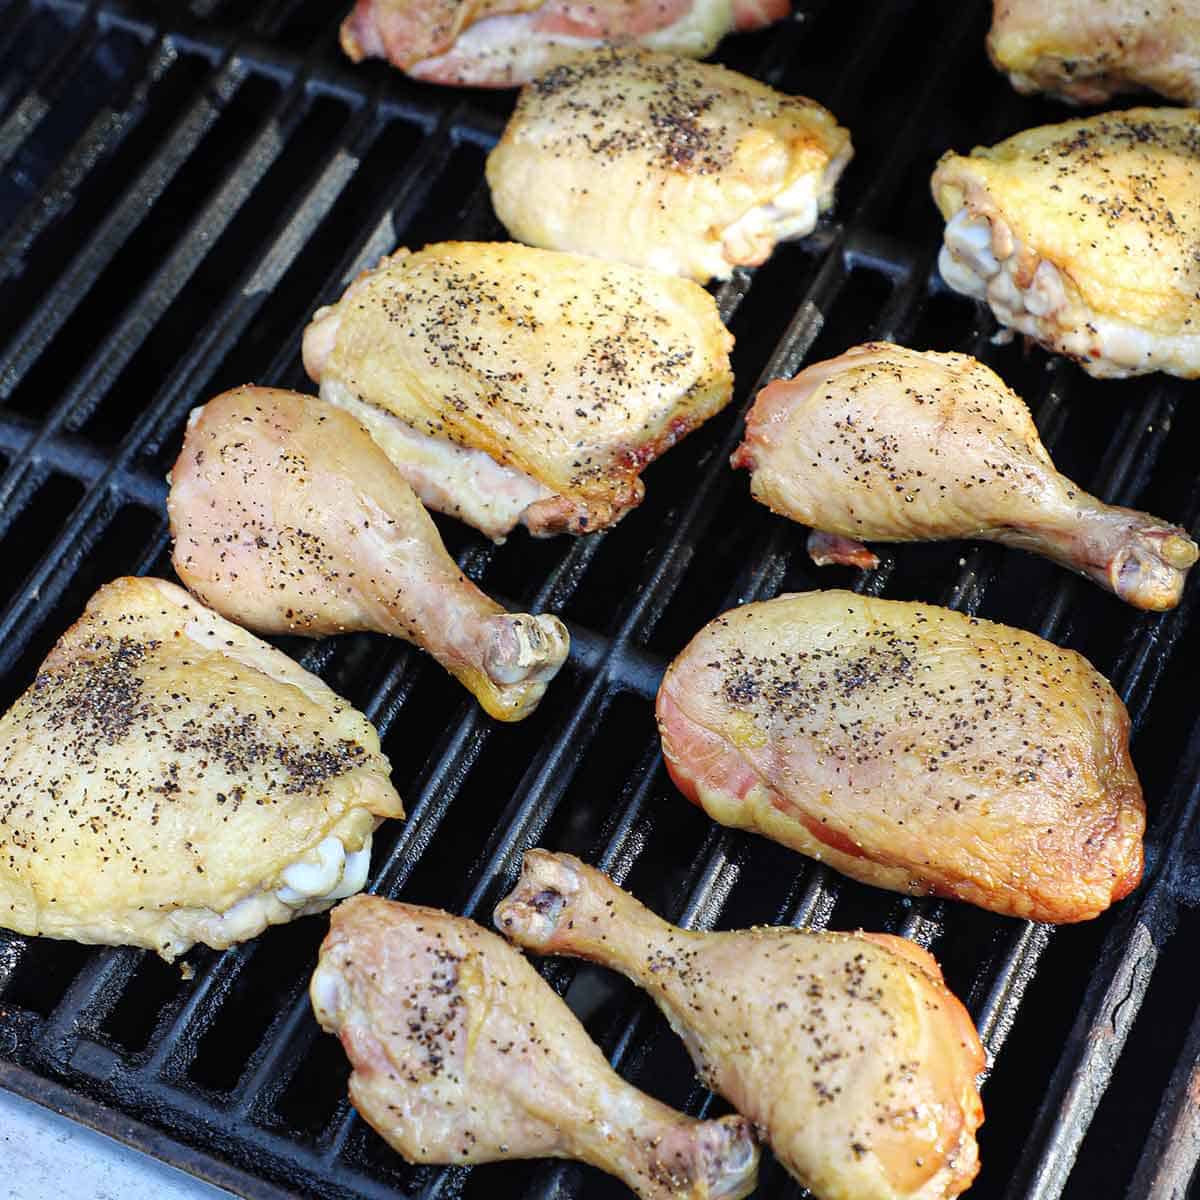
Seasoned chicken legs and chicken thighs grilling on a gas grill.
  1. Step 5: Oil and pepper the chicken, then grill over indirect heat until an internal temperature of 155°F is reached.
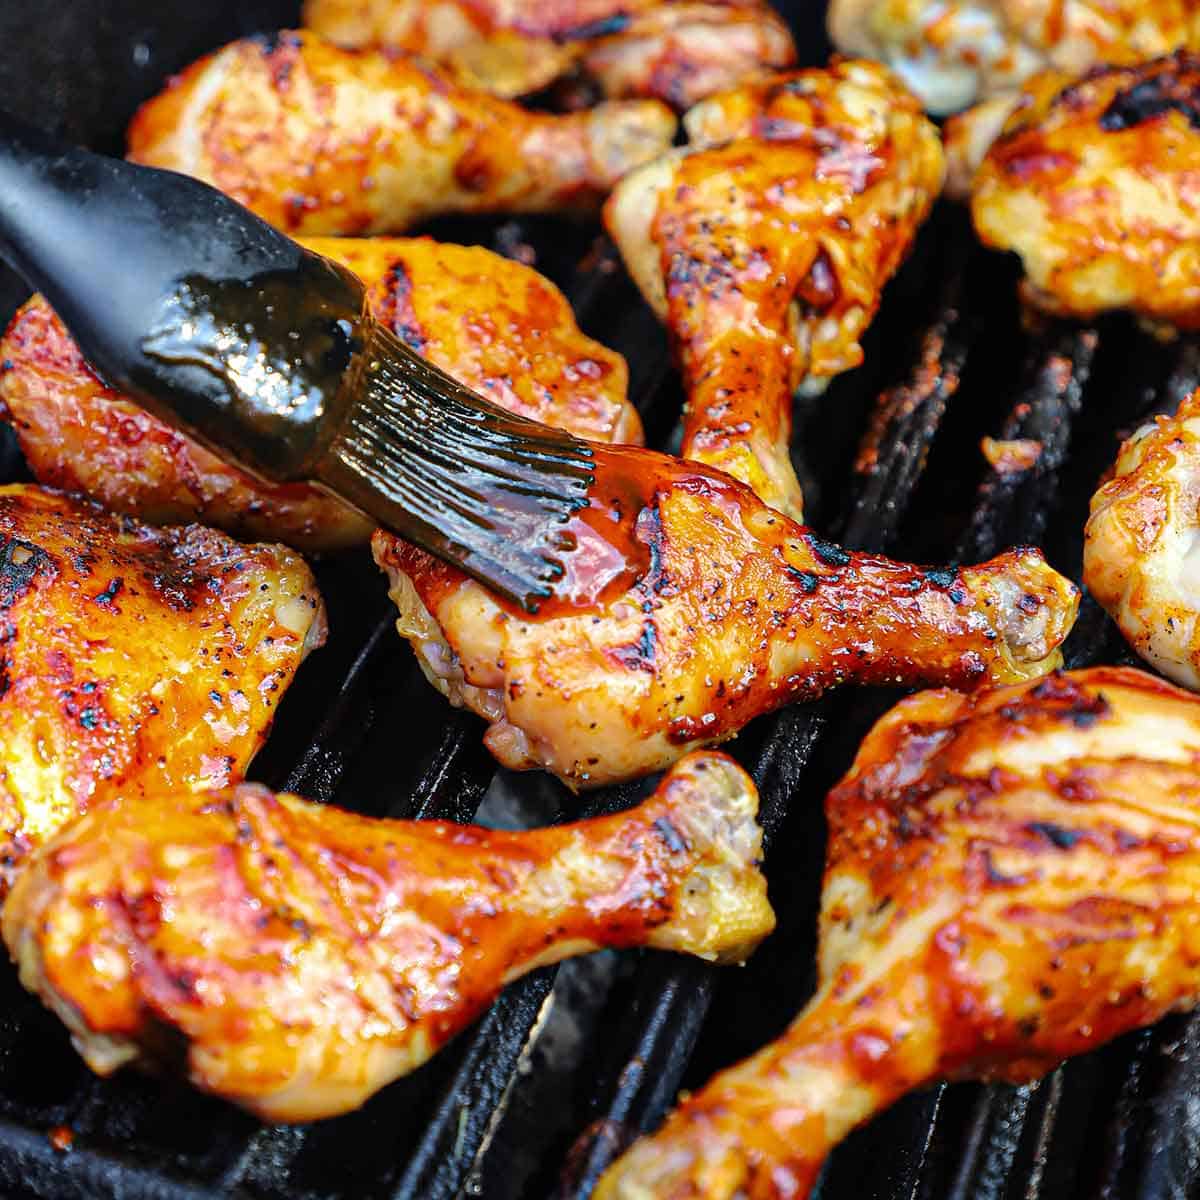
A person brushing homemade BBQ sauce onto a grilled chicken leg that is being cooked on a gas grill with other grilled BBQ chicken pieces.
  1. Step 6: Brush with the BBQ sauce and transfer to the direct-heat side of the grill. Cook until lightly charred, then serve!

🍽️ How To Serve

  • You’ll want to make sure all chicken pieces have an internal temperature of 165°F. You may need to move the smaller pieces to the indirect heat side until the larger pieces are ready. A digital thermometer ensures perfectly cooked chicken!
  • We recommend allowing the chicken to rest on a platter for 5 to 10 minutes before serving them. This allows the juices to redistribute and let the chicken cool just a bit.
  • Have plenty of extra BBQ sauce available for guests. You’ll need to discard the sauce you used for basting.
  • This chicken pairs wonderfully with all the standard BBQ sides. Some of our favorites include Slow-Cooker Corn on the Cob, Southern-Style Baked Beans, Caprese Pasta Salad, and Foil Roasted Potatoes.

Expert Tip

Dry brining the chicken with salt for 24 to 48 hours completely dries out the skin, which will keep the skin from getting rubbery on the grill. The skin will be slightly crispy, and the meat is incredibly juicy.

🙋🏽‍♂️ Frequently Asked Questions

Can I bake the BBQ chicken instead of grilling it?

Yes, you can bake BBQ chicken in the oven at 400°F (200°C) for about 25-30 minutes, basting with sauce halfway through for a delicious alternative to grilling.

If I don’t have time to dry salt-brine the chicken, will Grilled BBQ Chicken still be good?

Yes, the chicken will still be flavorful and juicy without dry salt brining, but brining helps enhance tenderness and seasoning, so it’s recommended if you have the time.

How do I prevent the BBQ sauce from burning on the grill?

To avoid burning, apply the BBQ sauce during the last few minutes of grilling and cook over medium heat to allow the sauce to caramelize without charring. A few charred spots are good, however. Scooch the chicken on the hot grates every now to help keep the skin from sticking.
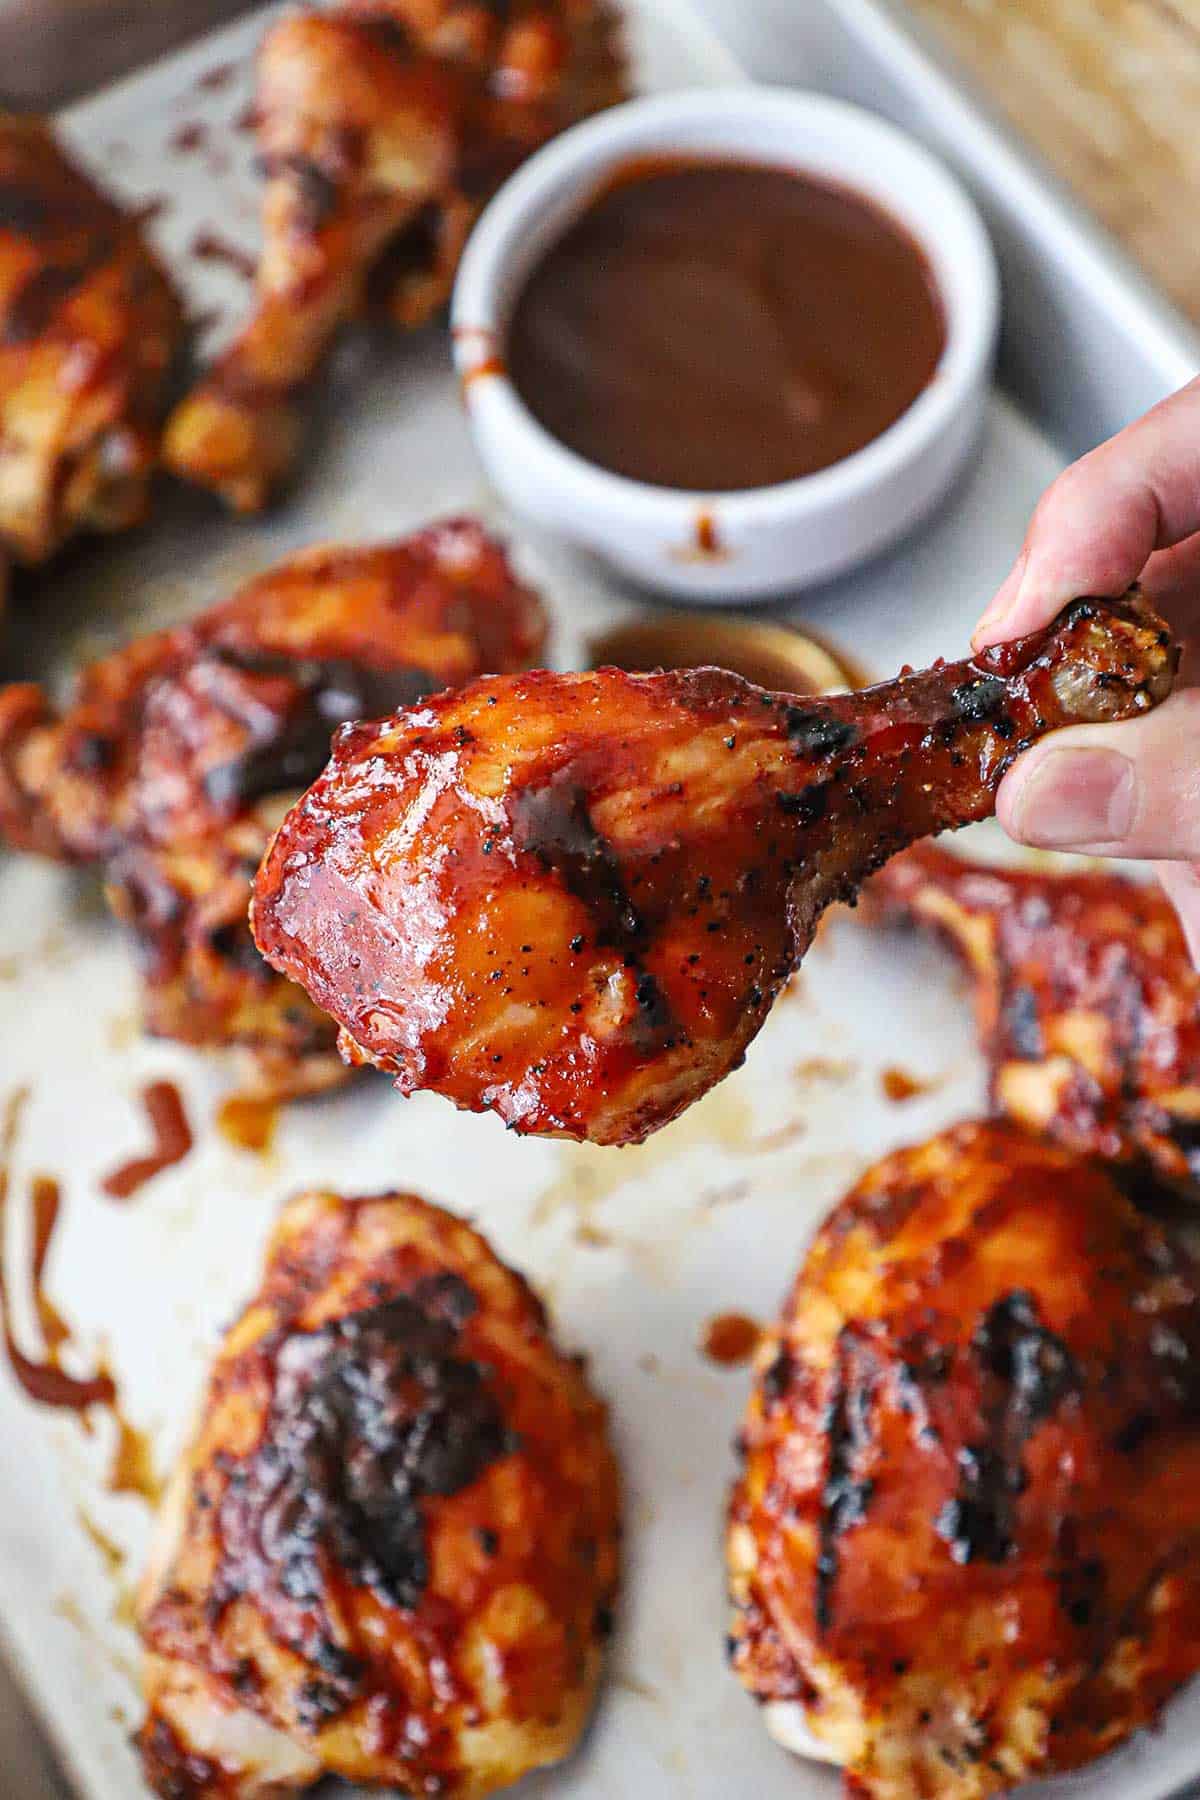
A person holding a grilled BBQ chicken leg over a silver sheet pan filled with more BBQ chicken pieces and a bowl of BBQ sauce.

🔥 Other Classic BBQ Recipes

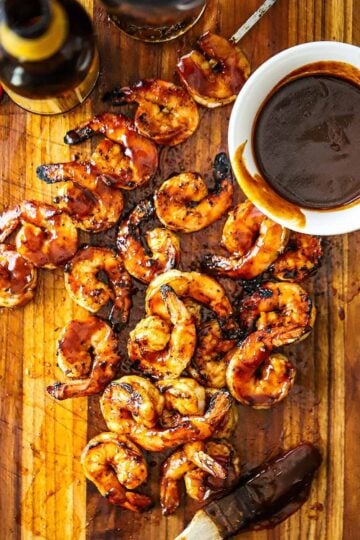
  • An overhead view of a pile of BBQ shrimp sitting on a cutting board with a small white bowl filled with homemade BBQ sauce nearby.
    Best-Ever BBQ Shrimp
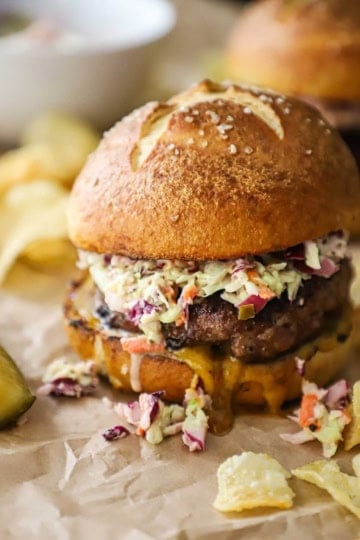
  • A pork burger topped with creamy coleslaw on a homemade pretzel bun with Carolina mustard sauce oozing from the underneath the patty with kettle chips scattered around the burger.
    Pork Burgers with Pretzel Buns
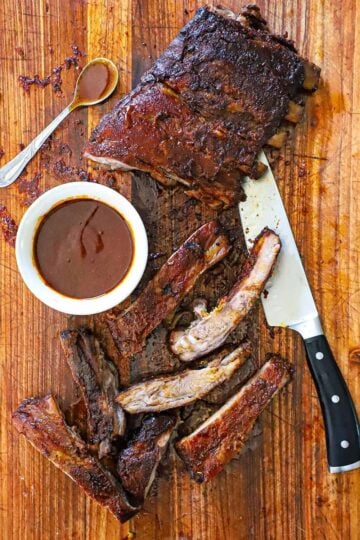
  • An overhead view of a rack of smoked St. Louis-style ribs that have been partially cut up with a bowl of homemade barbecue sauce nearby.
    Smoked St. Louis-Style Ribs
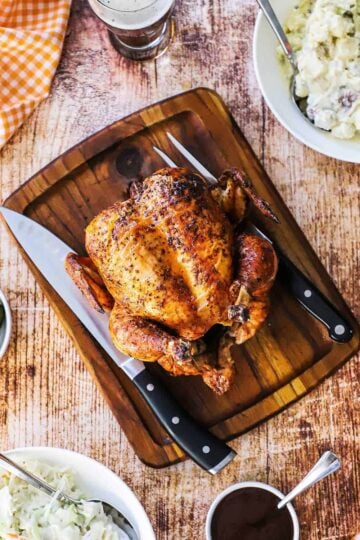
  • A grilled whole beer-can chicken sitting on a cutting board next to a carving knife and a bowl of BBQ sauce
    Grilled Beer-Can Chicken with BBQ Sauce

Ready to make the best BBQ this side of Memphis? Go for it!

And when you do, be sure to take a photo of it, post it on Instagram, and tag @HowToFeedaLoon and hashtag #HowToFeedaLoon!

Grilled BBQ Chicken with visible grill marks resting on a metal sheet pan with a small white bowl of homemade BBQ sauce with a spoon in it nearby.
Print Recipe
5 from 1 vote

Best-Ever Grilled BBQ Chicken

Best-Ever Grilled BBQ Chicken is extra flavorful and juicy thanks to a 24 to 48-hour dry salt brine, while the tangy homemade BBQ sauce can be prepared days ahead for easy grilling perfection.
Prep Time30 minutes mins
Sauce Preparation and Chill Time1 day d
Total Time1 day d 30 minutes mins
Course: Entree / Cookout
Cuisine: American / BBQ
Servings: 6
Calories: 565kcal
Author: Kris Longwell

Equipment

  • Gas, charcoal, or electric grill
  • Large tongs for handling the chicken on the grill

Ingredients

  • 4 lbs chicken pieces bone-in, skin-on
  • Kosher salt
  • 2 tablespoon olive oil or vegetable
  • black pepper
  • 1 cup BBQ sauce plus extra for serving

Instructions

  • Liberally sprinkle salt all over the chicken pieces. Place on a baking rack on a baking sheet and chill (uncovered) for a minimum of 2 hours, but 24 to 48 hours is best.
    4 lbs chicken pieces, Kosher salt
  • Prepare your grill for indirect and direct heating (2-zone).
  • Brush oil all over the chilled chicken and then season the chicken with pepper.
    2 tablespoon olive oil, black pepper
  • Place the chicken, skin-side up, over the indirect heat side of your grill. Close the lid and cook until the internal temperature reaches 150 to 155°F.
  • Slather BBQ sauce over the tops of the chicken pieces. Use a pair of tongs to carefully move the chicken to the direct-heat side of the grill, skin-side down. Slather more BBQ sauce onto the chicken. Grill for about 5 minutes, or until the skin is starting to brown and the BBQ sauce is beginning to caramelize.
    1 cup BBQ sauce
  • Turn the chicken over and cook for another 5 minutes, brushing on more BBQ sauce, if desired. The internal temperature should not be less than 165°F.
  • Place the chicken on a platter or a cutting board. Let rest for 5 to 10 minutes. Serve with fresh BBQ sauce on the side (discard the sauce you used to baste the chicken).


Video

Notes

NOTE: Watch the video near the top of the recipe for visual guidance.
Smaller chicken pieces will cook faster than the large ones. Once the smaller pieces reach an internal temperature of 165°F, move them back to the indirect heat side of the grill to keep them hot until the larger pieces are ready. Do this after you’ve applied the BBQ sauce. 
If doing this with boneless, skinless chicken pieces (breasts and/or thighs), the cooking time will take less time, depending on the size. A digital thermometer ensures perfectly cooked chicken. 
Leftover chicken will keep in an air-tight container for 3 to 4 days. Reheat in a dish covered with foil in the oven at 325°F for 15 to 25 minutes, or until heated through. 
The BBQ sauce can be made up to two weeks in advance. 

Nutrition

Calories: 565kcal | Carbohydrates: 19g | Protein: 39g | Fat: 26g | Saturated Fat: 7g | Polyunsaturated Fat: 5g | Monounsaturated Fat: 11g | Trans Fat: 0.2g | Cholesterol: 154mg | Sodium: 635mg | Potassium: 499mg | Fiber: 0.4g | Sugar: 16g | Vitamin A: 395IU | Vitamin C: 4mg | Calcium: 38mg | Iron: 2mg

Homemade New York-Style Pizza

June 22, 2025 by Kris Longwell 2 Comments

A person pulling a slice of homemade New York-style pizza from the entire pie that has been cut into six slices with a small bowl of grated cheese and two glasses of beer nearby.

Homemade New York-style pizza is a delicious way to bring the classic pizzeria experience right into your kitchen. With the right tools, ingredients, and patience, you can make authentic New York-style pizza at home without a pizza oven, featuring a thin, chewy crust and flavorful toppings.

A person pulling a slice of homemade New York-style pizza from the entire pie that has been cut into six slices with a small bowl of grated cheese and two glasses of beer nearby.
[feast_advanced_jump_to]

🍕 The Pizza Ingredients

The carefully selected ingredients for this amazing pizza work together to deliver the authentic taste and perfect chewy texture that define this iconic dish. Get started a few days before serving with authentic New York-Style Pizza Dough. Find ingredient notes (including substitutions and variations) below.

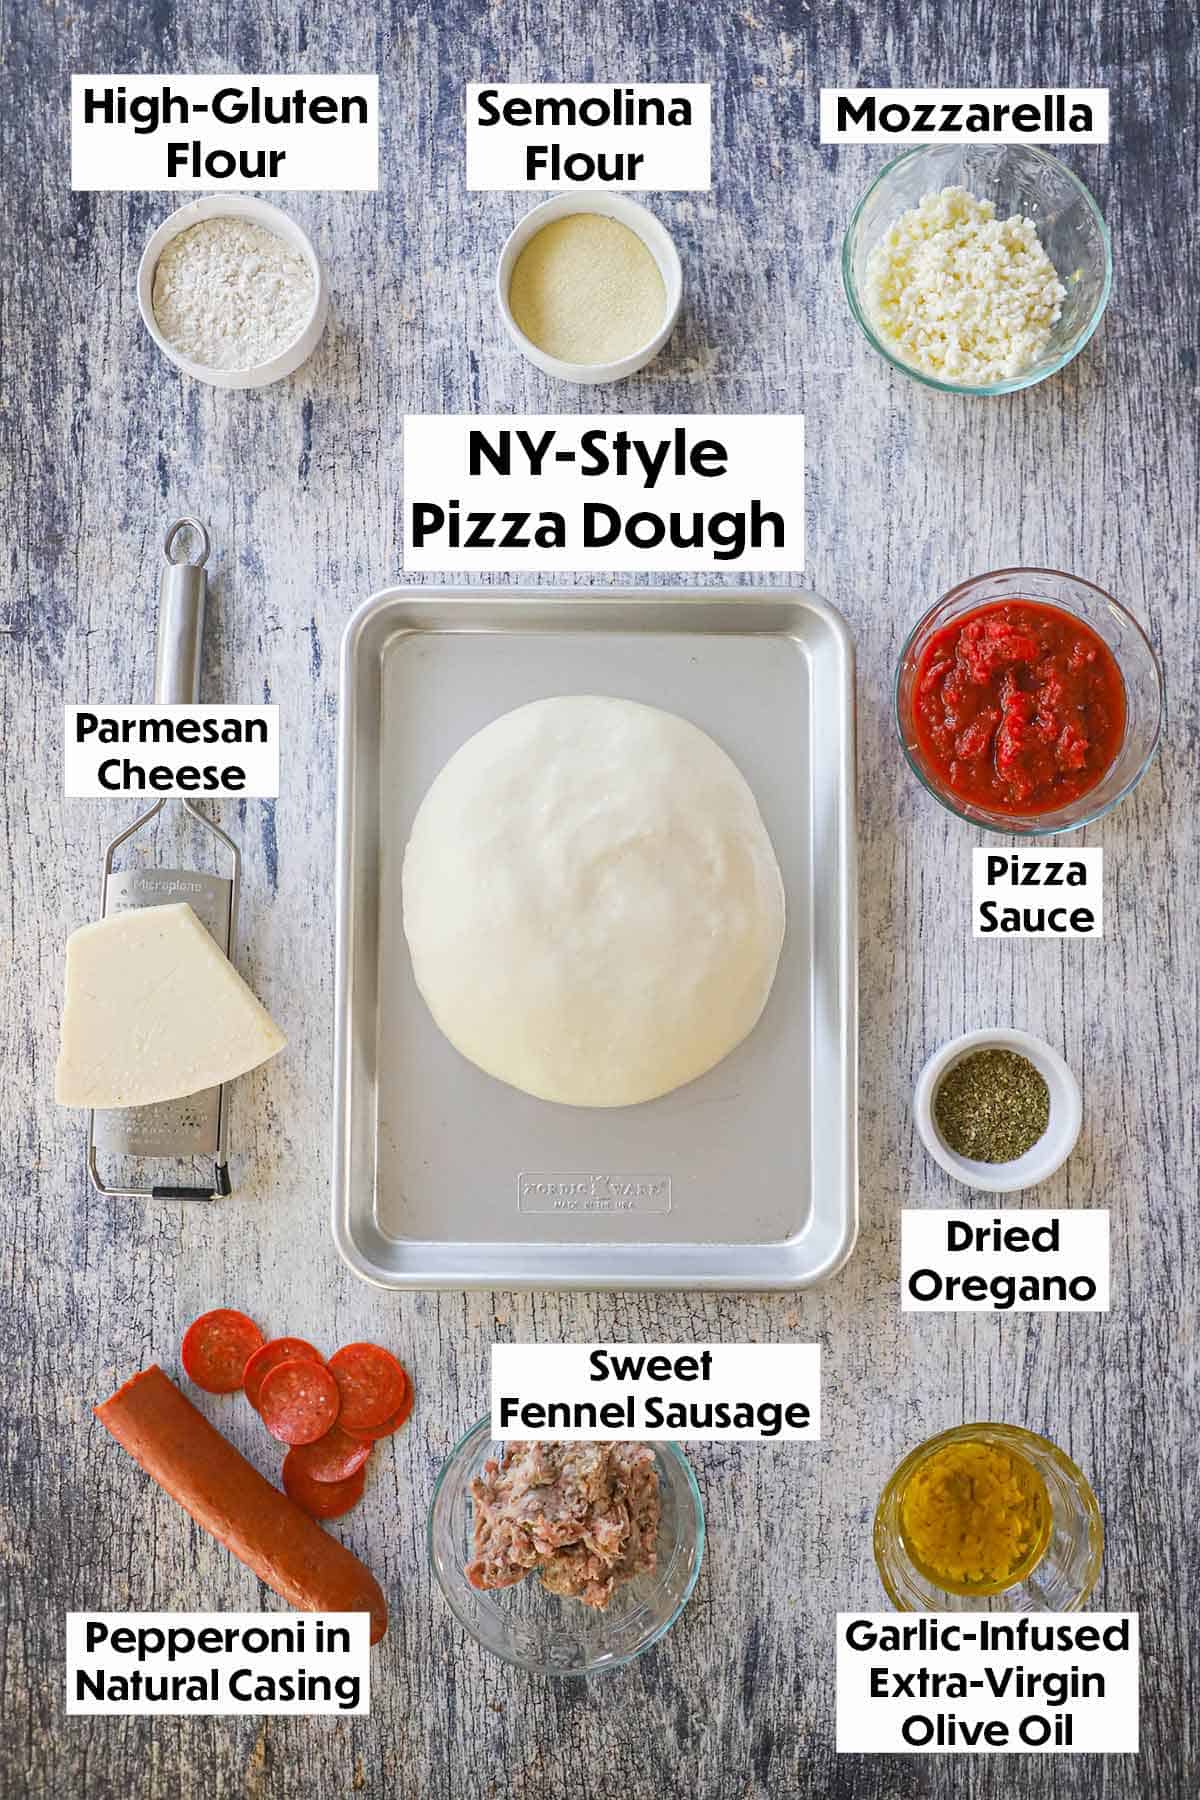
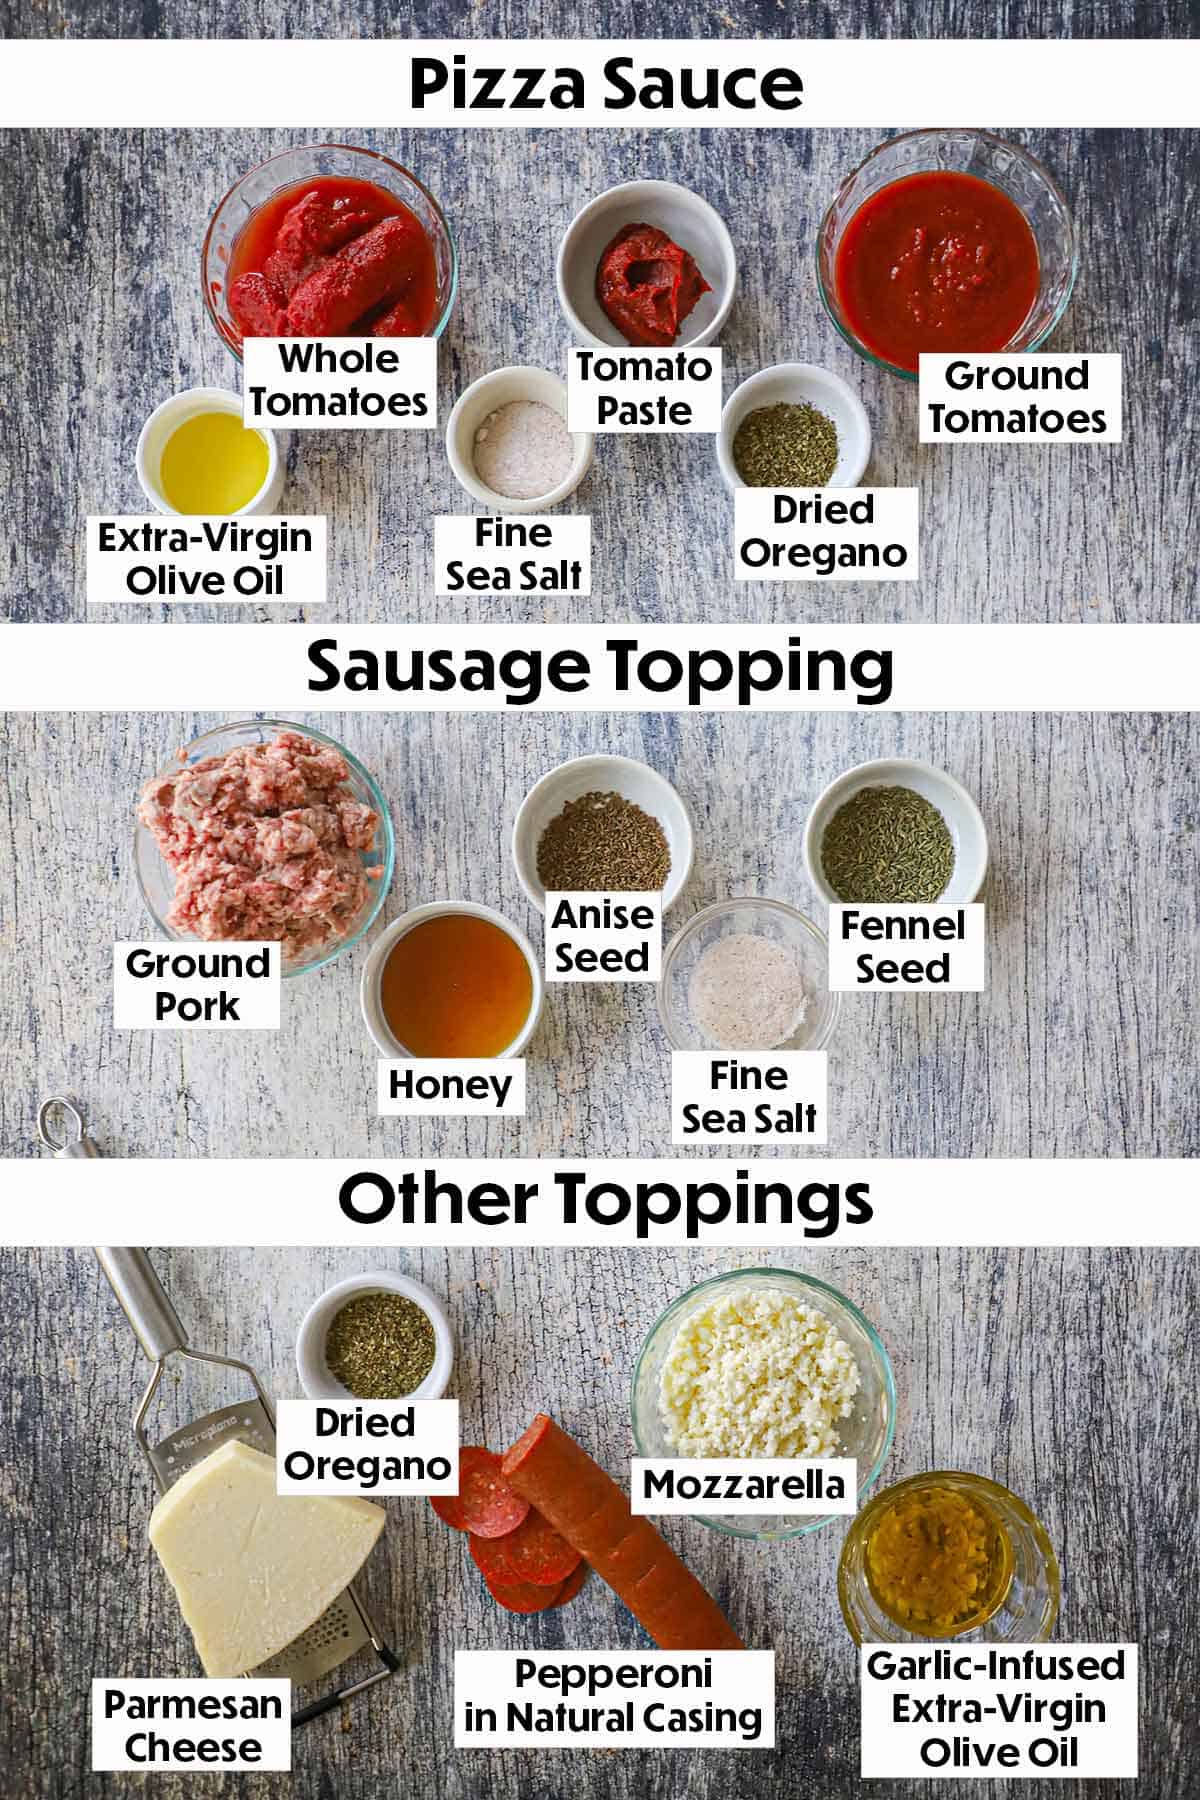
An arrangement of ingredients for homemade New York-style pizza on a grey wooden background including flour, cheese, dough, pizza sauce, pepperoni, sausage, and seasonings.

🍅 Pizza Sauce and Toppings Ingredients

An arrangement of ingredients for New York-style pizza toppings on a wooden grey background including tomato sauce, ground pork, mozzarella, pepperoni, and seasonings.

👉 More About the Ingredients

  • Dough – For the most authentic taste with superior taste and texture, we highly recommend going with New York-Style Pizza Dough (with Starter). You can purchase dough from your local pizza restaurant, but this recipe truly delivers authentic taste and texture.
  • Tomatoes – The types of ground tomatoes and whole tomatoes that are used in NY pizzerias (and from artisanal pizza restaurants around the country) can easily be ordered online. However, keep in mind that they are typically only sold commercially, so they are sold in large quantities. We divide our tomatoes up and freeze them until we are ready to use them. However, San Marzano (certified) whole tomatoes and top-notch crushed tomatoes can be found in most supermarkets and will still deliver great taste.
  • Pork and Pepperoni – For best flavor, ask your butcher to grind pork shoulder on a medium grind. Packaged ground pork will work in a pinch, but ground pork should is amazing (and freezes wonderfully). We recommend pepperoni that is in natural casing, which can be found often in the deli section of most well-stocked supermarkets. Boar’s Head is excellent.
  • Mozzarella – For best flavor and even melting, we recommend whole milk mozzarella that is in a loaf (not shredded or sliced). Chop the fresh mozzarella in your food processor or with a large, sharp knife. Bagged shredded mozzarella can be used in a pinch, but non-sticking additives are added to shredded cheese and don’t deliver the creamy melted cheese you want with this pizza.

See the recipe card (with video) below for a full list of ingredients and measurements.

⚖️ The Tools

Having the right tools is essential for making perfect pizza dough with the ideal texture and crispness.

  • Digital scale – Necessary for measuring the exact right amount of flour. Weighing ingredients is much more precise than measuring by volume.
  • Palm scale – You’ll need this for weighing yeast and other ingredients. It should register to 0.01 grams.
  • Stand mixer – You can knead the dough by hand (from start to finish), but a stand mixer makes life much easier.
  • Straight-edge dough cutter – This is also called a “bench scraper.” It’s perfect for cutting the dough evenly and cleaning your counter.
  • Round-edge bowl scraper – This makes getting the tacky (sticky) dough out of the bowl so much easier.
  • Half sheet pan – Or, two quarter sheet pans.
  • Extra-Wide Plastic Wrap – Extra wide makes wrapping the dough in the pan easier, but regular size works well, too.
  • Tape Measure – For ensuring your pizza dough is 13 inches in diameter.
  • Large Rectangular Pizza Steels – You’ll want two of these. Large pizza stones work, too.
  • Extra-Wide Pizza Wheel – This makes getting the pizza in and out of your oven much easier.
  • Rocking pizza cutter – A pizza slicer is perfectly fine, but the cutter will give you more precision when slicing the pizza.

👩🏼‍🍳 How To Make New York-Style Pizza Sauce and Toppings

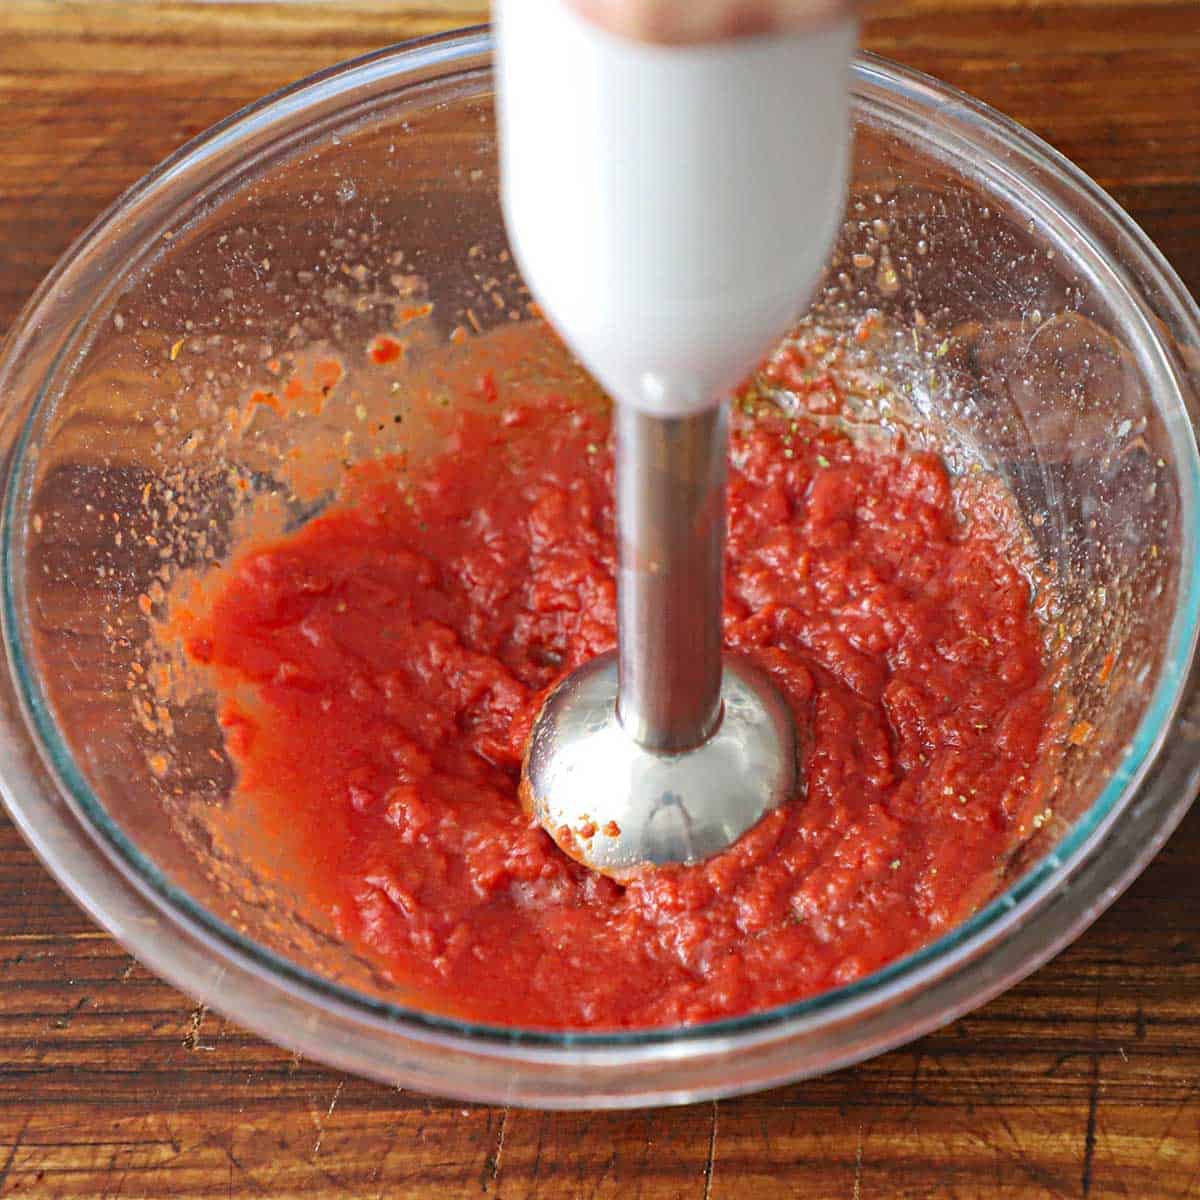
An immersion blender blending ground tomatoes in a glass bowl sitting on a wooden cutting board.
  1. Step 1: Purée the ground tomatoes, tomato paste, oregano, salt, and pepper with an immersion blender until smooth.
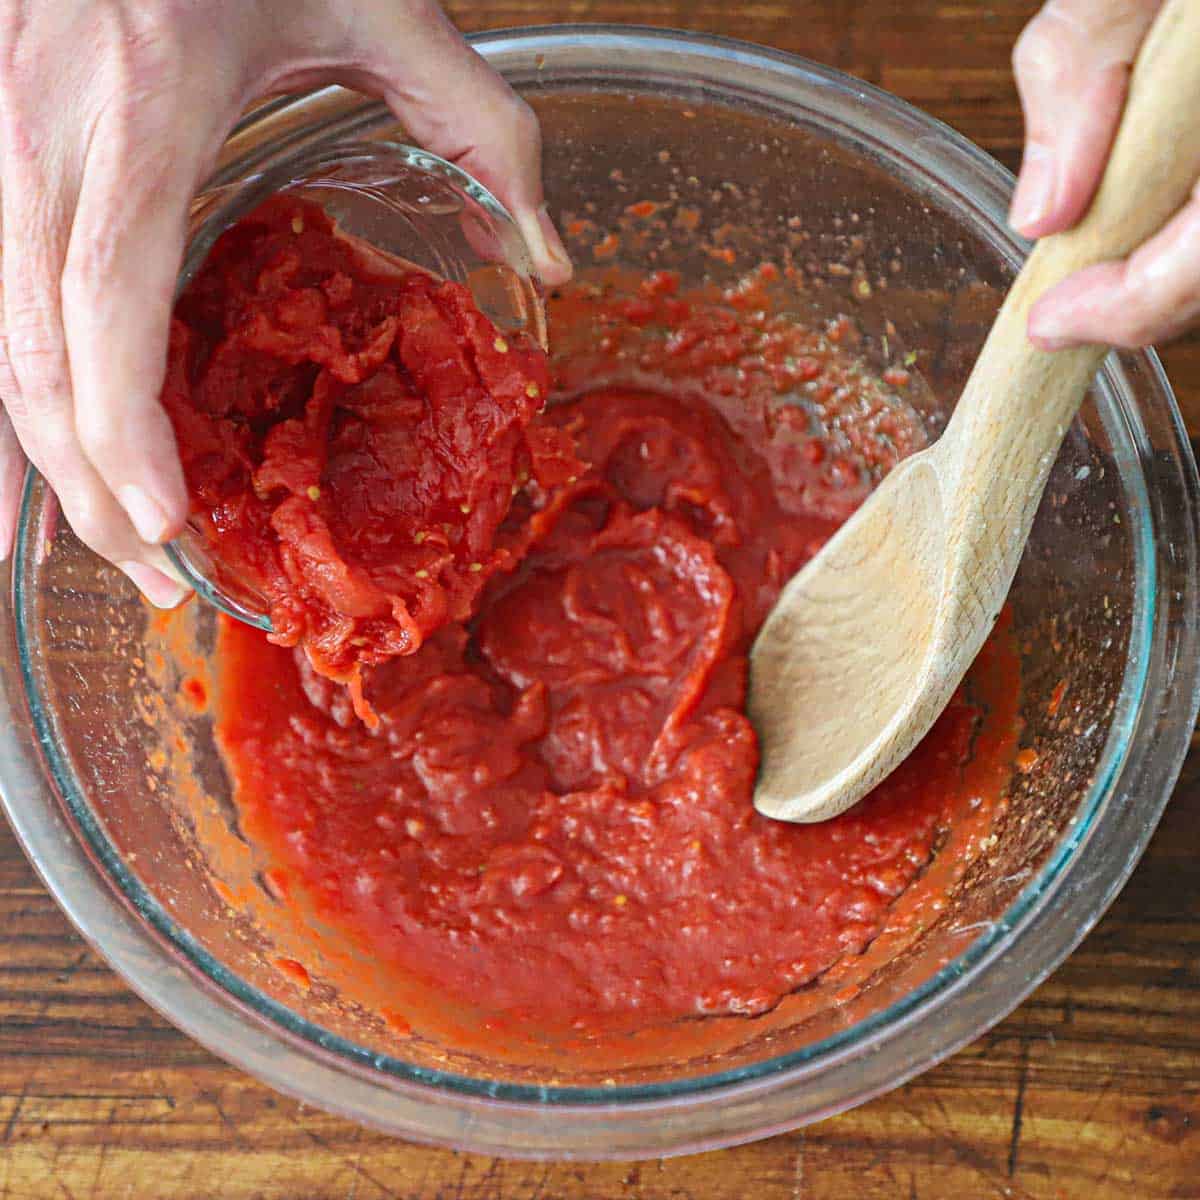
A person transferring hand-torn whole tomatoes into a bowl of ground tomatoes with a wooden spoon being held by his other hand.
  1. Step 2:
    Stir in the crushed tomatoes, then chill for 24 hours. 
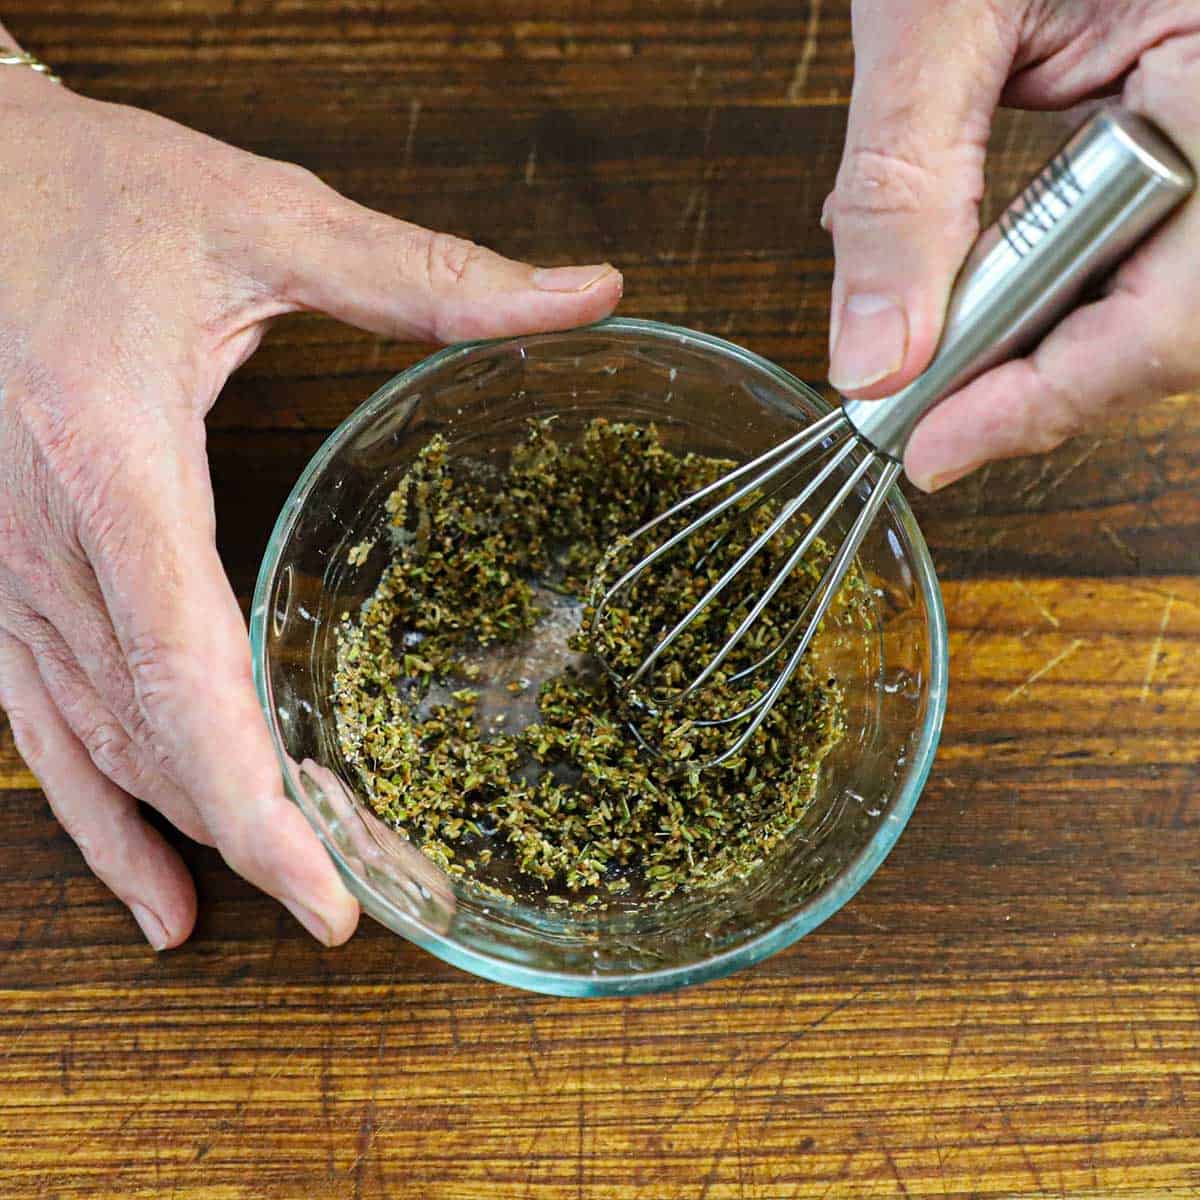
A person using a small whisk to incorporate water into a mixture of dried fennel, anise seeds, salt, and pepper in a small glass bowl.
  1. Step 3: In a small bowl, mix together the ground fennel and anise seed with salt, pepper, and water.
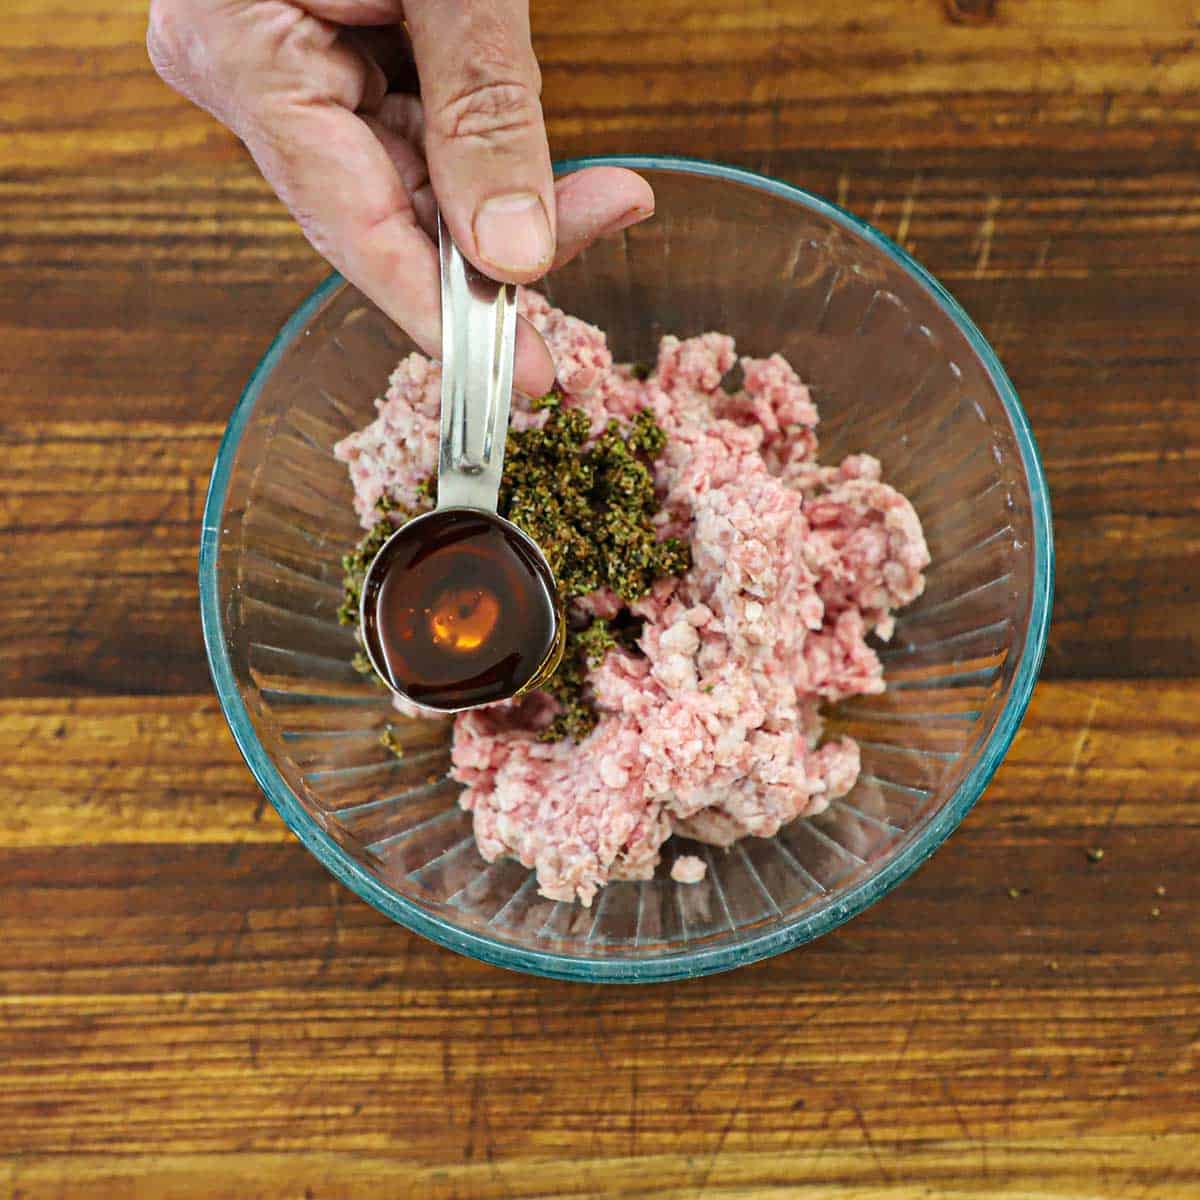
A person holding a tablespoon of honey over a glass bowl filled with uncooked ground pork topped with dried seasonings.
  1. Step 4: Place the pork in a large bowl and top with the seasoning and honey. 
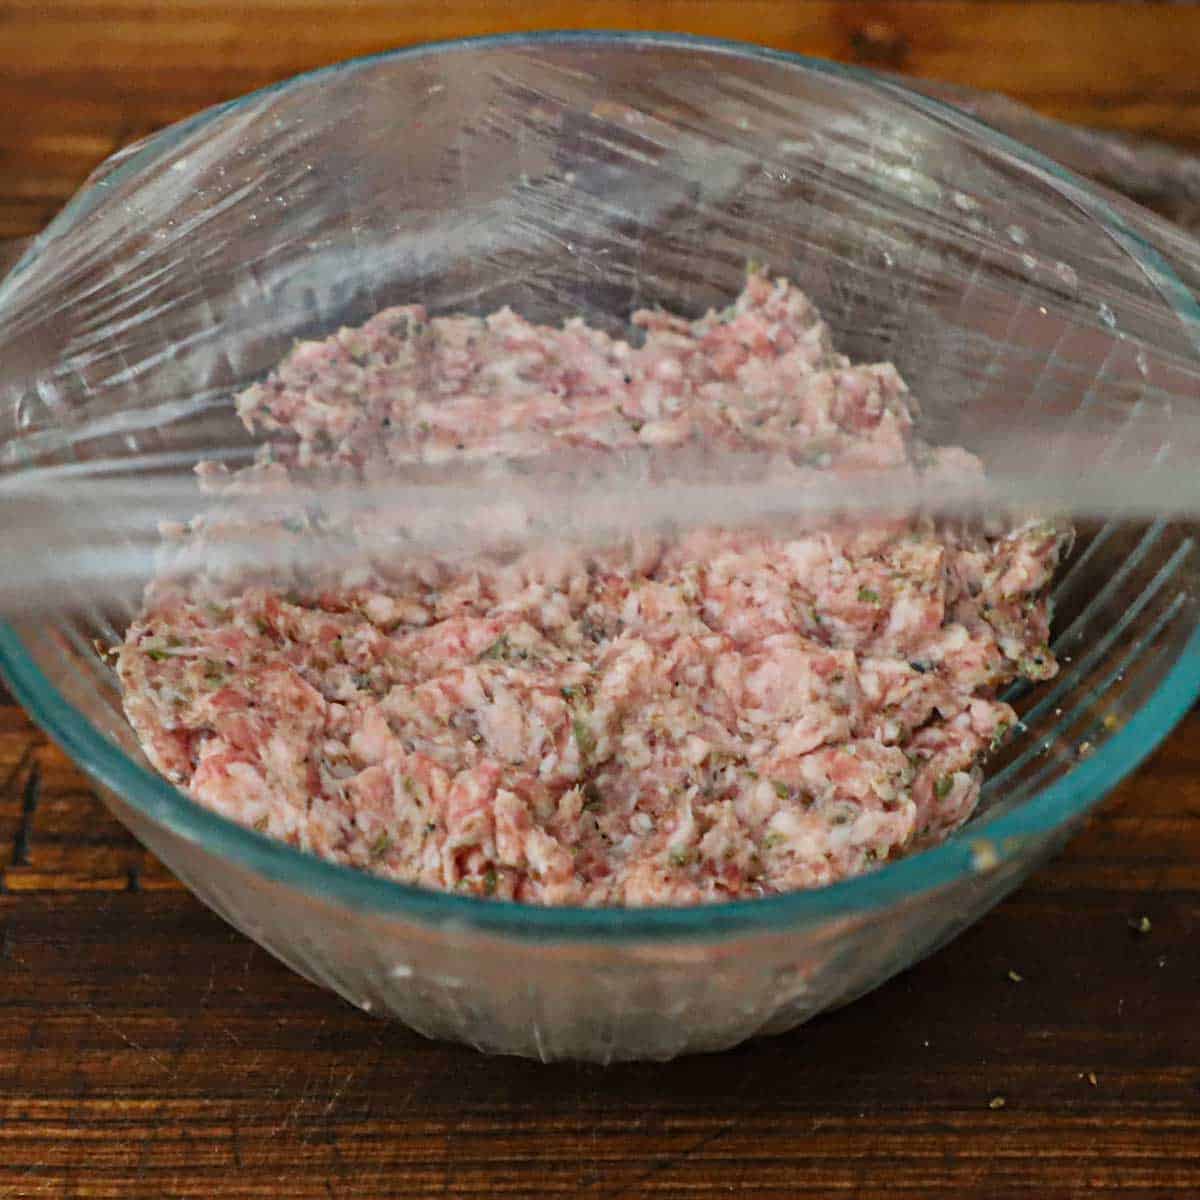
A person placing plastic wrap over a bowl of sweet feen sausage on a wooden cutting board.
  1. Step 5: Mix and cover with plastic wrap and chill for at least 2 hours.
A person holding a small silver bowl filled with olive oil next to a small white bowl filled with minced garlic.
  1. Step 6: Pour the oil over the garlic and let it rest for at least 2 hours. 

👨‍🍳 How To Make New York-Style Pizza

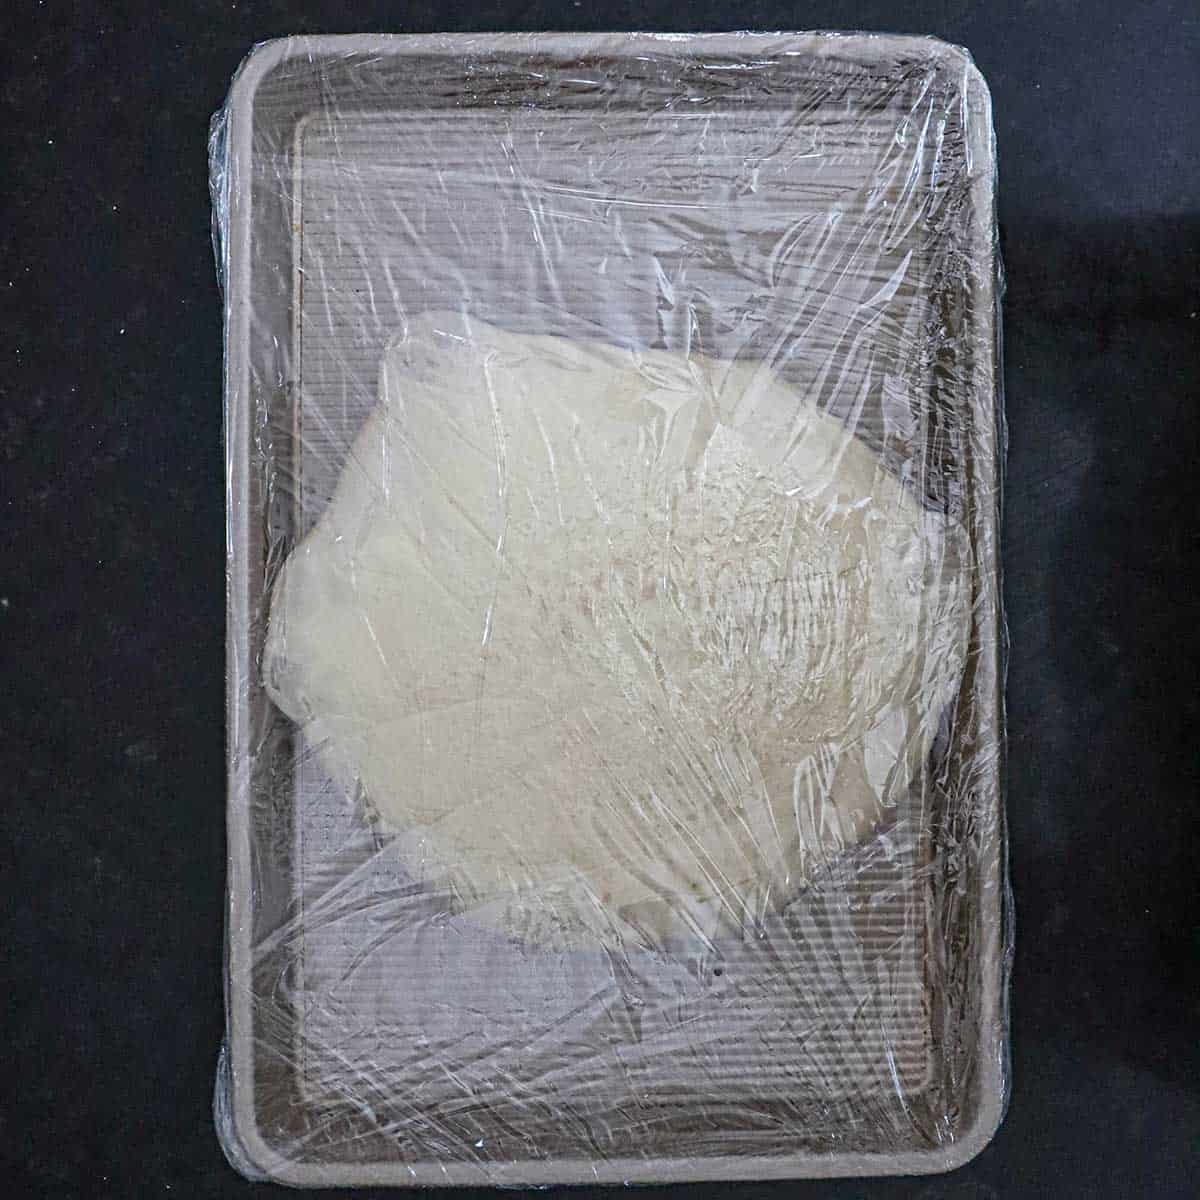
An expanded ball of New York-style pizza dough on a gold sheet pan that has been twice wrapped in plastic wrapy.
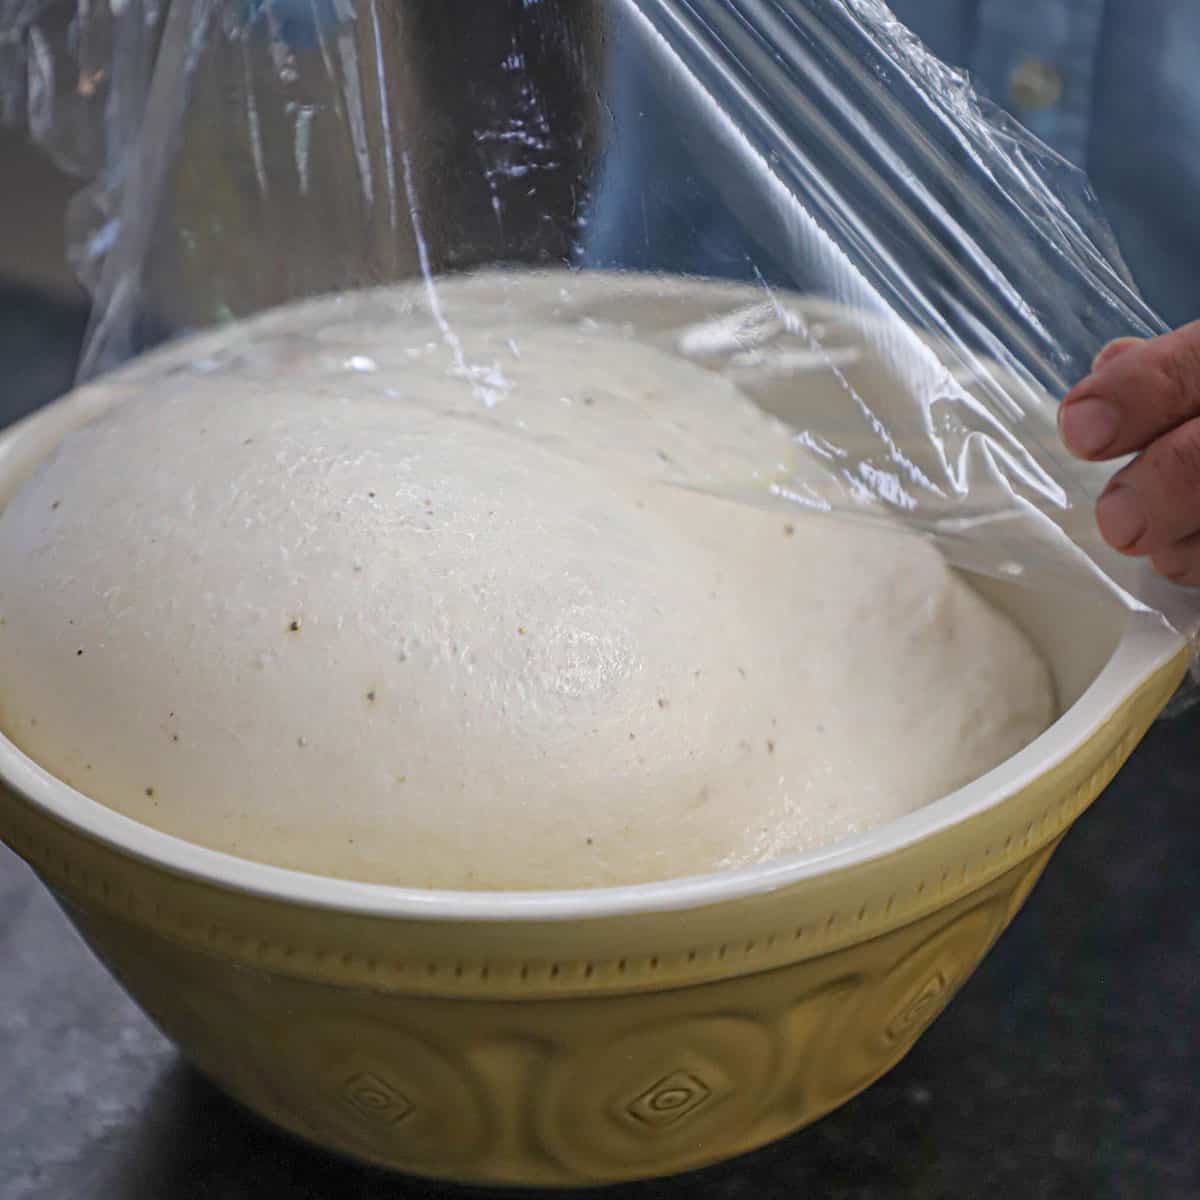
  1. Step 1: Allow the pizza dough to sit at room temperature for 2 hours. 
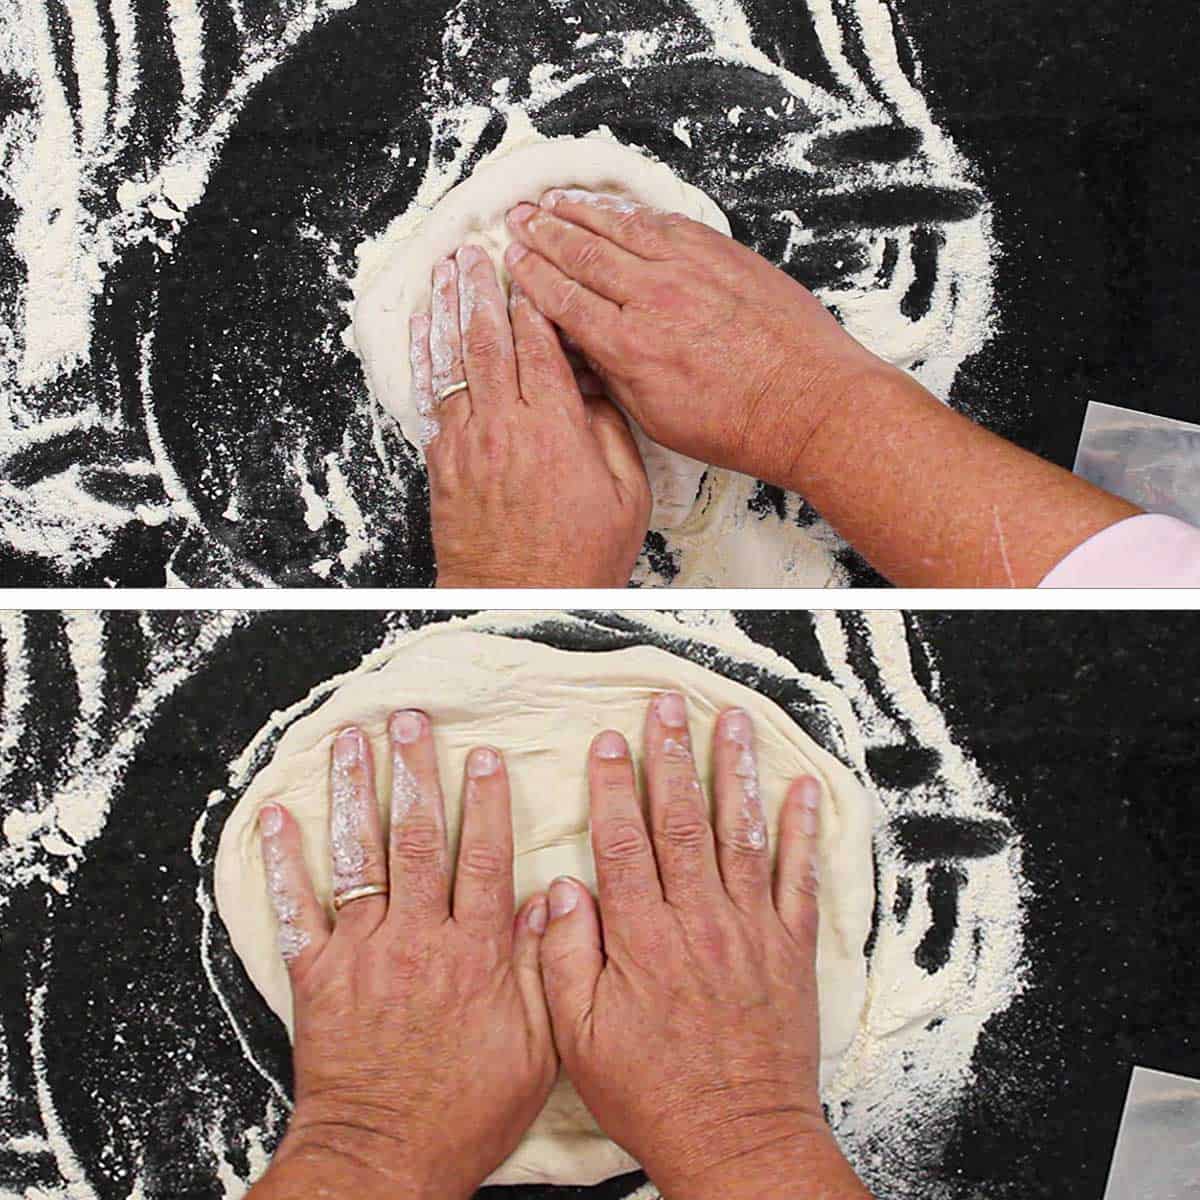
Two photos with the first being a person using his hand to stretch New York-style pizza dough on a floured surface and then the other photo of the dough being stretched even further.
  1. Step 2: Transfer dough to a flour/semolina-dusted surface and then use your hands to work the dough into a 13-inch diameter. 
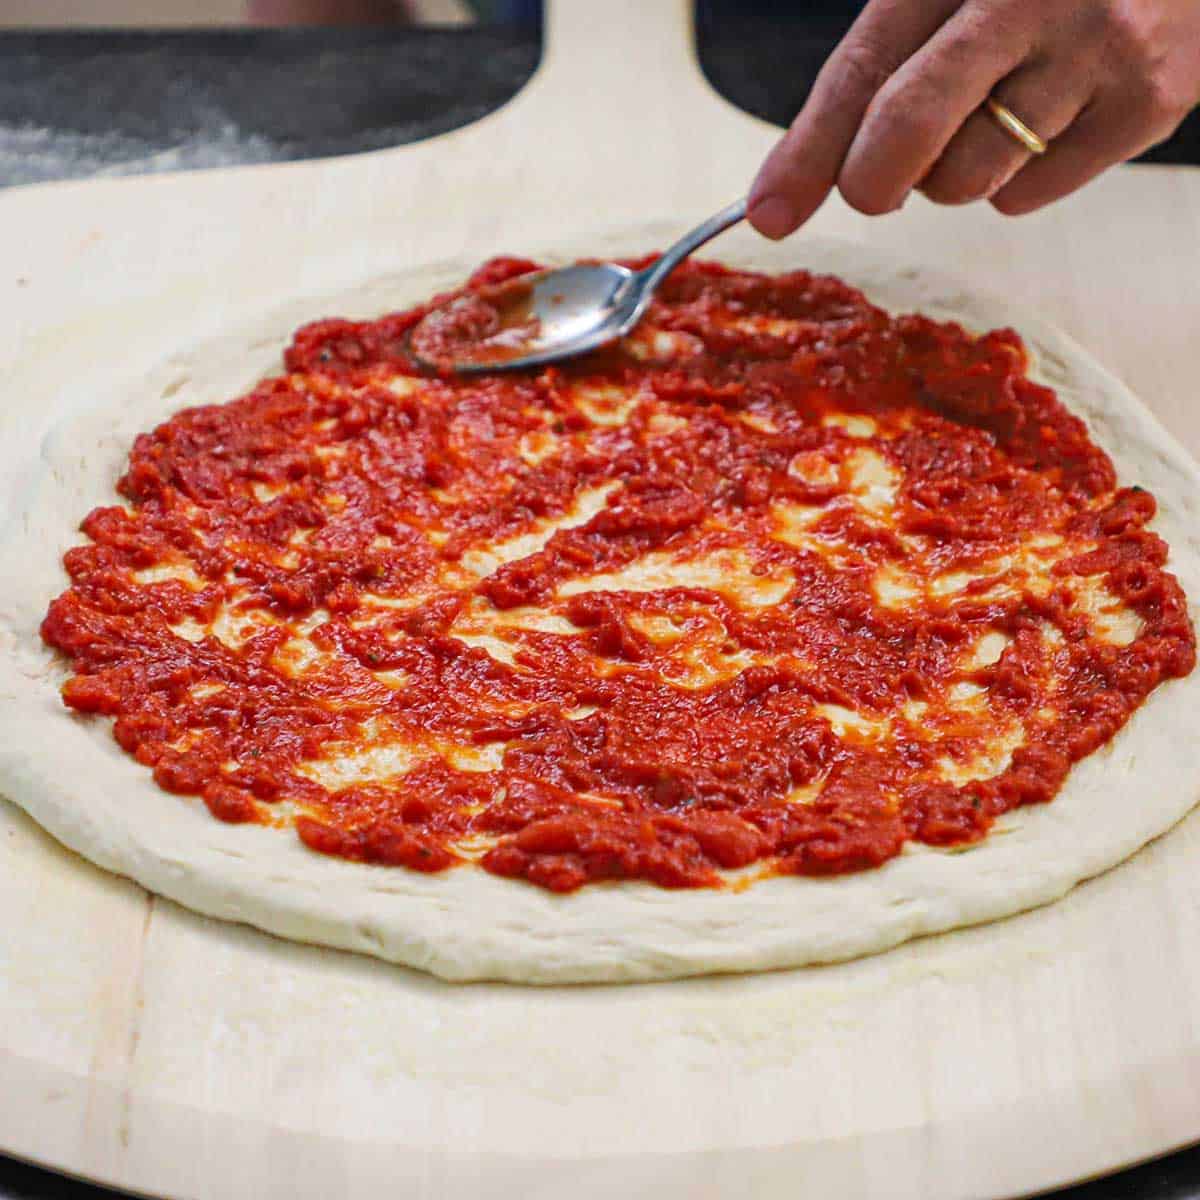
A person using a spoon to spread pizza sauce on a circular pizza dough that is sitting on a large pizza wheel.
  1. Step 3: Gently pull the dough onto the peel and spoon on the sauce in a circular motion, starting at the center. 
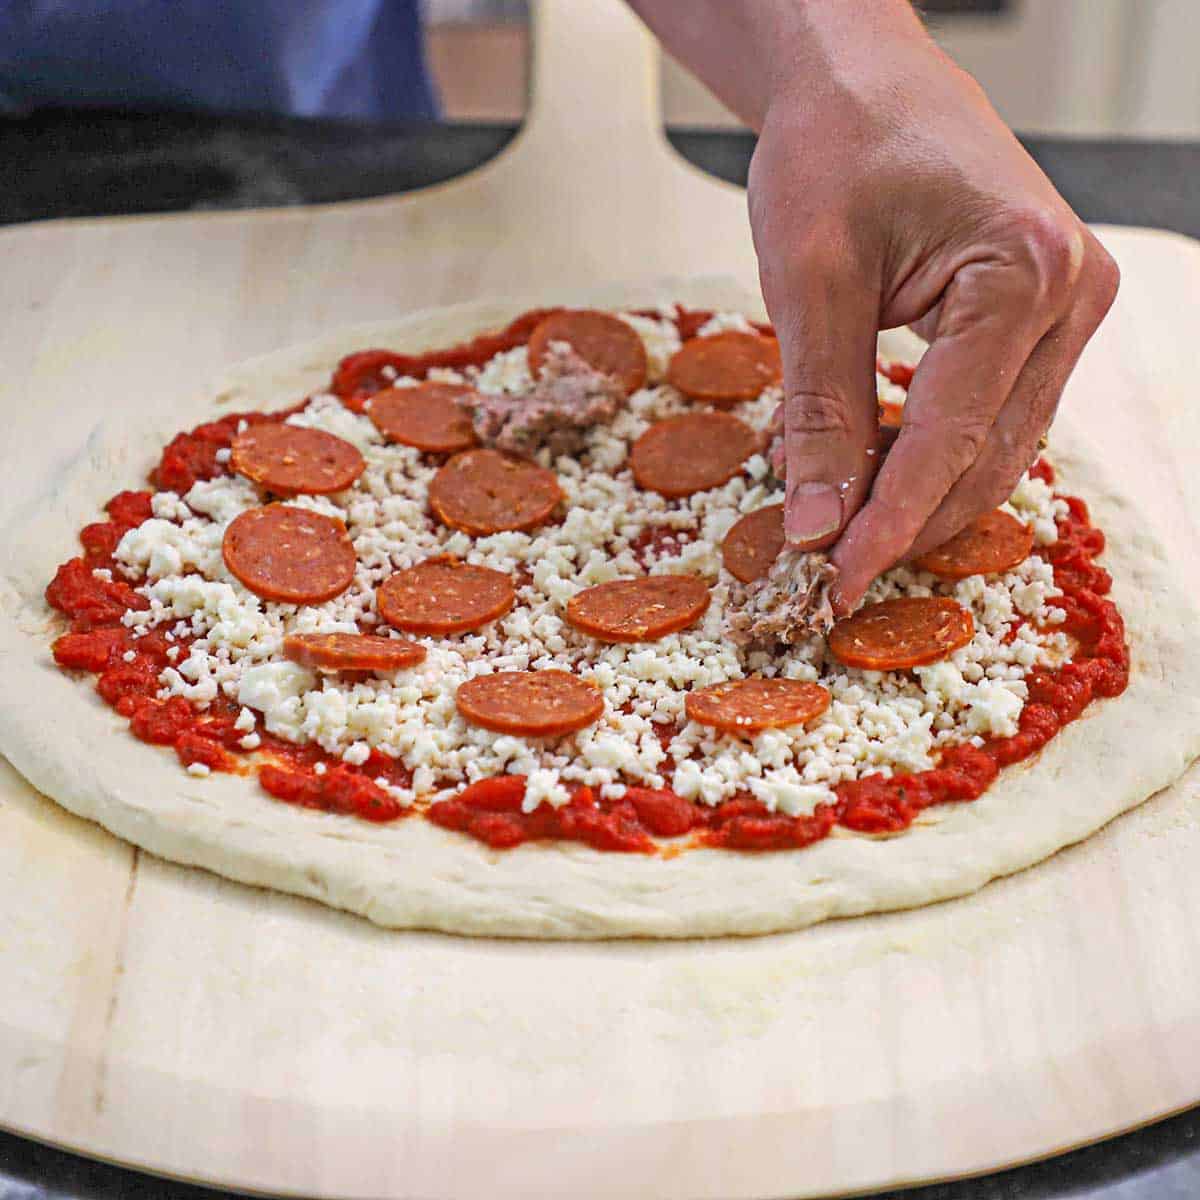
A person placing a small piece of uncooked ground pork onto an uncooked homemade New York-style pizza on a large pizza wheel.
  1. Step 4: Sprinkle on the mozzarella, then the pepperoni, prepared fennel sausage, and dried oregano. 
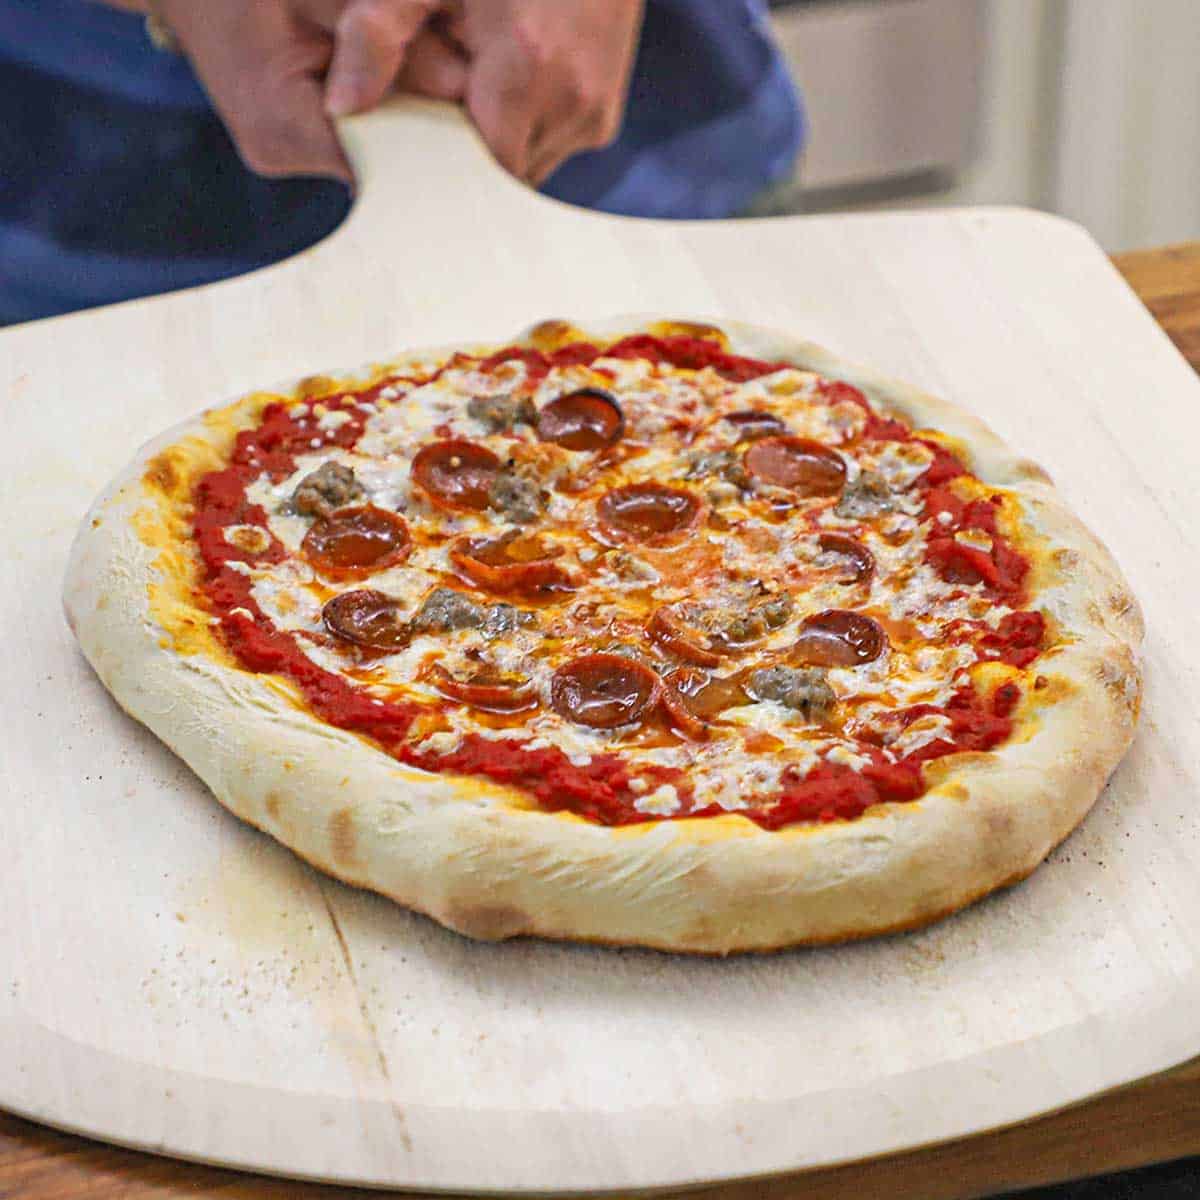
A person holding a freshly baked homemade New York-style pizza on a large pizza wheel.
  1. Step 5: Bake for 10 minutes in the oven on a baking steel (or stone) that has been preheated to 500°F for at least 1 hour. Remove with a pizza peel.
A person holding a brush that is in a bowl of garlic-infused olive oil over a freshly baked homemade New York-style pizza.
  1. Step 6: Top with grated Parmesan and drizzle with the garlic oil. Slice and then serve at once! 

Expert Tip

Using two baking steels (or stones) helps to create an even browning on the bottom of the crust. After 4 to 5 minutes, turn the pizza 180° and then transfer it to the lower baking steel. The new steel will heat and brown the crust perfectly. It’s okay if there are some dark spots on the bottom of the crust. This is normal, but you don’t want them burned. This may take some practice as you learn the temperature of your oven.

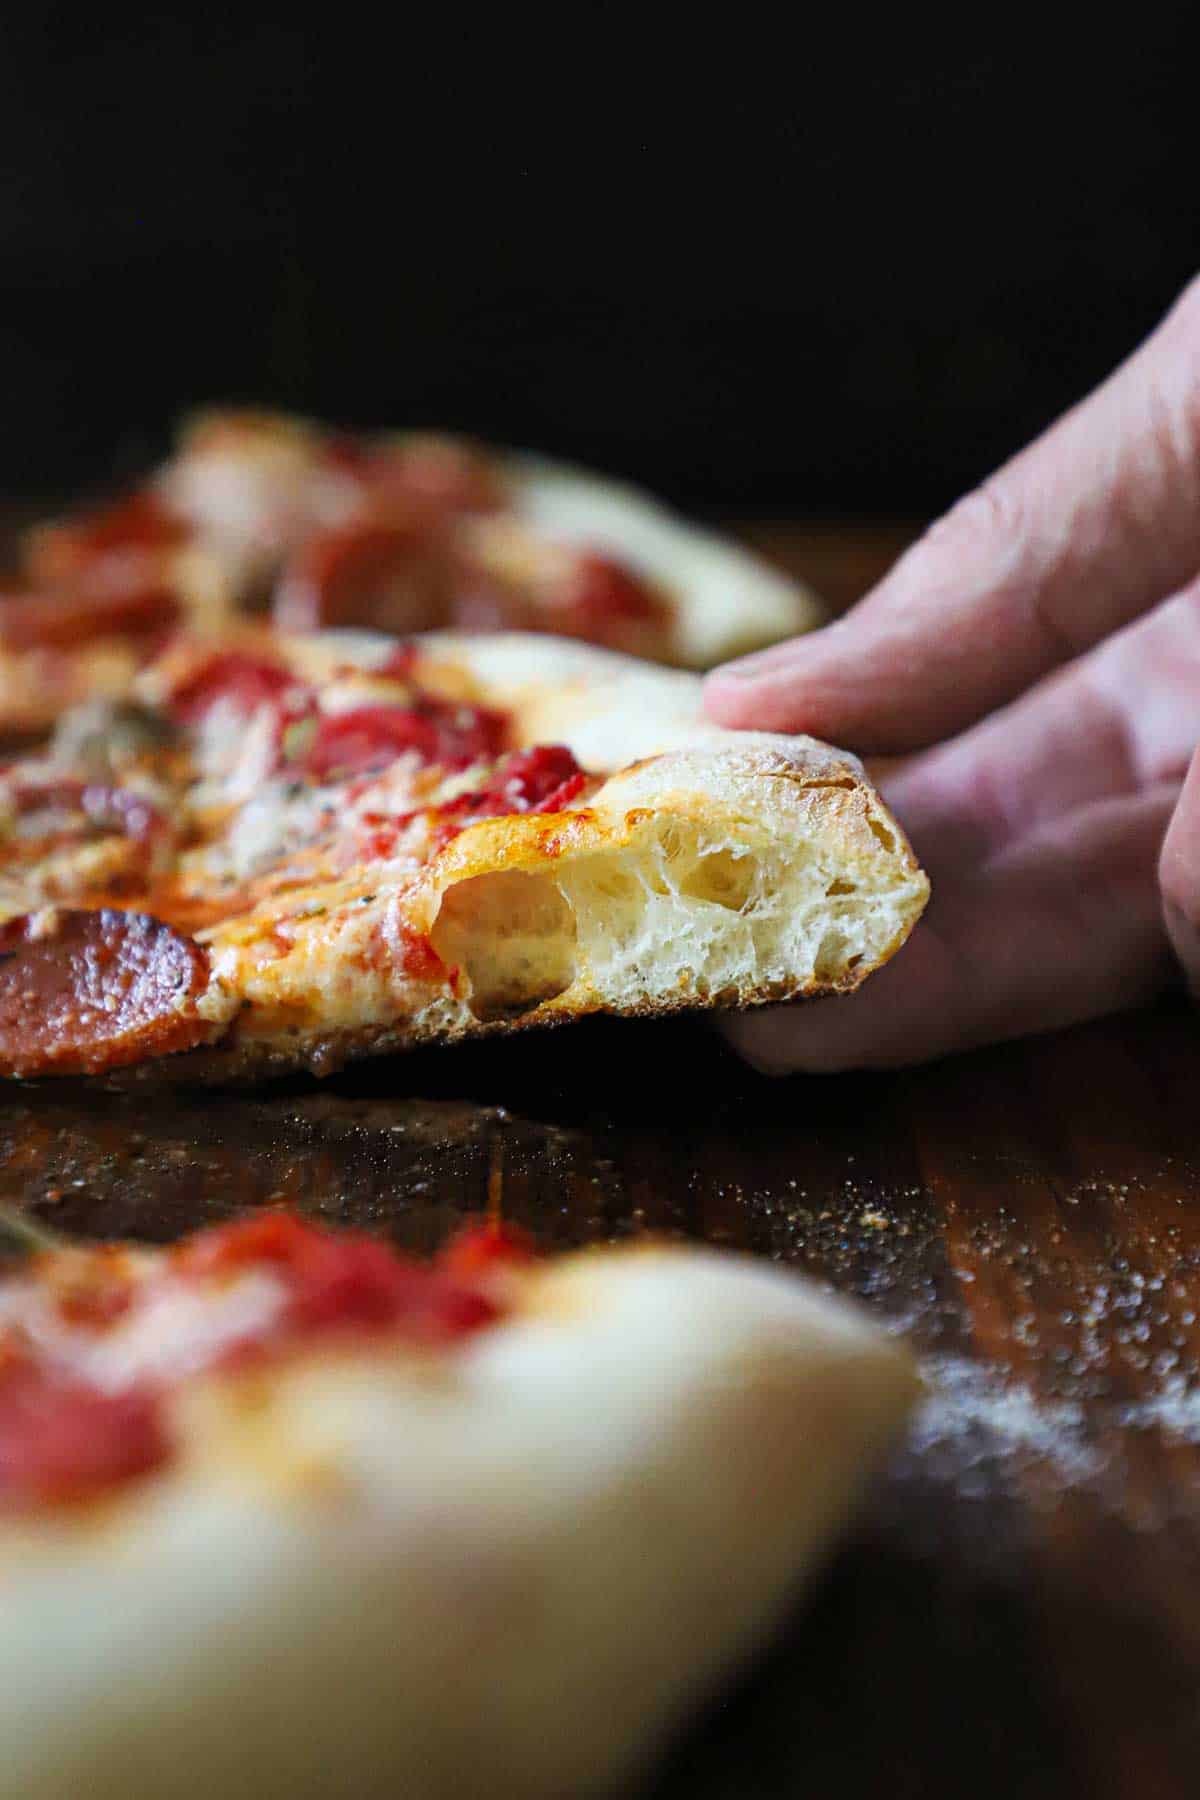
A person holding up a slice of New York-style pizza revealing the nooks and crannies in the edge of the crust.

😋 Other Homemade Pizza Recipes

  • A side view of a BBQ chicken pizza cut into slices with a piece missing, and a glass mug of beer nearby and checkered napkins.
    BBQ Chicken Pizza
  • Soppressata, mushroom and black olive pizza next to parmesan cheese and red pepper flakes
    Soppressata, Mushroom, and Black Olive Pizza
  • An overhead view of a whole Detroit-style pizza in a rectangular steel pan with two parallel stripes of red sauce on top of the pizza.
    Homemade Detroit-Style Pizza
  • A Chicago-Style Deep Dish Pizza on a cutting board with a slice pulled out next to Parmesan cheese.
    Chicago-Style Deep Dish Pizza

Ready to make the best pizza this side of the Big Apple? Go for it!

And when you do, be sure to take a photo of it, post it on Instagram, and tag @HowToFeedaLoon and hashtag #HowToFeedaLoon!

A person pulling a slice of homemade New York-style pizza from the sliced pie that is sitting uneaten on a wooden cutting board.
Print Recipe
5 from 1 vote

Homemade New York-Style Pizza

Homemade New York-Style Pizza features a thin, chewy crust topped with savory tomato sauce and melted cheese, capturing the classic flavors of the Big Apple right in your own kitchen. You'll need to invest in a few tools, some specific ingredients, and some time (3 days), but the end result will most likely be the most delicious pizza you've ever encountered!
Prep Time30 minutes mins
Cook Time10 minutes mins
Dough preparation22 days d
Total Time2 days d 40 minutes mins
Course: Entree / Pizza
Cuisine: American / Italian
Calories: 452kcal
Author: Kris Longwell

Equipment

  • See blog post for equipment recommendations

Ingredients

Pizza Dough (2 to 3 days before making the pizza)

  • 1 13 oz pizza dough

For the Pizza Sauce (1 day before making the pizza)

  • ½ cup ground tomatoes
  • ¼ cup tomato paste
  • ¼ teaspoon dried oregano
  • ½ teaspoon fine sea salt
  • 1 teaspoon extra-virgin olive oil
  • ¼ cup whole tomatoes seeded and hand torn (see NOTES)

For the Sweet Fennel Sausage (1 day before making the pizza)

  • 1 tablespoon fennel seeds
  • 1 tablespoon anise seeds
  • 1 teaspoon fine sea salt
  • 1 teaspoon ground black pepper
  • 1 tbsp + 1 tsp cool tap water
  • 1 lb ground pork preferably ground pork shoulder
  • 1 tablespoon honey

For the Garlic-Infused Olive Oil (1 day before making the pizza)

  • 2 teaspoon garlic minced
  • ¼ cup extra virgin olive oil

For the Pizza (Day of making the pizza)

  • ¼ cup high-gluten flour
  • ¼ cup semolina flour
  • ⅔ cup pizza sauce
  • ¾ cup whole milk mozzarella sliced (or chopped)
  • ½ cup pepperoni thinly sliced, preferably in natural casing
  • ½ cup sweet fennel sausage
  • dried oregano for dusting
  • ¼ cup Parmesan cheese grated, for garnish
  • garlic-infused oil for drizzling

Instructions

Make the Dough (2 to 3 days before making the pizza)

  • Prepare the pizza dough
    1 13 oz pizza dough

Make the Pizza Sauce (1 day before making the pizza)

  • Combine the ground tomatoes, tomato paste, oregano, salt, and oil in a large bowl. Purée with an immersion blender. Stir in the hand-crushed tomatoes.
    ½ cup ground tomatoes, ¼ cup tomato paste, ¼ teaspoon dried oregano, ½ teaspoon fine sea salt, 1 teaspoon extra-virgin olive oil, ¼ cup whole tomatoes
  • Cover and refrigerate for up to 3 days. Be sure to bring back to room temperature before adding to pizza dough (usually about 2 hours sitting on the counter).

Make the Sweet Fennel Sausage (1 day before making the pizza, or the morning of)

  • Grind the fennel seeds and anise seeds in a spice grinder until lightly ground. There should still be some texture; you don't want a powder. Add the seeds, salt, and pepper to a small bowl and add the water, and stir to form a paste.
    1 tablespoon fennel seeds, 1 tablespoon anise seeds, 1 teaspoon fine sea salt, 1 teaspoon ground black pepper, 1 tablespoon + 1 teaspoon cool tap water
  • Place the pork into a large bowl and top with the spice mixture and honey. Use your hands to incorporate the spices and honey into the meat. Cover with plastic wrap and refrigerate for at least 2 hours, or preferably overnight.
    1 lb ground pork, 1 tablespoon honey

Make the Garlic-Infused Oil

  • Add the garlic to a small bowl and pour the garlic over it. Keep covered on the counter for at least 2 hours, or even better for 1 to 2 days. Give it a stir every now and then to help infuse the garlic into the oil.
    2 teaspoon garlic, ¼ cup extra virgin olive oil

Make the New York-Style Pizza

  • 2 hours before preparing the pizza, take the dough and the sauce out of the refrigerator.
  • 1 hour and 15 minutes before baking, place the pizza steel(s) or stones in the oven, one on the second-highest grate placement and the other on the lowest grate placement. Turn the oven to 500°F.
  • Mix together the high-gluten flour and semolina flour in a bowl. Liberally sprinkle the flour mixture on your counter and on the pizza peel.
    ¼ cup high-gluten flour, ¼ cup semolina flour
  • Carefully remove the plastic wrap from the dough on the sheet pan. Use your fingers to help pull the plastic from the dough (it will be sticky). Try and maintain the dough shape, but it's okay if it loses its dome shape somewhat. Use your dough cutter/bench scraper to gently loosen the bottom of the dough from the pan. Once it's free, transfer the dough to the floured surface. Flip the dough so both sides are coated with the flour/semolina mixture.
  • Use your cupped hands to push the dough into a circle. Use the palms of your hands to expand the diameter of the dough. Gently lift the dough and toss it back and forth with your hands. Toss the dough onto both of your fists in the center of the dough, being careful not to tear the dough. Transfer to the pizza peel and continue working the dough with your fingers and palms until a 13-inch diameter is reached.
  • Transfer the room temperature sauce to the center of the dough. Use the back of a spoon to spread the sauce to about 1 inch from the edge of the exterior of the dough. Don't add too much sauce. It should be thin. Give the pizza peel a shake or two to keep the dough mobile on the peel.
    ⅔ cup pizza sauce
  • Sprinkle the mozzarella over the sauce, and then top it with the pepperoni slices and then pinches of the sweet fennel sausage (you will have leftover pork that can be frozen, or used again).
    ¾ cup whole milk mozzarella, ½ cup pepperoni, ½ cup sweet fennel sausage
  • Carefully transfer the pizza onto the heated steel or stone on the top rack and bake for 5 minutes. Open the oven and rotate the pizza 180°, and then pull it onto the wheel and transfer to the lower steel or stone. Bake for another 5 minutes, or until the crust and cheese are just starting to brown.
  • Remove from the oven. Garnish with freshly shave Parmesan cheese and dried oregano. Slice and serve at once!
    dried oregano, garlic-infused oil, ¼ cup Parmesan cheese

Video

Notes

NOTE: Watch the video near the top of the recipe for visual guidance. 
Watch the video on how to shape the dough. This takes practice, and you’ll get better at it every time you make a pizza. 
To make the hand-crushed tomatoes, place the tomatoes in a sieve over a bowl. Grab the whole tomatoes, and then use your fingers to tear them up, remove the seeds, and any tough parts of the tomato. Place in a separate bowl. 
This recipe requires a small investment in tools, ingredients, and time…but the result will be a pizza you and your loved ones will want to make time and time again! 

Nutrition

Calories: 452kcal | Carbohydrates: 23g | Protein: 132g | Fat: 18g | Saturated Fat: 6g | Polyunsaturated Fat: 4g | Monounsaturated Fat: 10g | Trans Fat: 1g | Cholesterol: 212mg | Sodium: 712mg | Potassium: 1119mg | Fiber: 12g | Sugar: 33g | Vitamin A: 2849IU | Vitamin C: 39mg | Calcium: 986mg | Iron: 15mg

NOTE: This recipe is adapted from the amazing chef master pizza maker Tony Gemignani and his book The Pizza Bible.

New York-Style Pizza Dough

June 22, 2025 by Kris Longwell 4 Comments

A person holding up a slice of New York-style pizza revealing the nooks and crannies in the edge of the crust.

Making New York-style pizza dough is achievable when you have the right ingredients, tools, and follow the proper steps for mixing, kneading, and rising. With patience and attention to detail, you can create a thin, chewy crust that’s perfect for your favorite toppings. Perfect for making Homemade New York-Style Pizza!

A person holding up a slice of New York-style pizza revealing the nooks and crannies in the edge of the crust.
[feast_advanced_jump_to]

🍶 The Ingredients

Using the right ingredients is crucial for crafting authentic New York-style pizza dough, ensuring the perfect balance of flavor, texture, and chewiness. Find ingredient notes (including substitutions and variations) below.

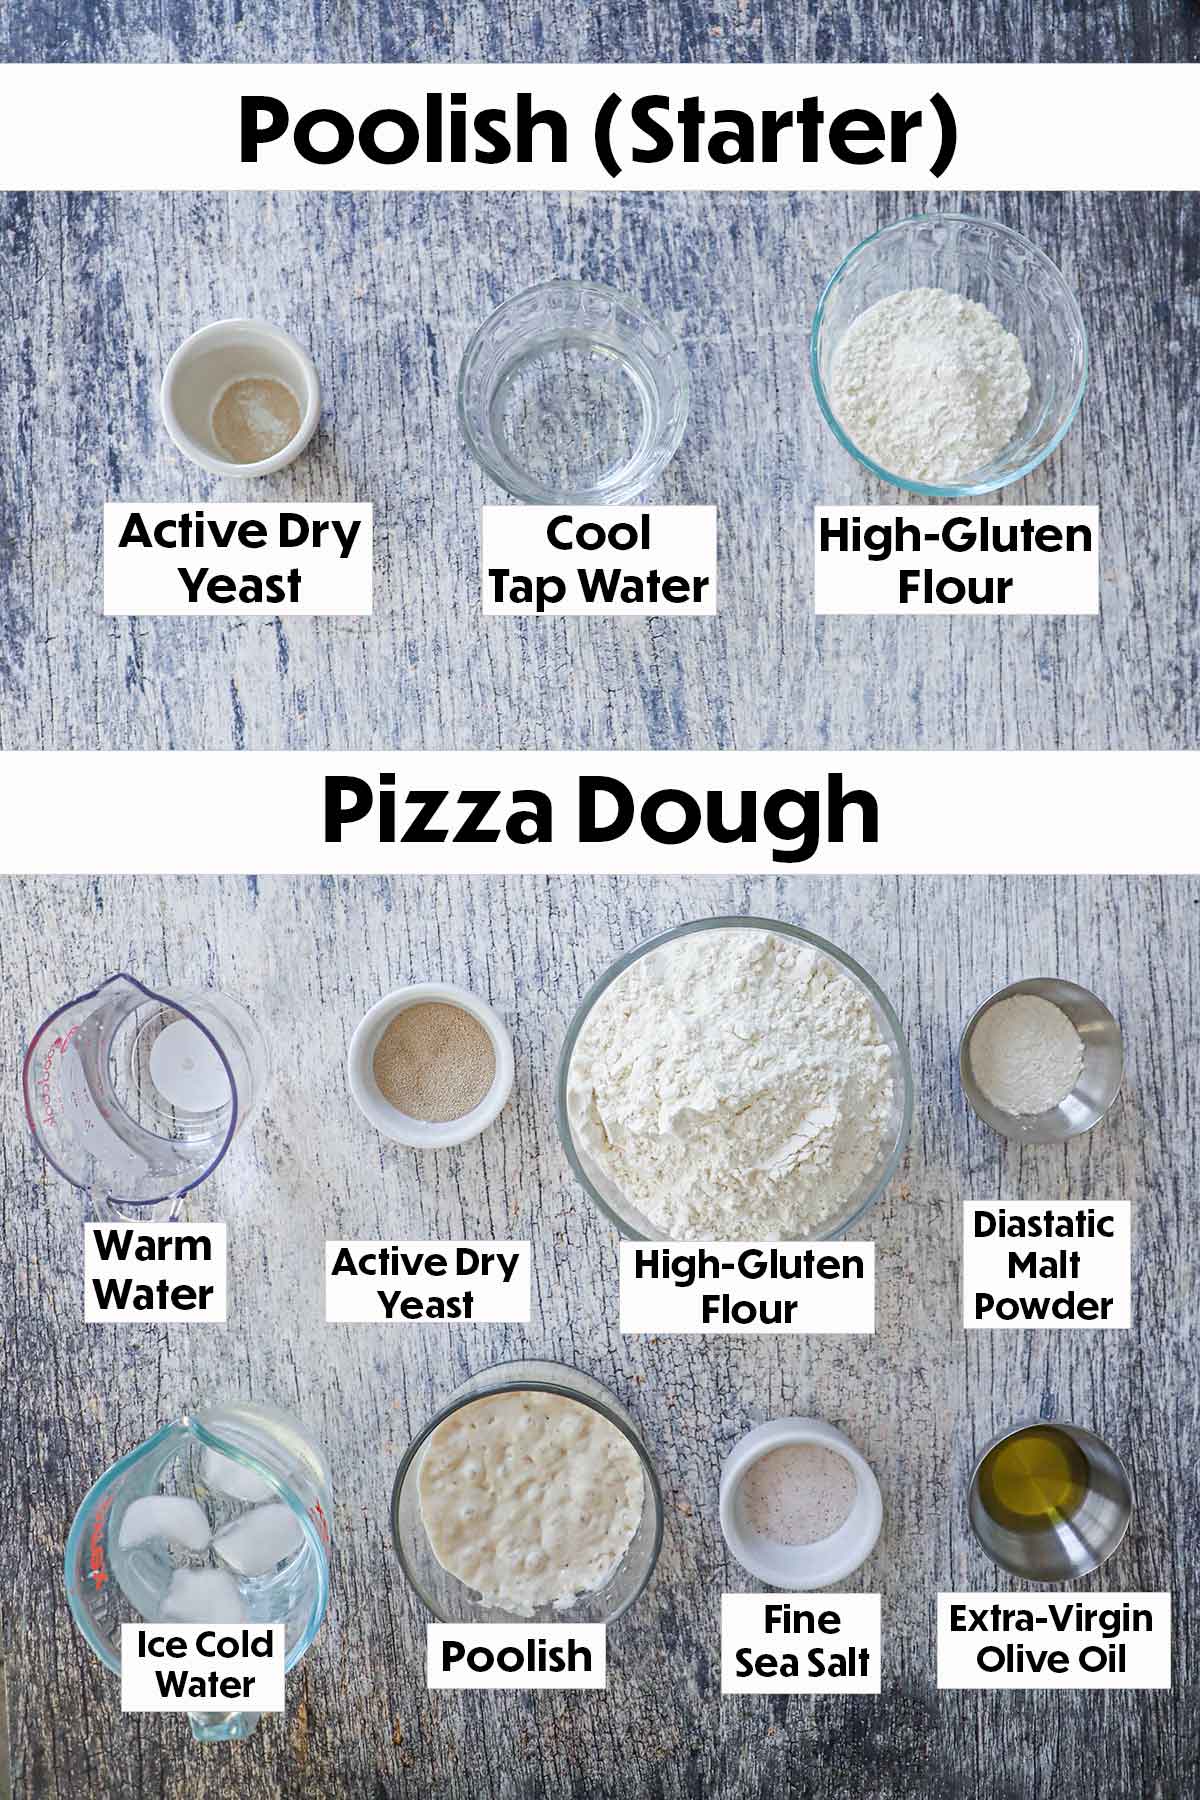
An arrangement of ingredients for poolish and pizza dough on a grey wooden background including yeast, flour, water, salt, and olive oil.

👉 More About the Ingredients

  • Flour – Nothing is more important than using the right flour. All-purpose won’t work. Seek out a high-gluten (high-protein) flour. We use High Power Flour (Pendleton); however, this comes in a large 25-lb bag. King Arthur High-Gluten flour is a great option.
  • Diastatic malt powder – This will help you get a nice brown on your crust. This is ideal when using a conventional oven at 500 to 550°F. If using a pizza oven (850° to 900°F), no need to use it. We use Baker’s Club.
  • Yeast – Regular Active Dry Yeast is recommended. We want the yeast to feed on the sugar in the flour slowly. This will result in a better-tasting crust with exceptional structure. Instant Yeast is not recommended.

See the recipe card (with video) below for a full list of ingredients and measurements.

Expert Tip

Be sure to check the date on your yeast. And then when you add the water, if the yeast rises to the top, it’s dead. You’ll need to discard the yeast and get new, fresh yeast. This is critical for achieving perfect pizza dough.

⚖️ The Tools

Having the right tools is essential for making perfect pizza dough with the ideal texture and crispness.

  • Digital scale – Necessary for measuring the exact right amount of flour. Weighing ingredients is much more precise than measuring by volume.
  • Palm scale – You’ll need this for weighing yeast and other ingredients. It should register to 0.01 grams.
  • Stand mixer – You can knead the dough by hand (from start to finish), but a stand mixer makes life much easier.
  • Straight-edge dough cutter – This is also called a “bench scraper.” It’s perfect for cutting the dough evenly and cleaning your counter.
  • Round-edge bowl scraper – This makes getting the tacky (sticky) dough out of the bowl so much easier.
  • Half sheet pan – Or, two quarter sheet pans.
  • Extra-Wide Plastic Wrap – Extra wide makes wrapping the dough in the pan easier, but regular size works well, too.
  • Tape Measure – For ensuring your pizza dough is 13 inches in diameter.
  • Large Rectangular Pizza Steels – You’ll want two of these. Large pizza stones work, too.
  • Extra-Wide Pizza Wheel – This makes getting the pizza in and out of your oven much easier.
  • Rocking pizza cutter – A pizza slicer is perfectly fine, but the cutter will give you more precision when slicing the pizza.

Something to Consider

All of these tools are investments that you will use repeatedly throughout your pizza-making life. They are not that expensive, and a lot less money than an actual pizza oven!

👩🏼‍🍳 How To Make Pizza Dough Poolish (Starter)

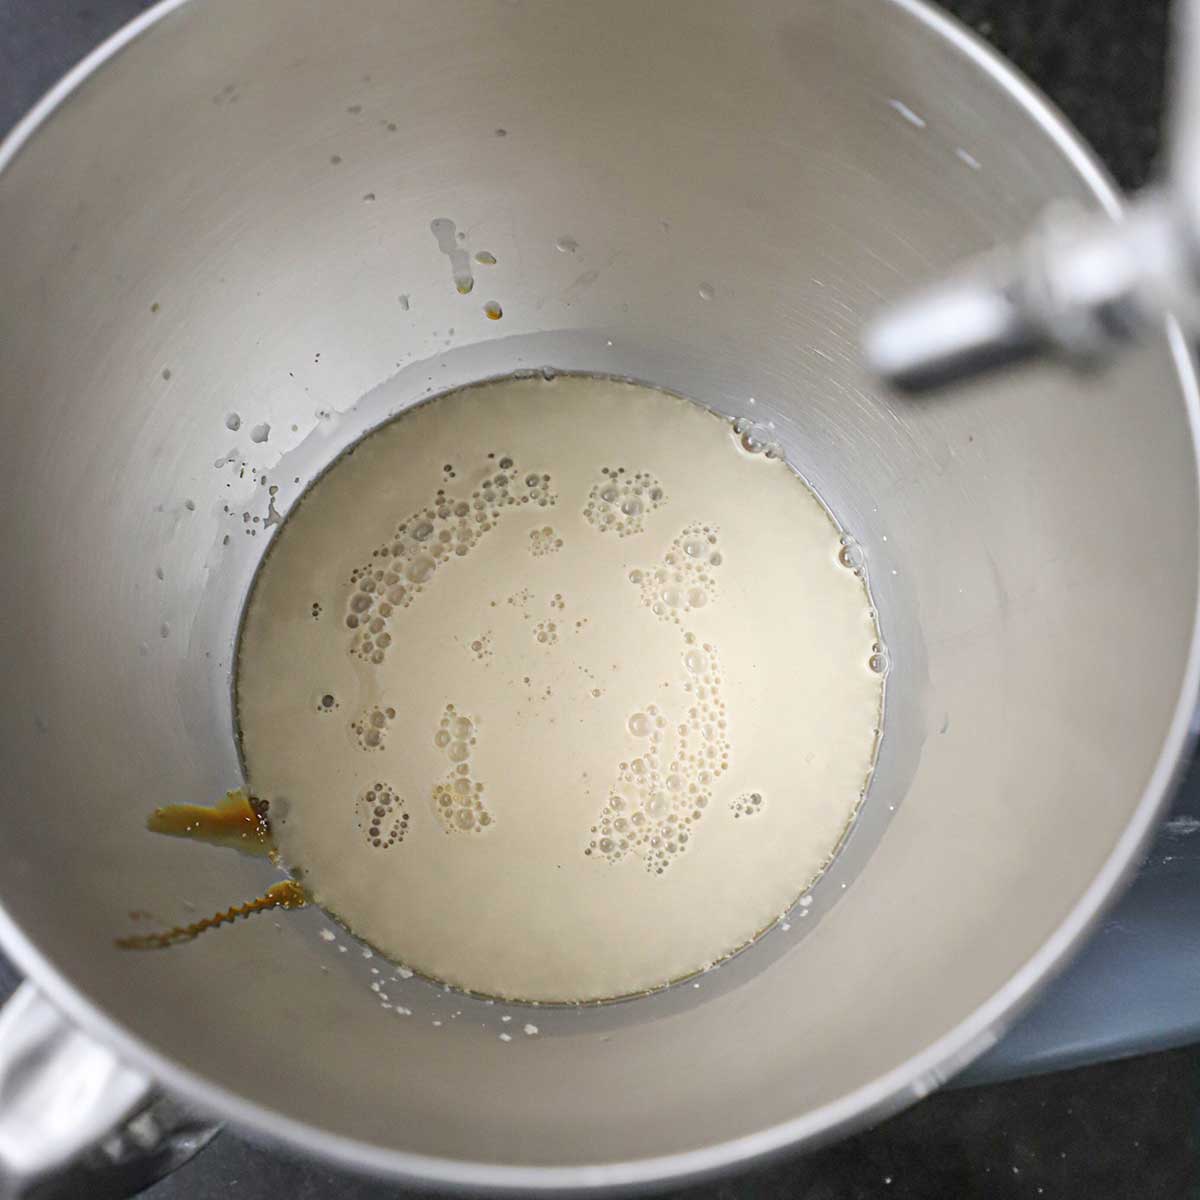
A person using a small whisk to activate a small amount of active yeast in a small glass bowl.
  1. Step 1: Whisk the yeast in a small bowl with the warm water. 
A person dumping high-gluten flour into a small glass bowl that is filled with a water and active dry yeast mixture.
  1. Step 2: Add the flour to the yeast/water mixture.
A person using a red rubber spatula to incorporate high-gluten flour into a small bowl filled a water and yeast mixture to create poolish.
  1. Step 3: Use a rubber spatula to incorporate the flour into the yeast water.
Two side by side bowls with one showing poolish before it rises and then the other bowl is the poolish after the yeast has cause the mixture to expand.
  1. Step 4: Cover and let rest at room temperature for 18 hours.

👨‍🍳 How To Make Pizza Dough in a Mixer

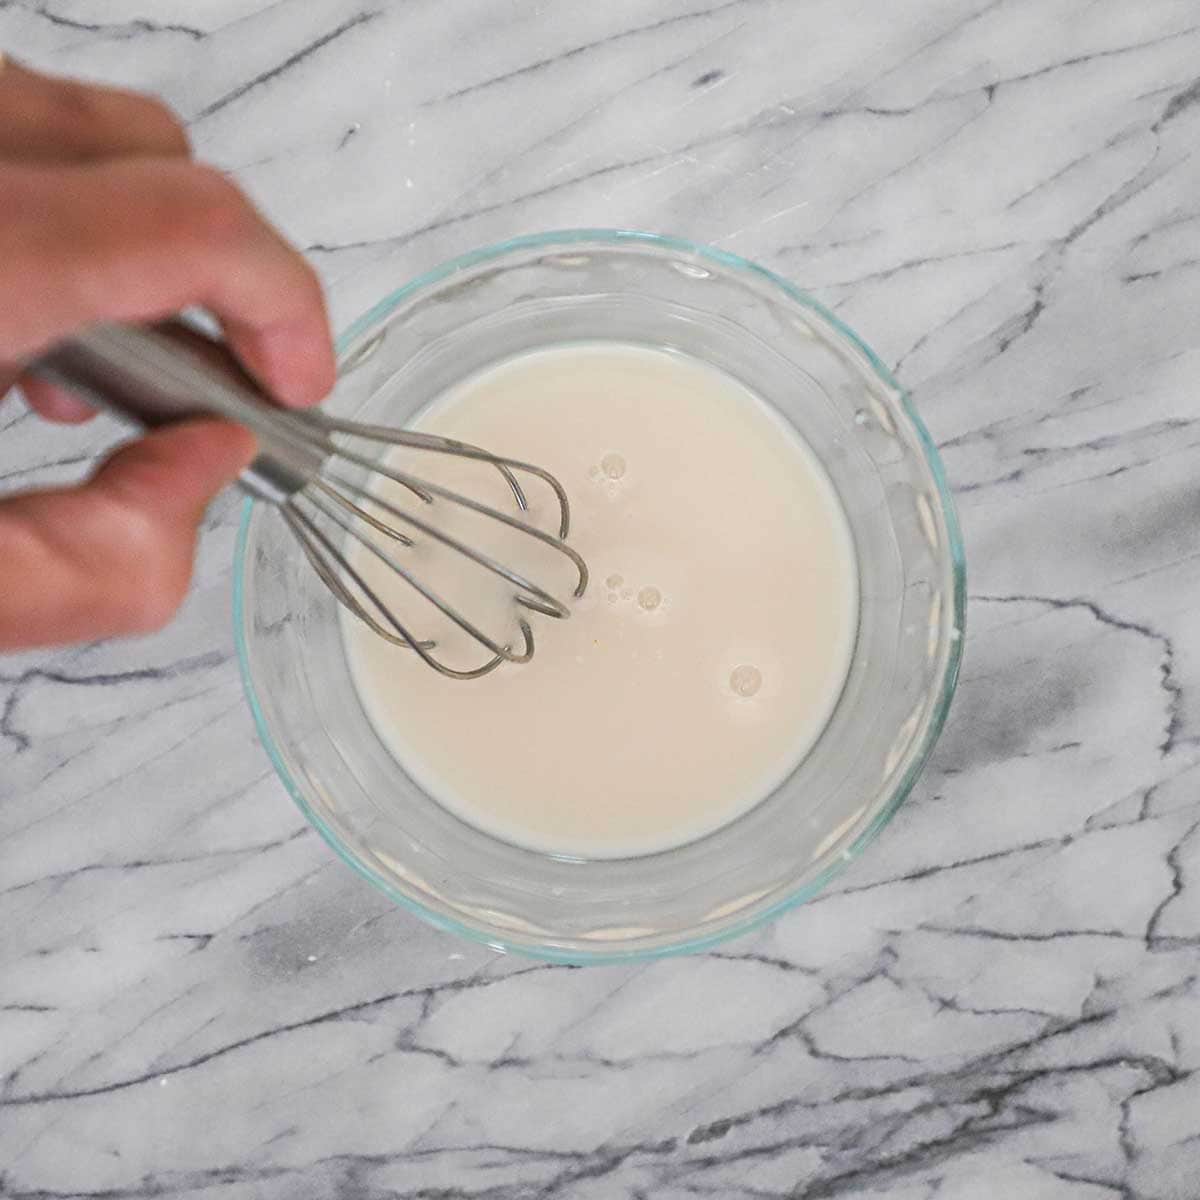
A person using a small whisk to activate active dry yeast in a small bowl of water on a marble counter.
  1. Step 1: Whisk the yeast in a small bowl with the warm water.
A person pouring water into a the bowl of a stand mixer that is filled with the ingredients for New York-style pizza dough.
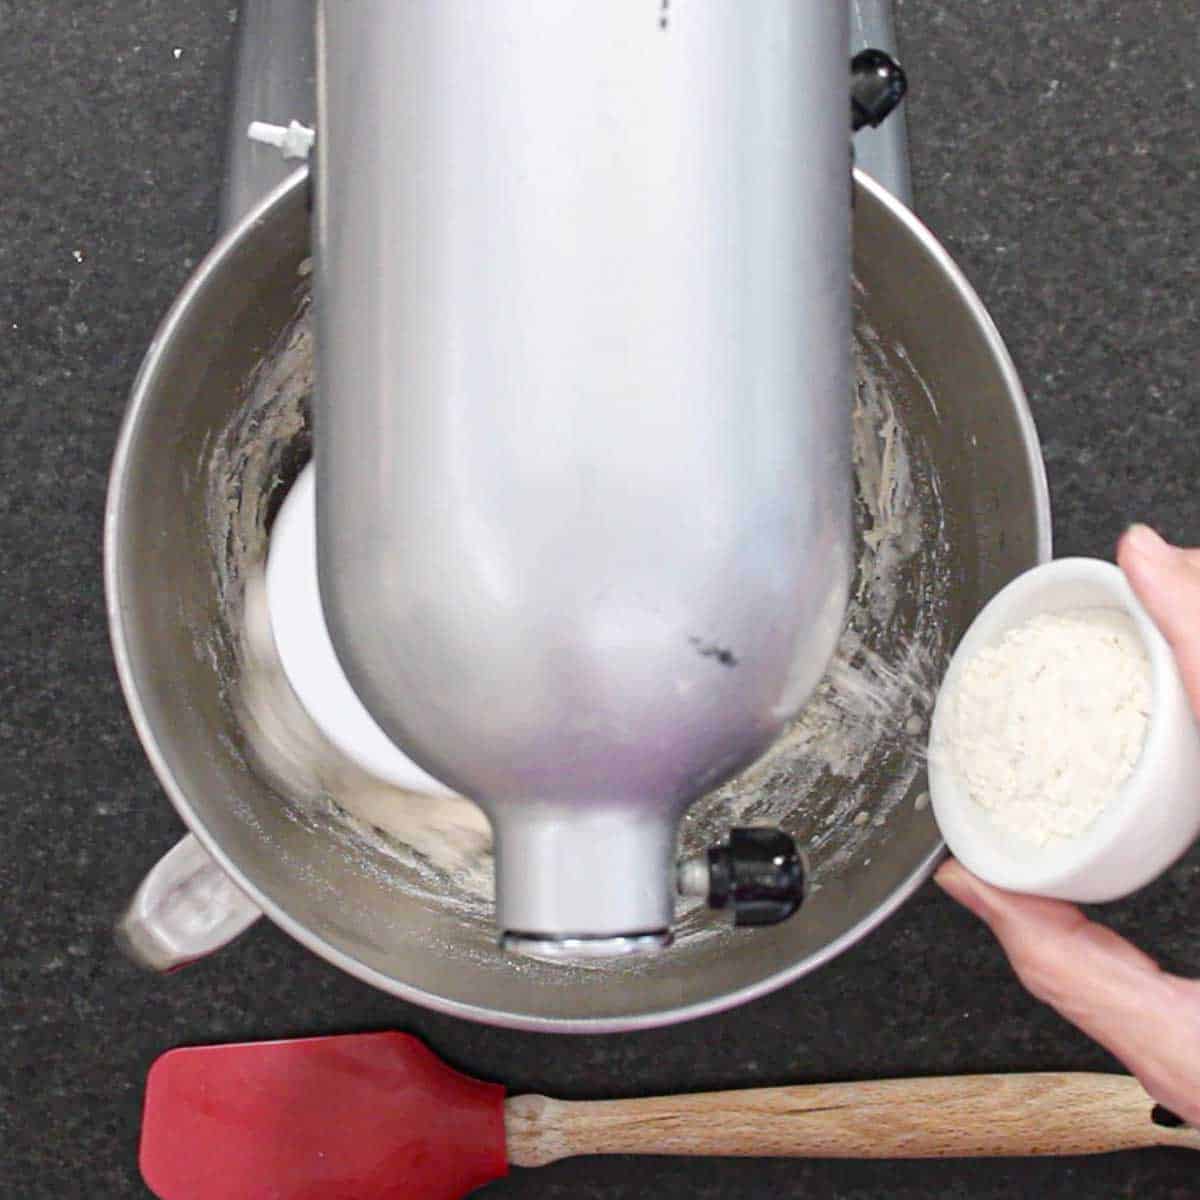
  1. Step 2: Combine the flour and malt in the bowl of a stand mixer and slowly add the ice water with the dough attachment. 
A person pouring a water and active dry yeast mixture into a bowl of a stand mixer that is filled with a flour and water mixture.
  1. Step 3: Add the yeast water and mix for 15 seconds. 
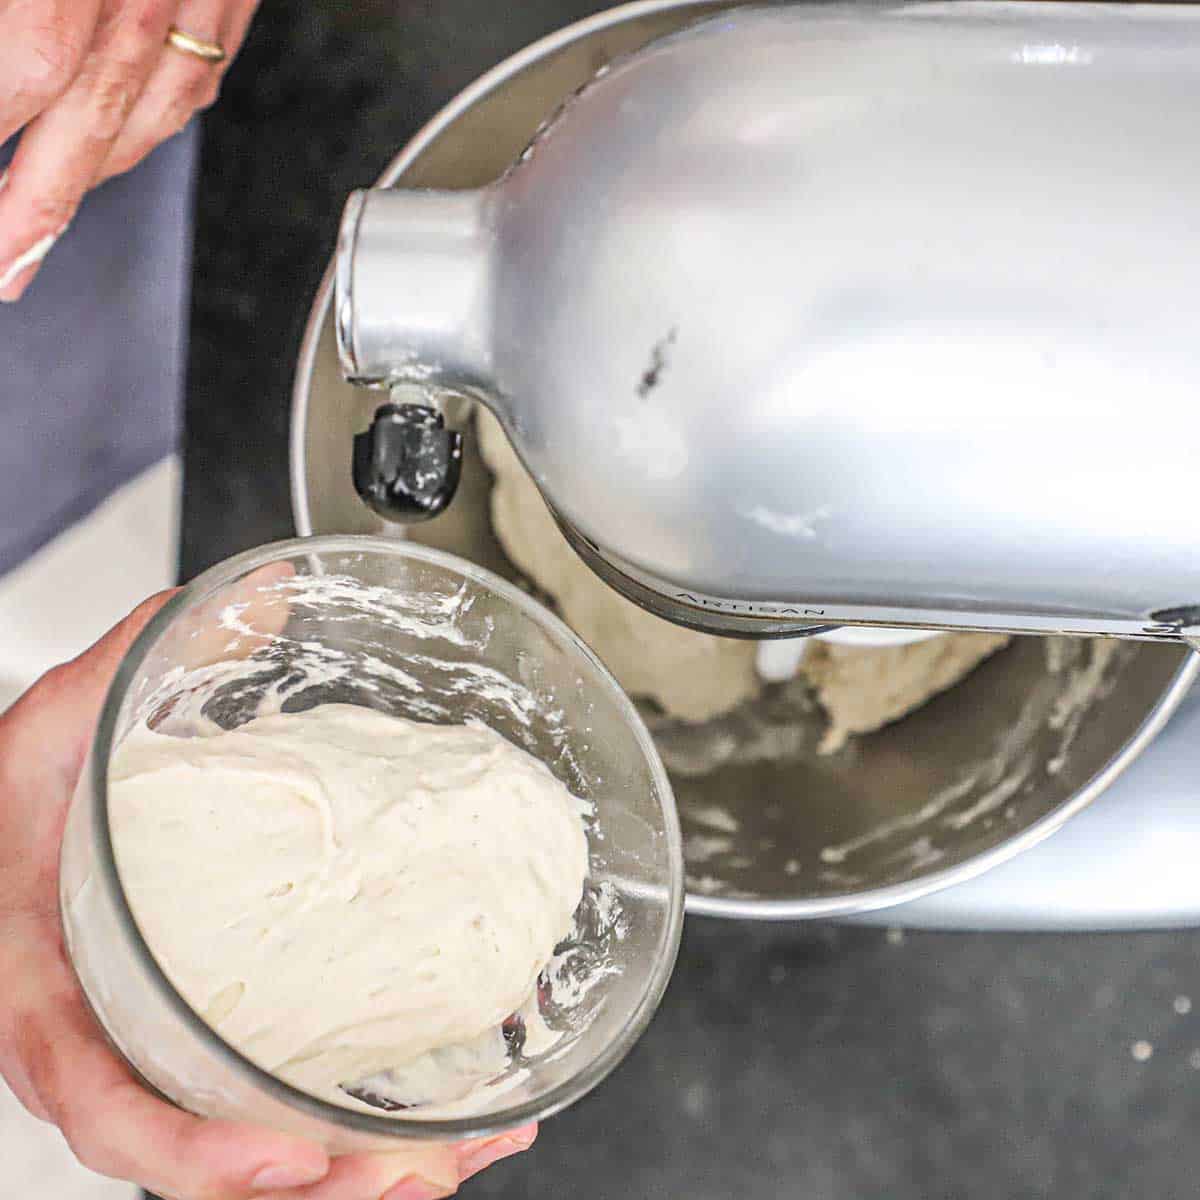
A person holding a small glass bowl filled with poolish, a pizza dough starter, over the bowl of a stand-mixer filled with the combined ingredients for New York-style pizza dough.
  1. Step 4: Mix in the poolish for 1 minute.
A person holding a small bowl of fine sea salt over the bowl of a stand-mixer filled with the ingredients of New York-style pizza dough.
  1. Step 5: Mix in the salt and mix for another minute.
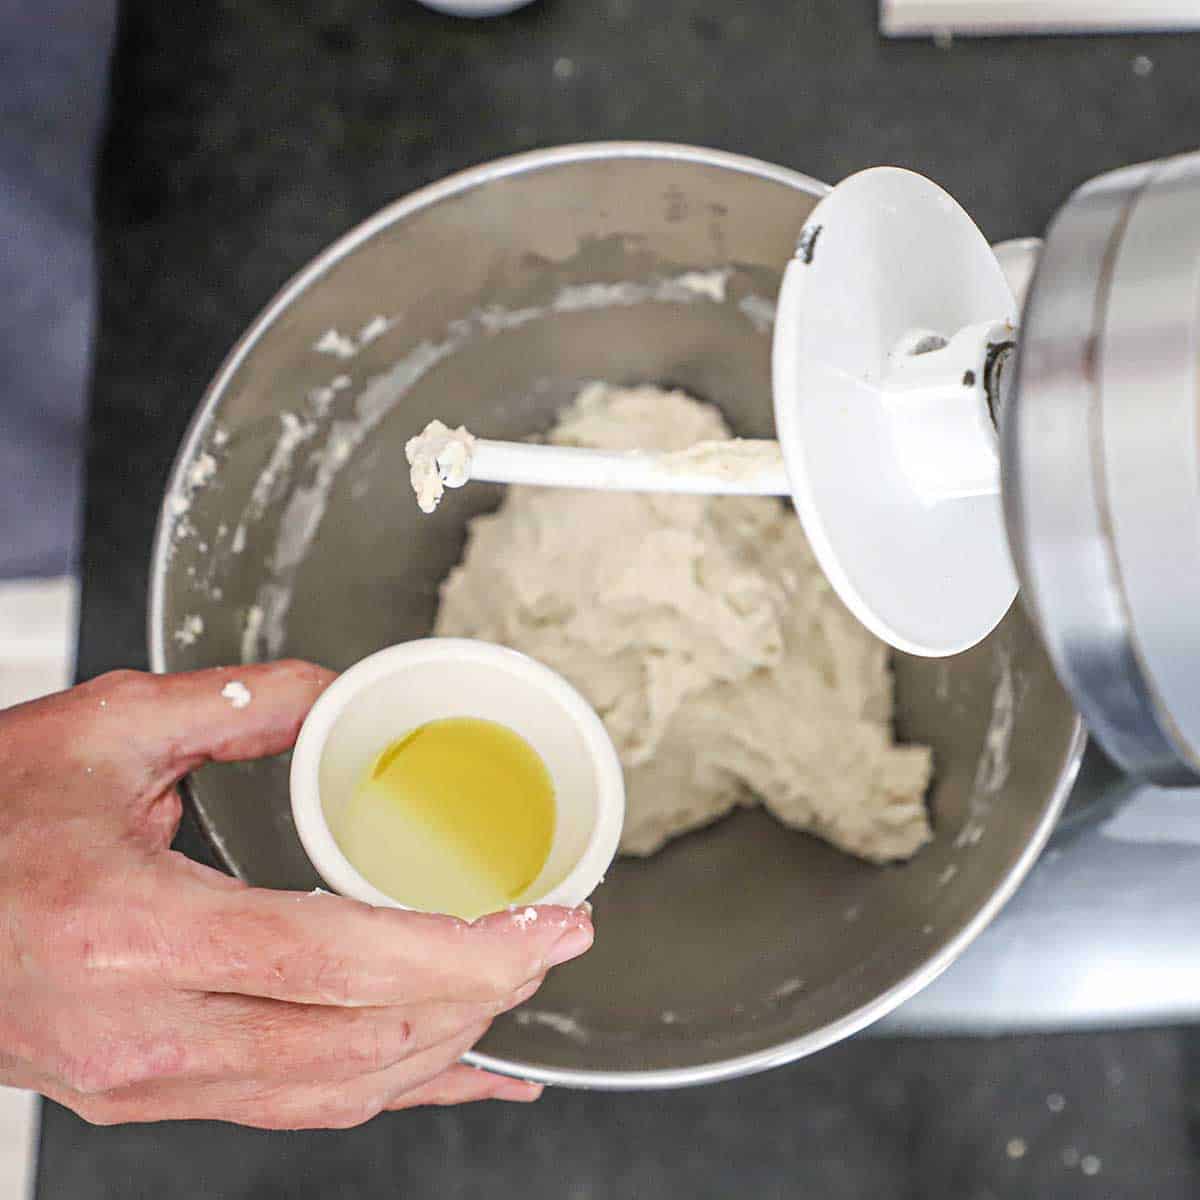
A person holding a small bowl with a small amount of extra-virgin olive oil over a bowl of a stand-mixer filled with a New York-style pizza dough.
  1. Step 6: Mix in the oil for 2 minutes. 

Expert Tip

The poolish will be very tacky, even sticky. Dip your fingers in the cold water and then use your wet hands to transfer the poolish from the bowl to the mixer.

🧑🏾‍🍳 How To Make New-York Style Pizza Dough

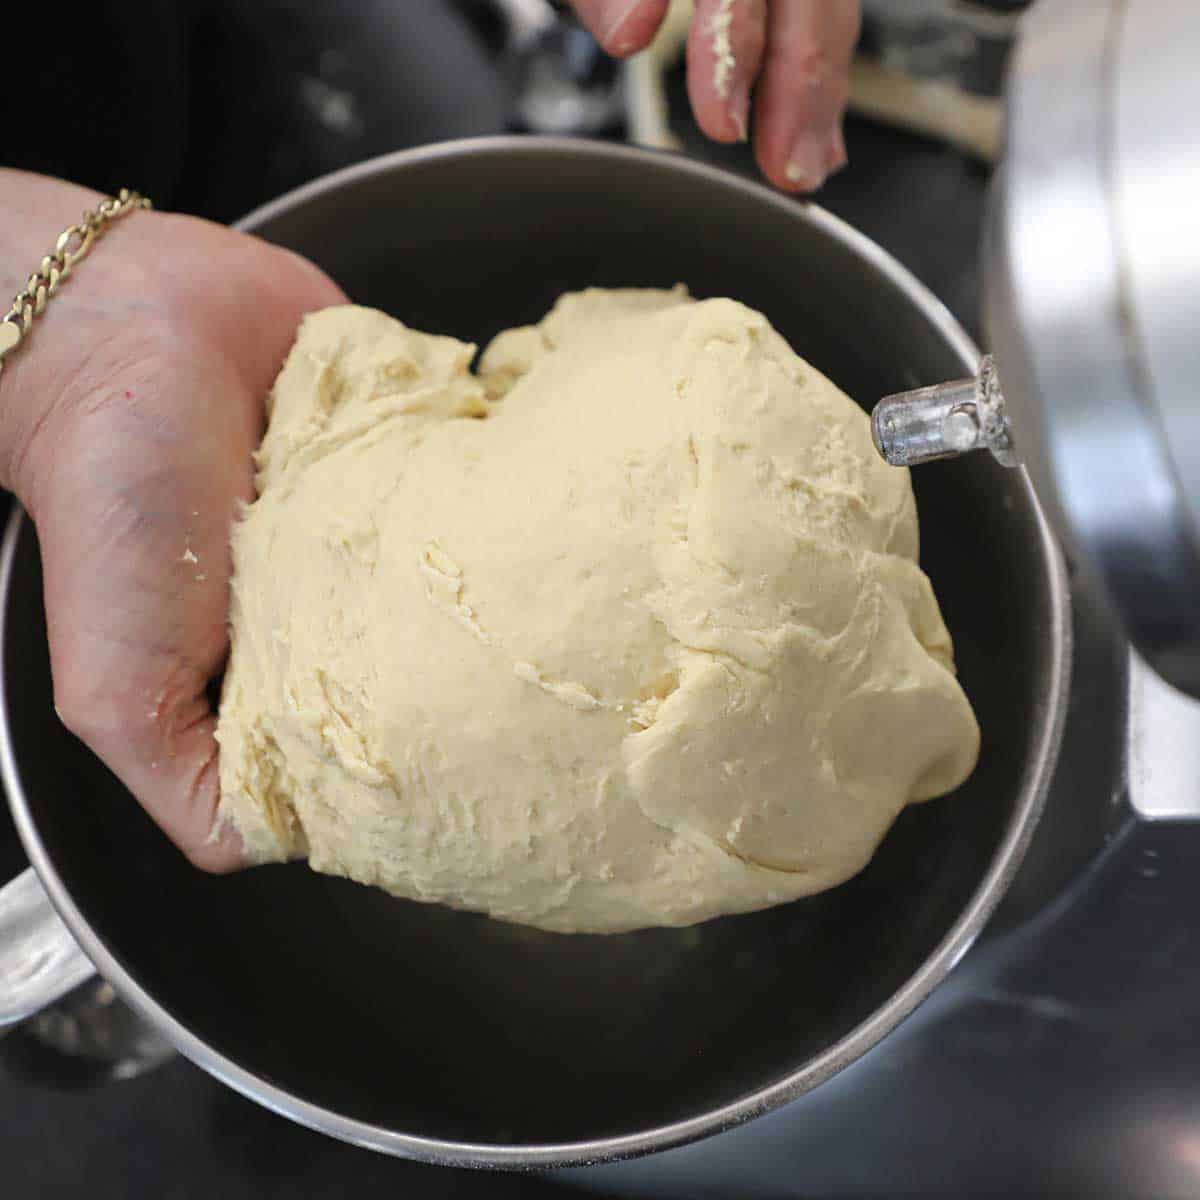
A person using a rubber dough scraper to remove New York-style pizza dough from the bowl of a stand mixer.
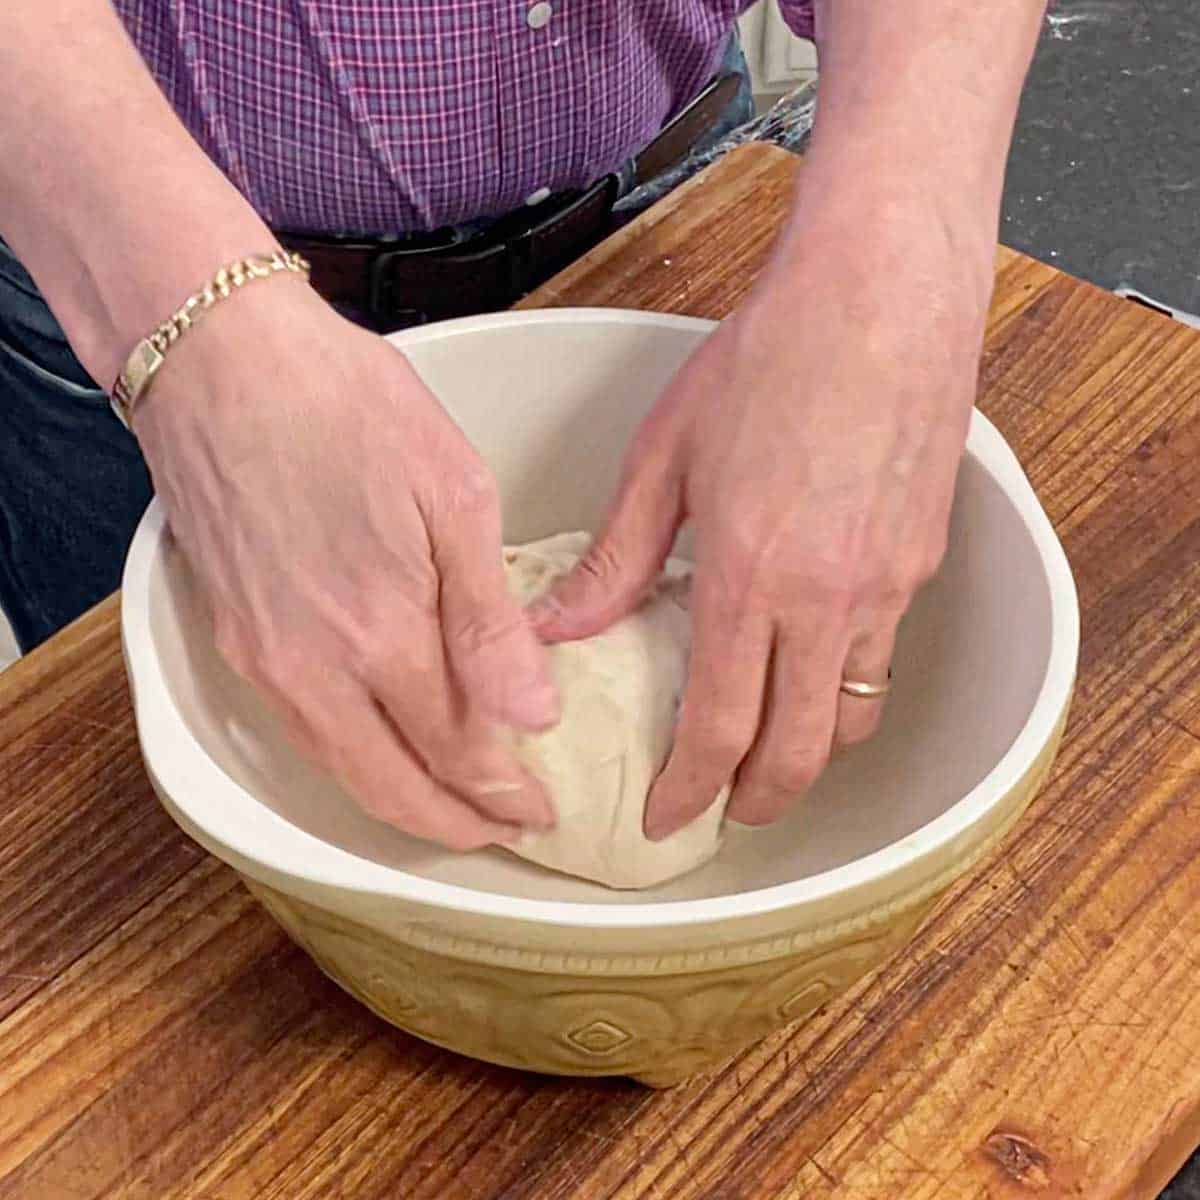
  1. Step 1: Use a bowl scraper to remove the dough from the bowl. 
A person using his hands to knead New York-style pizza dough on a black marbel counter.
  1. Step 2: Knead the dough on an unfloured surface for 3 minutes.
A person placing a damp grey napkin over a round ball of New York-style pizza dough on a black marble countertop.
  1. Step 3: Cover with a damp kitchen towel for 20 minutes.
A person using a bench scraper to cut in half a ball of New York-style pizza dough on a black marble countertop.
  1. Step 4: Divide the dough.
A person using his hands to smooth a round piece of New York-style pizza dough.
  1. Step 5: Form the dough into smooth balls by stretching the dough up (or down)on the sides and then sealing.
A smooth ball of New York-style pizza dough on a gold sheet pan wrapped in clear plastic wrap.
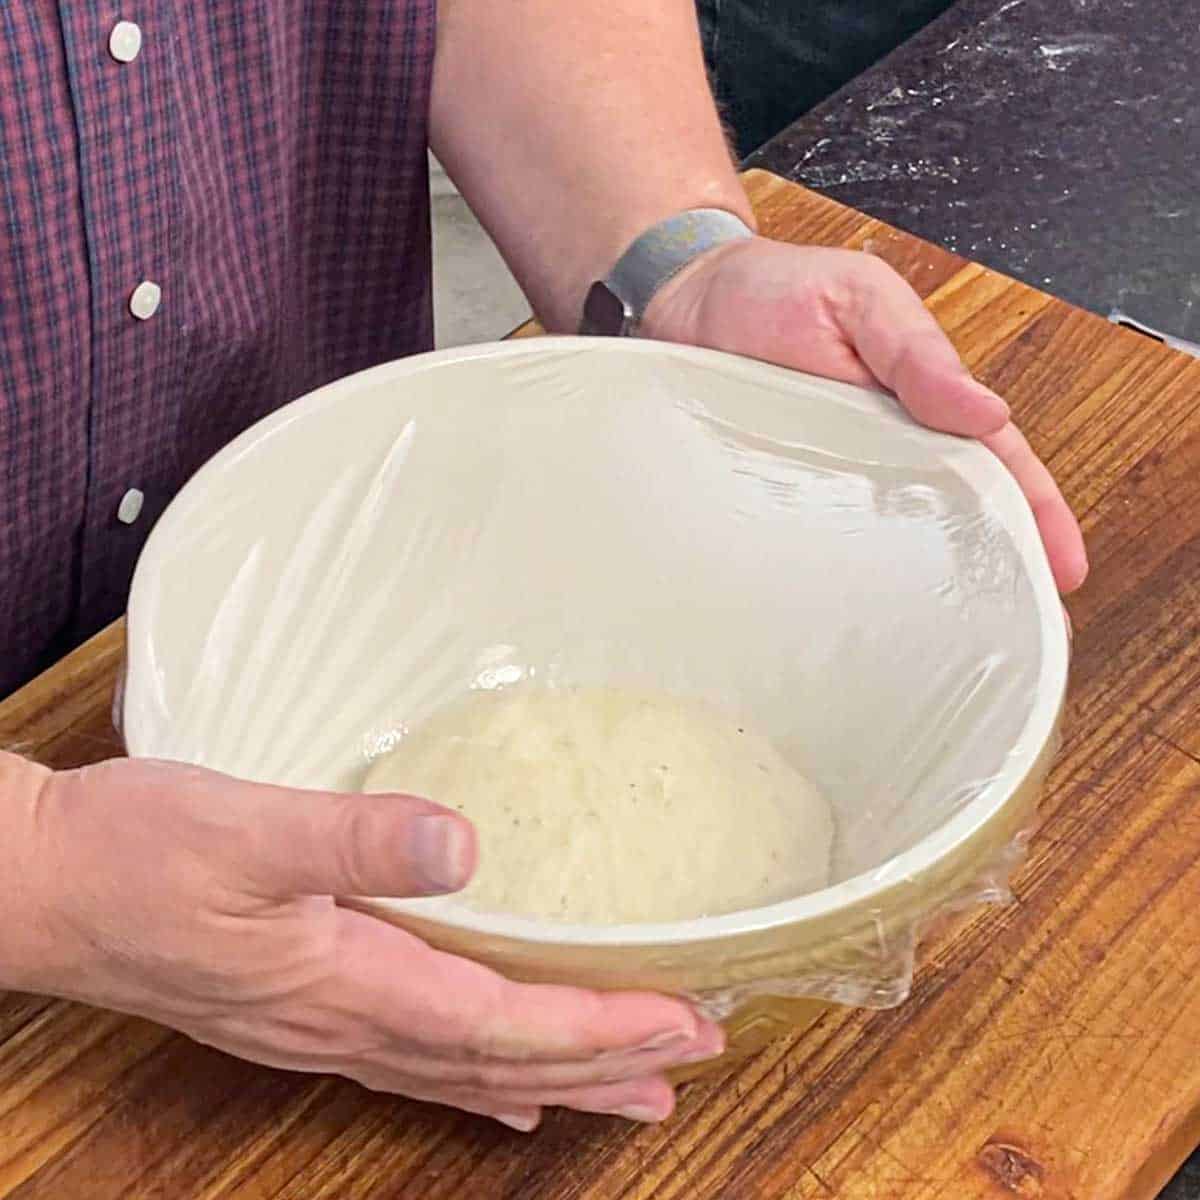
  1. Step 6: Place on a sheet pan, cover tightly with plastic wrap, and refrigerate for 24 to 48 hours.

👉 You are now ready to make New York-Style Pizza!

🍕 Homemade Pizza Recipes

  • A Chicago-Style Deep Dish Pizza on a cutting board with a slice pulled out next to Parmesan cheese.
    Chicago-Style Deep Dish Pizza
  • An overhead view of a whole Detroit-style pizza in a rectangular steel pan with two parallel stripes of red sauce on top of the pizza.
    Homemade Detroit-Style Pizza
  • Soppressata, mushroom and black olive pizza next to parmesan cheese and red pepper flakes
    Soppressata, Mushroom, and Black Olive Pizza
  • An overhead view of a grilled pulled pork pizza that has been cut into slices on a cutting board.
    Grilled Pulled Pork Pizza with BBQ Sauce

Ready to make the best pizza dough this side of Central Park? Go for it!

And when you do, be sure to take a photo of it, post it on Instagram, and tag @HowToFeedaLoon and hashtag #HowToFeedaLoon!

A person holding up a slice of New York-style pizza revealing the nooks and crannies in the edge of the crust.
Print Recipe
5 from 2 votes

New York-Style Pizza Dough

This New York-style pizza dough recipe highlights the importance of using the right tools and quality ingredients to achieve the perfect texture, while allowing a 72-hour fermentation for authentic flavor and chewiness. The result is pizza perfection!
Prep Time20 minutes mins
Chill time2 days d
Total Time2 days d 20 minutes mins
Course: Lunch / Dinner
Cuisine: American / Italian
Servings: 4
Calories: 471kcal
Author: Kris Longwell

Equipment

  • See blog post for complete list

Ingredients

For the Poolish (Starter)

  • 0.12 grams active dry yeast one-third of ⅛ teaspoon
  • 47 grams cold tap water 3 tablespoons plus 1 teaspoon
  • 47 grams high-gluten flour ¼ cup plus 2 tablespoons

For the Dough

  • 2.2 grams active dry yeast ¾ teaspoon
  • 70 grams warm water 80 to 85°F, ¼ cup pluse 1 tablespoon
  • 453 grams high-gluten flour 3½ cups
  • 10 grams diastatic malt powder 1 tablespoon plus ¼ teaspoon
  • 210 grams ice cold water ¾ cup, plus more as needed
  • 80 grams Poolish
  • 10 grams fine sea salt 2 teaspoons
  • 5 grams extra virgin olive oil 1 tsp

Instructions

Make the Poolish (Day 1)

  • Add the yeast to a small bowl and then add the cool water. Whisk vigorously for 30 seconds. The water should look murky. If the yeast granules float on top, the yeast is "dead" and should be discarded. You'll need to begin again with fresh yeast.
    0.12 grams active dry yeast, 47 grams cold tap water
  • Add the flour and stir with a rubber spatula until fully incorporated. The consistency will be thick and resemble thick pancake batter.
    47 grams high-gluten flour
  • Scrape down the sides and then cover the bowl with plastic wrap. Let it sit at room temperature for 18 hours.

Make the Dough (Day 2)

  • Weigh all the ingredients out first (heat the warm water just before adding to the yeast).
  • Put the yeast in a small bowl and then add the warm water. Whisk vigorously for 30 seconds. The water should look murky. If the yeast granules float on top, the yeast is "dead" and should be discarded. You'll need to begin again with fresh yeast.
    2.2 grams active dry yeast, 70 grams warm water
  • In the bowl of your stand mixer, combine the flour with the malt powder using the dough hook attachment.
    453 grams high-gluten flour, 10 grams diastatic malt powder
  • Remove 2 tablespoons of the ice-cold water (you'll use it soon). Turn the mixer on its lowest speed and then pour the ice-cold water (except for the 2 tbsp) into the flour/malt. Next, pour in the yeast/water mixture. Pour the reserved 2 tablespoons of water into the yeast water bowl and swirl it to dislodge any yeast that might be stuck to the bowl. Add it into the mixer. Mix for 15 seconds.
    210 grams ice cold water
  • Stop the mixer, wet your hands with the cold water, and use your wet (clean) hand to transfer the poolish into the mixer. Mix on the lowest speed for 1 minute.
    80 grams Poolish
  • Stop the mixer and pull the dough away from the attachment. Sprinkle on the salt and then lower the attachment and mix on low for another minute.
    10 grams fine sea salt
  • Stop the mixer, pull the dough from the attachment, and add the oil. Lower the attachment and mix on low for 2 minutes.
    5 grams extra virgin olive oil
  • Use a bowl scraper to transfer the dough to an unfloured surface. Knead the dough by hand for 3 minutes, until smooth (it will be a little sticky). Cover the dough with a damp cloth and let it rest for 20 minutes.
  • Use the dough cutter (bench scraper) to cut the dough in half. Weigh the dough (you'll need 13 to 13.5 ounces). You may have extra dough.
  • Working one dough ball at a time, use your hands to pull the sides of the dough either up or down, smoothing the dough as you work. Seal the dough at the end with your fingers, and repeat this process four or five times, until the dough is very smooth. Repeat with the other dough ball.
  • Place the dough balls on one large sheet pan, or one each on a quarter sheet pan. Cover with a double layer of plastic wrap and then refrigerate the dough for 24 to 48 hours.

Video

Notes

NOTE: Watch the video near the top of the recipe for visual guidance.
Read through the blog post for important information about tools, ingredients, and other essential steps for making successful pizza dough. 
Weighing the ingredients is highly recommended. 
You may need to very lightly flour your hands to form the balls of dough if it’s too sticky. You can also wet your hands with water to help you form the dough balls. 
The starter (poolish) is sticky. The best way to transfer it from the bowl to your stand mixer is to wet your fingers and then use your hands to remove it from the bowl and place it into the mixer. 
You can freeze the dough after you’ve formed it into balls. Place the balls on a small sheet pan and wrap them tightly in plastic wrap. Freeze for up to 3 months. Thaw completely before proceeding with the recipe. 

Nutrition

Calories: 471kcal | Carbohydrates: 88g | Protein: 17g | Fat: 1g | Saturated Fat: 0.2g | Polyunsaturated Fat: 0.1g | Monounsaturated Fat: 1g | Sodium: 969mg | Potassium: 6mg | Fiber: 4g | Vitamin C: 0.003mg | Calcium: 1mg | Iron: 2mg

NOTE: This recipe is from the brilliant pizza master Tony Gemignani and his award-winning book, The Pizza Bible.

Grilled Chicken Caesar Salad

June 15, 2025 by Kris Longwell Leave a Comment

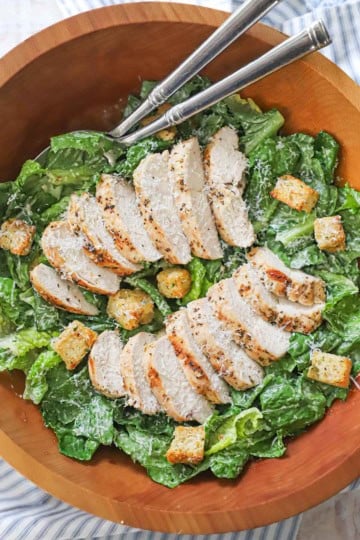
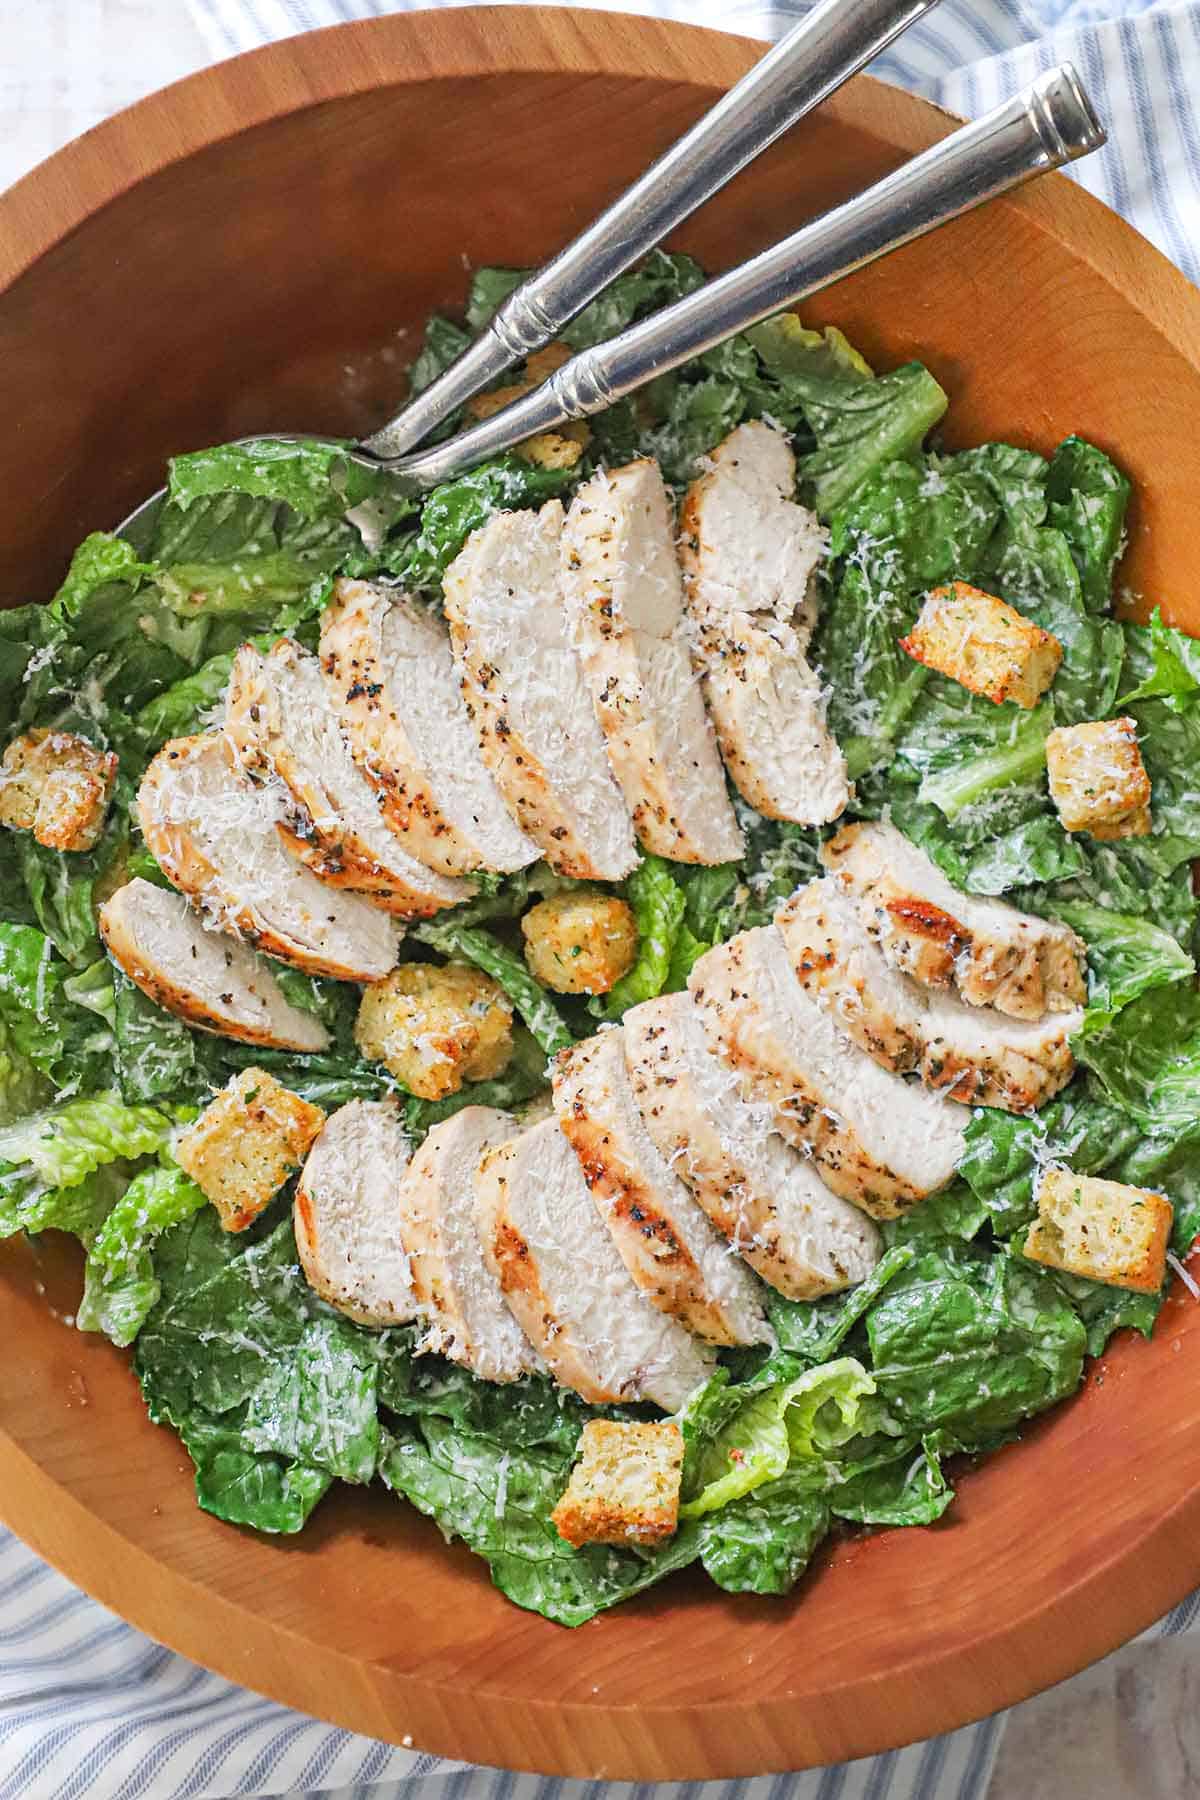
Grilled chicken Caesar salad in a large wooden bowl with homemade croutons scattered over the dressed lettuce and sliced chicken.

Grilled Chicken Caesar Salad is bursting with fresh, vibrant flavors that make every bite truly delicious. The crispy homemade croutons and rich, creamy dressing take it over the top, creating a perfect balance of texture and taste. Serve with Classic Minestrone Soup for the perfect meal!

Grilled chicken Caesar salad in a large wooden bowl with homemade croutons scattered over the dressed lettuce and sliced chicken.
[feast_advanced_jump_to]

🥬 The Ingredients

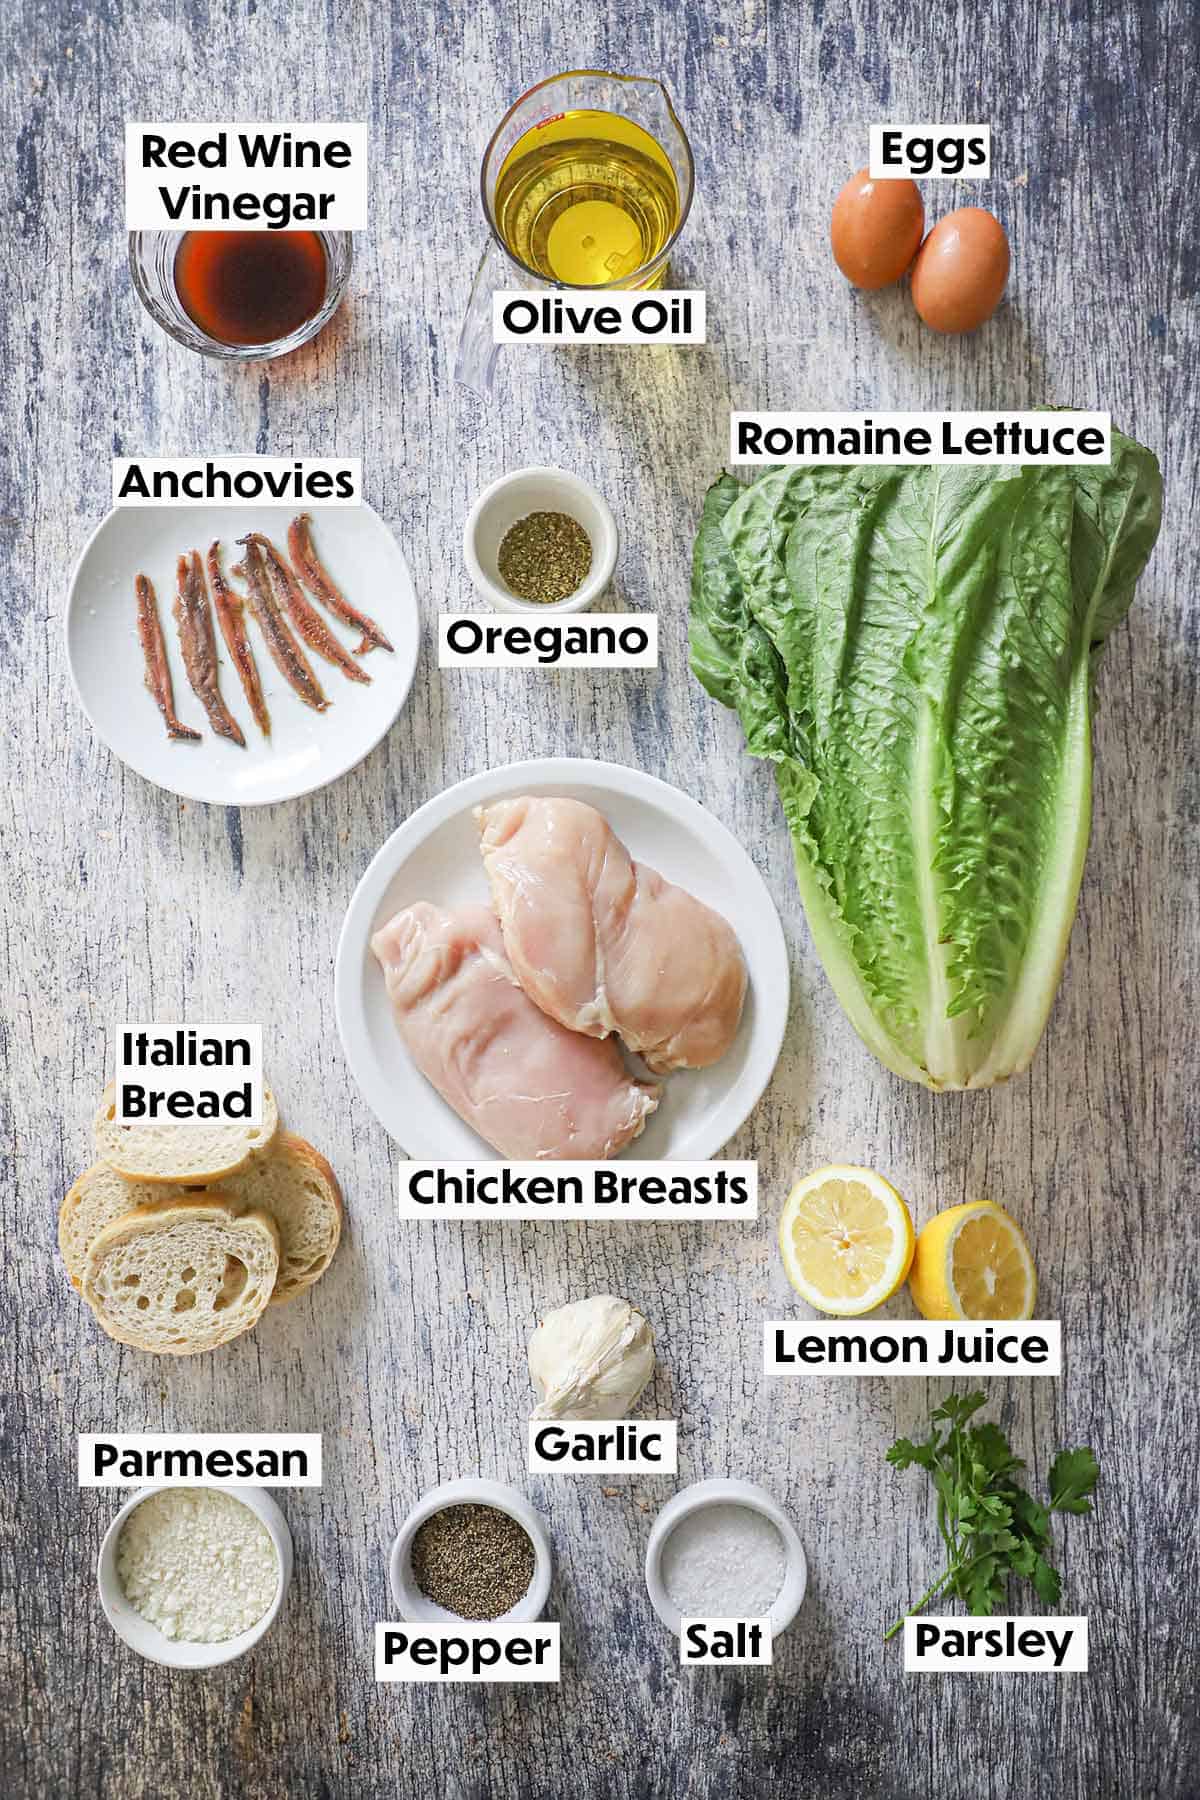
Using fresh ingredients elevates the taste of this classic salad, delivering vibrant flavors and crisp textures that make it truly irresistible.

An arrangement of ingredients for grilled chicken Caesar salad on a grey wooden background including romaine lettuce, chicken breasts, eggs, lemons, anchovies, bread, Parmesan cheese, and seasonings.

🍞 How To Make Grilled Chicken and Homemade Croutons

A person using a whisking together the ingredients for a marinade for grilled chicken in a small glass bowl on a wooden cutting board.
  1. Step 1: In a medium bowl, whisk together the chicken marinade ingredients. 
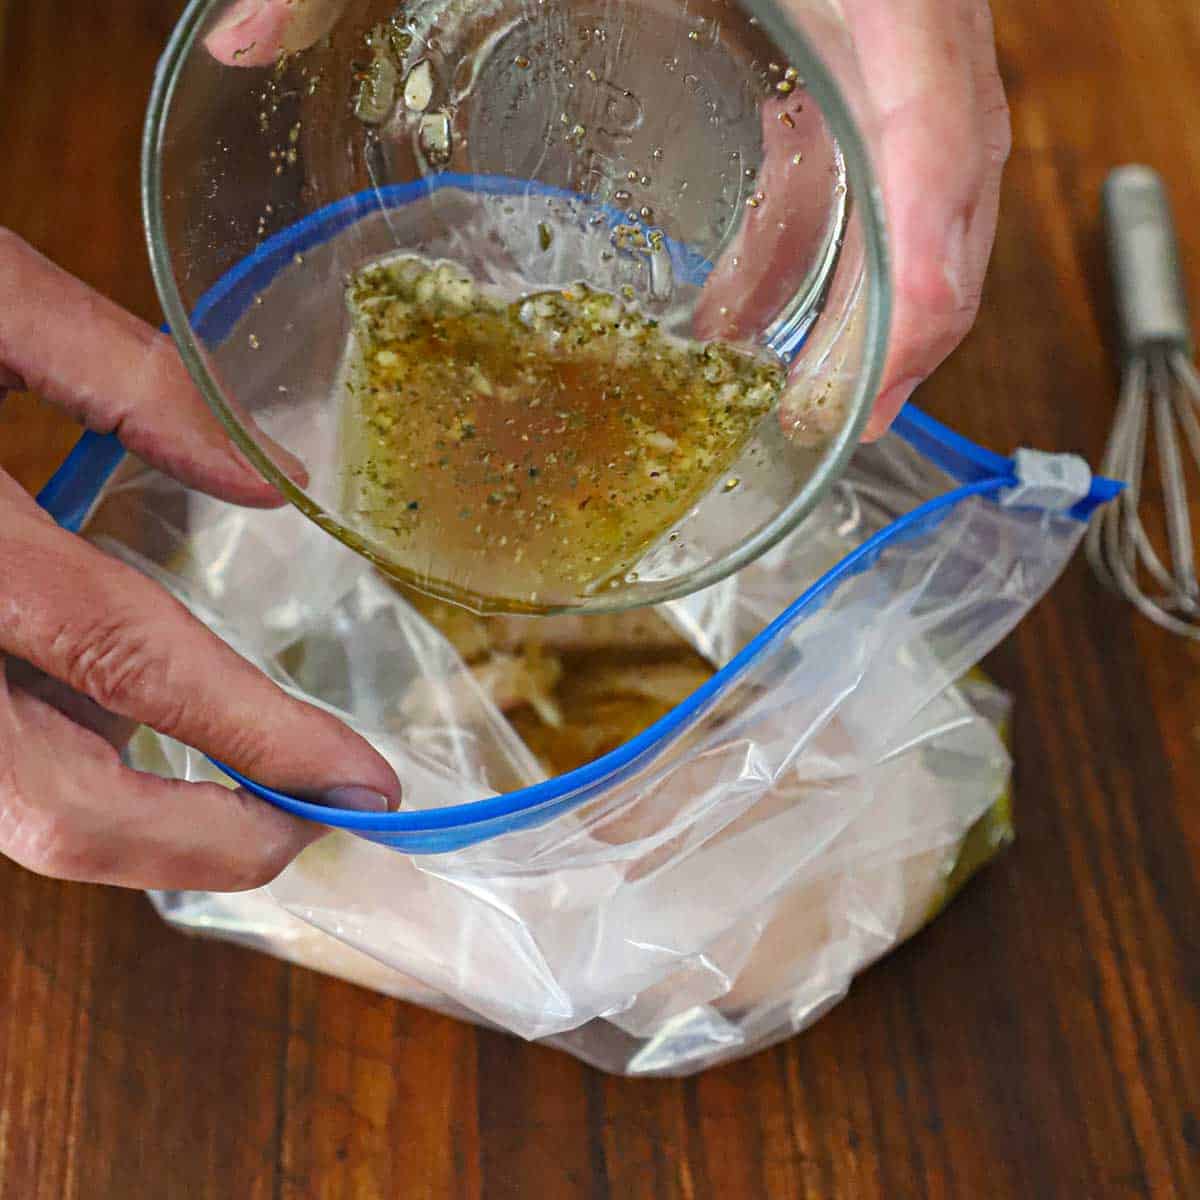
A person pouring a marinade from a small glass bowl into a plastic baggies that contains two uncooked chicken breasts.
  1. Step 2: Season the chicken with salt and pepper, then place it in a baggie with the marinade and chill for at least 1 hour. 
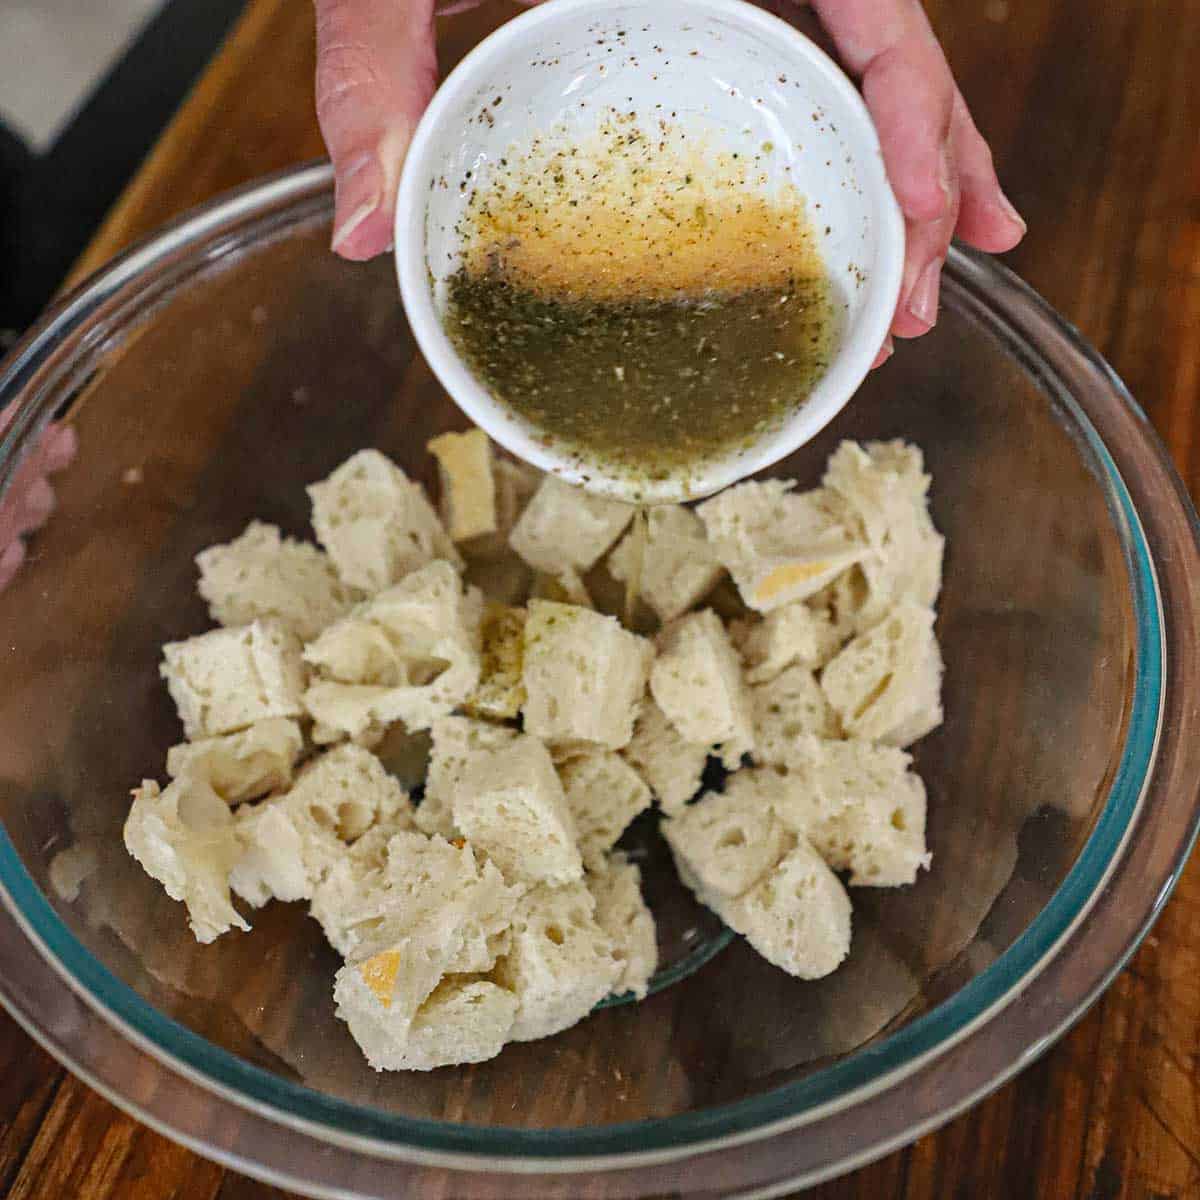
A person pouring seasoned oil over fresh cubes of bread that are sitting in a glass bowl on a cutting board.
  1. Step 3: Whisk together the oil, garlic, and oregano, and pour over the cubed bread, tossing to coat.
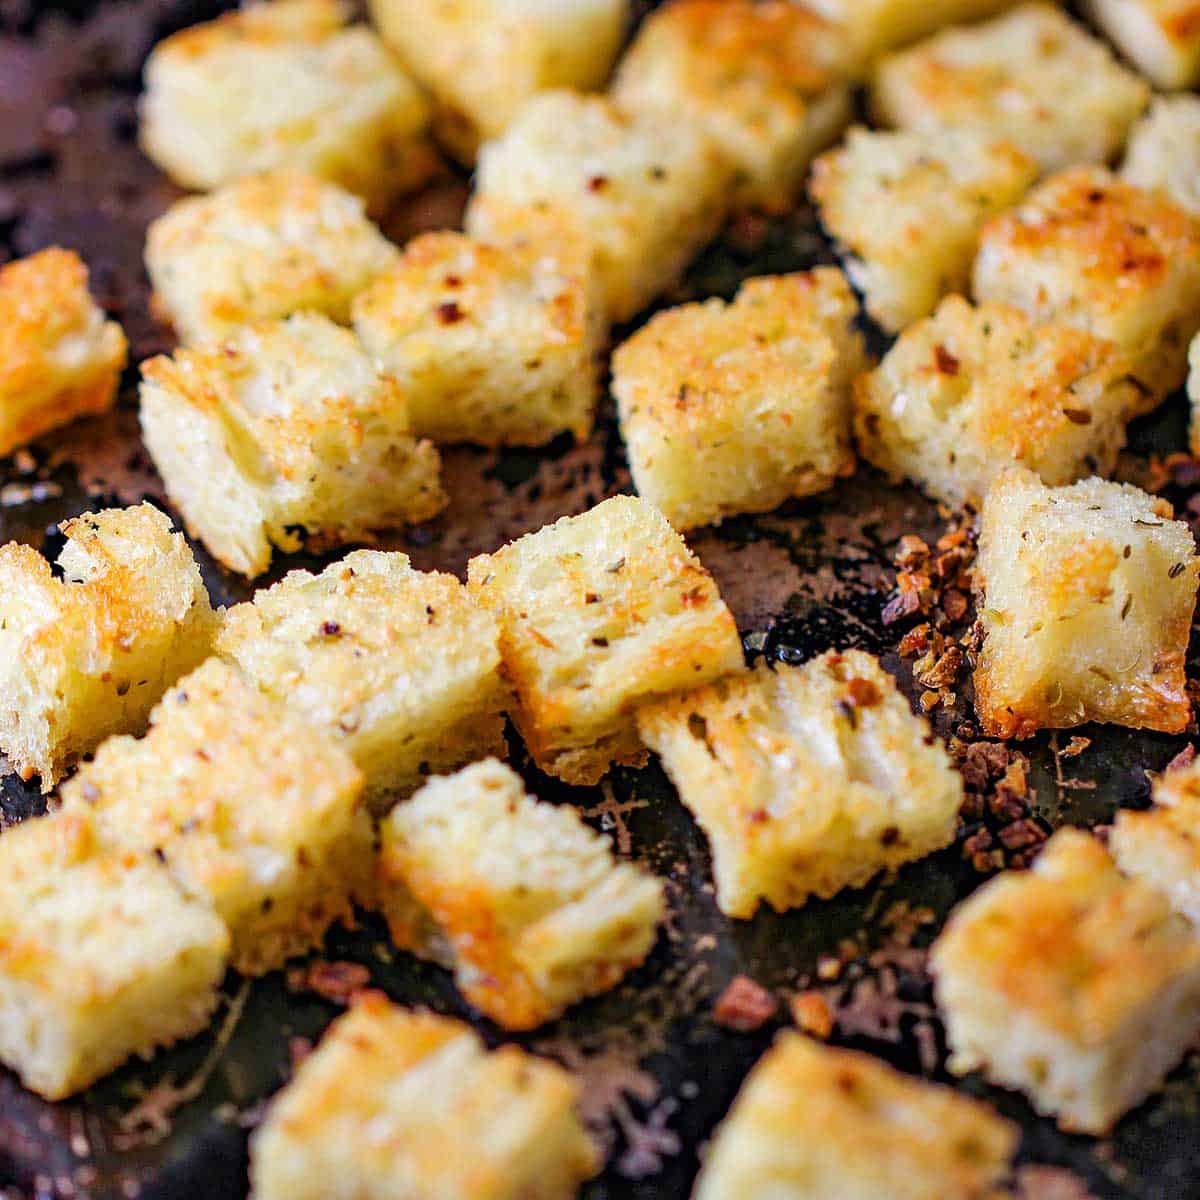
Freshly toasted croutons on a scratched metal baking pan.
  1. Step 4: Bake until browned, stirring halfway through, about 15 to 20 minutes.
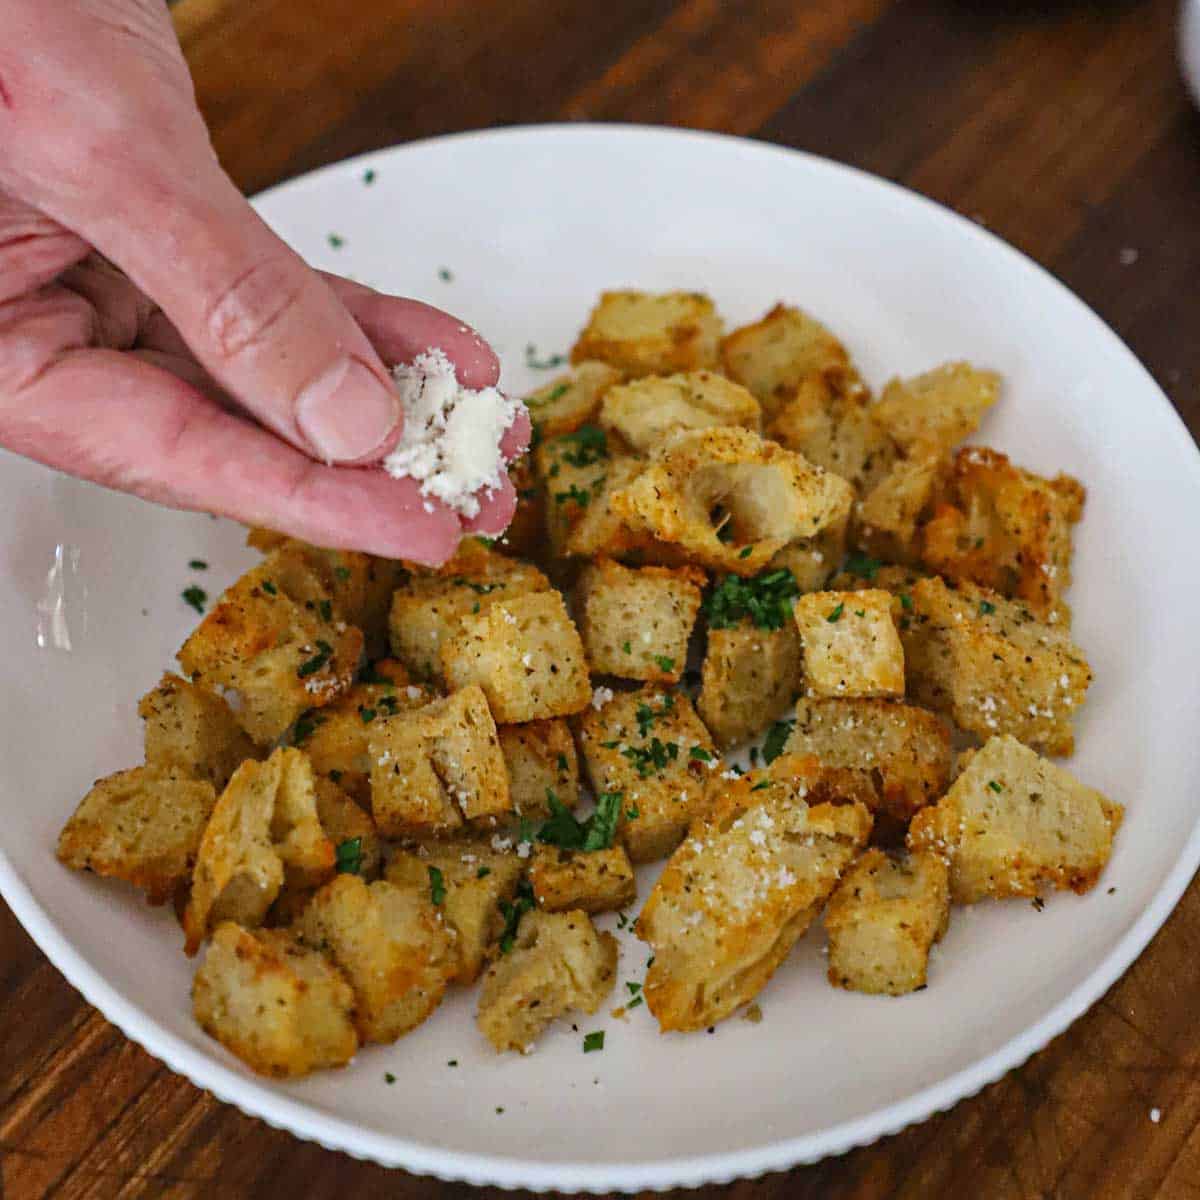
A person sprinkling freshly grated Parmesan cheese over homemade croutons that have also been sprinkled with chopped parsley.
  1. Step 5: Toss grated Parmesan and chopped parsley.
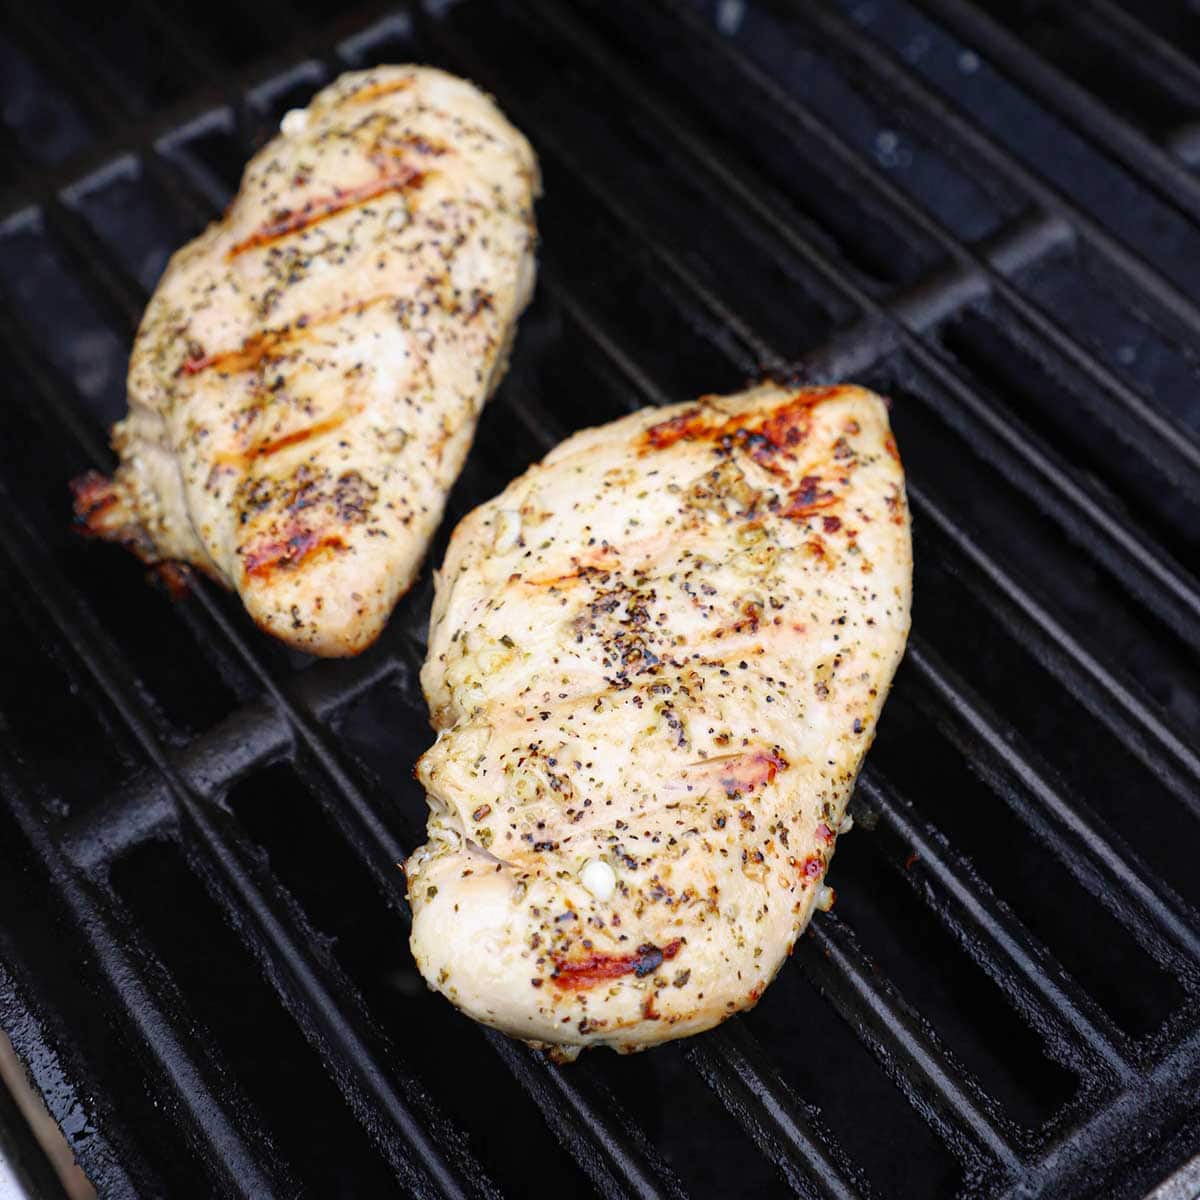
Two marinated skinless, boneless chicken breasts being grilled on a gas grill.
  1. Step 6: Season the chicken with salt and pepper and then grill it until the internal temperature reaches 165°F.

Expert Tip

We recommend boneless, skinless chicken breasts for this salad. If they are extra large, then consider pounding the cutlet between two pieces of plastic (or wax paper). Boneless, skinless chicken thighs are a wonderful option, too.

🍶 How To Make Classic Caesar Salad Dressing

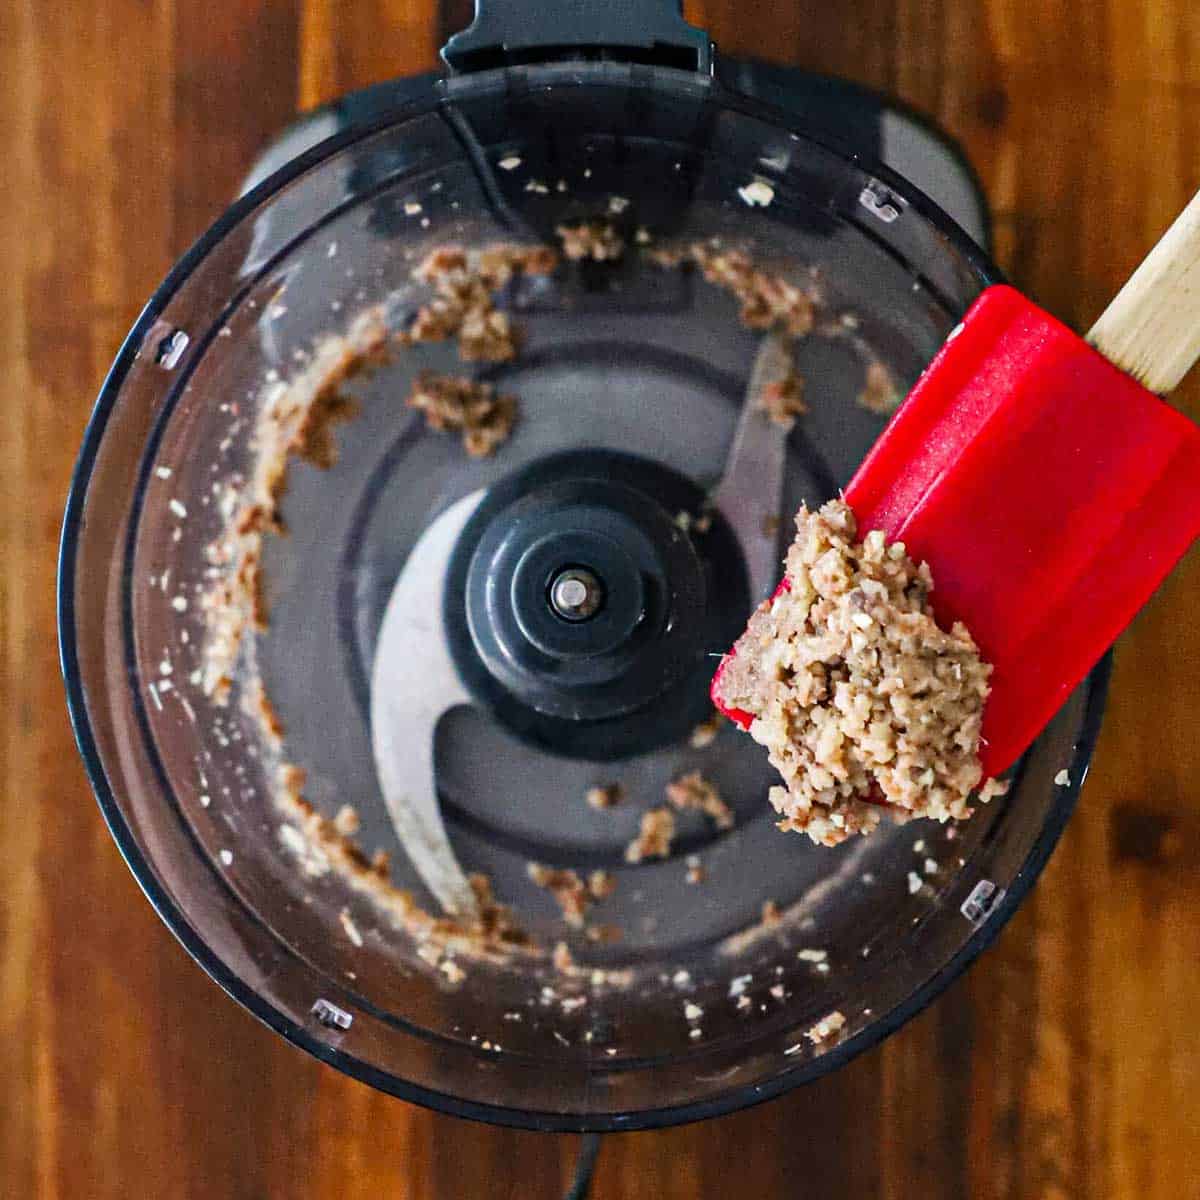
A person holding up a rubber red spatula with finely chopped anchovies and garlic over a the bowl food processor.
  1. Step 1: Finely chop the anchovy fillets with garlic in a blender or food processor.
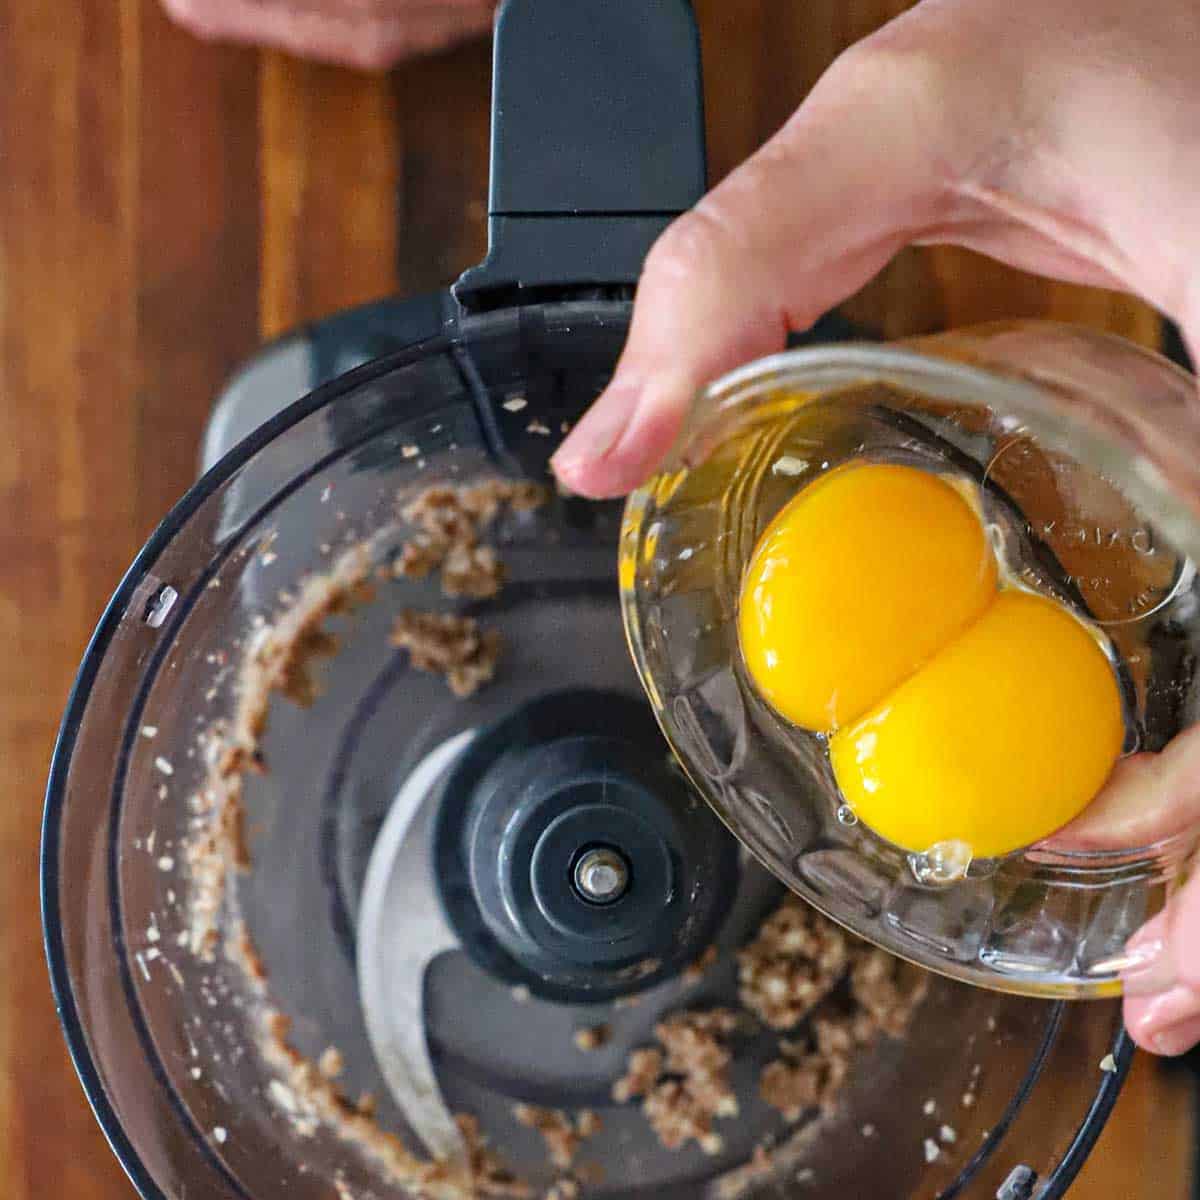
A person transferring two egg yolks into the bowl of a food processor that is filled with finely chopped anchovies and garlic.
  1. Step 2: Add the egg yolks and process (or blend) for 2 minutes.
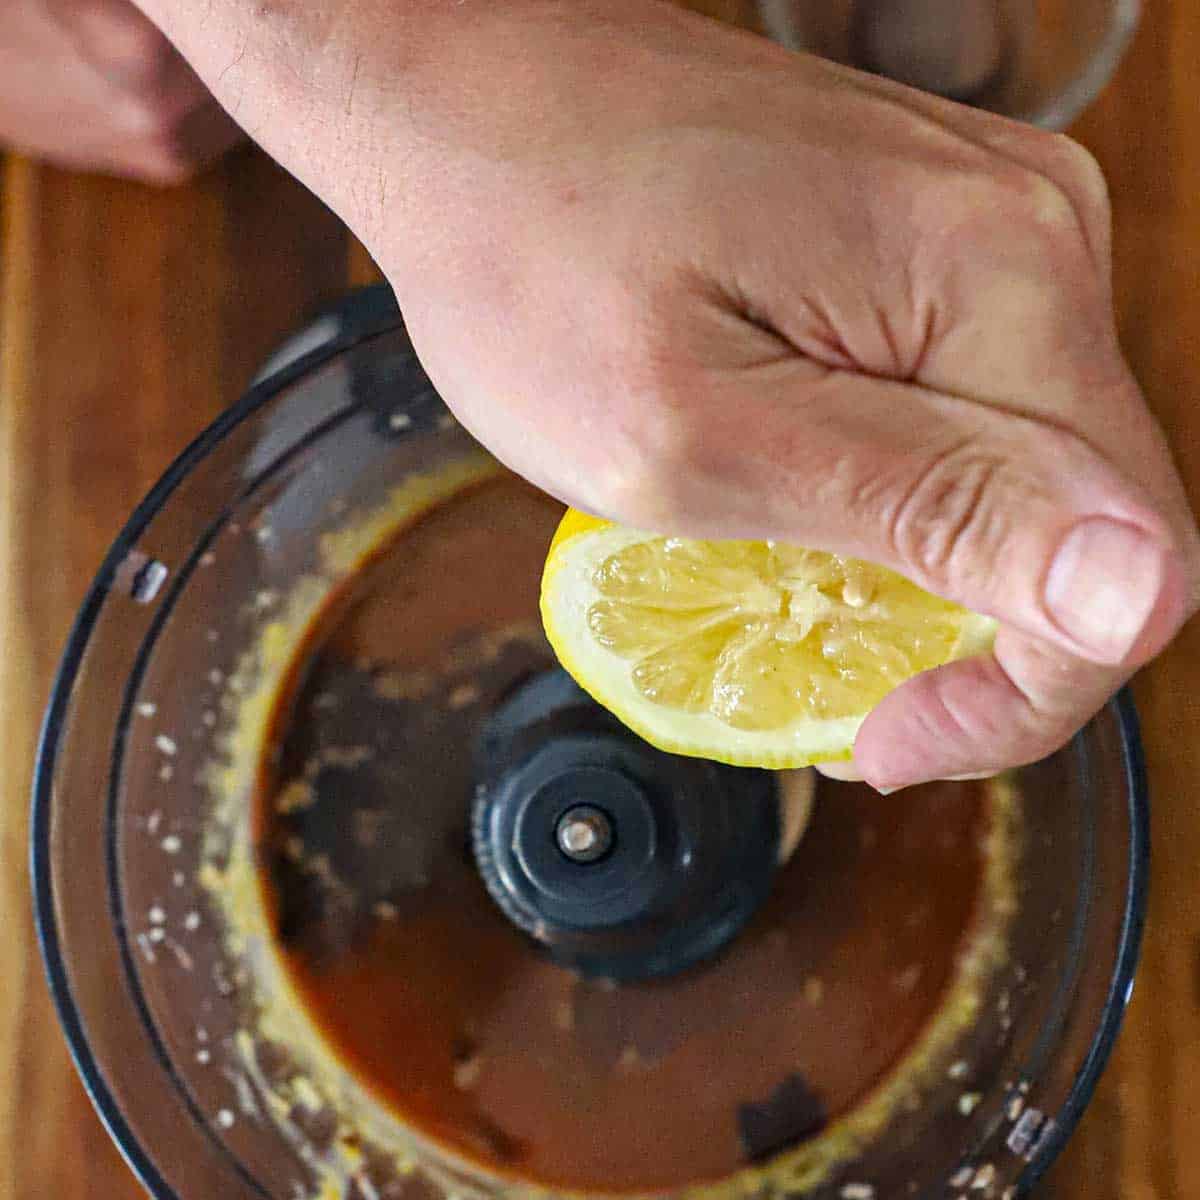
A person squeezing half of a lemon into the bucket of a food processor that is filled with puréed egg yolks mixed with chopped anchovies and garlic.
  1. Step 3: Add the vinegar and lemon juice and pulse for another 30 seconds.
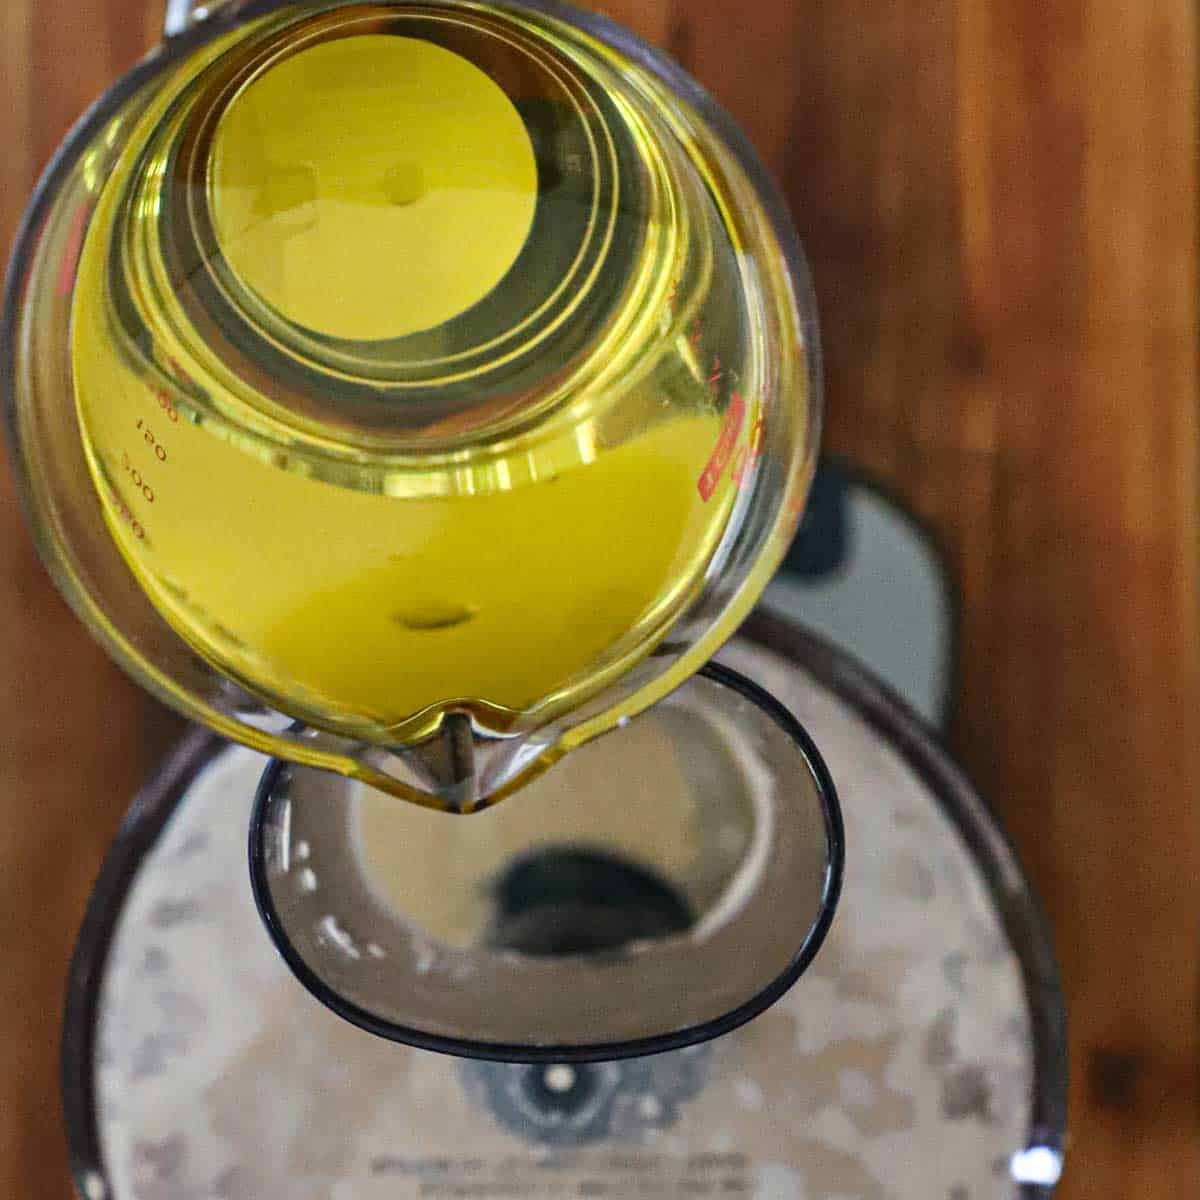
A person pouring olive oil from a glass measuring cup through the tube of a food processor in the bucket that is filled with the ingredients for Caesar dressing.
  1. Step 4: Slowly pour the oil through the tube with the motor running.
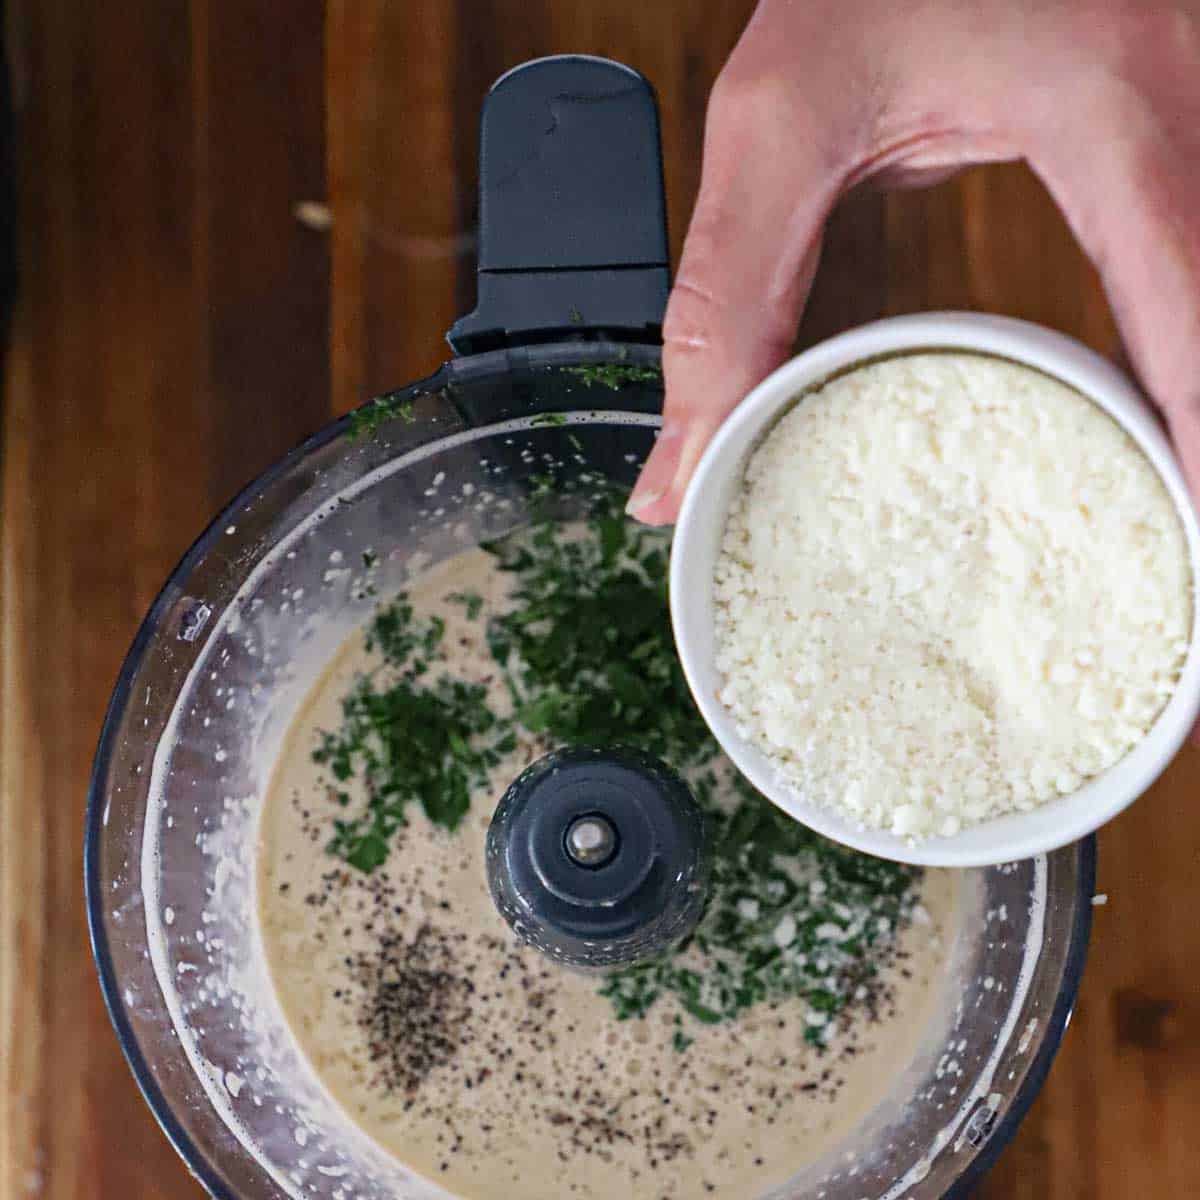
A person holding a small white bowl of grated Parmesan cheese over the bucket of a food processor that is filled with purée egg yolks, lemon juice, seasonings, and chopped Italian parsley.
  1. Step 5: Add the cheese, parsley, and oregano and pulse for another 10 seconds.
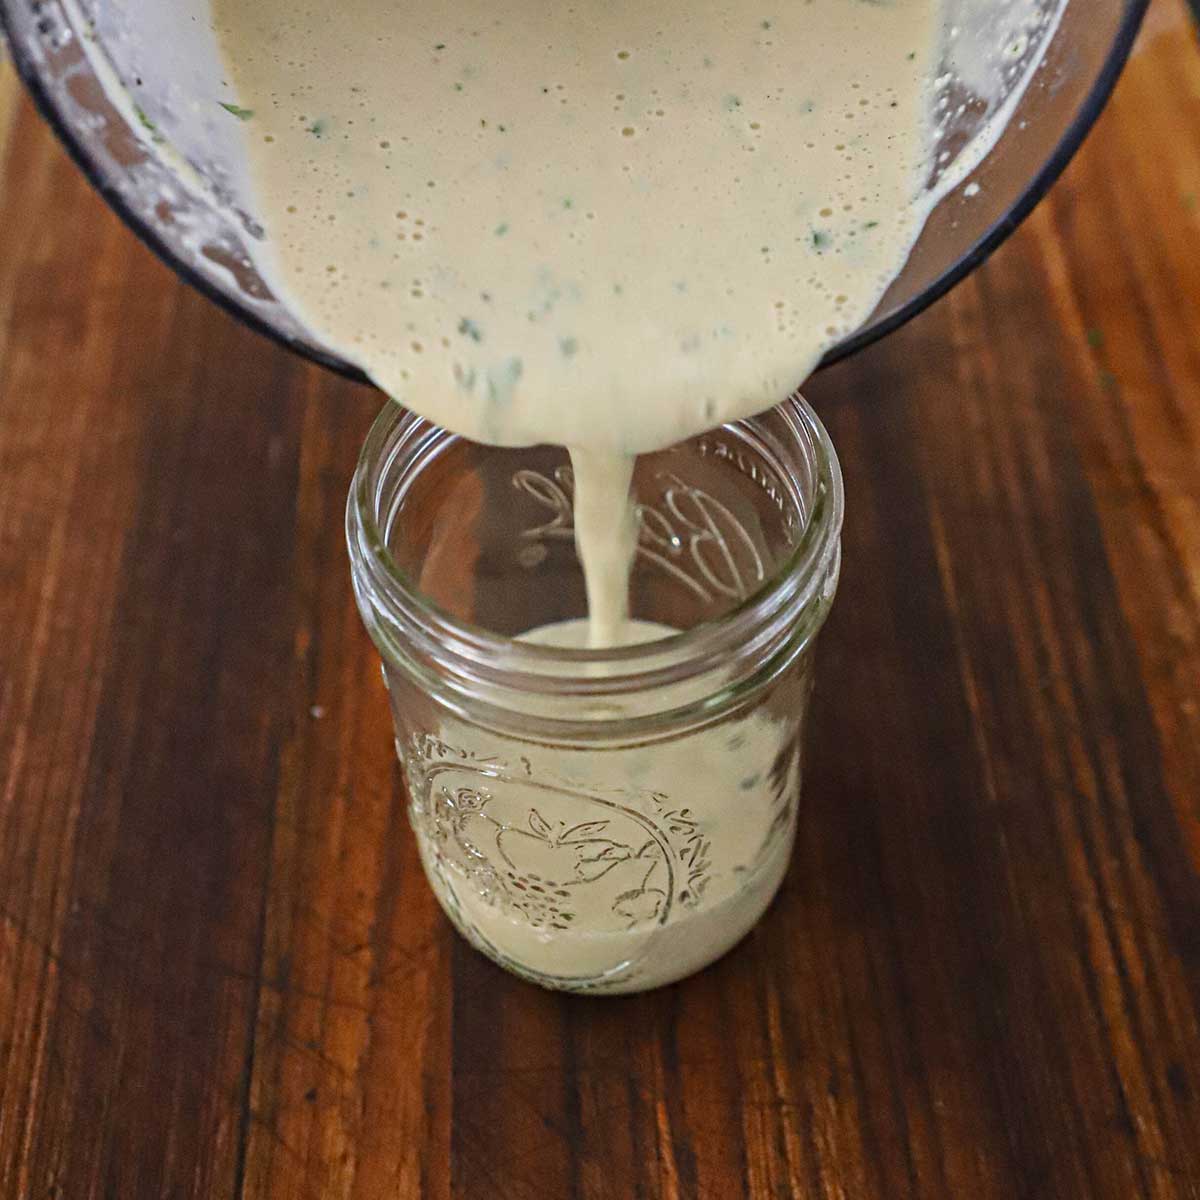
A person pouring homemade Caesar dressing from a glass bowl into a glass jar that is sitting on a wooden cutting board.
  1. Step 6: Transfer to a jar with a lid and chill for at least 2 hours or up to 24 hours. 

👩🏼‍🍳 How To Make Grilled Chicken Caesar Salad

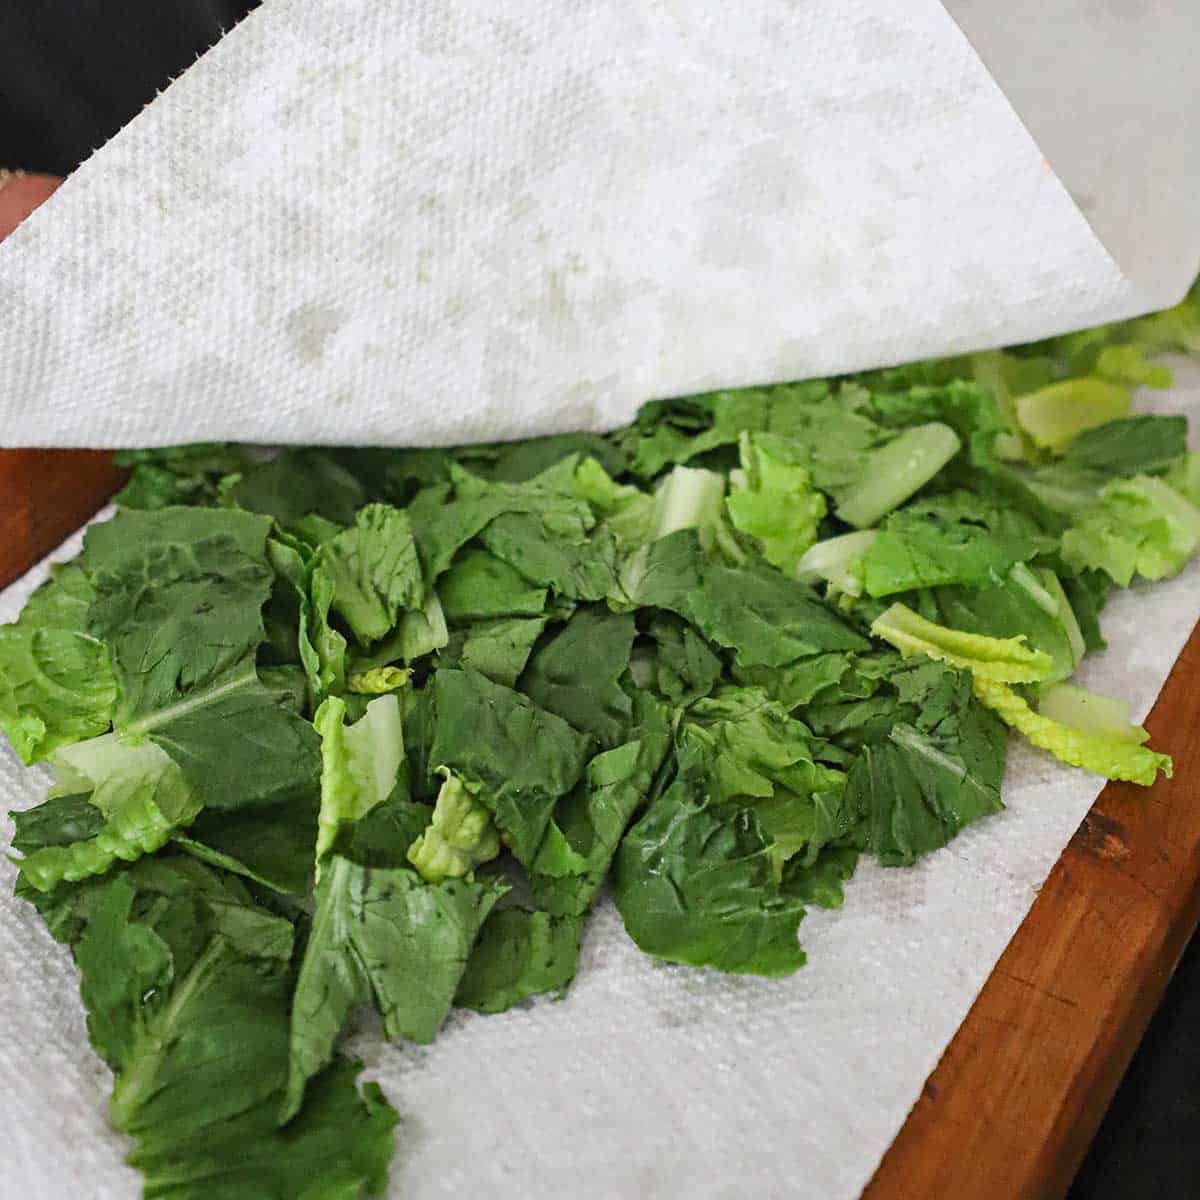
A person using several pieces of paper towels to dry chopped Romaine lettuce that has been rinsed with water.
  1. Step 1: Cut the lettuce, rinse it, and then pat it dry with paper towels. 
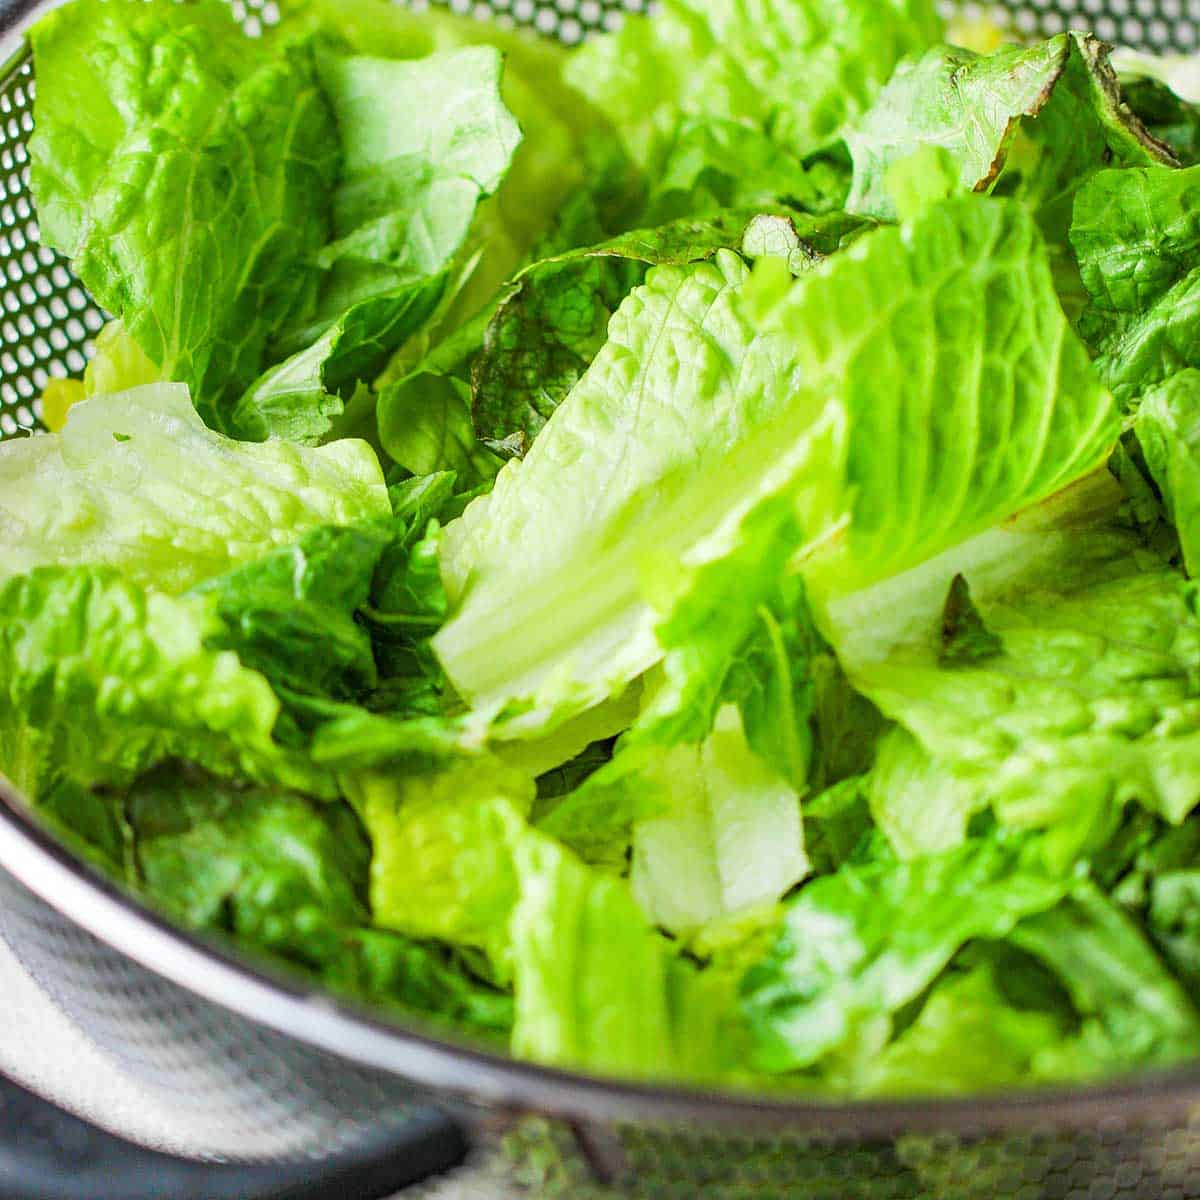
Chopped romaine lettuce in a large metal colander.
  1. Step 2: Put in a colander and chill in the fridge until cold, usually 1 to 2 hours.
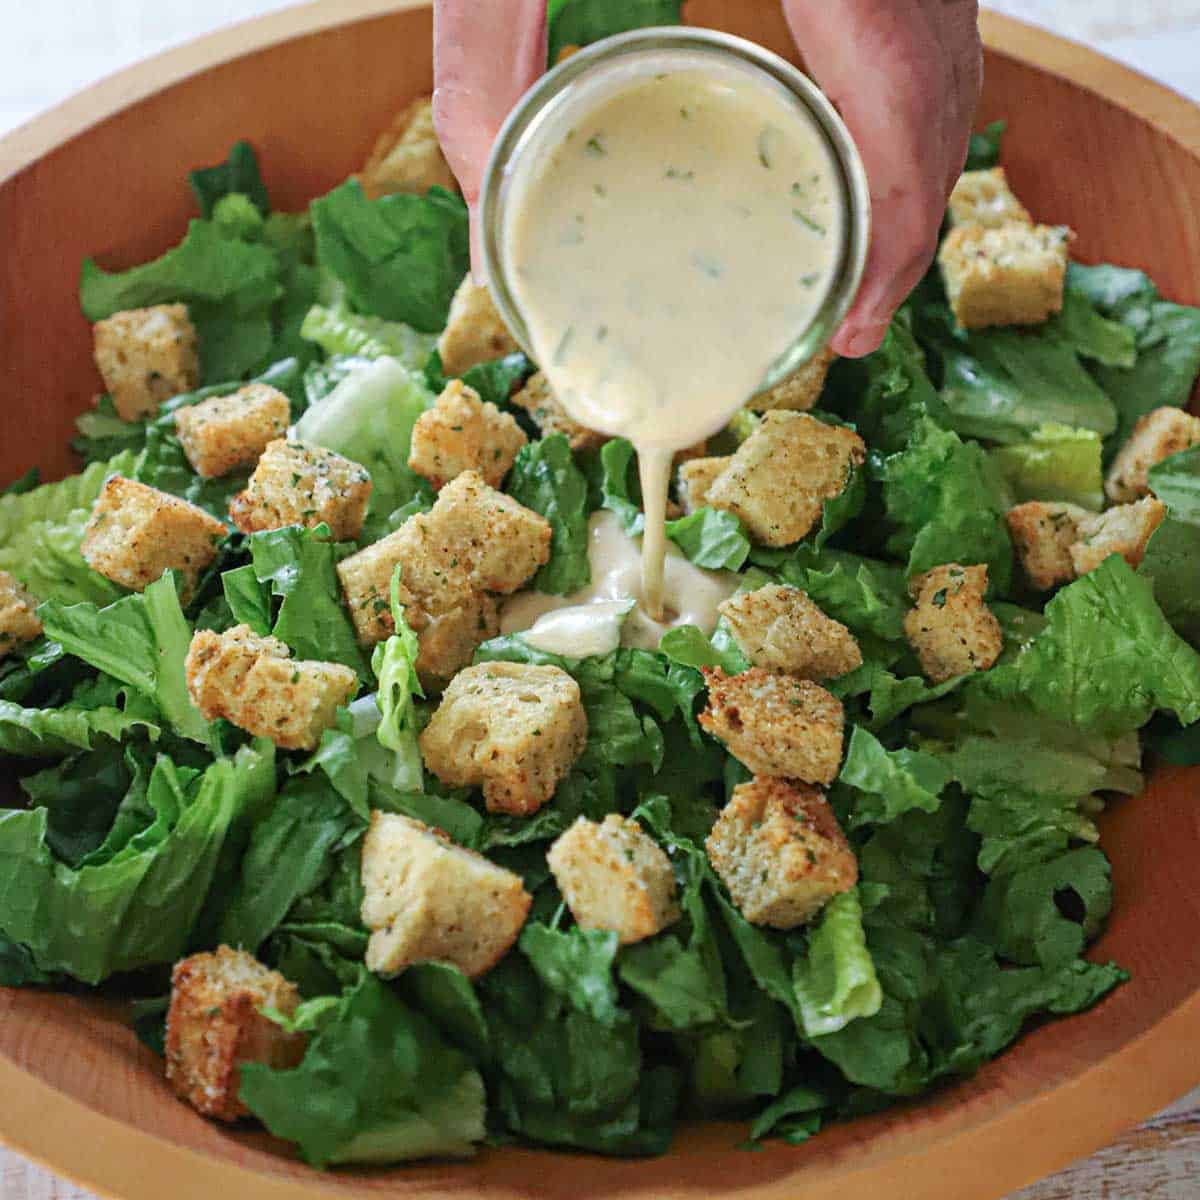
A person pouring homemade Caesar dressing over chopped romaine lettuce and homemade croutons in a large wooden salad bowl.
  1. Step 3: Place lettuce in a large bowl with the croutons, grated cheese, and 1 cup of dressing.
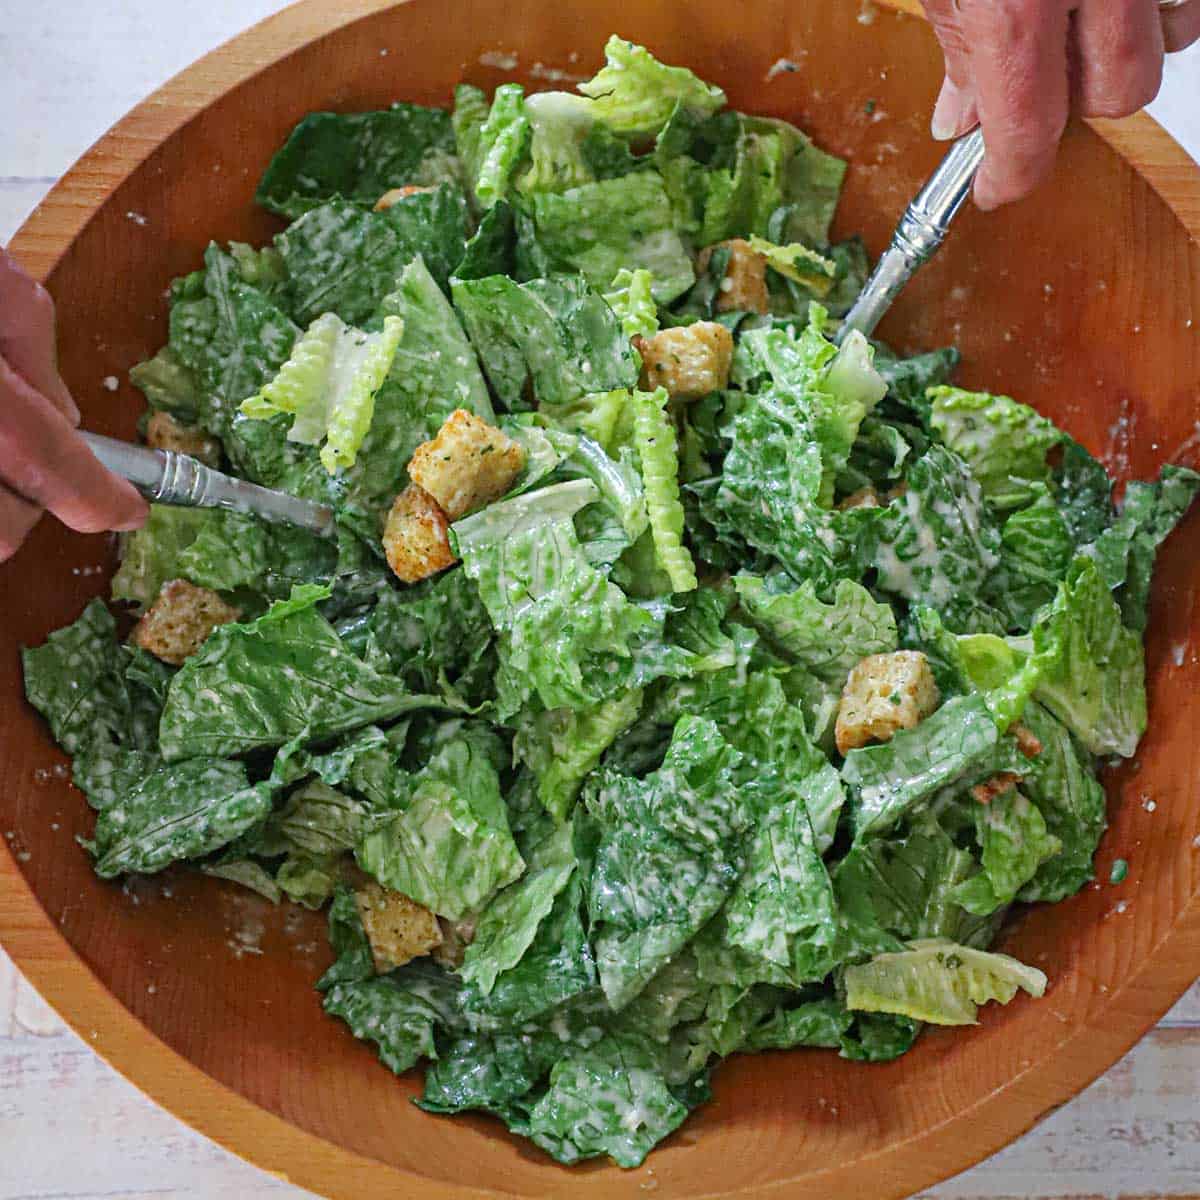
A person using two large silver serving spoons to toss together a homemade Caesar salad in a large wooden salad bowl.
  1. Step 4: Toss well with serving spoons (or your clean hands). 
A person using a large Japanese knife to slice a grilled boneless, skinless chicken breast on a wooden cutting board.
  1. Step 5: Slice chicken into strips. 
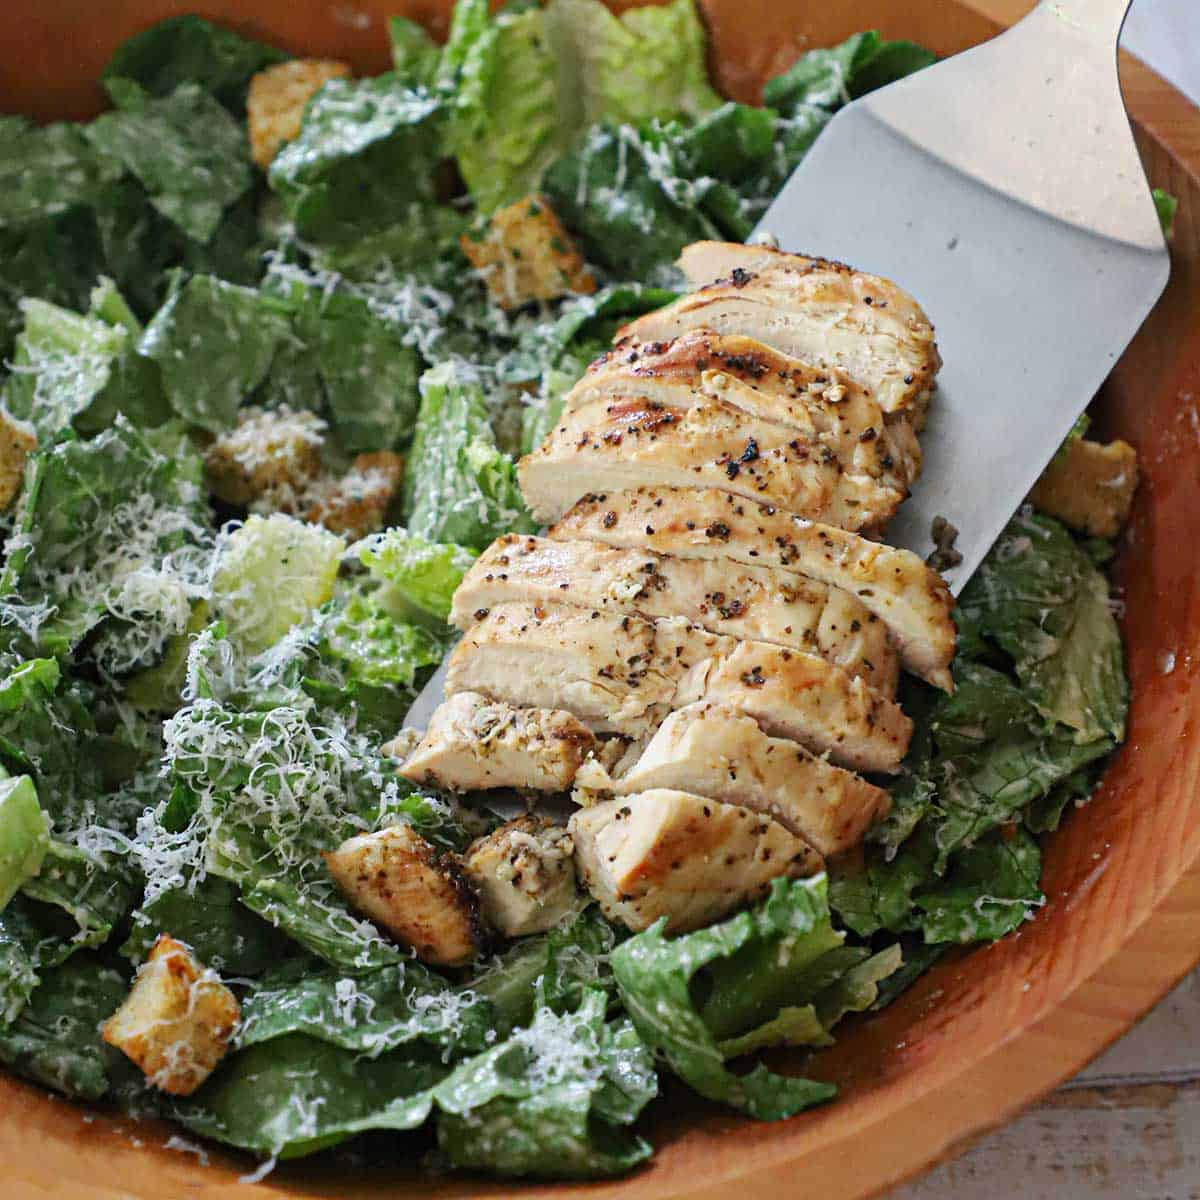
A person using a large silver spatula to place a sliced grilled chicken breast over a Caesar salad with homemade croutons in a large wooden salad bowl.
  1. Step 6: Top with chicken and sprinkle on more cheese. Serve at once. 

Expert Tip

This recipe is made with raw eggs. It is important to note that consuming raw (or undercooked) eggs is potentially dangerous for anyone who is immunosuppressed. You can substitute top-notch mayonnaise for the egg yolks if needed.

🙋🏽‍♂️Frequently Asked Questions

What type of chicken is best for grilled chicken Caesar salad?

Boneless, skinless chicken breasts or thighs work best because they grill evenly and stay juicy, adding great flavor to the salad.

Do anchovies make the Caesar dressing taste too strong or fishy?

Anchovies add a subtle umami depth to Caesar dressing without making it taste overly fishy, and if you’re sensitive to the flavor, you can use a smaller amount or substitute with Worcestershire sauce for a milder taste.

How far in advance can I prepare the components of the grilled chicken Caesar salad?

You can grill the chicken and make the dressing up to 1-2 days in advance and store them separately in the refrigerator; homemade croutons can be made several days ahead and kept in an airtight container to maintain their crispness. The lettuce can chill in the fridge for several hours before serving.

A white dinner plate filled with grilled chicken Caesar salad with a glass of white wine next to it.

🥗 More Classic Entree Salads

  • An overhead view of a Cobb salad on a large white oval platter flanked by two glasses of white wine and two gold serving spoons.
    Classic Cobb Salad with Roasted Chicken
  • A Greek salad on a large oval platter topped with strips of grilled meat with two gold serving spoons on the side.
    Greek Salad with Grilled Steak
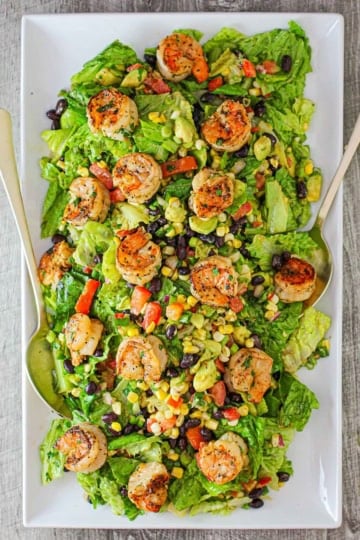
  • A large rectangular white platter filled with a grilled shrimp salad with cilantro-lime dressing along with grilled corn, black beans, chopped lettuce, all on torn pieces of romaine lettuce.
    Grilled Shrimp Salad with Cilantro-Lime Dressing
  • A large oval white platter holding a Chinese chicken salad.
    Chinese Chicken Salad

Ready to make the best entrée salad in town? Go for it!

And when you do, be sure to take a photo of it, post it on Instagram, and tag @HowToFeedaLoon and hashtag #HowToFeedaLoon!

Grilled chicken Caesar salad in a large wooden bowl with homemade croutons scattered over the dressed lettuce and sliced chicken.
Print Recipe
No ratings yet

Grilled Chicken Caesar Salad

A fresh and flavorful grilled chicken Caesar salad with tender grilled chicken, crisp romaine, crunchy homemade croutons, and creamy Caesar dressing—perfect for a healthy and satisfying meal.
Prep Time30 minutes mins
Cook Time15 minutes mins
Chill time1 hour hr
Total Time1 hour hr 45 minutes mins
Course: Entree
Cuisine: Italian
Servings: 4
Calories: 765kcal
Author: Kris Longwell

Equipment

  • Food processor
  • Grill Gas, charcoal, or electric
  • Digital thermometer
  • Large salad bowl

Ingredients

For the Chicken

  • 1 lemon 2 tablespoon of juice
  • 1 tablespoon red wine vinegar
  • 2 cloves garlic minced
  • ⅓ cup olive oil
  • 1 teaspoon dried oregano
  • 1 teaspoon dried basil
  • 2 6 oz chicken breasts boneless, skinless

For the Dressing

  • 6 anchovy fillets packed in oil
  • 3 cloves garlic minced
  • 2 egg yolks
  • ¼ cup red wine vinegar
  • ½ lemon about 1 tbsp
  • 1 cup olive oil
  • ½ cup grated Parmesan
  • 1 tablespoon Italian parsley chopped
  • ½ teaspoon dried oregano
  • Kosher salt and black pepper

For the Croutons

  • 3 tablespoon olive oil
  • 1 teaspoon garlic powder
  • 1 teaspoon dried oregano
  • 5 Italian bread slices ¾-inch thickness
  • Kosher salt
  • 2 tablespoon grated Parmesan
  • 1 tablespoon Italian parsley chopped

For the Salad

  • 1 large head of romaine lettuce Cut off the base, and cut about 1 inch of the top outer green parts.
  • salt and black pepper freshly ground
  • 2 tablespoon grated Parmesan cheese plus extra for garnish

Instructions

Marinate the Chicken

  • Place the marinade ingredients (except salt and pepper) in a small bowl and whisk to combine.
    1 lemon, 1 tablespoon red wine vinegar, 2 cloves garlic, ⅓ cup olive oil, 1 teaspoon dried oregano, 1 teaspoon dried basil
  • Place the chicken in a large plastic baggie (or baking dish) and pour the marinade over it. Chill in the fridge for at least 1 hour, or up to 24 hours.
    2 6 oz chicken breasts

Make the Dressing

  • In a food processor (or blender), purée the anchovy fillet with the garlic until finely chopped and blended. Scrape down the sides with a rubber spatula and pulse a few more times.
    6 anchovy fillets, 3 cloves garlic
  • Add the eggs and process the mixture for about 2 minutes, stopping to scrape down the sides a couple of times. Turn off the motor and add the vinegar and lemon juice. Pulse for another 30 seconds.
    2 egg yolks, ¼ cup red wine vinegar, ½ lemon
  • With the motor running, add the olive oil in a slow, steady stream until it is incorporated.
    1 cup olive oil
  • Add the cheese, parsley, and oregano and pulse the mixture for another 10 seconds. Season with a pinch of salt and pepper.
    ½ cup grated Parmesan, 1 tablespoon Italian parsley, ½ teaspoon dried oregano, Kosher salt and black pepper
  • Transfer the dressing to a jar (or container) with a lid and refrigerate for at least 1 to 2 hours, or overnight. The dressing will thicken as it chills.

Make the Croutons

  • Preheat oven to 375°F.
  • In a small bowl, whisk together the olive oil, garlic powder, and oregano.
    3 tablespoon olive oil, 1 teaspoon garlic powder, 1 teaspoon dried oregano
  • Trim the crusts from the bread slices and then cut into 1 to 2-inch cubes. Place the cubed bread into a large bowl and pour the seasoned oil over it, tossing to coat.
    5 Italian bread slices
  • Spread the bread cubes on a baking sheet and bake them for 15 to 20 minutes, stirring at least once, until they are crispy and lightly browned.
  • Season the croutons with a healthy pinch of salt. Transfer them to a bowl and toss them with the grated Parmesan cheese (2 tbsp) and chopped parsley (1 to 2 tbsp). Set aside.
    Kosher salt, 2 tablespoon grated Parmesan, 1 tablespoon Italian parsley

Prepare the Lettuce

  • Using your fingers or a sharp knife, cut the lettuce into bite-sized pieces. Place the lettuce into a colander and rinse under cool water. Pat dry with paper towels (or with a salad spinner).
    1 large head of romaine lettuce
  • Transfer the lettuce back into the colander and chill in the fridge for at least 1 hour (or overnight).

Grill the Chicken and Assemble the Salad

  • Heat your grill to medium-high heat.
  • Remove the chicken from the marinade and liberally sprinkle the cutlets with salt and pepper. Grill over direct heat, flipping occasionally, until an internal temperature of 165°F is reached.
    salt and black pepper
  • Slice the chicken into thin strips.
  • Place the lettuce into a large bowl. Add the croutons and 2 tablespoon grated Parmesan cheese. Spoon 1 cup of the dressing over the salad and toss to coat. Reserve the remaining dressing for passing at the table.
    2 tablespoon grated Parmesan cheese
  • If desired, transfer the salad to a large platter and top it with the sliced chicken and additional grated Parmesan cheese. (or simply leave in the bowl and top with chicken and grated cheese). Serve at once!

Video

Notes

NOTE: Watch the video near the top of the recipe for visual guidance.
The dressing and croutons can be made 1 to 2 days in advance. The dressing needs to be chilled for at least 1 to 2 hours before serving (it will thicken as it chills). 
The chicken can be served warm (right off the grill) or at room temperature. You can also bake the chicken for 30 to 40 minutes, or until the internal temperature reaches 165°F. 
Extra dressing will keep in the fridge for up to 1 week. 
This recipe calls for raw egg yolks (which is traditional). You can substitute top-notch mayonnaise for the egg yolks, if needed. People with compromised immune systems, elderly people, and infants should avoid raw eggs.  

Nutrition

Calories: 765kcal | Carbohydrates: 8g | Protein: 9g | Fat: 36g | Saturated Fat: 8g | Polyunsaturated Fat: 5g | Monounsaturated Fat: 12g | Cholesterol: 116mg | Sodium: 324mg | Potassium: 172mg | Fiber: 1g | Sugar: 1g | Vitamin A: 464IU | Vitamin C: 25mg | Calcium: 203mg | Iron: 2mg

Cube Steak with Mushroom Gravy

June 8, 2025 by Kris Longwell Leave a Comment

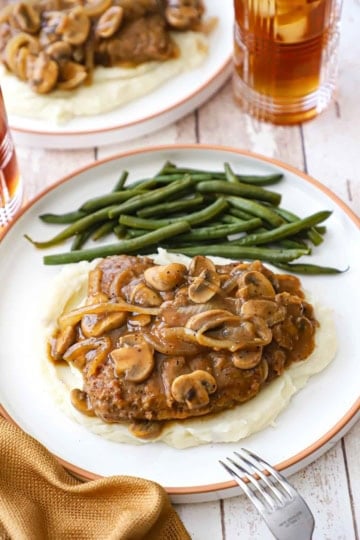
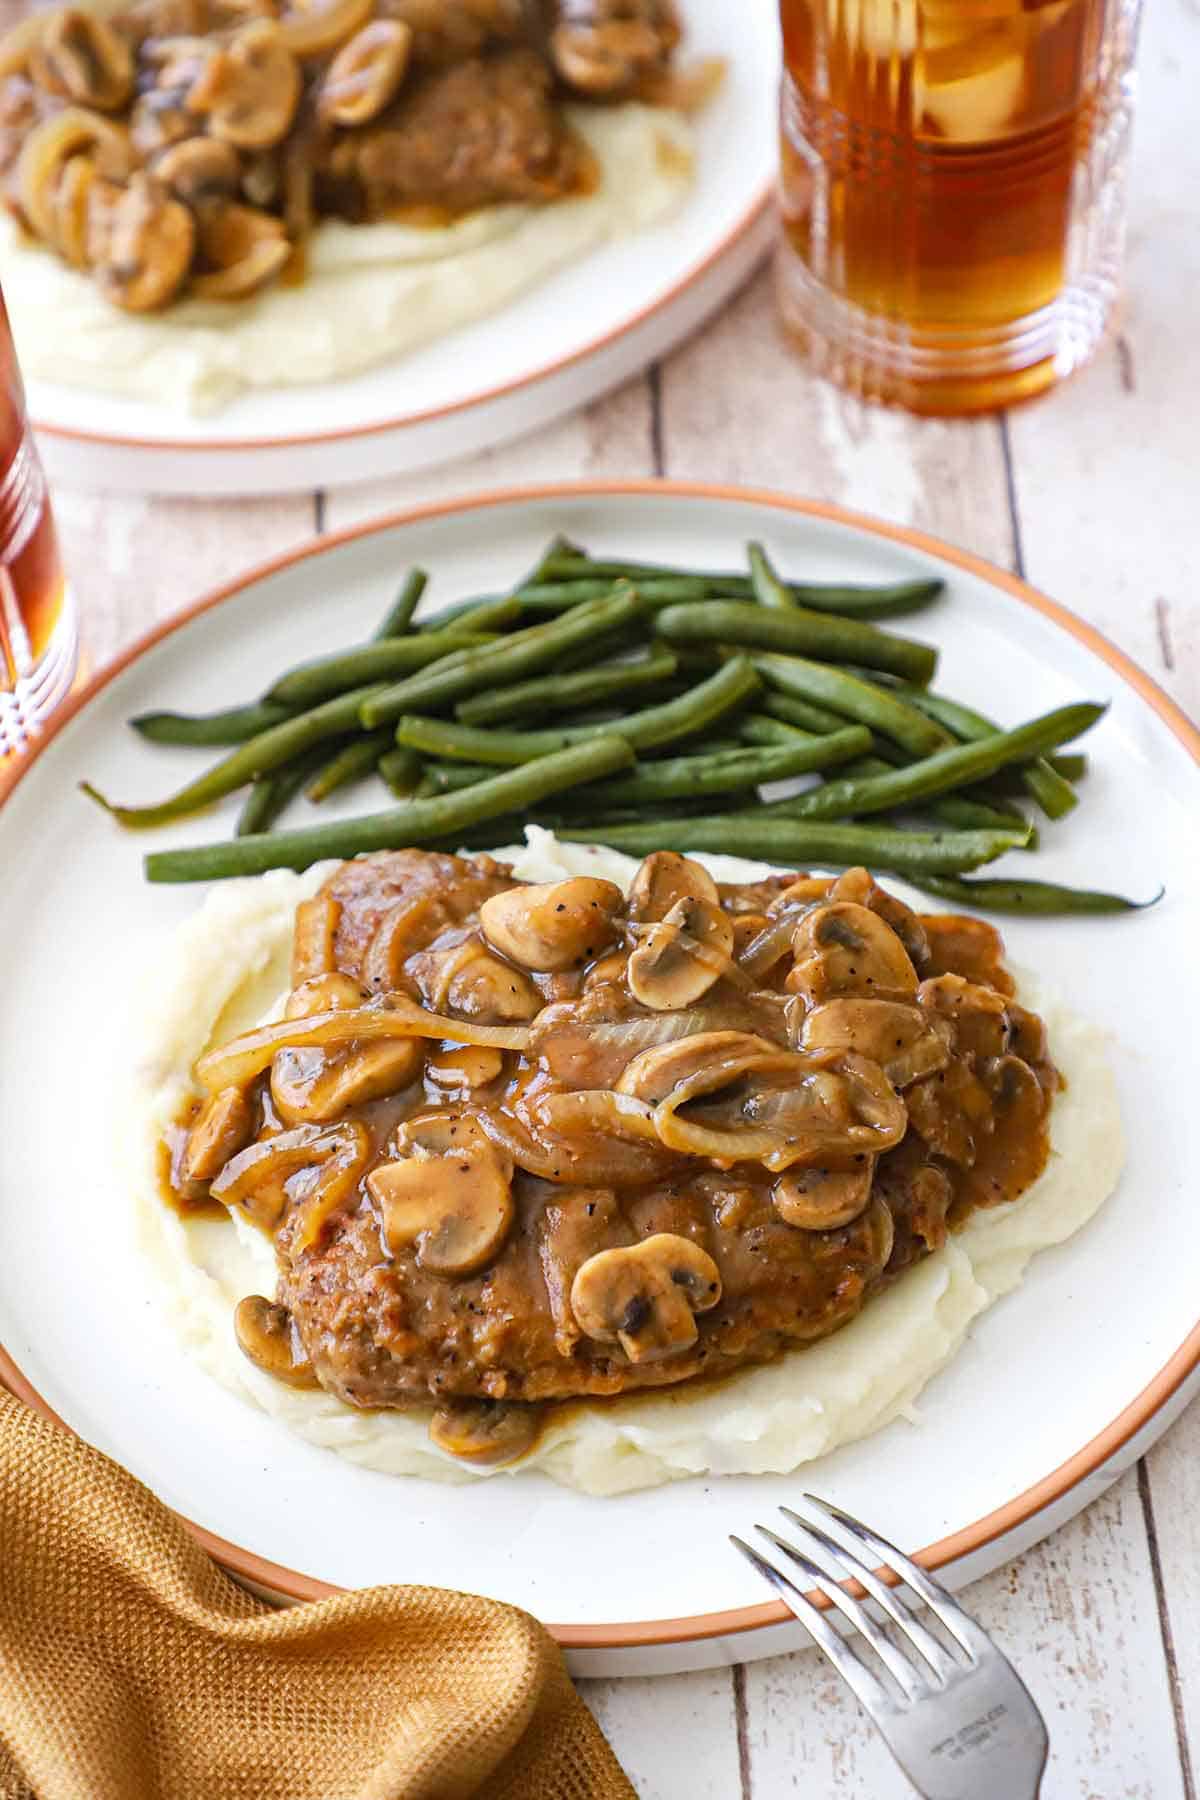
A white dinner plate filled with a serving of cube steak with mushroom gravy resting on a bed of mashed potatoes with braised green beans off to the side.

Cube Steak with Mushroom Gravy is not only incredibly easy to prepare but also delivers hearty, comforting flavors that satisfy every time. This classic dish embodies comfort food at its very best, making it perfect for cozy family dinners.

A white dinner plate filled with a serving of cube steak with mushroom gravy resting on a bed of mashed potatoes with braised green beans off to the side.
[feast_advanced_jump_to]

🥩 The Ingredients

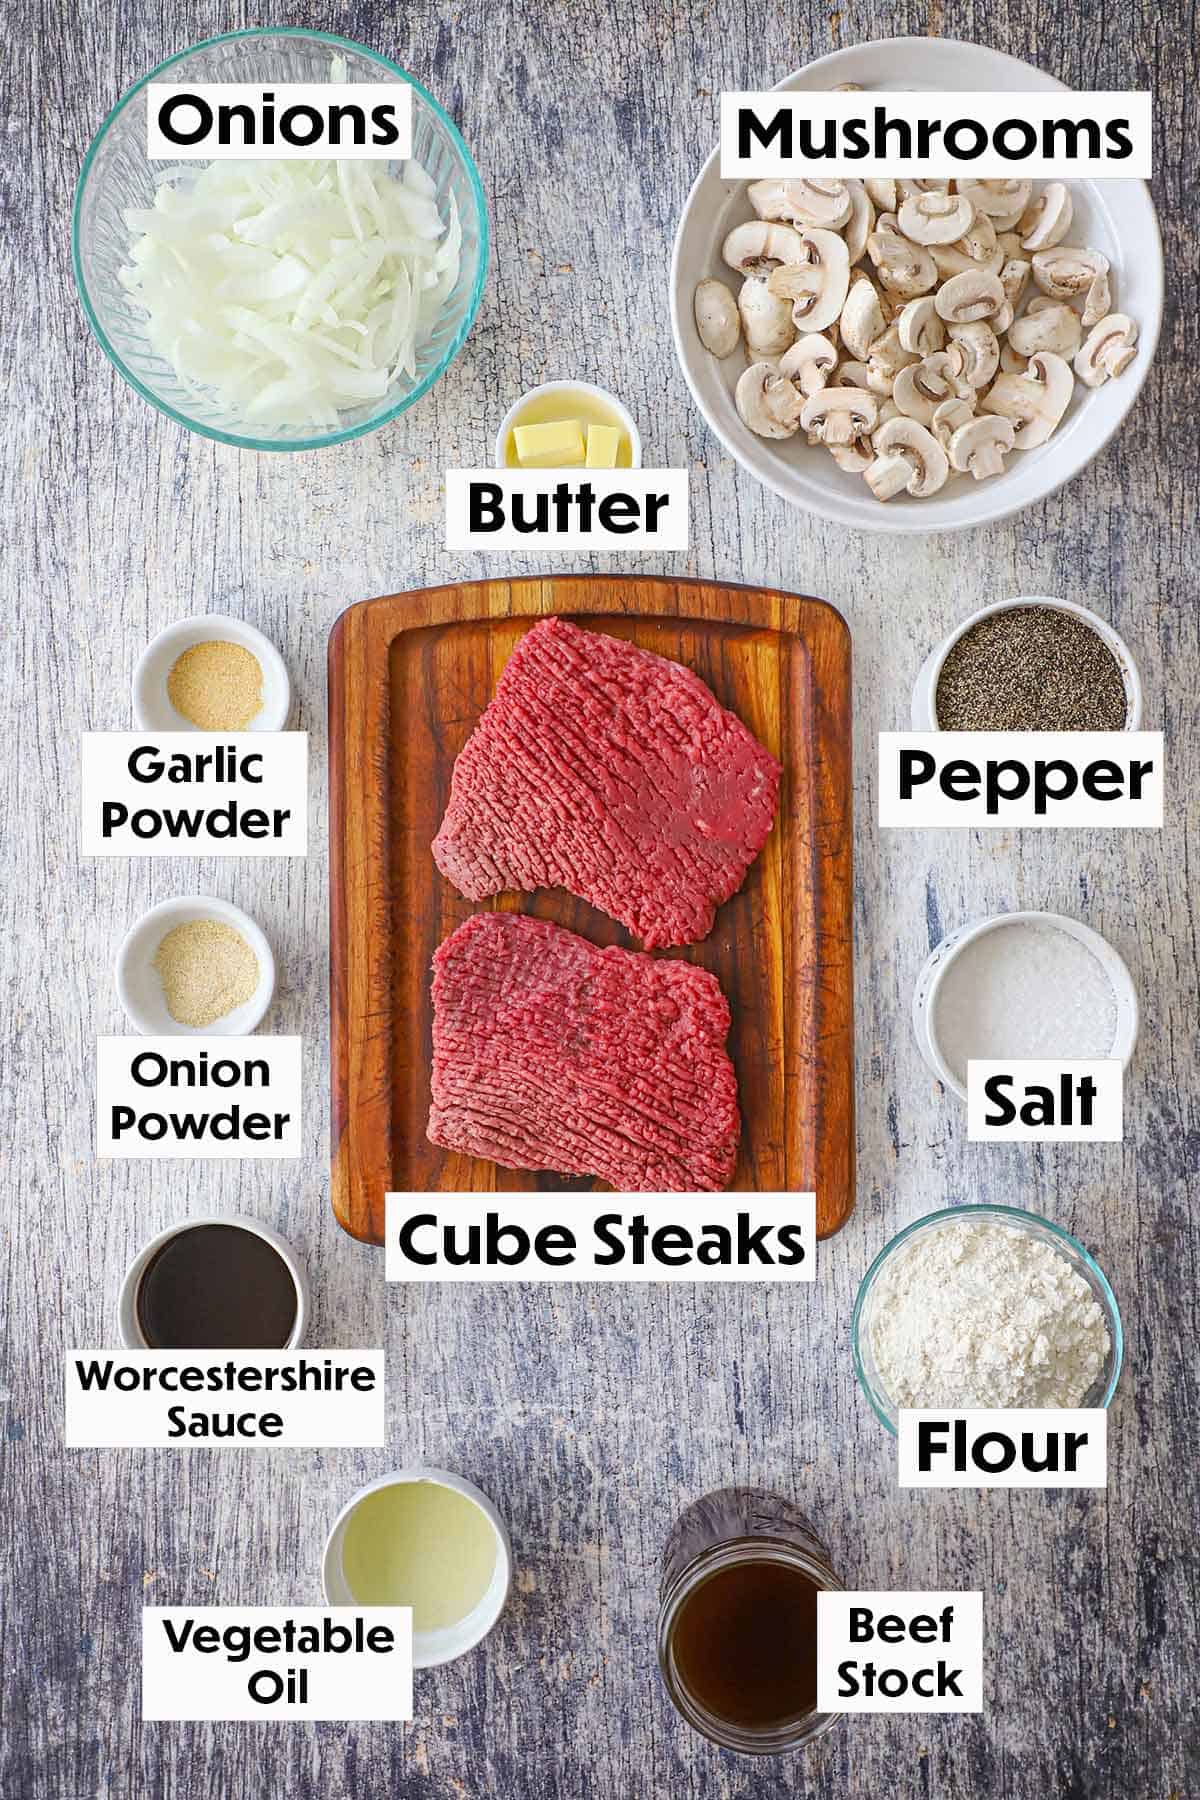
The straightforward and affordable ingredients for this classic dish come together to create a delicious and satisfying main dish that’s perfect for any meal. Find ingredient notes (including substitutions and variations) below.

An arrangement of ingredients for cube steak with mushroom gravy on a grey wooden background including cube steak, onions, mushrooms, Worcestershire sauce, flour, and seasonings.

🌿 Substitutions and Variations

  • Meat – Cube steak is usually pre-tenderized and is readily available in most supermarkets. You can also get top or bottom round steak and tenderize it yourself with a mallet. You can also substitute ground beef. Cook and season it first, then prepare the onions and mushrooms in a separate skillet, then combine the two and continue with the recipe as written.
  • Mushrooms and Onions – Go with any type of mushroom, including button, cremini, shiitake, or portobello. If desired, chop the onions finely rather than cutting them into strips. Either ingredient can also be omitted if desired. If you omit both, you’ll still have a delicious gravy.
  • Flavor enhancers – Worcestershire sauce, onion powder, and garlic powder provide a depth of flavor that enhances the beef. Fresh garlic can be used in place of the powder. The addition of herbs (fresh or dried) can be added as well, including thyme, rosemary, or marjoram.

See the recipe card (with video) below for a full list of ingredients and measurements.

👩🏼‍🍳 How To Make Cube Steak with Mushroom Gravy

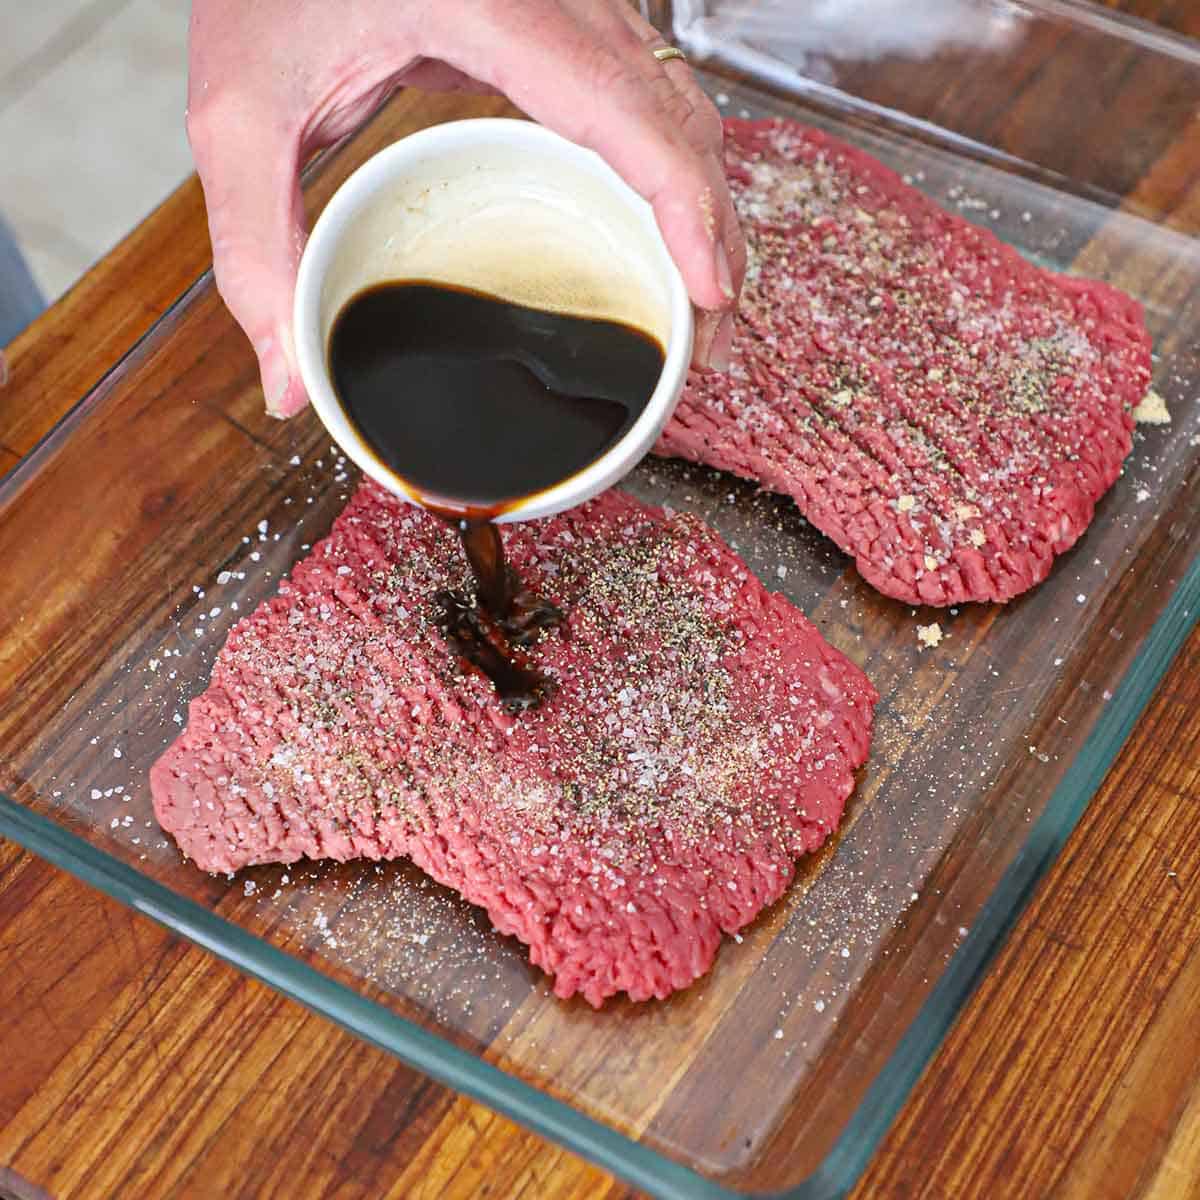
A person pouring Worcestershire sauce over two seasoned uncooked cube steaks in a glass baking dish.
  1. Step 1: Season the cube steaks with the seasonings, then place in a dish and coat with Worcestershire sauce.
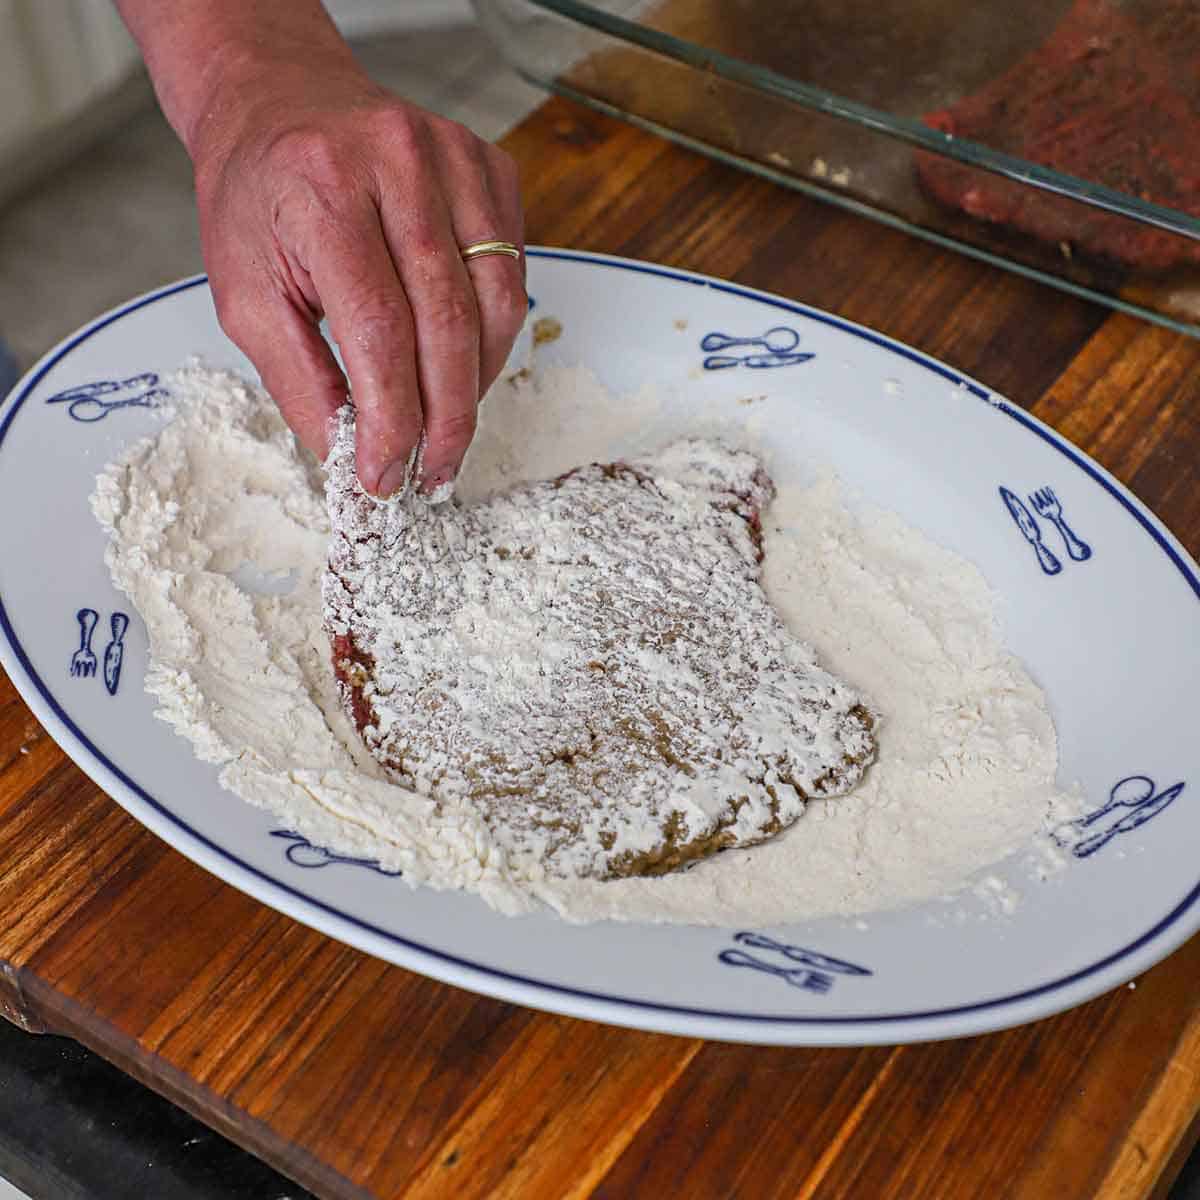
A person dredging a seasoned cube steak through flour on a large oval platter sitting on a wooden cutting board.
  1. Step 2: Dredge the steaks in the flour.
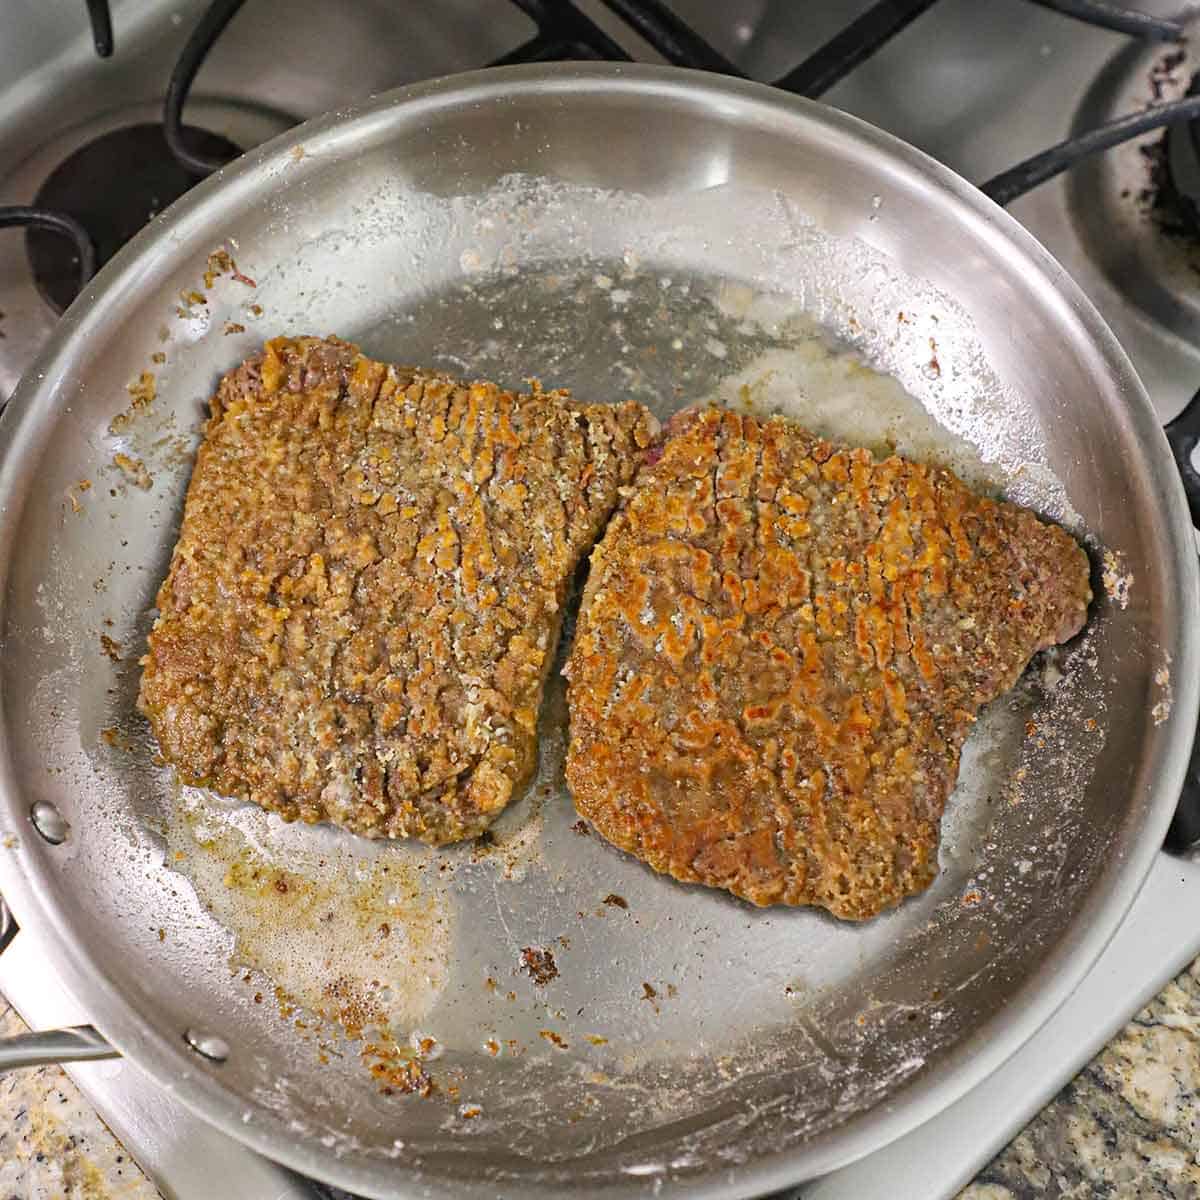
Two browned cubed steaks resting in a stainless steel skillet sitting on a gas stove.
  1. Step 3: Cook the floured steaks in butter and oil until browned on both sides.
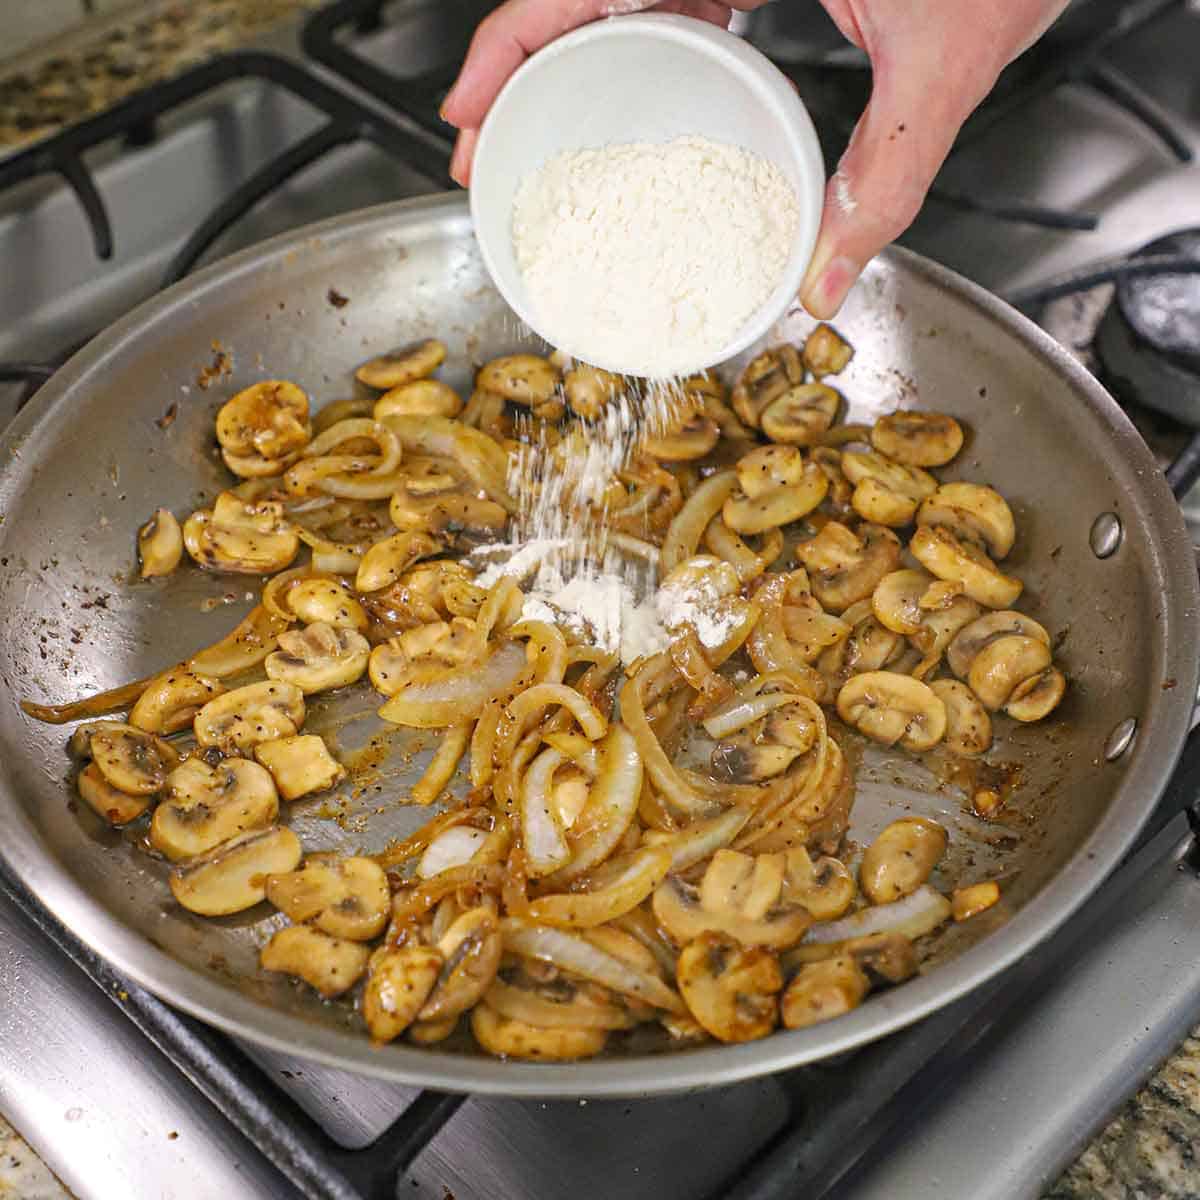
A person dumping all-purpose flour over sautéed onions and sliced mushrooms in a skillet on a gas stove.
  1. Step 4: Sauté the onions and mushrooms until soft, and then sprinkle the flour over them.
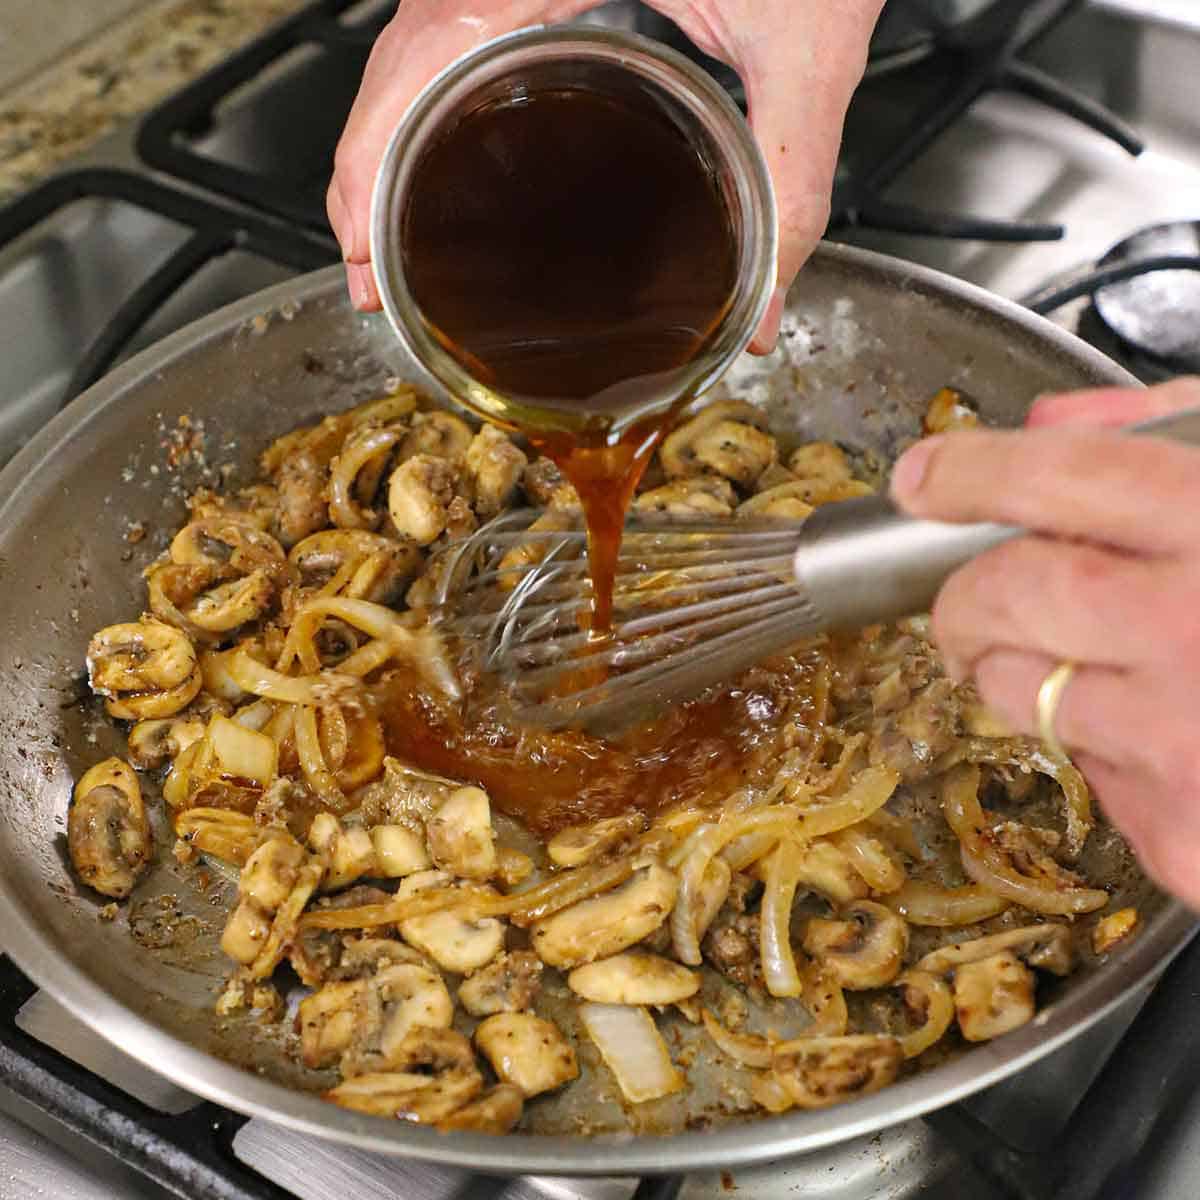
A person pouring beef broth from a glass jar into a skillet and is being whisked into sautéd onions and mushrooms that have been coated with flour.
  1. Step 5: Stir and cook for 1 minute and then whisk in the beef broth (or stock).
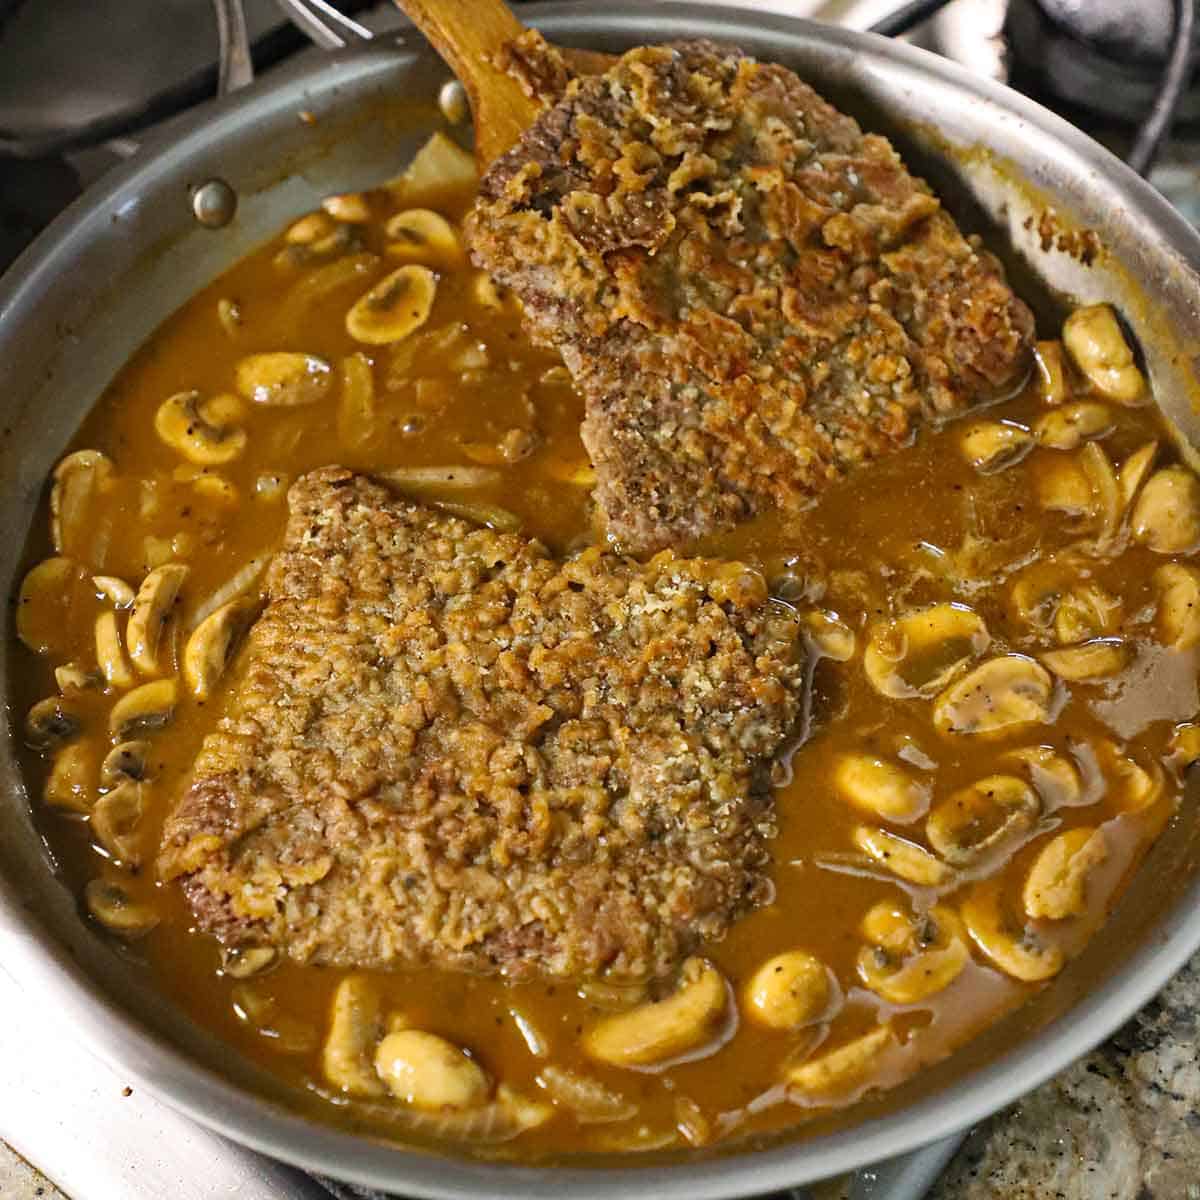
A person using a wooden spatula to place a browned cube steak into a skillet filled with a brown mushroom gravy.
  1. Step 6: Once the sauce has thickened into a gravy, nestle in the steaks and simmer for a few minutes.

Expert Tip

Go with quality beef broth or beef stock for the best flavor. Both broth and stock are excellent choices. Homemade beef stock is amazing, but store-bought is perfectly fine.

🍽️ How To Serve

  • You’ll want to serve this fresh off the stove; however, leftovers are amazing, too.
  • You can easily bring the skillet to the table and let everyone serve themselves. Or, you can plate them individually, or place the steaks on a platter and transfer the mushroom gravy to a bowl.
  • This dish screams to be paired with homemade mashed potatoes. The gravy and potatoes are heavenly. We also love to serve it with Southern-style green beans and easy skillet dinner rolls.

🙋🏽‍♂️ Frequently Asked Questions

What cut of meat is best for making cube steak with mushroom gravy?

Cube steak is typically made from top round or top sirloin that has been tenderized, making it the ideal cut for this dish because it cooks quickly and becomes tender when smothered in gravy. See substitutions above for more information.

How do I prevent the mushroom gravy from becoming too thin or watery?

The flour will act as a roux, and the broth should naturally thicken. If, after about 4 to 5 minutes of simmering, it’s still too thin, then make a cornstarch slurry (1 tablespoon cornstarch mixed with 1 tablespoon water) and whisk it into the gravy. Repeat until the desired consistency is reached.

Can I make cube steak with mushroom gravy ahead of time?

Yes, cube steak with mushroom gravy can be made ahead and stored in the refrigerator for up to 2-3 days; reheat gently on the stove to maintain tenderness and flavor.

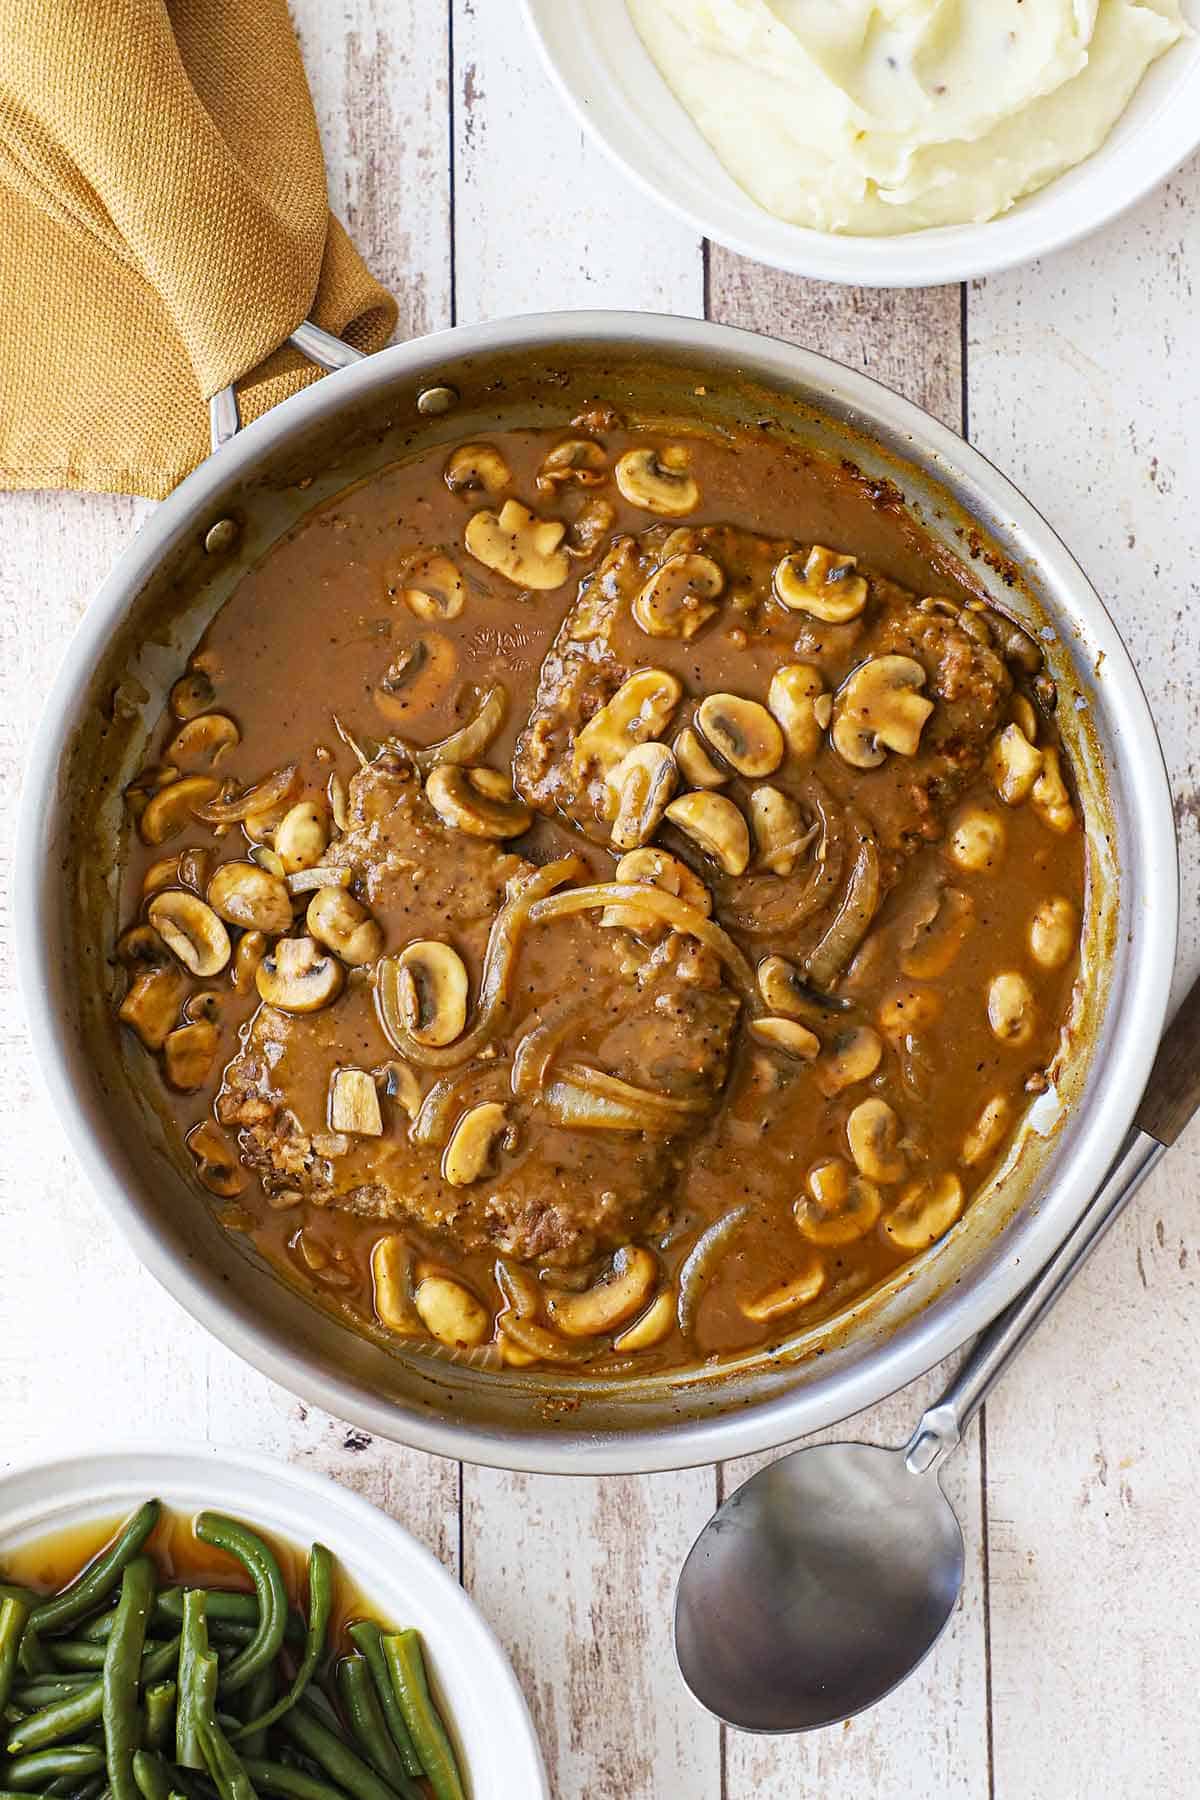
A large stainless steel skillet filled with two cube steaks with mushroom gravy and a bowl of cooked green beans and a bowl of mashed potatoes nearby.

😋 Other Amazing Easy Beef Recipes

  • Two side by side white dinner plates filled mashed potatoes topped with a helping of Swiss steak.
    Classic Swiss Steak
  • An overhead view of a large silver saucepan filled with four salisbury steaks that are resting in a mushroom brown gravy with a wooden spoon resting nearby.
    Salisbury Steak with Mushroom Brown Gravy
  • An overhead view of a large skillet filled with Weeknight Beef Stroganoff that is topped with finely chopped Italian parsley.
    Weeknight Beef Stroganoff
  • An overhead view of a Sloppy Joe Casserole in an oval baking dish with a portion of the casserole missing.
    Sloppy Joe Casserole

Ready to make the most comforting beef dish that the family will love? Go for it!

And when you do, be sure to take a photo of it, post it on Instagram, and tag @HowToFeedaLoon and hashtag #HowToFeedaLoon!

A white dinner plate filled with a serving of cube steak with mushroom gravy resting on a bed of mashed potatoes with braised green beans off to the side.
Print Recipe
No ratings yet

Cube Steak with Mushroom Gravy

Cube steak with mushroom gravy is a classic comfort food featuring tenderized beef smothered in a rich, savory mushroom sauce, perfect for a hearty and satisfying meal. Always a family favorite!
Prep Time10 minutes mins
Cook Time20 minutes mins
Total Time30 minutes mins
Course: Entree
Cuisine: American
Servings: 4
Calories: 425kcal
Author: Kris Longwell

Equipment

  • 1 large (12-inch) skillet preferably non-stick

Ingredients

For the Steaks

  • 4 4 oz cube steaks
  • salt and pepper for seasoning
  • ½ teaspoon garlic powder
  • ½ teaspoon onion powder
  • ¼ cup Worcestershire sauce
  • 1½ cups all-purpose flour
  • 2 tablespoon olive oil
  • 1 tablespoon unsalted butter

For the Gravy and Finishing the Dish

  • 3 tablespoon unsalted butter
  • ¼ cup white wine optional
  • ½ cup onion thinly sliced
  • 8 oz mushrooms sliced
  • 1 tablespoon Worcestershire sauce
  • ¼ cup all-purpose flour
  • 2 cups beef broth
  • ½ teaspoon garlic powder
  • ½ teaspoon Kosher salt
  • ½ teaspoon black pepper

Instructions

  • Place the steaks on a cutting board or in a large dish. Liberally sprinkle the salt, pepper, garlic powder, and onion powder all over both sides of the steaks.
    4 4 oz cube steaks, salt and pepper, ½ teaspoon garlic powder, ½ teaspoon onion powder
  • Drizzle the Worcestershire sauce over both sides of the steaks, using your finger to press the seasonings and Worcestershire sauce into the steaks.
    ¼ cup Worcestershire sauce
  • Place the flour on a large platter or dish. Dredge the seasoned steaks through the flour until coated on both sides. Shake off excess flour.
    1½ cups all-purpose flour
  • Heat the oil in a large skillet over medium heat. Once simmering, add the butter and stir until melted.
    2 tablespoon olive oil, 1 tablespoon unsalted butter
  • Working in batches (usually 2 at a time), place the steaks in the skillet and cook until browned, usually about 3 minutes. Move the steaks around slightly (and often) to help keep them from sticking to the skillet. Flip the steaks over and cook the other sides until browned, another 3 minutes. Remove the steaks and place them on a platter (or cutting board). Repeat this process with the remaining steaks.
  • Add 3 tablespoons of the butter to the skillet over medium heat. If using, add the wine and use a wooden spatula (or spoon) to scrape up any stuck bits in the pan (this is called deglazing). Simmer until the wine has reduced by about a third.
    3 tablespoon unsalted butter, ¼ cup white wine
  • Add the onions and sauté until soft, about 4 minutes. Stir in the mushrooms and cook, stirring often, until softened and starting to brown, another 4 to 6 minutes. Add a pinch of salt and pepper, and then stir in the Worcestershire sauce and garlic powder. Sauté for another minute.
    ½ cup onion, 8 oz mushrooms, 1 tablespoon Worcestershire sauce
  • Add the flour and stir to coat the mushrooms and onions. Cook for 1 minute. Add the beef broth and whisk to remove any clumps. Stir until it starts to thicken. Stir in ½ teaspoon garlic powder, ½ teaspoon salt, and ½ teaspoon black pepper. Continue simmering until you reach a gravy consistency, only another minute or so.
    ¼ cup all-purpose flour, 2 cups beef broth, ½ teaspoon garlic powder, ½ teaspoon Kosher salt, ½ teaspoon black pepper
  • Nestle the steaks into the gravy and simmer for a few minutes until heated through. Serve at once!

Video

Notes

NOTE: Watch the video near the top of the recipe for visual guidance.
If the mushrooms seem dry after sautéing for a few minutes, add a little more butter or oil. 
If the gravy is too thin, make a cornstarch slurry of 1 tablespoon cornstarch mixed with 1 tablespoon cold water. Drizzle it into the sauce and stir until thickened. Repeat, if necessary. 
Leftovers are amazing and can be heated in a covered dish in the oven at 325°F for 15 to 20 minutes, or until heated through. 
Leftovers will keep (in a container with a lid) in the fridge for up to 5 days. It can be frozen for 2 to 3 months. 

Nutrition

Calories: 425kcal | Carbohydrates: 51g | Protein: 10g | Fat: 19g | Saturated Fat: 8g | Polyunsaturated Fat: 2g | Monounsaturated Fat: 8g | Trans Fat: 0.5g | Cholesterol: 31mg | Sodium: 1024mg | Potassium: 537mg | Fiber: 3g | Sugar: 4g | Vitamin A: 369IU | Vitamin C: 6mg | Calcium: 52mg | Iron: 4mg

Shrimp Lo Mein with Cashews

June 1, 2025 by Kris Longwell 2 Comments

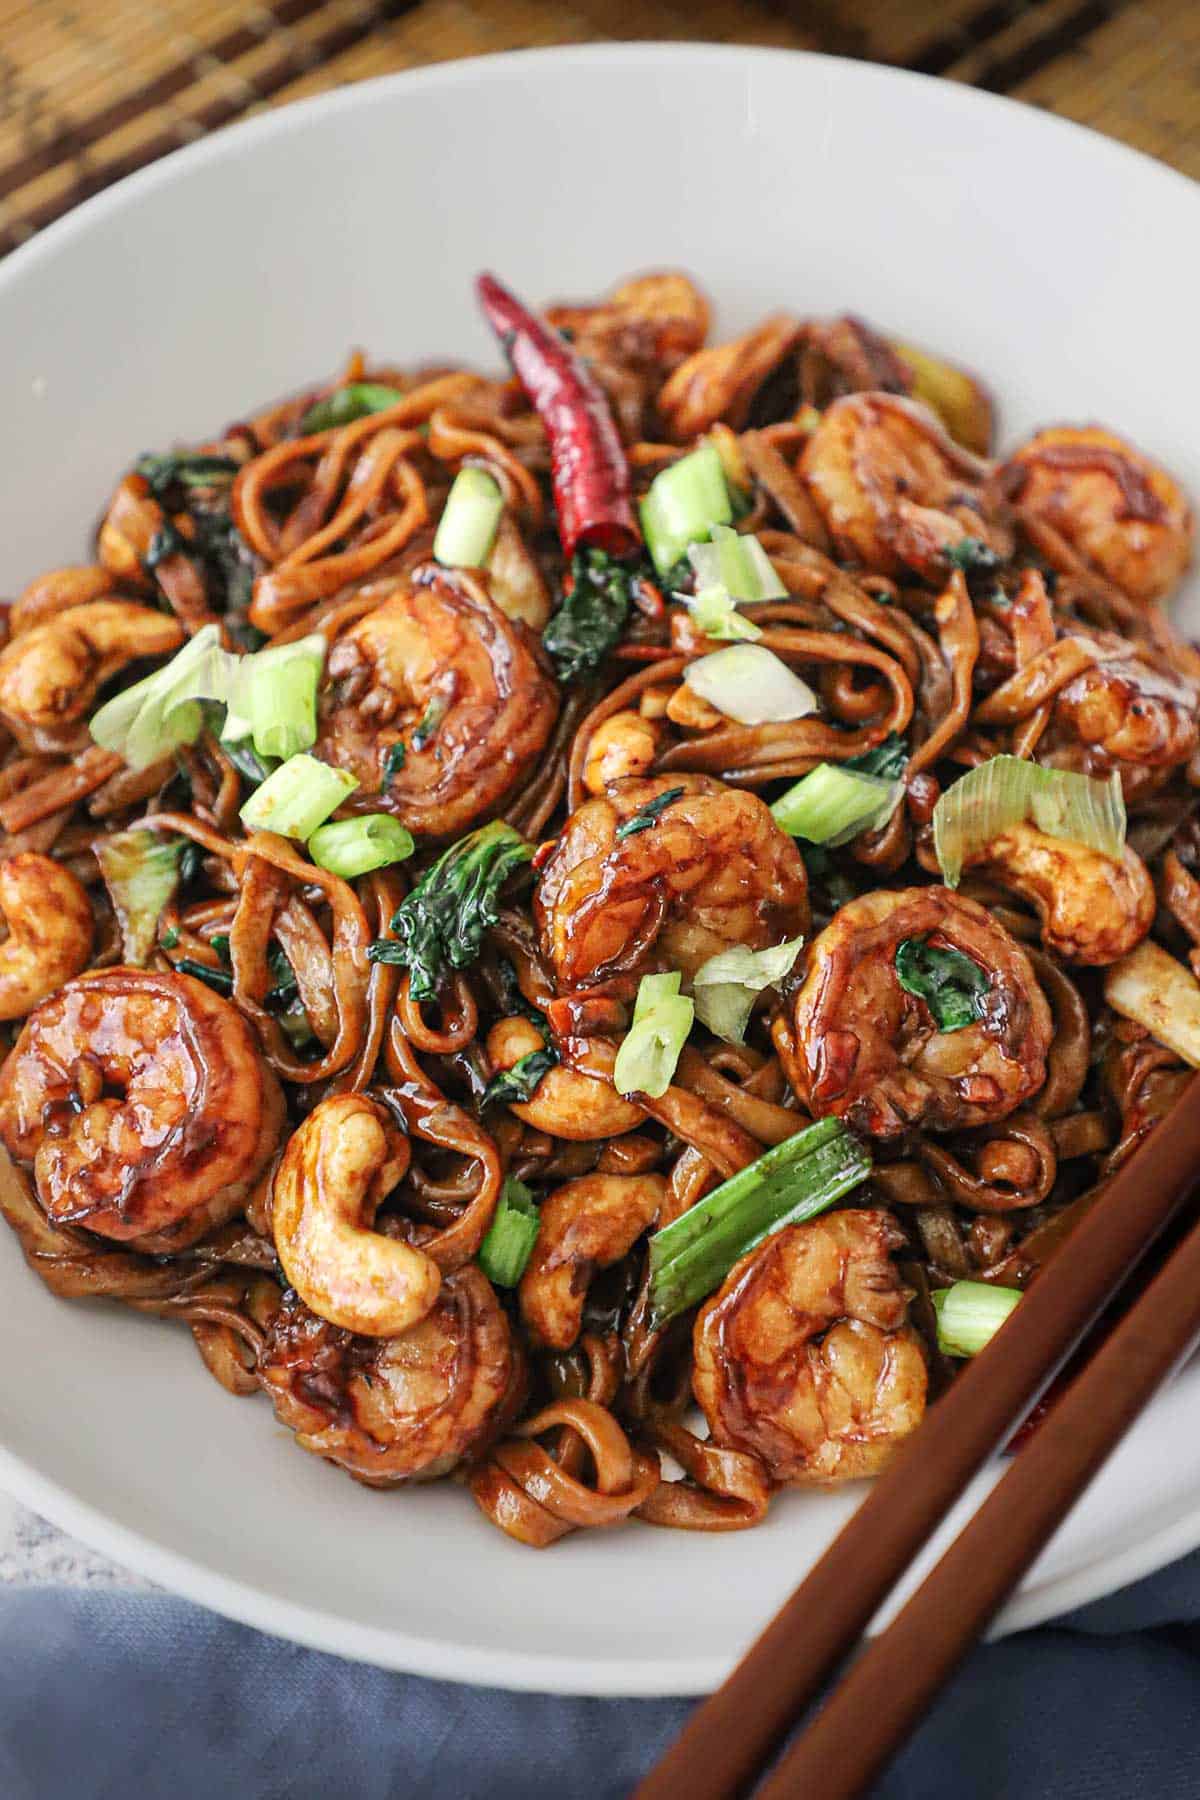
A white bowl filled with shrimp lo mein with cashews garnished with chopped scallions on top and two brown chopsticks resting side by side on the edge of the bowl.

Homemade Shrimp Lo Lein with Cashews is surprisingly easy to make and packed with delicious flavors that easily surpass takeout. Pair it with crispy homemade egg rolls for a perfect, satisfying meal everyone will love.

A white bowl filled with shrimp lo mein with cashews garnished with chopped scallions on top and two brown chopsticks resting side by side on the edge of the bowl.
[feast_advanced_jump_to]

🍤 The Ingredients

Most of the ingredients for shrimp lo mein can be found at well-stocked supermarkets, but a few specialty items might require a fun trip to your local Asian food market. Find ingredient notes (including substitutions and variations) below.

An arrangement of ingredients on a grey wooden background including uncooked shrimp, egg noodles, cashews, bok choy, carrots, chili peppers, ginger, garlic, and various bowls filled with ingredients to make the sauce.

🐓 Substitutions and Variations

  • Proteins – We love shrimp with lo mein. We opt for extra-large and remove the tails. However, you can leave the tails on for a beautiful presentation. Chicken (boneless thighs or breasts), thinly sliced beef, or even tofu are all wonderful substitutions for the shrimp. Or, do a combination of them all!
  • Noodles – If you have access to an Asian market, grab some fresh egg noodles. If not, check out the Asian section in your supermarket. Occasionally, you’ll see a package of noodles that are called ‘lo mein,’ if not, go with chow mein noodles. In a pinch, you can use spaghetti noodles. Cook until just al dente.
  • Vegetables – The sky is the limit here. We love the combination of carrots, baby bok choy, and scallions. You can substitute green cabbage for the bok choy. You could even stir-fry 2 cups of bagged coleslaw (without the dressing).
  • Flavor enhancers – Garlic and ginger (fresh) are key to classic Chinese cooking. We don’t recommend omitting them. Shaoxing wine can be found in the Asian section of many well-stocked supermarkets, at Asian food markets, or online. Sherry can be substituted or rice wine vinegar. Honey can be substituted for the brown sugar. Hoisin sauce can be substituted for the oyster sauce.

See the recipe card (with video) below for a full list of ingredients and measurements.

Expert Tip

Although it takes some time to prep all the ingredients, it’s important to get them all ready before you start to stir-fry. Prep the noodles last, just before you start stir-frying (rinse them with cold water to keep them from sticking to each other). The process of stir-frying the entire dish only takes a matter of minutes. Have everything near your wok or skillet.

👩🏼‍🍳 How To Prepare Shrimp Lo Mein with Cashews

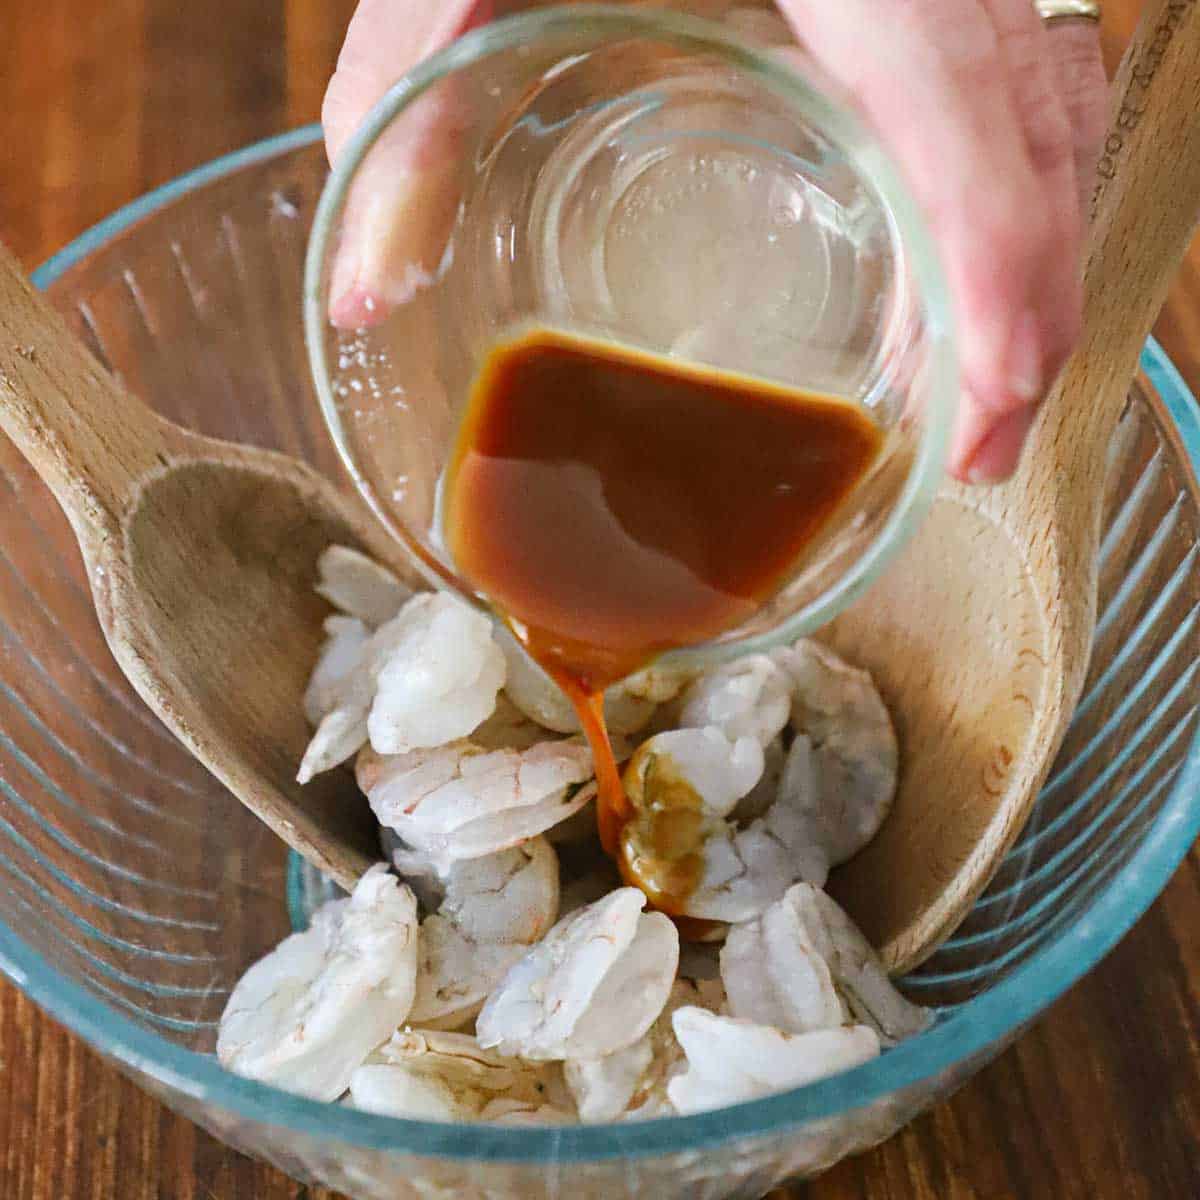
A person pouring a soy sauce and Chinese wine marinade over uncooked shrimp in a small glass bowl.
  1. Step 1: In a small bowl, combine the Shaoxing wine with the soy sauce and then pour over the cleaned shrimp in a bowl.
A person using a small whisk to mix a Chinese lo mein dark sauce in a small glass bowl on a wooden cutting board.
  1. Step 2: Whisk together the sauce ingredients in a small bowl. Set aside.
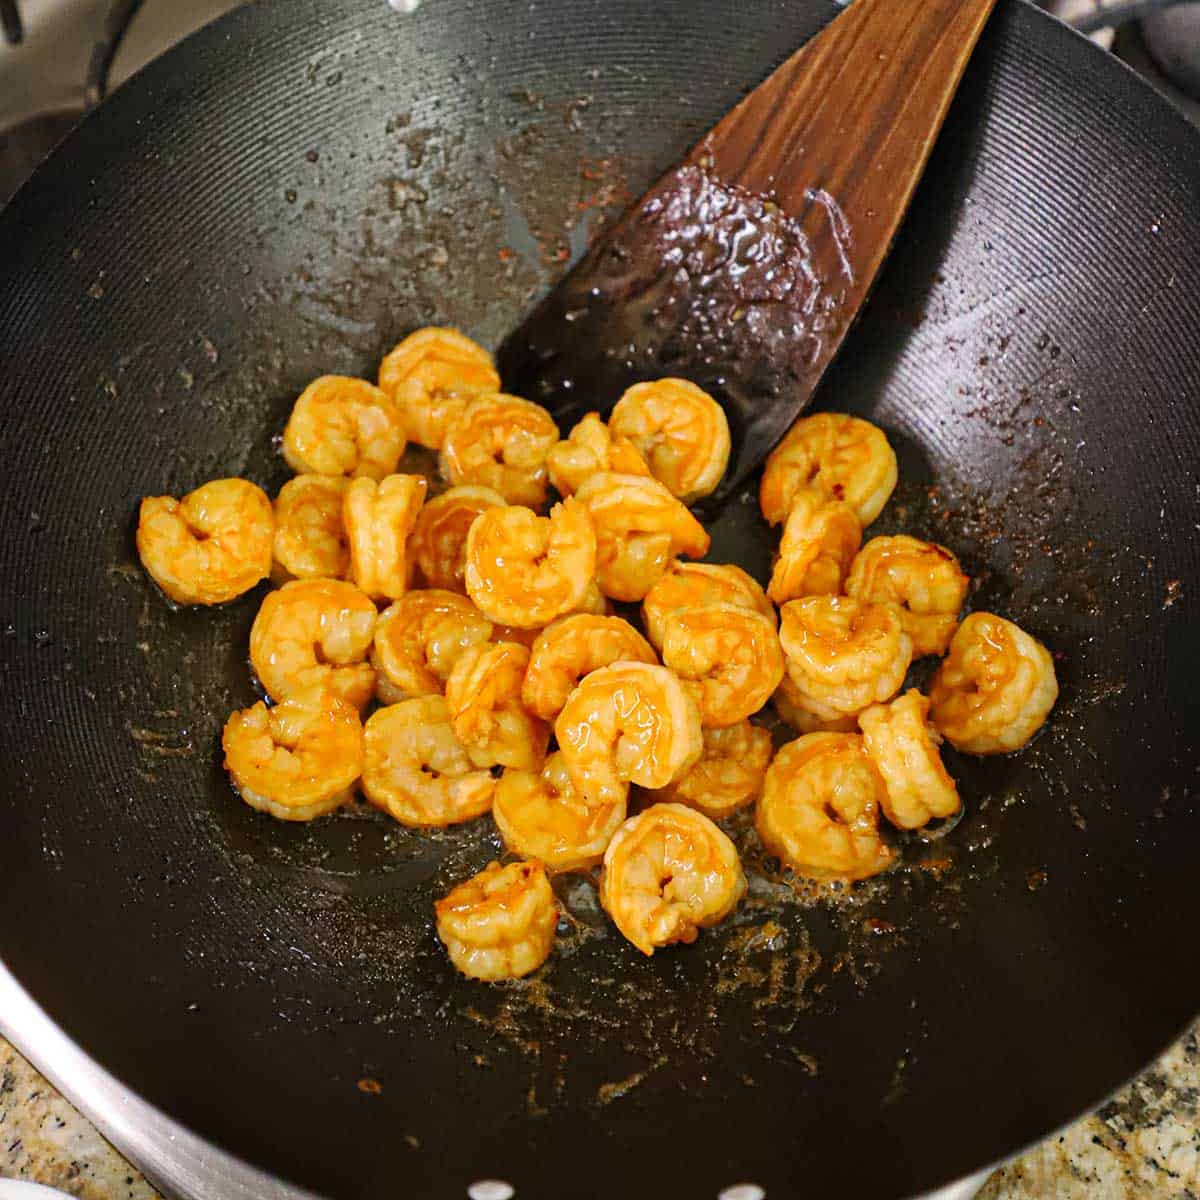
Marinated shrimp being sautéed in a large black wok with a wooden spatula off to the side.
  1. Step 3: Sauté the shrimp (with marinade and oil) over high heat in a wok or skillet.
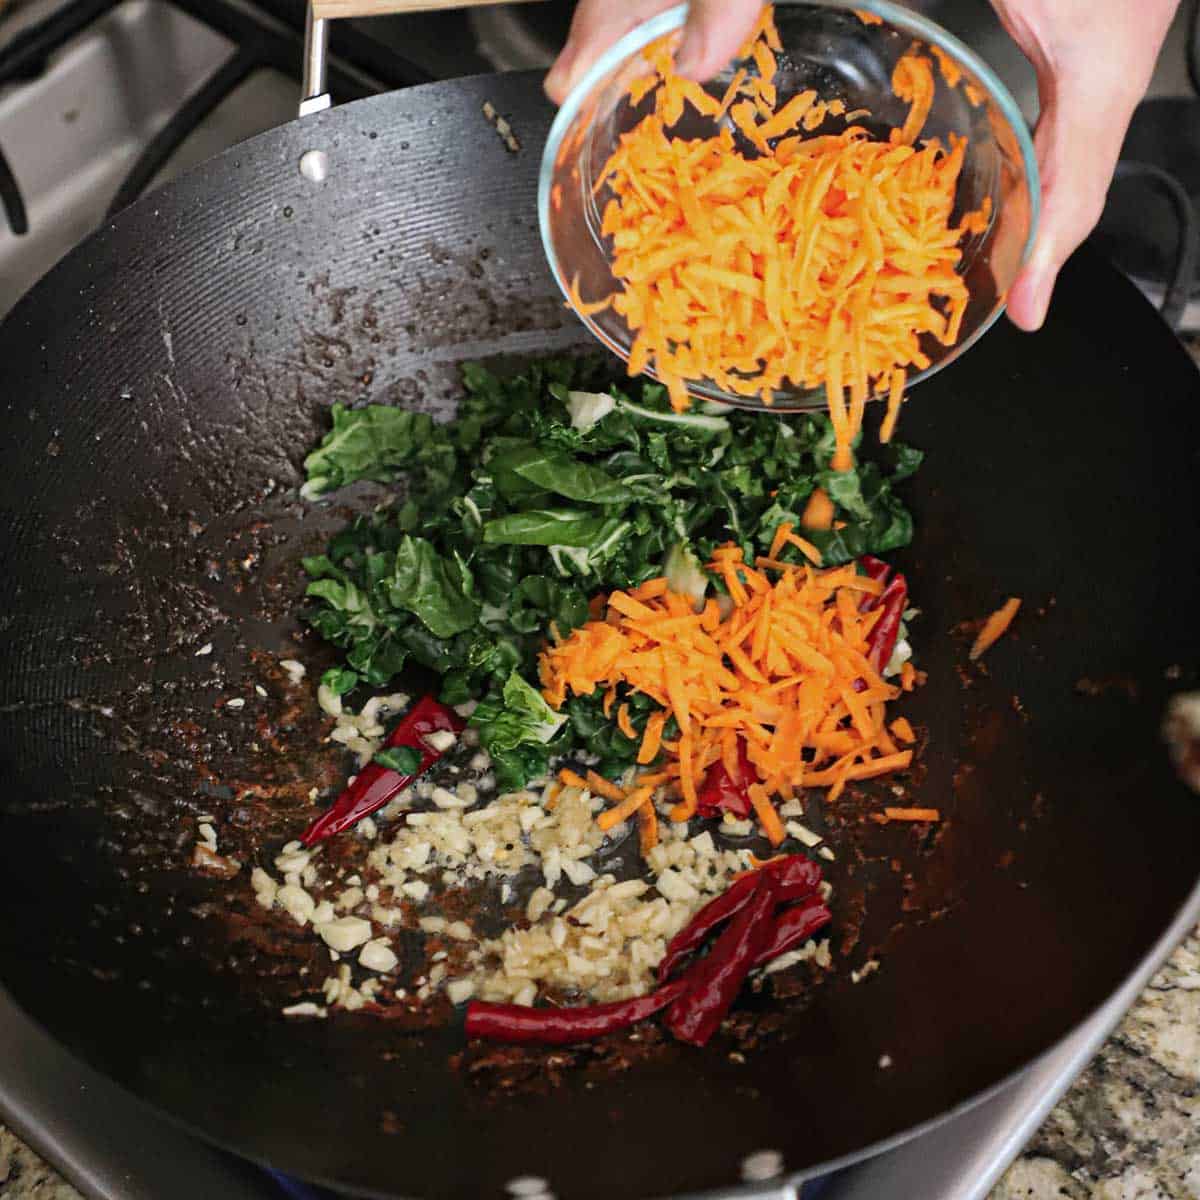
A person dumpling shredded carrots from a small glass bowl into a wok filled with chopped bok choy, garlic, ginger, and chili peppers simmering in oil.
  1. Step 4: Remove the shrimp, add more oil, and stir-fry the garlic, ginger, chiles, baby bok choy, and shredded carrots.
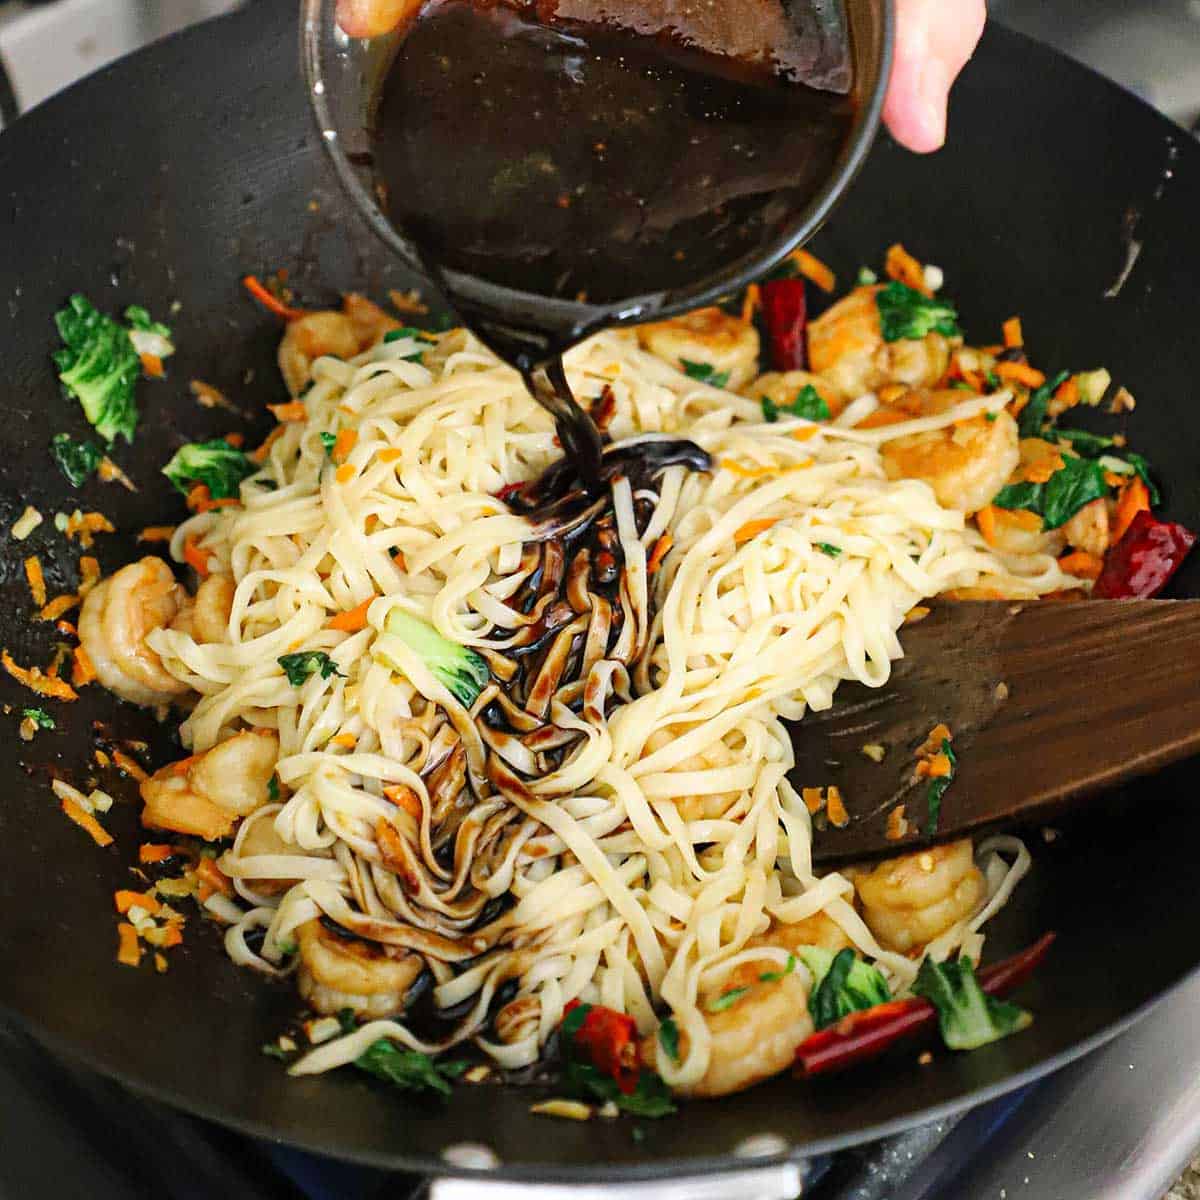
A person pouring a dark Chinese lo mein sauce into a wok that is filled with sautéed vegetables, shrimp, and cooked Asian egg noodles.
  1. Step 5: Add the cooked shrimp and noodles and pour in the sauce.
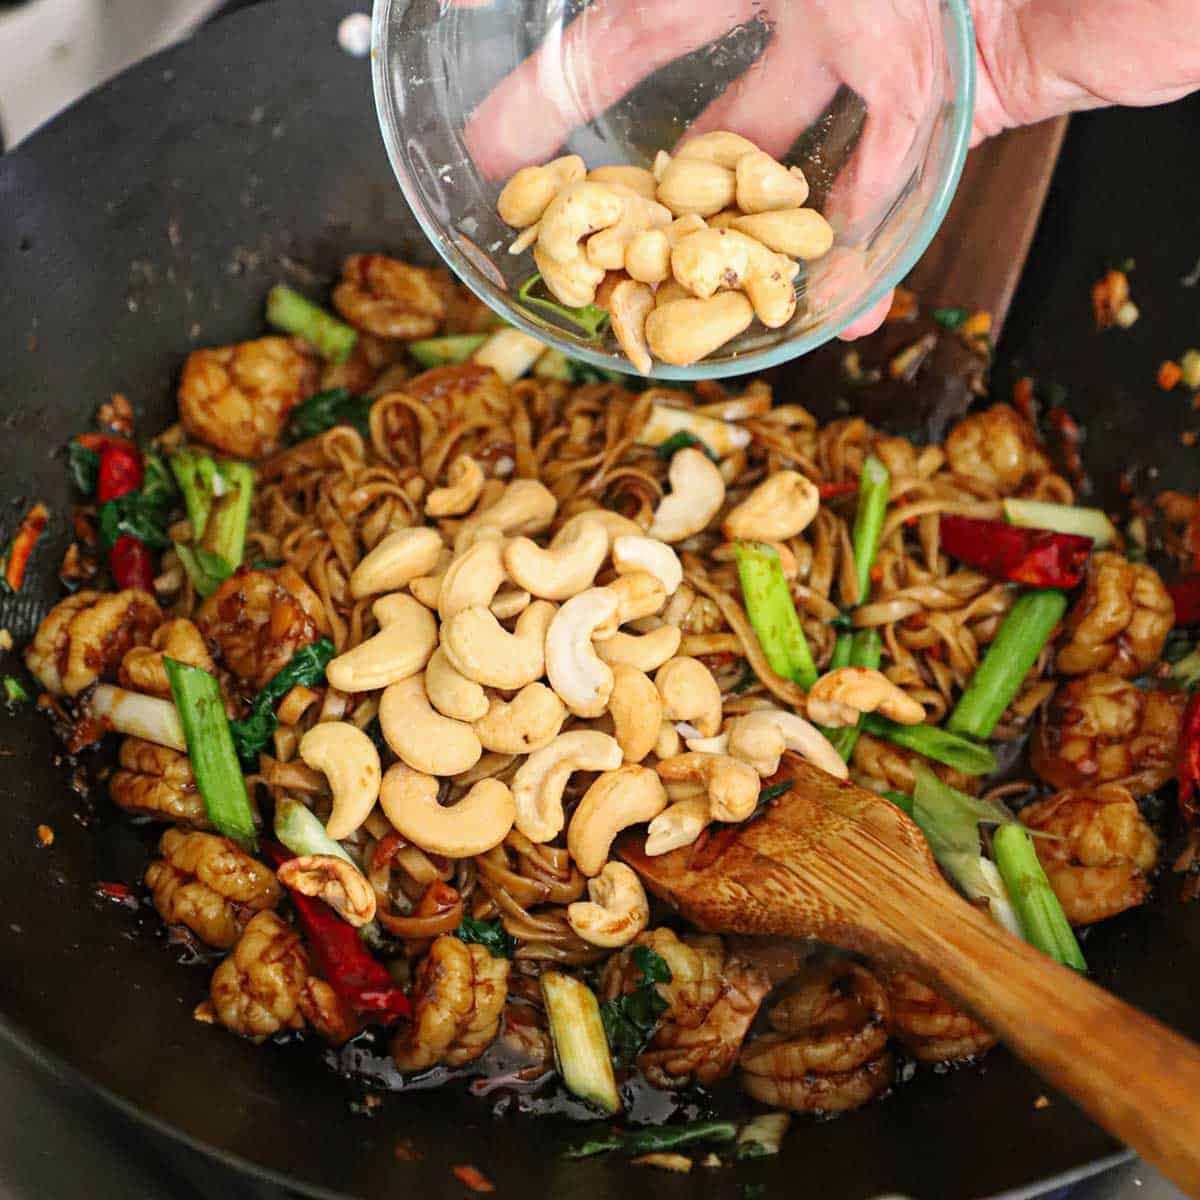
A person dumping roasted cashews from a small glass bowl into a wok filled with freshly prepared shrimp lo mein.
  1. Step 6: Toss to coast all ingredients and then quickly stir in the scallions and cashews.

🍽️ How To Serve, Store, and Reheat

  • This is best served piping hot right from the wok (or skillet). If the sauce feels too thick or the noodles are glooping together, thin the sauce with a little more broth. It should be slightly saucy, but not too thin.
  • Serve with extra soy sauce (preferably low-sodium) and chopped scallions on the side.
  • Store leftovers in a container with a tight-fitting lid in the fridge for 3 to 4 days.
  • Reheat on the stove with several splashes of broth (chicken or seafood). The noodles will absorb more of the sauce as it chills.

🙋🏽‍♂️ Frequently Asked Questions

How do I prevent the shrimp from overcooking in shrimp lo mein?

Cook the shrimp quickly over high heat just until they turn pink and opaque, then remove them from the pan before adding other ingredients to avoid overcooking. Don’t overcook! They will continue to cook once they are added back to the pan.

Can I substitute other nuts for cashews in shrimp lo mein?

Yes, almonds or peanuts can be used as alternatives if you prefer or have allergies, but cashews provide a unique creamy crunch that complements the dish best.

What’s the difference between lo mein and chow mein?

Lo mein noodles are boiled and then tossed with sauce and stir-fried, resulting in soft, saucy noodles, while chow mein noodles are typically fried until crispy, giving them a crunchy texture.

A black wok filled with shrimp lo mein with cashews and Chinese red peppers.

🥢 Other Classic Stir-Fry Recipes

  • A bowl full of beef and broccoli stir-fry with chop sticks.
    Beef and Broccoli Stir-Fry
  • A straight-on view of a homemade sesame chicken resting on a layer of steamed white rice on a medium-sized plate.
    Homemade Sesame Chicken
  • An overhead view of Chinese noodles with peanut sauce garnished with chopped scallions and sesame seeds.
    Chinese Noodles with Peanut Sauce
  • A white dinner plate filled with vegetable stir-fry over brown rice with two chop sticks sitting on the side.
    Vegetable Stir-Fry

Ready to make a stir-fry dish that will rival your favorite takeout? Go for it!

And when you do, be sure to take a photo of it, post it on Instagram, and tag @HowToFeedaLoon and hashtag #HowToFeedaLoon!

A white bowl filled with shrimp lo mein with cashews garnished with chopped scallions on top and two brown chopsticks resting side by side on the edge of the bowl.
Print Recipe
5 from 1 vote

Shrimp Lo Mein with Cashews

Shrimp Lo Mein with Cashews delivers authentic, savory flavors with a perfect balance of tender noodles, juicy shrimp, and crunchy cashews, all in an easy-to-prepare stir-fry that’s perfect for any night of the week.
Prep Time30 minutes mins
Cook Time10 minutes mins
Total Time40 minutes mins
Course: Entree
Cuisine: Chinese
Servings: 4
Calories: 556kcal
Author: Kris Longwell

Equipment

  • Wok or large sturdy skillet

Ingredients

For the Noodles, Shrimp, and Marinade

  • 8 oz egg noodles fresh or dried
  • 2 tablespoon soy sauce
  • 1 teaspoon Shaoxing wine Chinese cooking wine
  • ½ lb extra-large shrimp deveined and shells removed (tails on or off)

For the Sauce

  • 3 tablespoon oyster sauce
  • 1 teaspoon sesame oil
  • 1 tablespoon dark soy sauce
  • 1 tablespoon Shaoxing wine Chinese cooking wine
  • ¼ cup dark brown sugar
  • ½ cup chicken broth plus more, if needed
  • 1 teaspoon cornstarch

For the Stir-Fry

  • 3 tablespoon peanut oil divide, or canola oil
  • 1 tablespoon garlic minced
  • 2 tablespoon fresh ginger finely chopped
  • 6 red chili peppers dried (optional)
  • 2 baby bok choy base removed, chopped
  • ½ cup carrot shredded, julienned, or chopped
  • 4 scallions cut into 1-inch strips, plus extra for garnish
  • ½ cup roasted cashews unsalted

Instructions

  • If using dried noodles, follow the package instructions for preparing them to al dente. If using fresh noodles, add to boiling water, bring back to a boil, and cook, stirring often, for 1 minute. Drain and immediately rinse with cool water. Once cool enough to handle, use your hands to help separate them (they will separate even more once you stir-fry them.
    8 oz egg noodles
  • Meanwhile, in a small bowl, mix together the soy sauce (2 tbsp) and Shaoxing wine (1 tsp). Place the clean shrimp in a bowl and toss with the soy/wine mixture. Let marinate while you prep the remaining ingredients (about 15 minutes).
    2 tablespoon soy sauce, 1 teaspoon Shaoxing wine, ½ lb extra-large shrimp
  • In a small bowl, mix together the ingredients for the sauce. Set aside.
    3 tablespoon oyster sauce, 1 teaspoon sesame oil, 1 tablespoon dark soy sauce, 1 tablespoon Shaoxing wine, ¼ cup dark brown sugar, ½ cup chicken broth, 1 teaspoon cornstarch
  • Heat 1 tablespoon of the oil in a wok (or skillet) over high heat. Once the oil is shimmering, add the shrimp (with marinade) and stir-fry until pink (don't overcook), about 3 to 4 minutes. Use a slotted spoon to remove the shrimp from the wok onto a plate. Set aside (but keep them close)
    3 tablespoon peanut oil
  • Add the remaining 2 tablespoon of oil to the wok. Add the garlic, ginger, and chiles (if using) and stir-fry for 1 minute (if browning, quickly lower the heat).
    1 tablespoon garlic, 2 tablespoon fresh ginger, 6 red chili peppers
  • Add the bok choy and carrots and stir-fry for another minute..
    2 baby bok choy, ½ cup carrot
  • Add the shrimp and noodles, toss with the vegetables, and cook for 1 minute.
  • Pour the sauce into the wok and toss until everything is fully coated. Cook for about 1 minute (the sauce will thicken slightly). Stir in the cashews and scallions. If the sauce is too thick, add a splash or two of broth.
    4 scallions, ½ cup roasted cashews
  • Serve at once with chopped scallions for garnish.

Video

Notes

NOTE: Watch the video near the top of the recipe for visual guidance.
Fresh egg noodles can be found at Asian markets. Dried chow mein (or lo mein) noodles can be found in the Asian section of most well-stocked supermarkets. Don’t cook the noodles until just before beginning to stir-fry. 
The final sauce should be somewhat thick, but not “gloopy.” If it’s too thick, thin it with a little more broth. It should be slightly “saucy,” but not runny. 
Leftovers will keep in a container with a tight-fitting lid in the fridge for 3 to 4 days. Reheat in the skillet with several splashes of broth. 

Nutrition

Calories: 556kcal | Carbohydrates: 68g | Protein: 21g | Fat: 23g | Saturated Fat: 4g | Polyunsaturated Fat: 6g | Monounsaturated Fat: 11g | Trans Fat: 0.04g | Cholesterol: 120mg | Sodium: 879mg | Potassium: 457mg | Fiber: 4g | Sugar: 17g | Vitamin A: 5445IU | Vitamin C: 29mg | Calcium: 157mg | Iron: 3mg

Pork Burgers with Pretzel Buns

May 25, 2025 by Kris Longwell 2 Comments

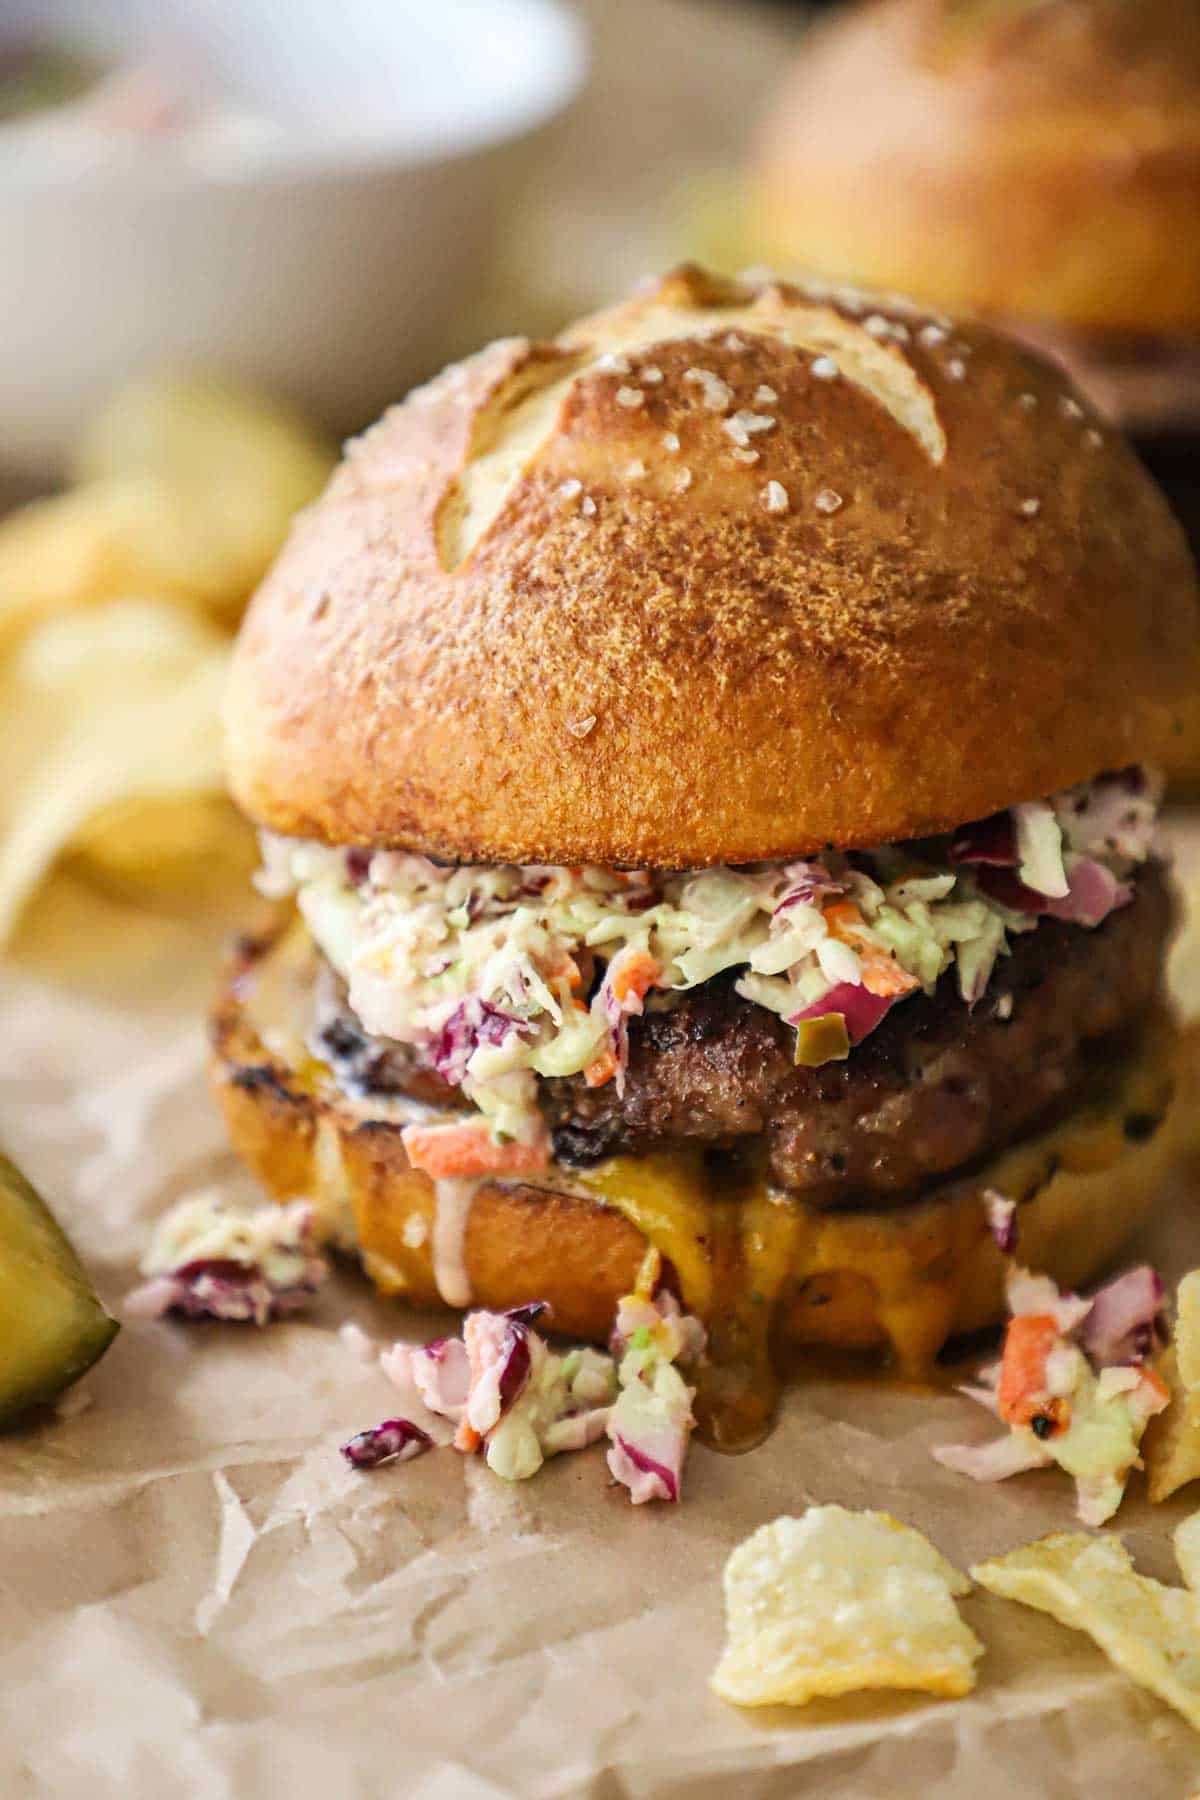
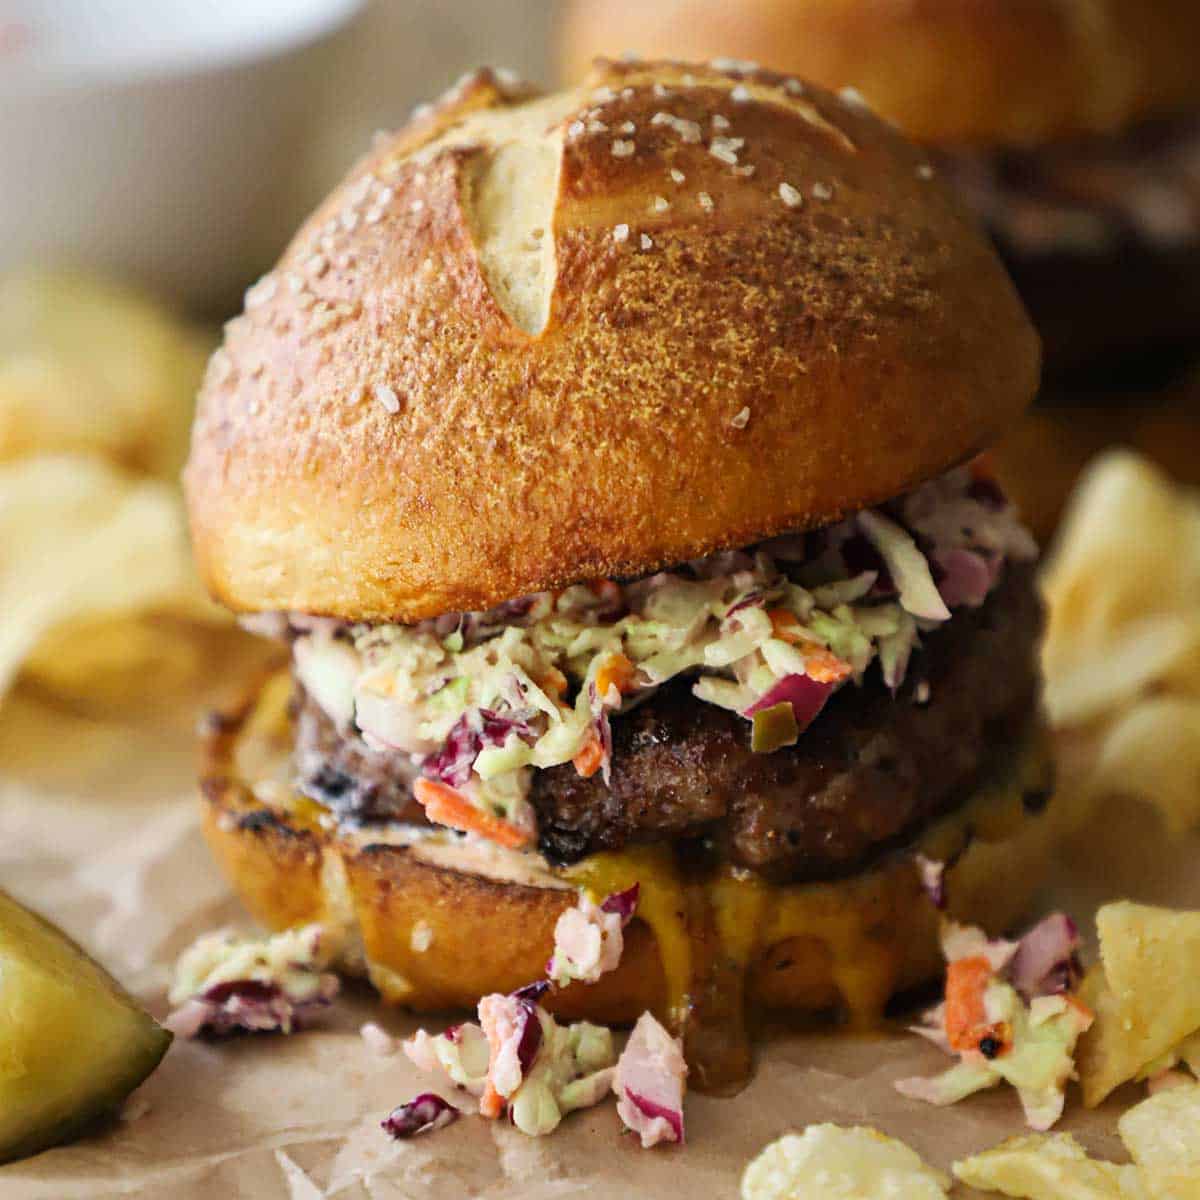
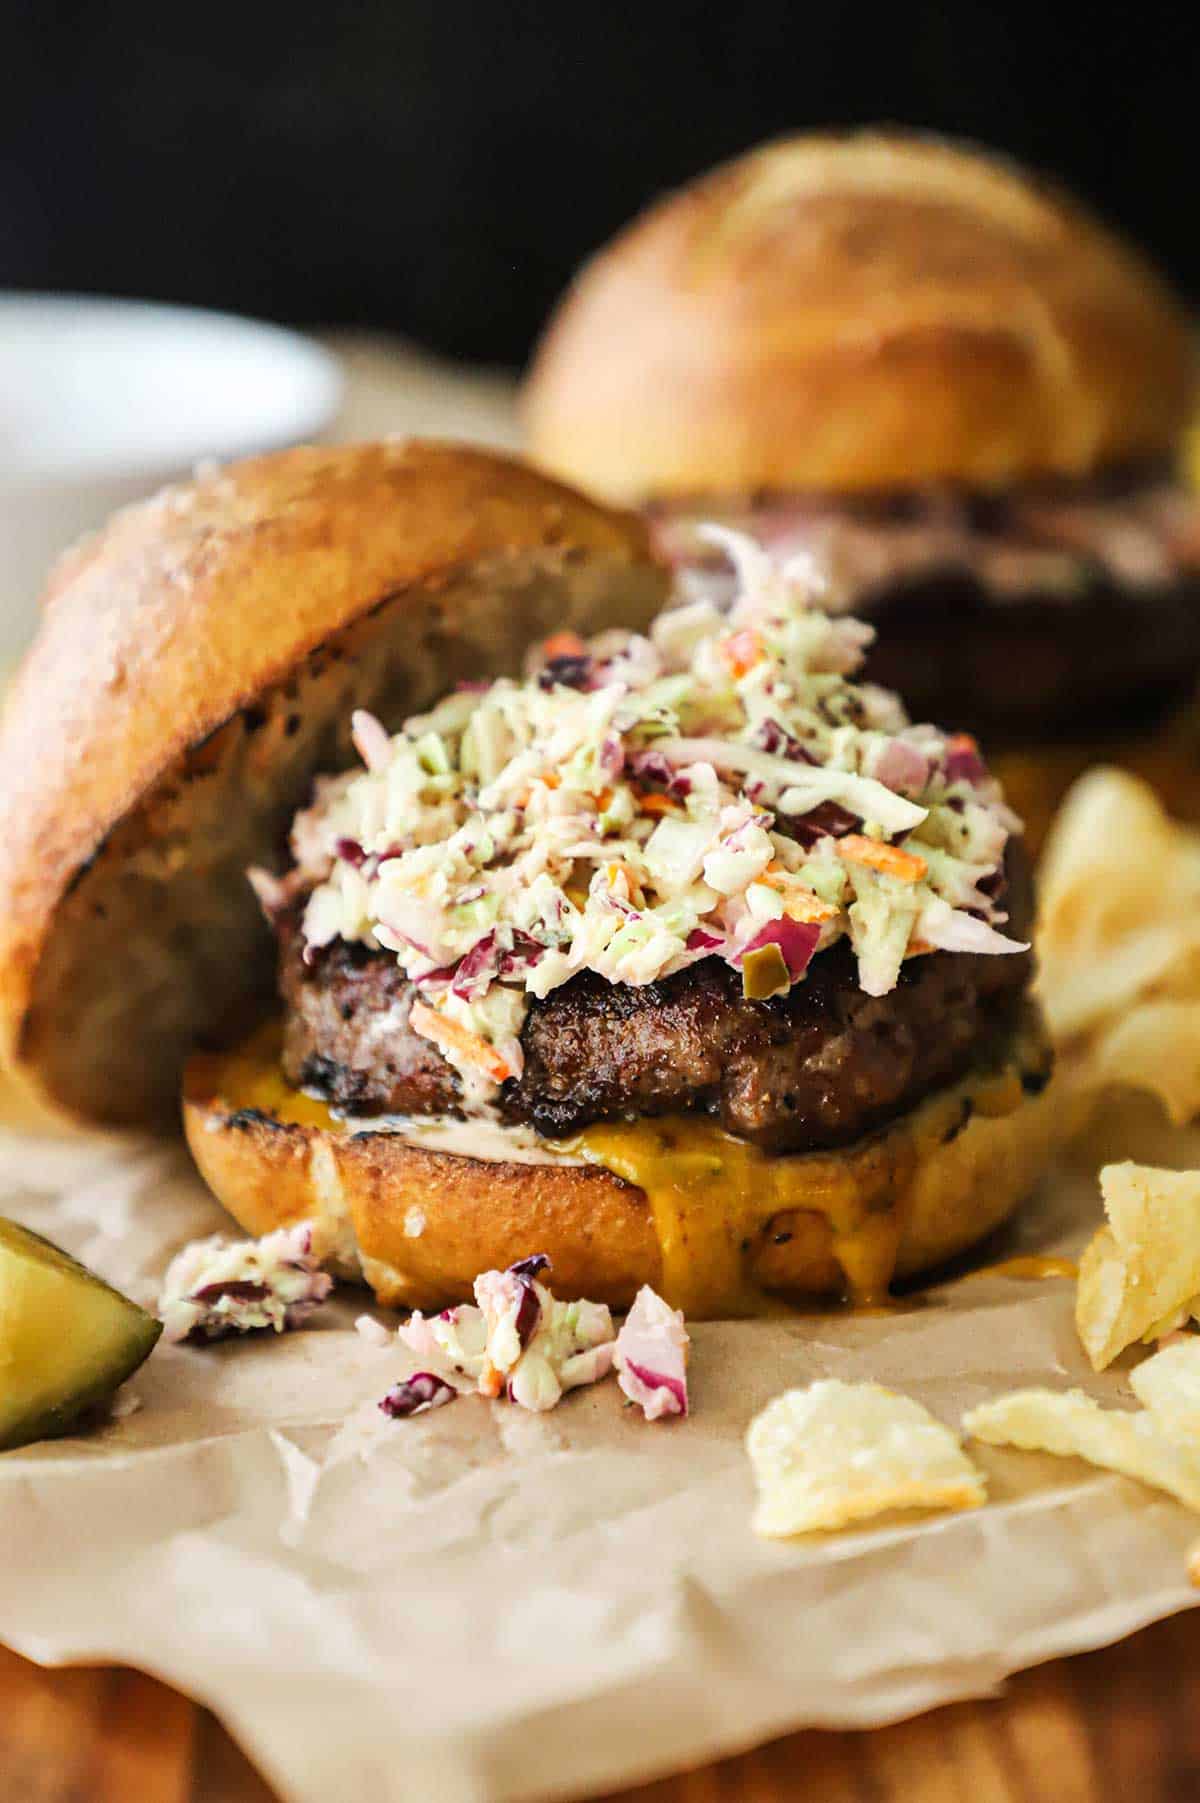
A pork burger topped with creamy coleslaw on a homemade pretzel bun with Carolina mustard sauce oozing from the underneath the patty with kettle chips scattered around the burger.

Homemade Pork Burgers with Pretzel Buns are truly one of the best burgers of all time, offering juicy, flavorful patties paired with a perfectly chewy bun. The homemade pretzel buns, diner-style coleslaw, and Carolina mustard sauce add that extra special touch that takes these burgers completely over the top!

A pork burger topped with creamy coleslaw on a homemade pretzel bun with Carolina mustard sauce oozing from the underneath the patty with kettle chips scattered around the burger.
[feast_advanced_jump_to]

🍔 The Ingredients

Simple, high-quality ingredients for pork burgers and homemade pretzel buns come together perfectly to create one of the best, most flavorful burgers you’ll ever enjoy. Find ingredient notes (including substitutions and variations) below.

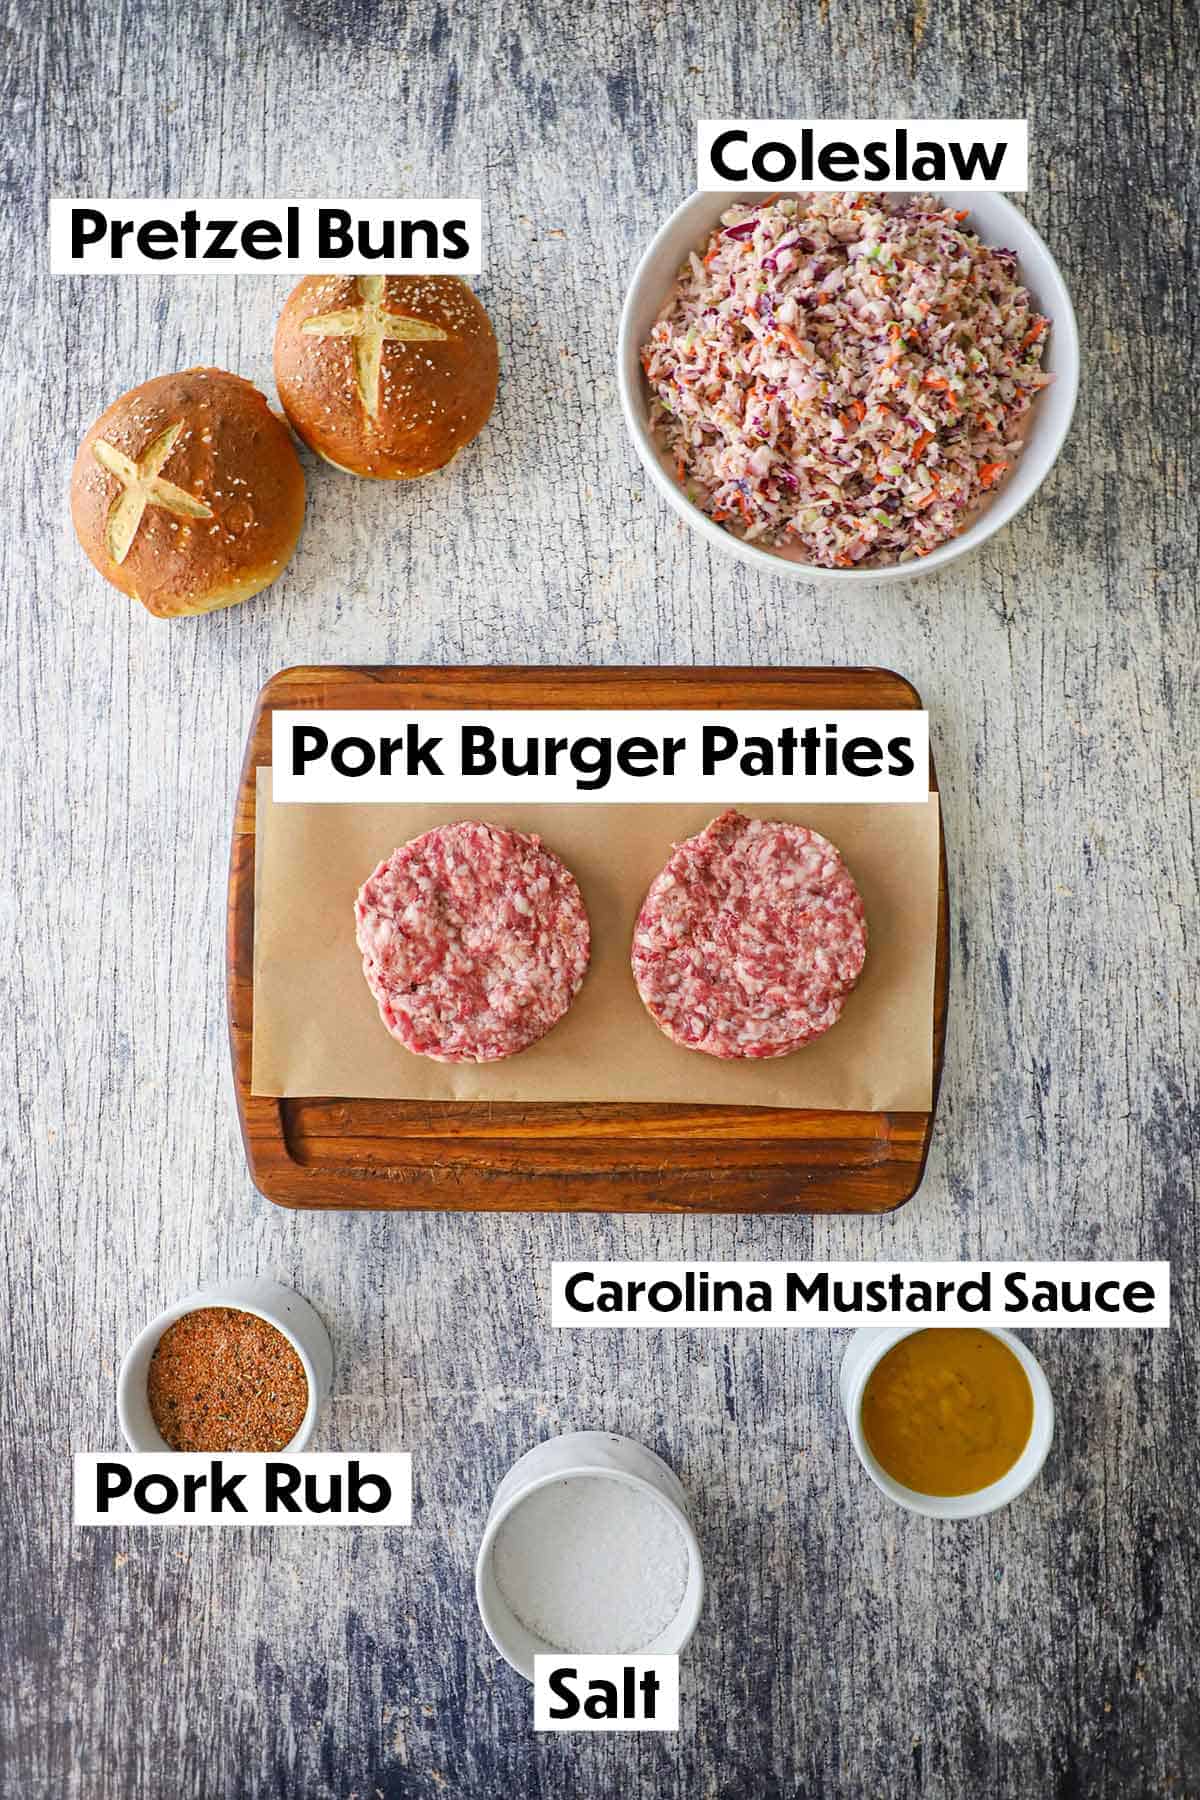
An arrangement of ingredients for pork burgers with pretzel buns on a grey wooden background including pretzel buns, coleslaw, pork burger patties, pork rub, salt, and mustard sauce.

👉 Substitutions and Variations

  • Burger Patties – For the best pork patties in the world, we order the Pork Bacon Burgers from Mangalitsa Estates. To make your own, combine 1 lb of ground pork with 4 chopped pieces of top-notch bacon and form them into patties.
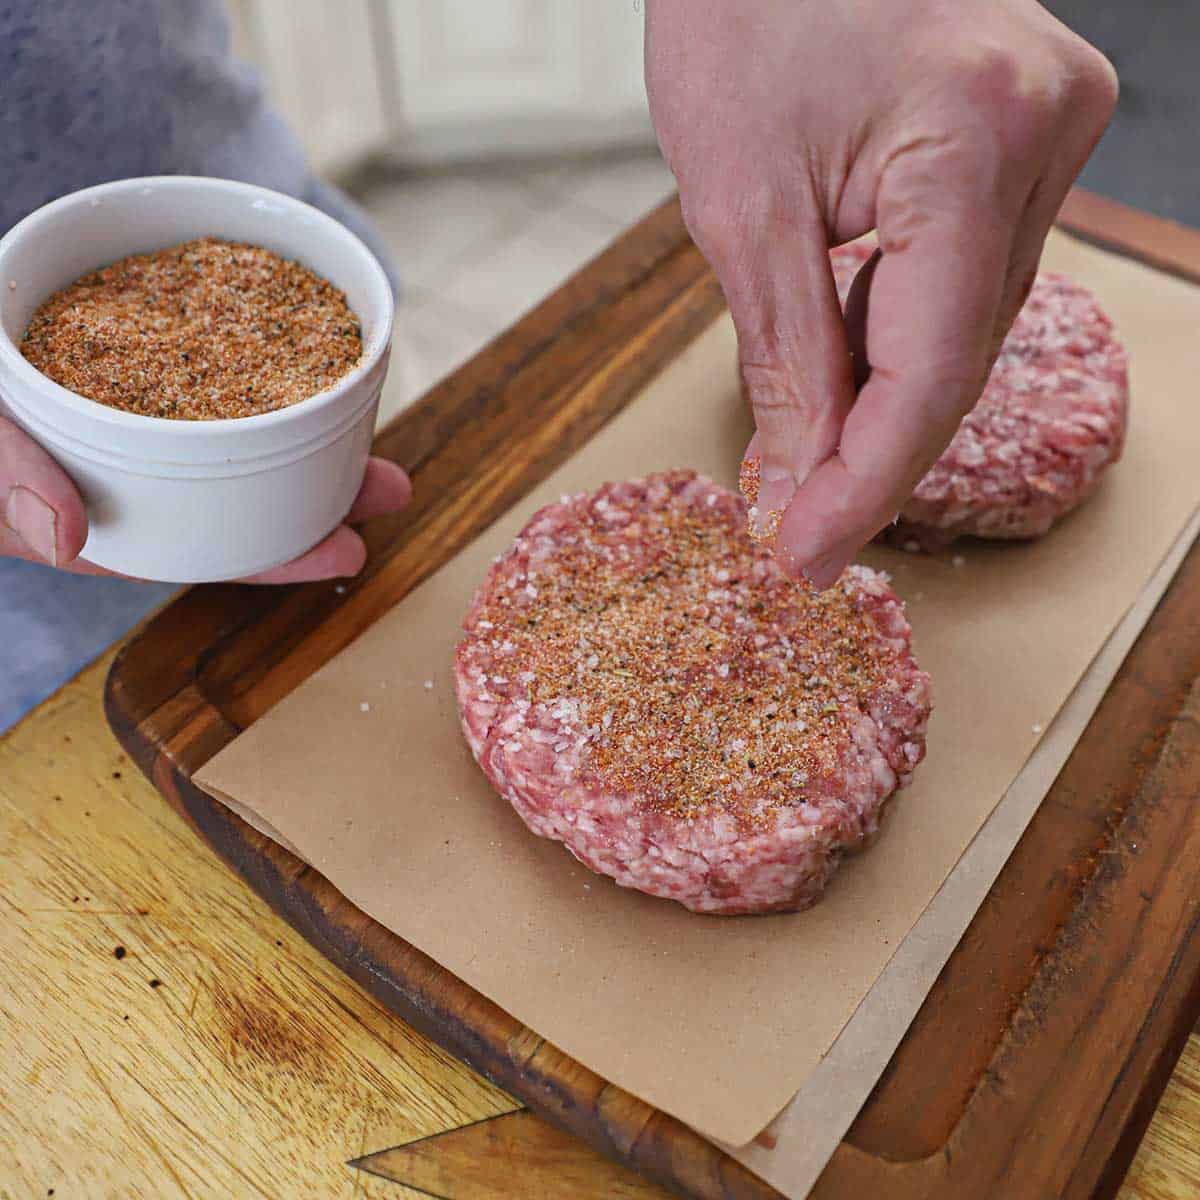
  • Seasoning – Easy Pork Rub elevates the flavor of the burgers, however, a simple sprinkling of salt and pepper will still give you amazing flavor.
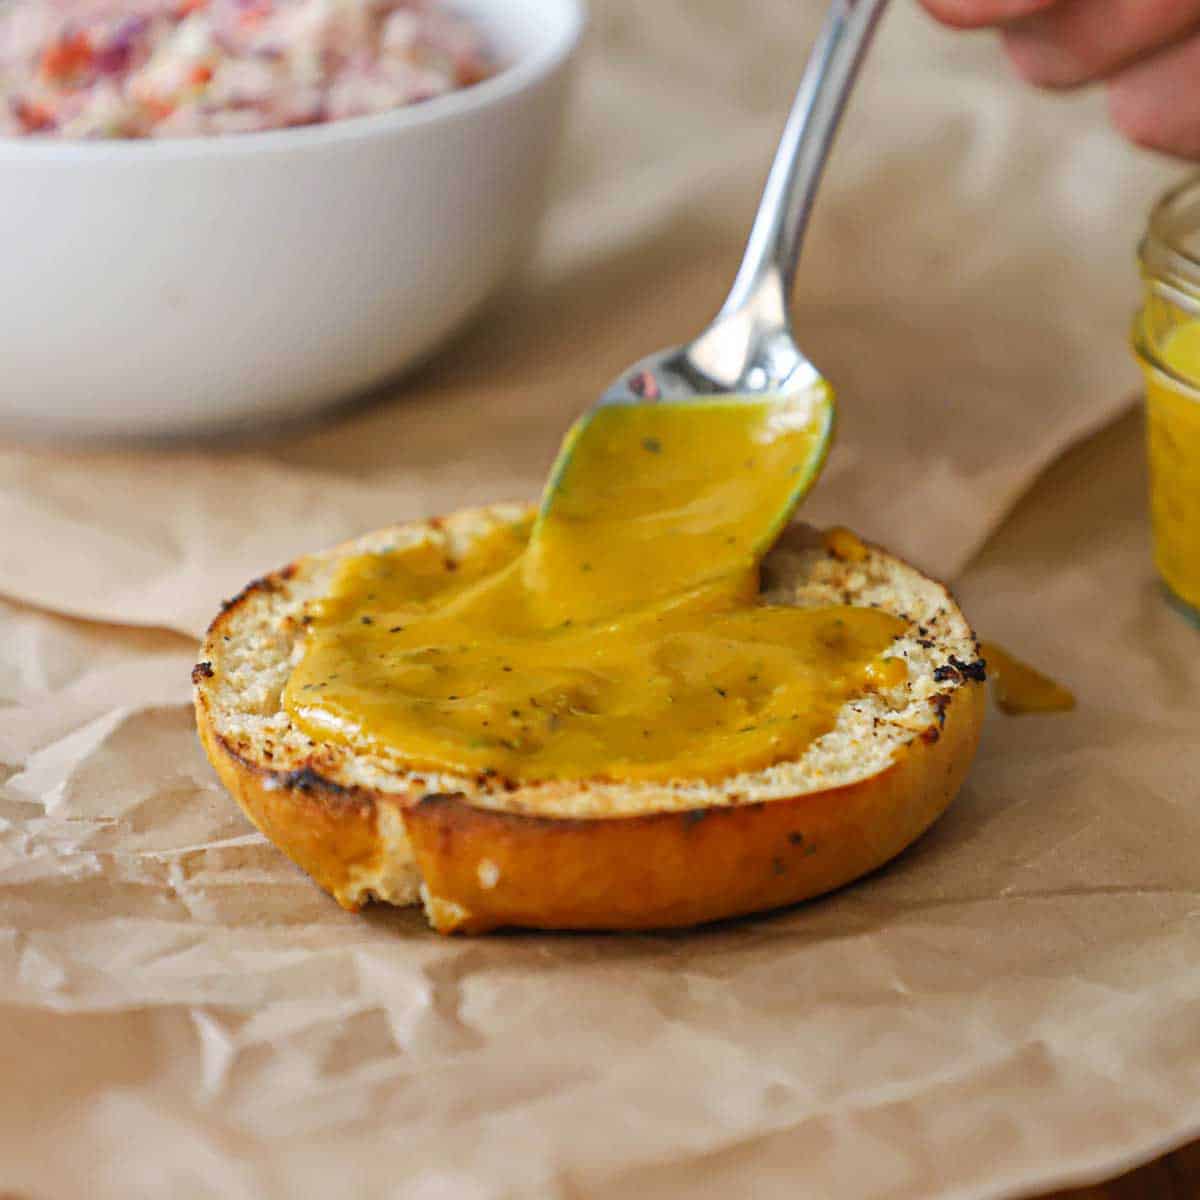
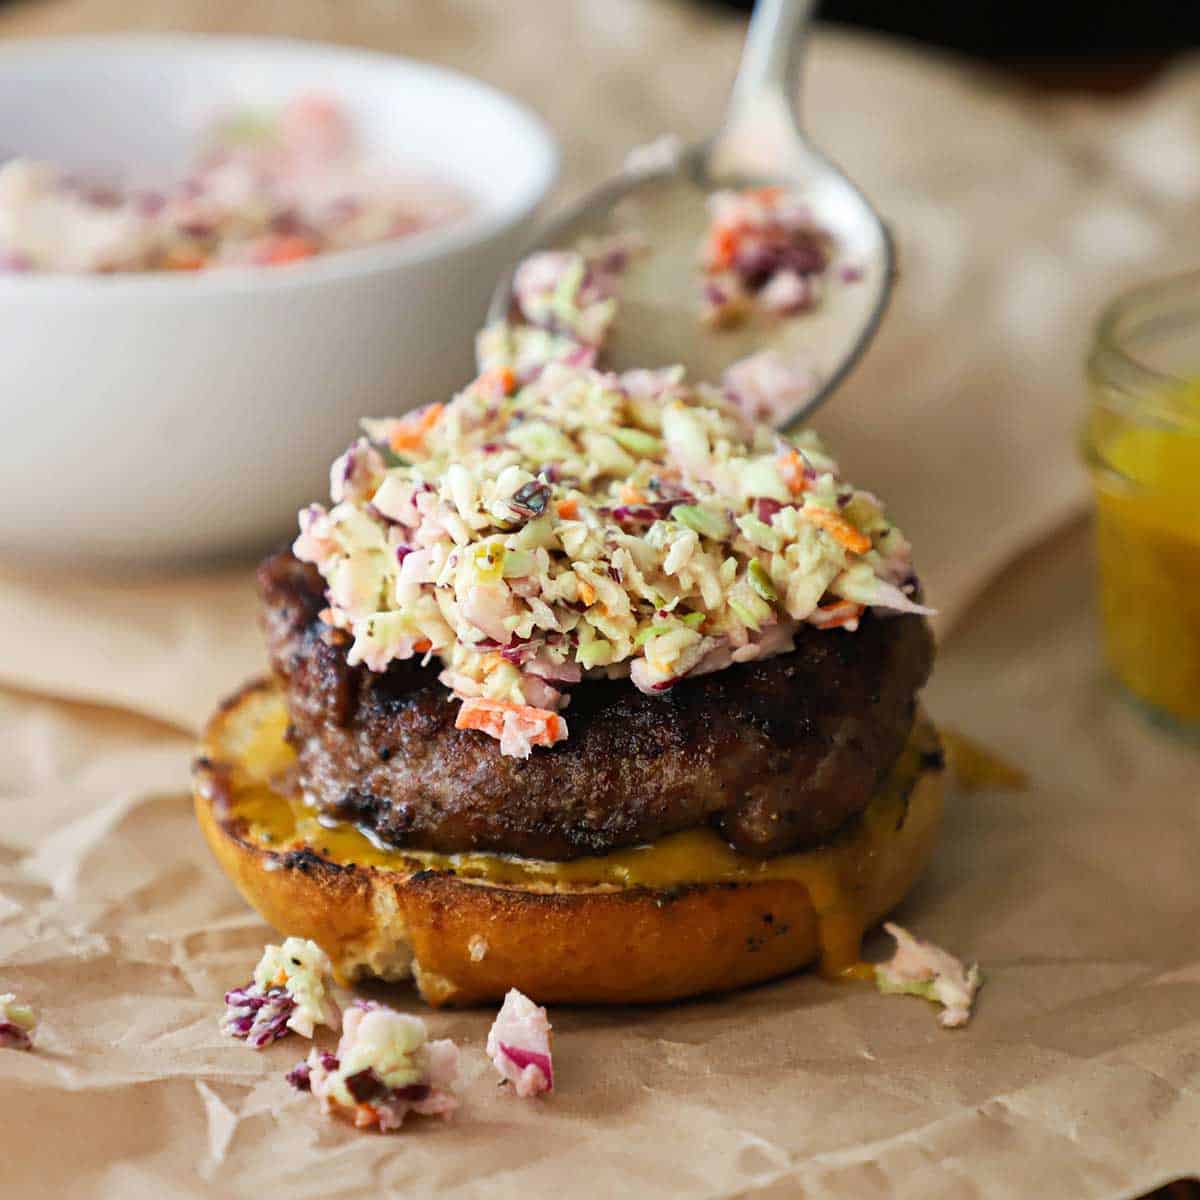
  • Garnishes – Diner-style Coleslaw and Carolina Mustard Sauce put these burgers in a class of their own. But, you could also go with BBQ Sauce, Alabama White Sauce, cheddar cheese slices, lettuce, tomato, and onion!
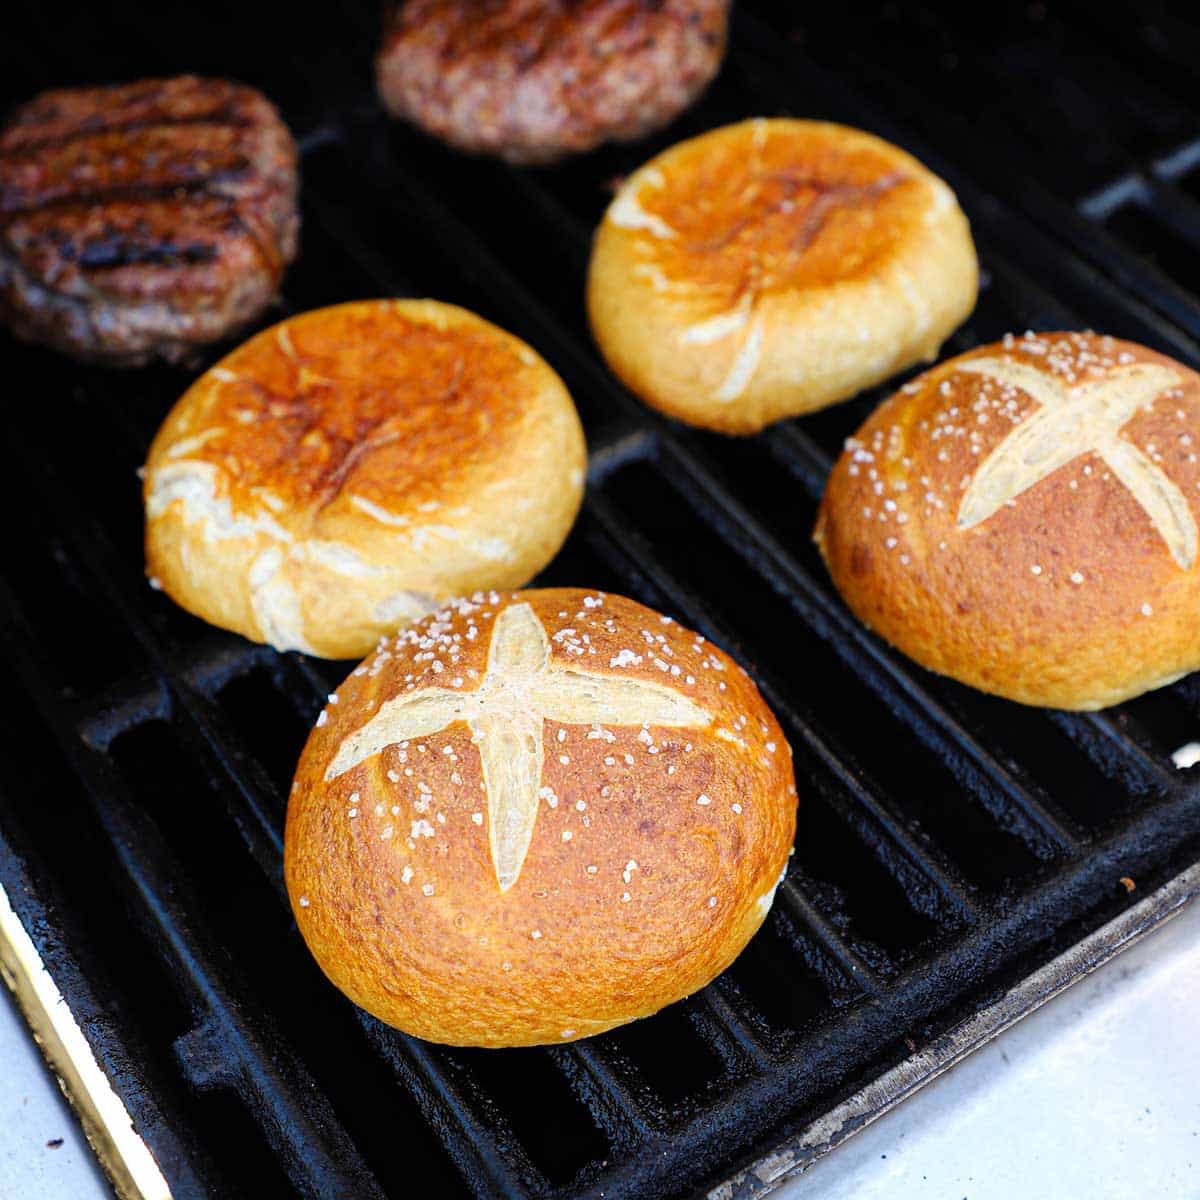
  • Buns – Homemade Pretzel Buns are delicious and will certainly impress your guests. However, regular hamburger buns are wonderful, too. You can’t go wrong with your bun choice!

See the recipe card (with video) below for a full list of ingredients and measurements.

Expert Tip

Mangalitsa Pork is considered to be the Wagyu or Kobe of pork. It is highly marbled and deeply flavorful. Order your pork burgers (and much more) and use Discount Code: LOON15 for 15% off your entire order!

🍽️ How To Serve

  • You’ll want to use a digital thermometer to ensure your patties reach an internal temperature of 135°F before serving them.
  • Toasting the buns on the grill isn’t 100% necessary, but it softens the buns and gives them a wonderful texture. You can also just heat them wrapped in a kitchen towel in the microwave until heated through.
  • We love to serve the burgers on a platter with the buns, coleslaw, mustard sauce, and any other fixings on the side.
  • Serve with Sweet Potato Crosshatch Fries for the perfect BBQ meal!

👨‍🍳 How To Make Pork Burgers with Pretzel Buns

A person using his hand to sprinkle pork rub over the top of an uncooked pork burger patty on wax paper on a small cutting board.
  1. Step 1: Season the patties with salt and pork rub.
Two pork burgers being grilled on a gas grill with grill marks visible on the top of the burgers.
  1. Step 2: Grill the patties to 135°F.
Four pretzel buns that have been cut in half are being toasted, cut-side down, on the grate of a gas grill.
  1. Step 3: Toast the buns on the grill.
A person using a spoon to smear a Carolina mustard sauce over the bottom half of a toasted pretzel bun.
  1. Step 4: Smear Mustard Sauce on toasted bun.
A person using a spoon to add diner-style coleslaw on the top of a grilled pork burger that is resting on the bottom half of a pretzel bun with mustard sauce on it.
  1. Step 5: Place the burger on the bun and top with the slaw.
A pork burger topped with creamy coleslaw on a homemade pretzel bun with Carolina mustard sauce oozing from the underneath the patty with kettle chips scattered around the burger.
  1. Step 6: Add the top bun and serve at once. 

🙋🏽‍♂️ Frequently Asked Questions

How do I prevent pork burgers from drying out on the grill?

To keep pork burgers juicy, avoid overworking the meat when forming patties, and cook them over medium heat, flipping only once until they reach an internal temperature of 135°F to 145°F.

Can I prepare pretzel buns ahead of time for grilling?

Yes, you can make pretzel buns ahead and store them in an airtight container or freeze them; just warm or toast them before serving for the best texture.

Can I make the pork burger patties in advance?

Yes, you can prepare pork burger patties ahead of time and store them in the refrigerator for up to 24 hours or freeze them for longer storage; just thaw completely before grilling.

Two pork burgers with pretzel buns sitting on crumpled brown paper with kettle chips scattered around.

😋 Other Mangalitsa Pork Recipes

  • A serving of pork chop agrodolce with mushrooms on a white dinner plate with a glass of white wine next to it.
    Pork Chop Agrodolce with Mushrooms
  • An overhead view of sliced best-ever pork tenderloin topped with a cranberry reduction on a large white platter with sprigs of parsley and a large serving fork next to the sliced meat.
    Best-Ever Pork Tenderloin
  • A sliced smoked brisket that is resting on cutting board with a large butcher's knife just underneath the meat.
    Smoked Pork Brisket
  • An overhead view of two smoked pork wings that are fully cooked and slathered with homemade barbecue sauce.
    Smoked Pork Wings

Ready to make the best burger in town? Go for it!

And when you do, be sure to take a photo of it, post it on Instagram, and tag @HowToFeedaLoon and hashtag #HowToFeedaLoon!

A pork burger topped with creamy coleslaw on a homemade pretzel bun with Carolina mustard sauce oozing from the underneath the patty with kettle chips scattered around the burger.
Print Recipe
5 from 1 vote

Pork Burgers with Pretzel Buns

Juicy pork burgers paired with soft, chewy pretzel buns create a flavorful and satisfying twist on a classic favorite, perfect for any cookout or meal.
Prep Time20 minutes mins
Cook Time1 hour hr
Pretzel dough prep3 hours hrs
Total Time4 hours hrs 20 minutes mins
Course: Lunch / Dinner
Cuisine: American
Servings: 4
Calories: 567kcal
Author: Kris Longwell

Equipment

  • 1 Grill gas, charcoal, or electric

Ingredients

  • ½ cup pork rub
  • 1 cup Carolina mustard sauce
  • 4 pretzel buns
  • 2 cups diner-style coleslaw
  • Kosher salt
  • 4 pork burger patties

Instructions

Do Ahead

  • Prepare the Pork Rub and Carolina Mustard Sauce. Store in a jar (or container) with a tight-fitting lid and refrigerate for up to 1 week.
    ½ cup pork rub, 1 cup Carolina mustard sauce
  • Make the pretzel rolls. Keep in an air-tight container until ready to use (up to 2 days).
    4 pretzel buns

Make the Pork Burgers

  • Make the Diner-Style Coleslaw. Keep in the fridge while you're preparing the burgers.
    2 cups diner-style coleslaw
  • Preheat your grill to medium-high heat.
  • Liberally season the patties all over with the rub. Sprinkle the salt on both sides of the patties.
    Kosher salt, 4 pork burger patties
  • Grill the patties until an internal temperature of 135°F to 145°F is reached. Meanwhile, split the buns and toast them on the grill until slightly browned.
  • Build the burgers: Start with a liberal smear of the mustard sauce on the bottom bun, topped with the burger, then a mound of the coleslaw, topped with the toasted top bun. Serve at once!

Video

Notes

NOTE: Watch the video near the top of the recipe for visual guidance.
We order our pork bacon burgers from Mangalitsa Estates. Use Discount Code: LOON15 for 15% off your entire order. 
To make pork burgers from scratch: Mix 1 lb of ground pork with 3 strips of chopped bacon and form 4 patties (chopping the bacon in your food processor is perfect). 

Nutrition

Calories: 567kcal | Carbohydrates: 20g | Protein: 15g | Fat: 12g | Saturated Fat: 6g | Polyunsaturated Fat: 1g | Monounsaturated Fat: 2g | Sodium: 27mg | Potassium: 202mg | Fiber: 3g | Sugar: 1g | Vitamin A: 778IU | Vitamin C: 4mg | Calcium: 295mg | Iron: 11mg

Homemade Pretzel Buns

May 23, 2025 by Kris Longwell 2 Comments

An overhead view of six homemade pretzel buns resting on a wire baking rack.

Homemade Pretzel Buns are irresistibly delicious with their golden, chewy crust and soft interior, making every bite a treat. They’re also incredibly fun to make, and complement Pork Bacon Burgers and Pulled Pork Sandwiches perfectly!

An overhead view of six homemade pretzel buns resting on a wire baking rack.
[feast_advanced_jump_to]

🥨 The Ingredients

This recipe combines simple ingredients that create chewy buns bursting with the classic, savory pretzel flavor. You may need to seek out a couple of the items, or just omit them. Either way, you’ll have delicious buns! They are similar to our Easy Homemade Soft Pretzels! Find ingredient notes (including substitutions and variations) below.

An arrangement of ingredients for homemade pretzel buns on a white background including flour, yeast, salt, malt powder, baking soda, water, butter, and molasses.

👉 Substitutions and Variations

  • Flour – All-purpose flour produces wonderful buns. However, you can substitute bread flour. The buns may be a little more chewy, and you may need to add a bit more water since bread flour will absorb more liquid.
  • Yeast – Instant Yeast or Active Dry Yeast will work. Instant will make the dough rise faster, but you’ll get excellent results with either. Be sure to double-check the ‘best used by’ date. Preferably, it won’t be for months in the future.
  • Barley Malt Syrup, Malt Powder, and Molasses – These three ingredients help to give the pretzel rolls that classic chew, taste, and appearance. However, you can make the buns without them, and they will still be good. Dark brown sugar or dark corn syrup can be substituted for the barley malt syrup.

See the recipe card (with video) below for a full list of ingredients and measurements.

👩🏼‍🍳 How To Make the Dough for Pretzel Buns

Yeast that is foamy in a mixer bowl filled with warm water and malt barley syrup.
  1. Step 1: In the bowl of your stand mixer, add the yeast to the barley malt syrup and warm water. Let stand until foamy, about 10 minutes.
A person dumping baking soda from a small bowl and melted butter from another small bowl into the bowl of a stand mixer that is filled with foamy yeast water.
  1. Step 2: Stir in the salt, malt powder, and cooled melted butter.
A person pulling a ball of pretzel dough from the bowl of a stand mixer.
  1. Step 3: Add the flour and then knead with the mixer until smooth, elastic, and not sticking to the bowl.
A person using the palms of his hands to knead pretzel dough on a floured black marble countertop.
  1. Step 4: Knead the dough by hand for 1 minute on a lightly floured surface.
A person turning a ball of pizza dough in a grease ceramic bowl.
  1. Step 5: Place in a greased bowl and cover with plastic wrap
A person removing plastic wrap the top of a ceramic bowl that is filled with risen pretzel dough.
  1. Step 6: Let it proof in a non-drafty, warm area until doubled in size, usually 1 hour to 90 minutes. Remove the plastic wrap.

Expert Tip

It’s important to allow the dough to double in size. This can take anywhere from 1 hour to 2 hours. For even further flavor development, you can place the unrisen dough in the fridge overnight or up to 24 hours.

👨‍🍳 How To Make Homemade Pretzel Buns

Eight square of pretzel dough on a lightly floured black marble countertop.
  1. Step 7: Punch the dough down, turn it out onto a lightly floured surface, and cut into 8 pieces.
A kitchen towel being lifted away from a baking sheet that is lined with a silicone matt and filled with round balls of pretzel dough.
  1. Step 8: Form the pieces into tight balls of dough, place on a baking sheet, gently press down on them, and then cover with a kitchen towel.
Two balls of pretzel bun dough in boiling water and molasses in a large oval Dutch oven on a gas stove.
  1. Step 9: Add the molasses and baking soda to boiling water in a large pot, and then add the buns (working in batches). Cook for 30 seconds, flip, and cook for another 30 seconds.
A person using a sharp knife to cut an 'x' in the top of a partially cooked pretzel bun resting on a silicone matt in a baking sheet.
  1. Step 10: Remove with a slotted spoon and place on a pan with parchment paper or a silicone mat. Sprinkle on salt and slice an ‘X’ into the top of the bun.
A person holding a baking sheet pan that is filled with eight freshly baked homemade pretzel buns.
  1. Step 5: Bake for 20 minutes at 425°F, or until golden.
A metal spatula being used to place a freshly baked homemade pretzel bun onto a baking rack with three other pretzel buns on it.
  1. Step 6: Cool on a baking rack.

🍽️ How To Serve

  • The buns are wonderful with grilled hamburgers, bratwurst sliders, juicy pork burgers, honey mustard chicken sandwiches, and slow-cooker pulled pork sandwiches.
  • You can also form the dough into a long oval and make hero pretzel buns. These are perfect for Grilled Sausage with Peppers and Onions.
  • These buns toast beautifully on the grill or in a hot skillet. Or, serve them without toasting them. They are delicious either way.

🙋🏽‍♂️ Frequently Asked Questions

What makes homemade pretzel buns chewy and different from regular buns?

Pretzel buns get their chewy texture and distinctive flavor from boiling the dough briefly in a baking soda solution before baking, which creates the classic pretzel crust.

Do homemade pretzel buns require malt powder, and what does it do?

Using malt powder adds authentic flavor and enhances the classic pretzel taste and crust, but it’s not 100% necessary—you can still make delicious pretzel buns without it.

How should I store homemade pretzel buns to keep them fresh?

Store pretzel buns in an airtight container or resealable bag at room temperature for up to two days, or freeze them for longer storage and reheat before serving.

Two rows of freshly baked homemade pretzel buns cooling on wire baking rack on a grey linen.

🥯 Other Classic Bread Recipes

  • A person holding a homemade hamburger bun that is topped with sesame seeds with his hand over a baking rack filled with more buns.
    Homemade Hamburger Buns
  • A person spreading cream cheese over the surface of a halved homemade everything bagel on a piece of brown paper next to other bagels and a bowl of cream cheese.
    Homemade Everything Bagels
  • A cast-iron skillet filled with easy skillet dinner rolls with a red checkered napkin wrapped around the handle of the skillet.
    Easy Skillet Dinner Rolls
  • A red and white plaid napkin with several slices of county white bread on it next to the remaining unsliced loaf.
    Homemade Country White Bread

Ready to make the best buns in town? Go for it!

And when you do, be sure to take a photo of them, post it on Instagram, and tag @HowToFeedaLoon and hashtag #HowToFeedaLoon!

An overhead view of six homemade pretzel buns resting on a wire baking rack.
Print Recipe
5 from 1 vote

Homemade Pretzel Buns

Homemade pretzel buns are soft, chewy, and packed with the classic savory flavor of traditional pretzels. Follow the steps and you'll have perfect buns perfect for elevating burgers, sandwiches, or enjoying as a tasty snack.
Prep Time20 minutes mins
Cook Time20 minutes mins
Proofing Time2 hours hrs
Total Time2 hours hrs 40 minutes mins
Course: Lunch / Dinner
Cuisine: American
Servings: 8
Calories: 308kcal
Author: Kris Longwell

Equipment

  • 1 Stand mixer
  • baking sheets
  • Parchment paper or silicone mat
  • Slotted spoon

Ingredients

  • 1½ cups warm water (105 to 115°F)
  • 2 tablespoon barley malt syrup or dark corn syrup
  • 2¼ teaspoon instant yeast 1 package
  • 1 teaspoon salt
  • 1 teaspoon malt powder optional
  • 2 tablespoon unsalted butter melted, and cooled
  • 4⅓ cups all-purpose flour plus more as needed
  • cooking spray
  • Water for boiling
  • 2 tablespoon molasses optional
  • ¼ cup baking soda
  • 2 tablespoon coarse sea salt or Kosher salt

Instructions

  • In the bowl of your stand mixer, add the warm water. Stir in the barley malt and then stir in the yeast. Let stand for 10 minutes, or until foamy.
    1½ cups warm water (105 to 115°F), 2 tablespoon barley malt syrup, 2¼ teaspoon instant yeast
  • Stir in the salt, malt powder, and cooled butter.
    1 teaspoon salt, 1 teaspoon malt powder, 2 tablespoon unsalted butter
  • Add the dough attachment and mix on LOW, and slowly add the flour to the mixture. Mix for a minute or two, and then increase the speed to MEDIUM and knead for 10 minutes, until the dough is smooth, elastic, and no longer sticks to the bottom of the bowl. If the dough is sticking, add flour (1 tablespoon at a time) until the dough turns freely in the bowl.
    4⅓ cups all-purpose flour
  • Remove the dough from the bowl and off of the dough attachment. Place it on a lightly floured surface and knead it by hand for 1 to 2 minutes.
  • Spray a large bowl with cooking spray. Form the dough into a smooth ball and place in the oiled bowl. Turn the dough over to coat it with the oil. Spray the top of the dough and cover with plastic wrap. Place the bowl in a warm, non-drafty area until the dough has doubled in size, usually 1 hour to 90 minutes.
    cooking spray
  • Preheat oven to 425°F.
  • Punch the dough down with your fist to deflate it. Turn the dough onto a lightly floured surface. Cut the dough into 8 equal portions.
  • Cover the pieces of dough with a kitchen towel. Working one dough piece at a time, form the dough into a smooth ball. Pull the sides of the dough to the top (or bottom) of the ball. Place the ball on the floured counter and use the palm of your hands to continue smoothing the ball of dough, which will also cause the dough to have a little tension (see video for guidance). Place the dough ball on a baking sheet lined with parchment paper or a silicone mat. Press the top down slightly with your finger. Repeat with remaining dough pieces. Keep dough balls covered with a kitchen towel as you work.
  • Meanwhile, bring a large pot of water to a boil. Add the molasses and stir until combined. Carefully add the baking soda. The water will foam and fizz strongly for a few seconds. Once the foaming stops, gently add two or three dough balls. Boil for 30 seconds, and then flip them over with a slotted spoon and boil for another 30 seconds. Remove with the slotted spoon, and let excess water drip off.
    Water, 2 tablespoon molasses, ¼ cup baking soda
  • Place the buns on a baking sheet lined with parchment paper or a silicone mat. Sprinkle salt over the tops of the buns and then use a sharp knife or razor blade to cut an 'X' into the top of the bun. Repeat with the remaining buns.
    2 tablespoon coarse sea salt
  • Bake for 18 to 20 minutes, until the buns are a deep golden color, turning the pan around about halfway through.
  • Cool completely on a baking rack. Store in an air-tight container for up to 2 days.

Video

Notes

NOTE: Watch the video near the top of the recipe for visual guidance.
See the blog post for links to the malt powder and barley malt syrup. You can omit these ingredients and still have delicious buns. They contribute to the classic pretzel taste, texture, and color. 
The baking soda and molasses add color, shininess, and a chewy middle with a crisp exterior. 

Nutrition

Calories: 308kcal | Carbohydrates: 59g | Protein: 9g | Fat: 11g | Saturated Fat: 2g | Polyunsaturated Fat: 0.4g | Monounsaturated Fat: 1g | Trans Fat: 0.1g | Cholesterol: 8mg | Sodium: 3077mg | Potassium: 199mg | Fiber: 3g | Sugar: 5g | Vitamin A: 93IU | Vitamin C: 0.1mg | Calcium: 31mg | Iron: 3mg

Homemade Everything Bagels

May 18, 2025 by Kris Longwell 4 Comments

A person spreading cream cheese over the surface of a halved homemade everything bagel on a piece of brown paper next to other bagels and a bowl of cream cheese.

Homemade Everything Bagels are fun to make and delicious, allowing you to enjoy that iconic New York flavor right in your own kitchen. Just as classic as a savory pastrami sandwich or comforting matzo ball soup, these bagels bring a taste of the city to your table.

A person spreading cream cheese over the surface of a halved homemade everything bagel on a piece of brown paper next to other bagels and a bowl of cream cheese.
[feast_advanced_jump_to]

🥯 The Ingredients

Using the right high-quality ingredients is essential for making top-notch homemade bagels that have the perfect chewy texture and authentic flavor. Find ingredient notes (including substitutions and variations) below.

An arrangement of ingredients for homemade everything bagels on a white background including yeast, malt powder, baking soda, sugar, flour, molasses, eggs, salt, pepper, bagel seasoning, and a cup of water.

👉 Substitutions and Variations

  • Flour – Using the right flour is key to producing the perfect bagel. We highly recommend High-Gluten Flour from King Arthur. Bread flour can be substituted, but you won’t get as nice a rise with a nice “chewy” bagel.
  • Malt Powder – This helps boost the yeast and gluten process. It also gives a slightly sweet and nutty flavor. It’s not 100% necessary, but it helps to create the perfect bagel. Barley malt syrup is a good substitute.
  • Molasses and baking soda – These two ingredients give the bagels the golden color on the crust and help them to shine. You can skip the molasses, but we don’t recommend omitting the baking soda.
  • Toppings – You can vary up the toppings in addition to the Everything Seasoning. Go with poppy seeds, sesame seeds, granulated onion, or a combination of them.

See the recipe card (with video) below for a full list of ingredients and measurements.

👩🏼‍🍳 How To Make a Bagel “Starter” Sponge

A person holding a glass bowl filled with high-gluten flour that he is about to dump into a mixer bowl that has foamy yeast water in it.
  1. Step 1: In a mixing bowl, add the water, yeast, and flour.
A stand-mixer mixing flour into a dough sponge with the whisk attachment.
  1. Step 2: Whisk until smooth, about 2 minutes. Scrape down the sides once and whisk again.
A person using a whisk to mix together high-gluten flour, instant yeast, and salt in a glass bowl.
  1. Step 3: In a bowl, whisk together the flour mixture of flour, yeast, malt powder, sugar, salt, and black pepper.
A person adding a flour and yeast mixture into the bowl of a mixer that contains a bagel dough sponge.
  1. Step 4: Sprinkle the flour mixture over the thick wet mixture in the bowl of the mixture. Don’t stir it!
A person holding the bowl of a stand mixer filled with a bagel dough sponge with clear plastic wrap over the top.
  1. Step 5: Cover the bowl with plastic wrap.
A person holding the bowl of a stand mixer that is filled with a flour, yeast, bagel sponge mixture with the sponge visible through the flour resting on top.
  1. Step 6: Allow to chill in the fridge for 1 to 4 hours, or, even better, overnight. The sponge will bubble up through the flour.

Expert Tip

It’s important not to stir the flour mixture into the sponge. Let it rest at room temperature for 1 to 4 hours. But, for the best flavor, cover and let the sponge chill in the fridge for up to 24 hours.

🧑🏾‍🍳 How To Make Bagel Dough

A person adding a small amount of flour from a white bowl into a stand mixer that is kneading bagel dough.
  1. Step 1: Mix the sponge with the dough attachment on low and add 1 tablespoon of the flour.
A person kneading bagel dough on a lightly flour black marble counter.
  1. Step 2: Mix on medium for 10 minutes, then knead the dough on a lightly floured surface for about 1 minute.
A person placing a ball of bagel dough into an oiled ceramic bowl sitting on a wooden cutting board.
  1. Step 3: Place the dough in an oiled bowl.
A person spraying cooking spray over an un-risen ball of bagel dough in an oiled ceramic bowl.
  1. Step 4: Spray the top of the dough with cooking spray.
A person holding the sides of a ceramic bowl that has bagel dough in it and is covered with clear plastic wrap.
  1. Step 5: Cover the bowl and let it proof in a non-drafty area.
A person removing clear plastic wrap from the top of a ceramic bowl that is filled with bagel dough that has fully risen to the top of the bowl.
  1. Step 6: Remove the plastic after the dough has doubled in size, usually 1 to 2 hours.

👨‍🍳 How to Make Homemade Everything Bagels

A person using a bench scraper to divide bagel dough into 5 separate pieces on a black marble counter.
  1. Step 1: Remove the dough, punch it down, and then divide it into 5 equal-sized pieces.
A person using his fingers to form bagel dough into a taut ball.
  1. Step 2: Pull the sides up on each ball of dough and pinch the dough to create a smooth ball.
A person using his thumb and fingers to stretch bagel dough into a circular bagel formation.
  1. Step 3: Push your index finger through the middle of the dough and then use your fingers to stretch the dough, forming an opening in the middle.
Two bagels boiling in water with molasses in an oval Dutch oven on a stove.
  1. Step 4: Working in batches, carefully lower the bagels into boiling water with the molasses and baking soda. Flip after 1 minute and then remove from the water after another minute.
A person using a pastry brush to add an egg white wash over the top of an un-baked bagel sitting next to a bagel that has everything bagel seasoning sprinkled on top.
  1. Step 5: Place the partially cooked bagels on parchment paper on a baking sheet. Brush with egg whites and then toppings.
A person placing a freshly baked homemade everything bagel onto a baking rack topped with three other freshly baked everything bagels.
  1. Step 6: Bake at 425°F for 20 minutes, until golden. Let cool on a baking rack.

🙋🏽‍♂️ Frequently Asked Questions

What type of flour is best for homemade everything bagels?

Flour with a high protein content is best for homemade bagels because it helps create the chewy texture and sturdy structure that bagels are known for. We use High-Gluten Flour. Bread flour is the next best.

Why do bagels need to be boiled before baking?

Boiling bagels briefly before baking sets the crust, gives them their characteristic chewiness, and helps develop a shiny, golden exterior.

How should I store homemade bagels to keep them fresh?

Store homemade bagels in an airtight container or resealable plastic bag at room temperature for up to 2 days, or freeze them for longer storage—just toast or warm them before serving to restore their freshness.

Five homemade everything bagels on a wrinkled brown piece of wax paper with a bowl of cream cheese in the middle.

🍞 More Bread-Making Recipes

  • A red and white plaid napkin with several slices of county white bread on it next to the remaining unsliced loaf.
    Homemade Country White Bread
  • A straight-on view of a black platter filled with a stack of homemade soft pretzels next to two glasses of beer and a bowl of melted cheese.
    Easy Homemade Soft Pretzels
  • A person holding a homemade hamburger bun that is topped with sesame seeds with his hand over a baking rack filled with more buns.
    Homemade Hamburger Buns
  • A 9 by 13-inch metal baking pan filled with homemade cinnamon rolls with one in the lower right corner missing.
    Homemade Cinnamon Rolls

Ready to make the best bagel this side of Brooklyn, NY? Go for it!

And when you do, be sure to take a photo of them, post it on Instagram, and tag @HowToFeedaLoon and hashtag #HowToFeedaLoon

A person spreading cream cheese over the surface of a halved homemade everything bagel on a piece of brown paper next to other bagels and a bowl of cream cheese.
Print Recipe
5 from 1 vote

Homemade Everything Bagels

If you love bagels as much as we do, you will have fun making them from scratch! These will honestly rival any bakery, anywhere! Even New York City! Although these can be prepared in one day, we think giving the sponge and then the bagel dough plenty of time to develop helps to create authentic, chewy, delicious bagels.
Prep Time20 minutes mins
Cook Time35 minutes mins
Chilling and Cooling Time (Minimum)4 hours hrs
Total Time4 hours hrs 55 minutes mins
Course: Breakfast, Lunch, or Dinner
Cuisine: American
Servings: 4
Calories: 353kcal
Author: Kris Longwell

Equipment

  • 1 Stand mixer with a dough attachment
  • Baking sheet lined with parchment or silicone mat

Ingredients

For the Dough Starter (Sponge)

  • ½ teaspoon instant yeast
  • 1 cup water PLUS 2 tbsp, room temperature
  • 1½ cups high-gluten flour or bread flour

For the Flour Mixture

  • 1 cup high-gluten flour Plus 1 to 3 tablespoon
  • ½ teaspoon instant yeast
  • ½ tablespoon diastatic malt powder
  • ½ tablespoon sugar
  • ½ tablespoon salt
  • ½ teaspoon black pepper

Everything Bagel Seasoning

  • 4 teaspoon white sesame seeds
  • 2 teaspoon black sesame seeds
  • 2 teaspoon poppy seeds
  • 2 teaspoon dried minced garlic
  • 2 teaspoon dried minced onion
  • 1 teaspoon coarse sea salt

For Preparing the Bagels

  • Cooking spray
  • 2 tablespoon molasses
  • 1 teaspoon baking soda
  • 2 egg whites
  • 1 teaspoon water
  • 1 cup Everything bagel seasoning

Instructions

Make the Dough Starter (Sponge)

  • In the bowl of your mixer, add the yeast, water (1 cup + 2 tbsp), and flour. Use the whisk attachment to slowly mix until very smooth, scraping down the sides after about 1 minute (2 minutes total).
    ½ teaspoon instant yeast, 1 cup water, 1½ cups high-gluten flour
  • In a medium bowl, whisk together the flour (1 cup), yeast, malt powder, sugar, salt, and pepper. Sprinkle the flour over the sponge, but do not stir.
    1 cup high-gluten flour, ½ teaspoon instant yeast, ½ tablespoon diastatic malt powder, ½ tablespoon sugar, ½ tablespoon salt, ½ teaspoon black pepper
  • Cover with plastic wrap and let sit at room temperature for 1 to 4 hours. For best flavor development, refrigerate for up to 24 hours.

Put Together the Everything Bagel Seasoning

  • In a small bowl, mix together all of the ingredients for the Everything Bagel Seasoning. Set aside.
    4 teaspoon white sesame seeds, 2 teaspoon black sesame seeds, 2 teaspoon poppy seeds, 2 teaspoon dried minced garlic, 2 teaspoon dried minced onion, 1 teaspoon coarse sea salt

Make the Dough

  • Remove the plastic from the mixer bowl. You may notice that some of the sponge has bubbled up through the flour. This is normal.
  • Add 1 tablespoon of the flour and mix with the dough attachment on LOW for about 1 to 2 minutes. Turn the speed up (to medium) and knead the dough for 10 minutes. If the dough is sticking to the bottom of the bowl, add 1 to 2 tablespoons more flour. The dough should be smooth and elastic, but not sticky.
  • Transfer the dough to a very lightly floured surface. Punch the dough down and knead it for about 1 minute. If it is sticking to the surface, add a little more flour.
  • Shape the dough into a smooth ball. Spray a bowl with cooking spray and place the dough in the bowl, turning to coat with the oil. Spray a little more on top of the dough. Cover with plastic wrap and let proof in a non-drafty area until the dough has doubled in size (1 to 2 hours).
    Cooking spray
  • Turn the dough out onto a clean surface (no flour, unless it is sticky) and push it down. Shape into a rectangle and then fold over the ends (like an envelope), and then form it into a ball. Add more cooking spray to the bowl and then place the dough in it. Spray the top of the dough with more spray and cover with plastic wrap. Refrigerate for 4 hours, or even better, overnight.

Make the Bagels

  • Let the dough sit out at room temperature for 20 to 30 minutes.
  • Preheat oven to 425°F.
  • Bring a large pot of water to a boil.
  • Meanwhile, transfer the dough to the counter and cut the dough into 5 equal pieces. Cover and allow to rest for 10 minutes. (As you form the bagels, keep the remaining dough and the shaped bagels covered with a kitchen towel.)
  • For each piece of dough, draw up the sides to form a round ball. Pinch the dough together at the top of the ball. Press your index finger through the center of the dough to form a hole. Use your fingers and thumb to stretch the dough into a bagel shape, leaving about a 1 to 2-inch hole in the center. Keep shaped bagels covered with a kitchen towel. Let them rest for 15 minutes.
  • Carefully add the molasses and baking soda to the boiling water. The baking soda will cause intense foaming for a short time.
    2 tablespoon molasses, 1 teaspoon baking soda
  • Working in batches (2 or 3 bagels at a time), lower the bagels into the boiling water. After 1 minute, use a metal spatula or spoon to flip the bagels over. Boil for 1 more minute. Use the spatula to remove the bagels from the water, allowing excess water to drip off. Place on a baking sheet lined with parchment paper or a silicone mat.
  • In a small bowl, mix together the egg whites and water (1 tsp). Brush the tops of the bagels with the egg wash and then liberally sprinkle the Everything Seasoning over the tops.
    2 egg whites, 1 teaspoon water, 1 cup Everything bagel seasoning
  • Bake the bagels until golden, about 20 to 25 minutes, turning the baking sheet halfway through.
  • Cool the bagels on a rack. Store in an air-tight container or sealable baggie for 3 to 4 days.

Video

Notes

NOTE: Watch the video near the top of the recipe for visual guidance.
After the dough has proofed for the first time (after doubling in size), the dough can be wrapped in plastic wrap and kept in the fridge for up to 2 days. Let the dough sit out for 30 minutes at room temperature before transferring it to the counter to form the bagels.
Other toppings include: Poppy Seed / Sesame Seed / Dried Minced Onion
These bagels are delicious plain (with no toppings), too. 
If desired, slice the bagels open and toast them. Serve with butter, cream cheese, lox, capers, and red onion, if desired. 

Nutrition

Calories: 353kcal | Carbohydrates: 64g | Protein: 14g | Fat: 2g | Saturated Fat: 0.3g | Polyunsaturated Fat: 1g | Monounsaturated Fat: 1g | Sodium: 658mg | Potassium: 228mg | Fiber: 4g | Sugar: 9g | Vitamin A: 2IU | Vitamin C: 0.03mg | Calcium: 77mg | Iron: 2mg

NOTE: This recipe is adapted from Rose Levy Beranbaum’s Book, The Bread Bible.

One-Pot Chili Mac

May 11, 2025 by Kris Longwell 4 Comments

A skillet filled with one-pot chili mac with a layer of melted cheddar cheese over the the surface with colorful checkered napkins near the pan and two glasses of iced tea nearby.

One-Pot Chili Mac is deliciously hearty and nostalgic, bringing comforting flavors that remind you of home-cooked meals. It’s incredibly easy to prepare, making it the perfect dish to serve to the family alongside warm, homemade cornbread.

A skillet filled with one-pot chili mac with a layer of melted cheddar cheese over the the surface with colorful checkered napkins near the pan and two glasses of iced tea nearby.
[feast_advanced_jump_to]

🧀 The Ingredients

The simple ingredients in this one-pot wonder combine effortlessly to create a warm, comforting dish that everyone will crave. Find ingredient notes (including substitutions and variations) below.

An arrangement of ingredients for chili mac on a wooden background including ground beef, seasonings, tomatoes, macaroni, peppers, and onions.

🥫Substitutions and Variations

  • Meat – Ground beef is traditional, but you could substitute ground turkey, ground pork, or ground chicken with excellent results. You could even make it meatless using our Veggie and Black Bean Chili.
  • Tomatoes – We love the addition of fire-roasted tomatoes, but if you don’t like chunky tomatoes, you can go with all tomato sauce, or purée the tomatoes before adding them to the chili.
  • Seasonings – We get our chili powder from Penderey’s (Fort Worth). They ship their products throughout North America. For an additional depth of flavor, add 1 teaspoon smoked paprika, 1 teaspoon dried oregano, and 1 teaspoon garlic powder. Be sure to do a taste test before serving, you may need to add a little more salt.
  • Peppers – Feel free to use your favorite type of peppers. Bell peppers are not spicy, and they add color and depth of flavor. You can substitute pickled (nacho) jalapeños for the fresh, or just omit them. When you remove the seeds, they are mild.

See the recipe card (with video) below for a full list of ingredients and measurements.

Expert Tip

You will notice the chili is thin (not thick) before adding the macaroni. This is normal. As the macaroni absorbs the liquid as it cooks, the mixture will thicken. It will be somewhat “saucy” but not runny.

👩🏼‍🍳 How To Make One-Pot Chili Mac

A person dumping minced garlic from a small white bowl into a skillet filled with sautéed diced onions, orange bell pepper, and jalapeño.
  1. Step 1: Sauté the onions and pepper in the oil until soft, and then stir in the garlic.
A person dumping chili powder and ground cumin from a small bowl into a skillet filled with cooked ground beef and sautéed chopped onions and peppers.
  1. Step 2: Add the ground beef, cook until no longer pink, remove the excess grease, and stir in the seasonings.
A person pouring beef broth from a large glass measuring cup into a skillet filled with cooked ground beef, vegetables, chopped tomatoes, and tomato sauce.
  1. Step 3: Stir in the tomatoes, tomato sauce, and beef broth.
A person dumping uncooked macaroni from a large white bowl into a skillet filled with a simmering tomato and beef sauce.
  1. Step 4: Bring to a simmer and then stir in the macaroni.
A person dumping grated cheddar cheese from a glass bowl into a large skillet filled with beef chili and cooked macaroni.
  1. Step 5: Once the pasta is soft, stir in half of the cheese (about 1½ cups).
A person sprinkling shredded cheddar cheese over the surface of chili mac in a large skillet.
  1. Step 6: Top with the remaining cheese, then cover and wait until the cheese has melted, and serve at once!

Expert Tip

We recommend purchasing a block of cheese (8 oz) and shredding it with a box grater on the shredding attachment on your food processor. Bagged shredded cheese is fine, but anti-caking additives are included, resulting in a less creamy, cheesy sauce.

🍽️ How To Serve, Store, and Reheat

  • This dish is filling and satisfying on its own. We love to serve this with homemade cornbread for a complete meal. Toppings that you would normally serve with chili are all great garnishes, such as chopped onion, chopped fresh cilantro, and sour cream.
  • Store leftovers in an air-tight container with a lid in the fridge for up to 5 days.
  • Chili Mac reheats wonderfully on the stove over medium heat. Add another splash or two of broth or water to loosen up the sauce.

🙋🏽‍♂️ Frequently Asked Questions

Can I make One-Pot Chili Mac ahead of time and reheat it later?

Yes, chili mac can be made ahead and stored in the refrigerator for up to 5 days; simply reheat it on the stove or in the microwave, adding a splash of broth (or water) if it seems too thick.

What type of pasta works best for One-Pot Chili Mac?

Elbow macaroni is the classic choice for chili mac because its shape holds the sauce well, but small pasta shapes like shells or rotini also work great.

Can I make Chili Mac vegetarian or vegan?

Absolutely! You can substitute the ground meat with plant-based protein like lentils, beans, or meat alternatives, and use vegetable broth along with dairy-free cheese or omit cheese to make a vegan version.

A bowl of One-Pot Chili Mac sitting net to an orange checkered napkin with a glass of iced tea and a skillet of the chili mac in the background.

🥘 Other Delicious Weeknight Recipes

  • An overhead view of a Sloppy Joe Casserole in an oval baking dish with a portion of the casserole missing.
    Sloppy Joe Casserole
  • An overhead view of a large skillet filled with Weeknight Beef Stroganoff that is topped with finely chopped Italian parsley.
    Weeknight Beef Stroganoff
  • A straight-on view of two white bowls filled with Tex-Mex pasta with colorful bell peppers and cilantro sitting nearby.
    Tex-Mex Pasta with Ground Beef
  • An overhead view of a large silver skillet filled with homemade cheesy hamburger helper garnished with finely chopped Italian parsley.
    Homemade Cheesy Hamburger Helper

Ready to make a dish that the whole family will be requesting time and time again? Go for it!

And when you do, be sure to take a photo of it, post it on Instagram, and tag @HowToFeedaLoon and hashtag #HowToFeedaLoon!

A white bowl filled with a serving of one-pot chili mac with a gold fork inserted into the side of the food.
Print Recipe
5 from 2 votes

One-Pot Chili Mac

One-Pot Chili Mac is the perfect comfort dish that comes together in about 30 minutes. Savory chili mixed with tender macaroni and melty cheese. Kids and adults will be requesting this time and time again!
Prep Time15 minutes mins
Cook Time20 minutes mins
Total Time35 minutes mins
Course: Entree
Cuisine: American
Servings: 6
Calories: 675kcal
Author: Kris Longwell

Equipment

  • 1 large skillet or pot at least 3 inches deep

Ingredients

  • 2 tablespoon olive oil
  • 1 cup onion chopped
  • 1 bell pepper red, yellow, or green, seeded and chopped
  • 1 jalapeño stemmed, seeded, and finely chopped
  • 3 cloves garlic minced
  • 1 lb ground beef
  • 2 tablespoon chili powder
  • 2 teaspoon ground cumin
  • 1½ teaspoon Kosher salt
  • 1 teaspoon ground black pepper
  • 1 14.5 oz can fire-roasted tomatoes
  • 1 8 oz can tomato sauce
  • 3 cups beef broth or stock
  • 2 cups elbow macaroni
  • 3 cups cheddar cheese grated, divided
  • ¼ cup cilantro fresh, chopped, for garnish (optional)

Instructions

  • Heat the oil in a large skillet or pot over medium heat. Add the onions, bell peppers, and jalapeño, and sauté until soft, stirring often, about 4 minutes. Stir in the garlic and cook for another 30 seconds to 1 minute.
    2 tablespoon olive oil, 1 cup onion, 1 bell pepper, 1 jalapeño, 3 cloves garlic
  • Add the ground beef, breaking up with a wooden spoon, and cook until no longer pink, stirring occasionally. Spoon out most of the grease and discard it safely.
    1 lb ground beef
  • Stir in the chili powder, cumin, salt, and pepper. Cook for a couple of minutes, stirring often. Add the tomatoes, tomato sauce, and broth and bring to a strong simmer.
    2 tablespoon chili powder, 2 teaspoon ground cumin, 1½ teaspoon Kosher salt, 1 teaspoon ground black pepper, 1 14.5 oz can fire-roasted tomatoes, 1 8 oz can tomato sauce, 3 cups beef broth
  • Stir in the macaroni. Turn the heat to low and cover. Cook until al dente, usually about 10 minutes. Remove the lid and stir. The sauce should not be runny, but still "saucy." Turn the heat off.
    2 cups elbow macaroni
  • Stir in half of the cheese (1½ cups) until melted. Sprinkle with the remaining cheese. Place the lid back on the pan and let rest for about 5 minutes, or until the cheese on top has melted.
    3 cups cheddar cheese
  • Serve at once with chopped cilantro, if desired.
    ¼ cup cilantro

Video

Notes

NOTE: Watch the video near the top of the recipe for visual guidance.
Ground turkey is a great substitute for ground beef. Ground chicken can be used, too. 
Diced tomatoes can be substituted for fire-roasted. If you don’t like chunky tomatoes, you can purée them, or substitute the diced tomatoes with tomato sauce (you would need 1 14-ounce can and 1 8-oz can). 
Leftovers will keep in an air-tight container with a lid for up to 5 days. Reheat on the stove over medium heat with a couple of splashes of broth or water. 

Nutrition

Calories: 675kcal | Carbohydrates: 42g | Protein: 35g | Fat: 28g | Saturated Fat: 7g | Polyunsaturated Fat: 2g | Monounsaturated Fat: 6g | Trans Fat: 1g | Cholesterol: 110mg | Sodium: 842mg | Potassium: 582mg | Fiber: 4g | Sugar: 4g | Vitamin A: 2060IU | Vitamin C: 31mg | Calcium: 458mg | Iron: 4mg

Grilled Tacos al Pastor

May 4, 2025 by Kris Longwell 4 Comments

An arrangement of ingredients for grilled tacos al pastor on a white background including dried chiles, spices, pineapple, pork shoulder, sugar, vinegar, and corn tortillas.

Grilled Tacos al Pastor are a culinary delight, bursting with flavor from the perfectly marinated pork grilled to perfection. The addition of homemade chili paste and fresh corn tortillas elevates these tacos to a whole new level, creating an unforgettable taste experience that showcases the essence of authentic Mexican cuisine.

An arrangement of ingredients for grilled tacos al pastor on a white background including dried chiles, spices, pineapple, pork shoulder, sugar, vinegar, and corn tortillas.
[feast_advanced_jump_to]

🍍 The Ingredients

While the ingredients for Tacos al Pastor may necessitate a quick trip to your local Hispanic food market or an online order, their harmonious combination results in one of the greatest tacos you’ll ever taste. Find ingredient notes (including substitutions and variations) below.

An arrangement of ingredients for grilled tacos al pastor on a white background including dried chiles, spices, pineapple, pork shoulder, sugar, vinegar, and corn tortillas.

🌶️ Substitutions and Variations

  • Protein – We recommend a boneless pork shoulder (Boston butt or pork butt) because the marbling (streaks of fat) make the meat tender and juicy. You can substitute a pork loin (not tenderloin) and still get delicious results. A pork tenderloin is very lean and will dry out during the cooking process. Both beef chuck and chicken thighs are wonderful options. Cooking times will vary.
  • Pineapple – We highly recommend using fresh pineapple juice (not from concentrate or sweetened). This can be found in the juice section of most well-stocked supermarkets. If you can’t get fresh pineapple for grilling, use canned, but get the type packed with water, not syrup. Orange juice can be substituted.
  • Chiles – The homemade chili garlic paste adds amazing depth of flavor and can be made up to 2 weeks in advance. Guajillo and ancho peppers can be found in many supermarkets, Hispanic markets, or can easily be ordered online. You can use bottled paste and still get excellent results. Any type of dried chili will work for the paste, just do a little research, some carry more heat than others.
  • Achiote paste – This is a key ingredient found in specialty markets, but can also be easily ordered online. If you omit it, the taste will still be delicious, you just won’t get the classic bright red color.
  • Tortillas – Corn is traditional, and homemade corn tortillas are amazing. However, flour tortillas are delicious, too.

See the recipe card (with video) below for a full list of ingredients and measurements.

Expert Tip

Fresh pineapple is a key ingredient in making authentic tacos al pastor. We use a pineapple corer to easily get slices for grilling. Or, just cut up the pineapple after you’ve cut the pieces for the top and bottom of the marinated pork.

👩🏼‍🍳 How to Make Homemade Chili Paste

A large cast-iron skillet filled with dried chiles and cloves of garlic simmering in vegetable oil.
  1. Step 1: Cook the chiles and garlic in hot oil for 1 to 2 minutes.
A person pouring water from a large glass measuring cup into a pot filled with dried chiles.
  1. Step 2: Remove the chiles with a slotted spoon. Place them in a pot and cover with water.
A colander resting on top of a ceramic bowl with a pile of dried chiles that have been rehydrated with boiling water.
  1. Step 3: Drain the chiles through a strainer, reserving the liquid
A person standing behind a blender full of softened chiles, garlic, spices, and water on a cutting board on a kitchen island.
  1. Step 4: Add chiles, garlic, salt, bouillon cubes, and 1 cup soaking liquid to a blender.
A person holding down the lid of a blender that is halfway filled with a pureed chili mixture that will be a marinade for tacos al pastor.
  1. Step 5: Purée until smooth.
A person pouring a bright red marinade from a blender into a glass jar on a wooden cutting board.
  1. Step 6: Let cool and transfer to a jar with a tight-fitting lid.

Expert Tip

Place the pork shoulder in the freezer for 30 to 40 minutes before slicing it. This will firm up the meat and make slicing much easier.

🌮 How to Make Tacos al Pastor

A person using a large chef's knife to slice strips of an uncooked boneless pork shoulder on a wooden cutting board.
  1. Step 1: Slice the pork.
A person transferring homemade chili paste from a small glass bowl into a blender that contains broth and spices.
  1. Step 2: Add the marinade ingredients to the blender.
A person removing the lid from a blender that is half-filled with a puréed chili marinade.
  1. Step 3: Purée until smooth, about 1 minute.
A person wearing latex gloves pressing slices of pork soaked in an al pastor marinade in a large glass baking dish with a blender nearby containing more of the marinade.
  1. Step 4: Submerge the pork in the marinade in a dish, cover, and chill overnight.
A person pressing a large slice of fresh pineapple onto an upright skewer that is attached to a metal pan with handles on a wooden cutting board.
  1. Step 5: Slice the pineapple and place it on a skewer. 
A person pressing onto the top of a pile of strips of raw marinated pork shoulder on an upright skewer attached to a metal pan with handles.
  1. Step 6: Stack the pork on and top with pineapple. 

Expert Tip

We use our tacos al pastor skewer (with plate) to grill the meat. You can also use wooden or metal skewers that you insert into the bottom slice of the pineapple to secure the meat. Or, you can simply grill the strips of marinated pork directly on the grill until crispy on the edges and fully cooked (about 15 to 20 minutes).

🔥 How to Cook Tacos al Pastor

A stack of pork with pineapple slices on an al pastor pan resting in the middle of a charcoal kettle grill.
  1. Step 1: Heat a charcoal grill and place the meat over indirect heat.
A person using a chef's knife and a pair of tongs to cut away burnt ends of a partially cooked pork al pastor on a charcoal grill.
  1. Step 2: Cook for 2 hours, trimming the dark edges after 1 hour. 
Several large grilled chunks of fresh pineapple resting on the edge of a grate on a charcoal grill.
  1. Step 3: Grill the pineapple slices.
A person using a chef's knife to slice chunks of cooked marinated pork from a skewer that has a slice of pineapple on top.
  1. Step 4: Cut off chunks of the pork. 
A person using a large knife to chop grilled pineapple on a wooden cutting board.
  1. Step 5: Chop the grilled pineapple. 
A person using a small spoon to add a layer of homemade taco sauce over the top of tacos al pastor resting on brown wax paper.
  1. Step 6: Build the tacos.  

🍽️ How To Serve

  • We recommend using a paper towel (or two) to soak up some of the rendered grease that will have collected in the pan.
  • For a dramatic presentation, bring the pork tower to the table and slice the meat, and place it on your guest’s open tortilla.
  • Have bowls of the toppings such as chopped cilantro, red onion, grilled pineapple (cut into chunks), and the heated reserved sauce. Let guests build their tacos.
  • We love to serve these amazing tacos with individual servings of slow-cooked borracho beans and homemade cilantro lime rice.

🙋🏽‍♂️ Frequently Asked Questions

What’s the difference between carnitas and al pastor? 

They are similar. Carnitas are slow-cooked pork, usually braised or roasted until tender and crispy. Al pastor is marinated and then typically cooked on a spit (like shawarma), with bold spices and pineapple for a sweet, smoky flavor.

Can I make tacos al pastor at home without a vertical spit?

Yes, you can make tacos al pastor at home by grilling or roasting the marinated pork in the oven or on a grill, then slicing it thinly to serve in warm tortillas.

What toppings are best for grilled tacos al pastor?

Diced onions, fresh cilantro, pineapple chunks, and a squeeze of lime, roasted tomato salsa, or heated al pastor sauce (reserved from the marinade before adding the pork).

A tower of grilled layers of marinated pork with a rod centered in the middle anchoring the meat with a slice of pineapple on top all on a charcoal grill.

🇲🇽 Other Amazing Mexican Recipes

  • A sheet pan filled with a row of beef enchiladas with red sauce and topped with chopped tomatoes and lettuce.
    Beef Enchiladas with Red Sauce
  • A close-up view of shrimp veracruz sitting on three rolled corn tortillas topped with a pipián sauce.
    Shrimp Veracruz with Pumpkin Seed Sauce (Pipián)
  • A black circular plate filled with two pieces of roasted chipotle chicken next to cilantro rice and lime wedges all next to a glass of beer.
    Roasted Chipotle Chicken
  • An overhead view of two chile rellenos resting in a red sauce in a large cast-iron skillet.
    Authentic Chile Relleno

Ready to make the best tacos this side of Mexico? Go for it!

And when you do, be sure to take a photo of them, post it on Instagram, and tag @HowToFeedaLoon and hashtag #HowToFeedaLoon!

Three grilled tacos al pastor pressed against each other loaded with marinated grilled pork, pineapple chunks, cilantro, red onion, and a homemade sauce on top.
Print Recipe
5 from 2 votes

Grilled Tacos al Pastor

Grilled Tacos al Pastor is a true flavor explosion. Allow the pork to sit in the marinade for at least 12 hours for maximum flavor. If you don't have a skewer plate, you can simply grill the meat on your gas or charcoal grill. You can also roast the meat in the oven. The homemade chili paste can be made up to 2 weeks in advance.
Prep Time30 minutes mins
Cook Time3 hours hrs
Marinating time12 hours hrs
Total Time15 hours hrs 30 minutes mins
Course: Lunch / Dinner
Cuisine: Mexican
Servings: 6
Calories: 247kcal
Author: Kris Longwell

Equipment

  • Al Pastor Skewer for Grill
  • Charcoal or gas grill

Ingredients

For the Chili Paste

  • 1 cup vegetable oil
  • 20 guajillo chiles dried, stems and seeds removed
  • 35 chiles de Arbol dried, stems and seeds removed
  • 4 cloves garlic
  • 2 teaspoon Kosher salt
  • 1 chicken bouillon cube

For the Tacos al Pastor

  • 1 3 lb pork shoulder boneless
  • ½ cup pineapple juice
  • ½ cup distilled white vinegar
  • ¼ cup chili paste
  • ¼ cup achiote paste
  • 6 tablespoon light brown sugar
  • 4 cloves garlic
  • 1½ teaspoon oregano dried, preferably Mexican
  • 1½ teaspoon cumin ground
  • 1½ teaspoon black pepper
  • ½ teaspoon ground cinnamon
  • ¼ teaspoon ground cloves
  • 2 tablespoon Kosher salt
  • 1 whole pineapple
  • 12 corn tortillas
  • 1 cup red onion finely chopped, for garnish
  • cilantro fresh, chopped, for garnish
  • lime wedges for serving

Instructions

Make the Chili Paste

  • Heat the oil in a large, sturdy skillet over medium heat until shimmering. Add the chiles and garlic and stir to coat with the oil. Simmer in the oil for about 2 minutes. Use a slotted spoon or tongs to carefully remove the chiles and garlic and place them on a platter lined with paper towels.
    1 cup vegetable oil, 20 guajillo chiles, 35 chiles de Arbol, 4 cloves garlic
  • Pat the chiles and garlic dry and place them in a large pot. Add just enough water to cover the chiles. Bring to a simmer and cover. Simmer for 7 minutes, or until the chiles are very tender.
  • Drain the chiles and garlic through a colander into a heatproof bowl, reserving the liquid.
  • Transfer the chiles and garlic to a blender. Add the salt, bouillon cube, and 1 cup of the chile water. Purée for 1 minute, until very smooth. Allow the paste to cool down and then transfer to a jar with a tight-fitting lid. Refrigerate for up to 2 weeks.
    2 teaspoon Kosher salt, 1 chicken bouillon cube

Make the Tacos al Pastor

  • Place the pork shoulder in the freezer for 30 minutes (this makes slicing it easier).
    1 3 lb pork shoulder
  • In a blender, add the pineapple juice, vinegar, oil, chile paste, achiote paste, brown sugar, garlic, oregano, cumin, pepper, cinnamon, cloves, and salt. Purée until smooth. Set aside.
    ½ cup pineapple juice, ½ cup distilled white vinegar, ¼ cup chili paste, ¼ cup achiote paste, 6 tablespoon light brown sugar, 4 cloves garlic, 1½ teaspoon oregano, 1½ teaspoon cumin, 1½ teaspoon black pepper, ½ teaspoon ground cinnamon, ¼ teaspoon ground cloves, 2 tablespoon Kosher salt
  • Remove the pork shoulder from the freezer and use a sharp knife to cut it into ¼-inch slices.
  • Place the pork in a large dish and pour about three-quarters of the marinade over it. Turn the meat over and press the marinade into the pork. Cover and chill for up to 24 hours, preferably overnight. Add the remaining marinade/sauce to a container with a lid and refrigerate.
  • Prepare your charcoal (or gas) grill to medium-high heat, creating a 2-zone (heat and no-heat) set-up.
  • Cut the top and base off the pineapple. Cut two ½-inch slices. Cut the remaining pineapple into slices or chunks, cutting around the core.
    1 whole pineapple
  • Press one pineapple slice down the skewer and then layer the marinated pork on the skewer. Top with the other pineapple slice.
  • Place the skewer plate over the indirect heat and cover for 1 hour.
  • After 1 hour, use kitchen shears (or a sharp knife) to cut away dark spots on the edges of the meat. Cover and cook for another 45 minutes.
  • Add the pineapple slices and cook for another 15 minutes (the meat should cook for 2 hours). Add the extra sauce to a saucepan and gently warm it.
  • Carefully remove the skewer plate and pineapple from the grill. Cut the pineapple into chunks and use a large, sharp knife to slice pieces of meat from the skewer.
  • Serve at once with warmed corn tortillas, garnished with the grilled chopped pineapple, cilantro, onion, warmed sauce, and lime wedges.
    12 corn tortillas, 1 cup red onion, cilantro, lime wedges

Video

Notes

NOTE: Watch the video near the top of the recipe for visual guidance.
You can create a makeshift skewer plate by placing a slice of pineapple on a heatproof skillet (or pan) and inserting wooden or metal rod or rods into it. Add the meat to the rod or rods and top with the pineapple. 
Be sure to make sure you will be able to close the lid with the tower of meat on the grill. This is important to test before you get started. 
You can also roast the pork in your oven set at 400°F for approximately the same amount of time. Keep an eye on the meat and trim any edges that are starting to burn. 
You can also simply grill the slices until the edges are crispy and the meat is cooked. This will only take about 15 to 25 minutes, depending on how thick your slices are.  

Nutrition

Calories: 247kcal | Carbohydrates: 54g | Protein: 5g | Fat: 13g | Saturated Fat: 0.4g | Polyunsaturated Fat: 1g | Monounsaturated Fat: 1g | Cholesterol: 0.2mg | Sodium: 678mg | Potassium: 481mg | Fiber: 8g | Sugar: 21g | Vitamin A: 3134IU | Vitamin C: 11mg | Calcium: 97mg | Iron: 2mg

NOTE: This recipe is adapted from the amazing Chef Ford Fry from his TexMex Cookbook.

Beef Enchiladas with Red Sauce

April 27, 2025 by Kris Longwell 4 Comments

A sheet pan filled with a row of beef enchiladas with red sauce and topped with chopped tomatoes and lettuce.

Beef Enchiladas with Red Sauce are so flavorful and satisfying that they will rival your favorite Tex-Mex restaurant, bringing the authentic taste of Mexico right to your kitchen. Served alongside traditional refried beans and homemade Mexican rice, this dish creates a complete and delicious meal that will impress family and friends.

A sheet pan filled with a row of beef enchiladas with red sauce and topped with chopped tomatoes and lettuce.
[feast_advanced_jump_to]

🌶️ Red Sauce Ingredients

The ingredients include ripe tomatoes, dried chilies, garlic, onion, and a blend of spices, creating a rich and flavorful sauce that perfectly complements enchiladas.

The ingredients for red enchilada sauce arranged on a wooden background, including ripe tomatoes, dried chilies, garlic cloves, chopped onion, and a variety of spices, all neatly organized for easy preparation.

🧀 Beef Enchiladas Ingredients

The ingredients for beef enchiladas may be simple and unassuming, but their combination creates a restaurant-quality dish that is both comforting and bursting with flavor.

The ingredients for red enchilada sauce arranged on a wooden background, including ground beef, shredded cheese, corn tortillas, beer, garlic cloves, chopped onion, and a variety of spices, all neatly organized for easy preparation.

👩🏼‍🍳 How To Make Red (Rojo) Enchilada Sauce

A person using kitchen scissors to cut off the stems from a dried chili over a bowl.
  1. Step 1: Toast the chiles in a skillet, then remove their stems and seeds.
A person pouring hot tap water from a large glass measuring cup into a large glass bowl filled with dried chiles.
  1. Step 2: Place the chiles in a bowl and cover them with hot water.
A person holding a kitchen towel over the top of a blender that is filled with puréed chiles, tomatoes, and onions.
  1. Step 3: Add the chiles, tomatoes, garlic, and onions to a blender and purée them.
A person pouring a puréed chili and vegetable liquid from a blender into a fine-mesh colander over a ceramic bowl.
  1. Step 4: Strain the mixture into a heatproof bowl.
A person pouring a puréed chile and vegetables sauce into a skillet with a roux simmering in it.
  1. Step 5: In a large skillet, create a roux of oil and flour and then whisk in the puréed chili mixture.
A person dumping seasonings into a skillet filled with a red enchilada sauce.
  1. Step 6: Whisk in the seasonings and stir until slightly thickened.

Expert Tip

Straining the puréed chiles is critical in yielding a silky sauce. If you skip this step, the sauce will be gritty from the skins of the chiles. Use a wooden spoon or spatula to help the sauce pass through the sieve.

👩🏼‍🍳 How to Make the Beef Enchilada Filling

A person dumping minced garlic into a skillet filled with chopped onion and jalapeño being sautéed in olive oil.
  1. Step 1: Sauté the onion, jalapeño, and garlic in olive oil over medium heat.
Ground beef being cooked with chopped onions and jalapeños in a large skillet.
  1. Step 2: Add the ground beef and cook until no longer pink (remove excess grease).
A person dumping chopped tomatoes from a small bowl into a large skillet filled with cooked ground beef, onions, and peppers.
  1. Step 3: Stir in the chili powder, cumin, salt, and chopped tomatoes. Sauté for 5 minutes.
A person pouring beer into a skillet of simmering taco meat.
  1. Step 4: Add 1 cup of Mexican beer.
A large skillet filled with simmering taco meat.
  1. Step 5: Simmer for about 10 minutes.
A large spoon holding up a serving of fully cooked beef taco meat.
  1. Step 6: Ready to fill the enchiladas!

Expert Tip

Simmer the sauce until most of the liquid has evaporated; however, don’t let the meat become dry. It should be very juicy. If you don’t want to cook with beer, you can substitute beef broth.

👩🏼‍🍳 How to Make Beef Enchiladas with Red Sauce

A person using a ladle to spread red enchilada sauce across the bottom of a sheet pan.
  1. Step 1: Ladle a thin layer of the enchilada sauce
A corn tortilla being lightly fried in vegetable oil in a small black skillet.
  1. Step 2: Heat vegetable oil in a small skillet and lightly fry corn tortillas for a couple of seconds per side.
A person submerging a lightly fried corn tortilla into a bowl of red enchilada sauce.
  1. Step 3: Use a paper towel to remove excess grease and then coat the tortilla with enchilada sauce.
A person using a spoon to add a beef filling down the center of a corn tortilla that is coated in a red sauce.
  1. Step 4: Add a couple of spoonfuls of the beef filling down the middle of a tortilla on the prepared pan.
A person sprinkling shredded cheddar cheese over the top of beef enchiladas with red sauce.
  1. Step 5: Seal the enchiladas on top and then sprinkle the cheese over them.
A row of beef enchiladas with red sauce in a sheet pan.
  1. Step 6: Bake until cheese has melted and the filling is heated, about 15 to 20 minutes.

🍽️ How To Serve

  • After the enchiladas are baked, they can be a little tricky to transfer from the pan to a plate. Use a large spatula and gently place it under the enchiladas and lift straight up. Use a fork to transfer the enchiladas to the plate.
  • A fun way to serve these enchiladas is in individual oven-safe baking dishes. Just make sure your guests know the dish is hot.
  • Don’t worry if the enchiladas fall apart when you are serving. The taste will still be amazing.

🙋🏽‍♂️ Frequently Asked Questions

Can I use a different type of meat for beef enchiladas?

Yes, you can substitute ground beef with other meats such as shredded chicken, pork, or even a meatless option like black beans or lentils for a delicious variation.

Can I make the beef enchiladas with red sauce ahead of time?

Absolutely! You can assemble the beef enchiladas in advance, cover them tightly, and refrigerate or freeze them until you’re ready to bake, making meal prep easy and convenient.

What can I serve with beef enchiladas?

Beef enchiladas pair wonderfully with sides like authentic refried beans, Mexican rice, guacamole, or a fresh salad, enhancing the overall meal experience.

A white plate filled with two beef enchiladas with red sauce next to a serving of Mexican rice and refried beans.

🌮 Other Classic Tex-Mex Recipes

  • Two rows of crispy beef tacos resting on two taco holders with chopped tomatoes and shredded cheese scattered around them.
    Authentic Tex-Mex Beef Tacos
  • An overhead view of a white 9 by 13 baking dish filled with cheese enchiladas in ancho sauce topped with shredded lettuce and pico de Gallo.
    Tex-Mex Cheese Enchiladas
  • Classic Tex-Mex Queso in a cast iron dish with pico de gallo on top.
    Classic Tex-Mex Queso
  • An arrangement of ingredients for grilled tacos al pastor on a white background including dried chiles, spices, pineapple, pork shoulder, sugar, vinegar, and corn tortillas.
    Grilled Tacos al Pastor

Ready to make the best enchiladas this side of San Antonio? Go for it!

And when you do, be sure to take a photo of them, post it on Instagram, and tag @HowToFeedaLoon and hashtag #HowToFeedaLoon!

A white plate filled with two beef enchiladas with red sauce next to a serving of Mexican rice and refried beans.
Print Recipe
5 from 2 votes

Beef Enchiladas with Red Sauce

Beef Enchiladas with Red Sauce is Tex-Mex at its very best. The red sauce (Rojo sauce) is deeply flavorful and has authentic Tex-Mex flavor. And the sauce and beef filling can be made in advance, making assembly and serving a snap!
Prep Time20 minutes mins
Cook Time1 hour hr
Chili soak time1 hour hr
Total Time2 hours hrs 20 minutes mins
Course: Entree
Cuisine: Tex-Mex, Mexican
Servings: 4
Calories: 789kcal
Author: Kris Longwell

Equipment

  • large skillet (12")
  • Blender
  • Sheet pan or baking dish

Ingredients

For the Red Sauce

  • 5 ancho chiles dried
  • 5 guajillo chiles dried
  • 2 plum tomatoes roughly chopped
  • 3 cloves garlic roughly chopped
  • 1 medium onion chopped
  • 2 tablespoon olive oil
  • 2 tablespoon all-purpose flour
  • 1 teaspoon oregano dried
  • 1 teaspoon garlic powder
  • 1 teaspoon ground cumin
  • 1½ teaspoon Kosher salt

For the Beef Filling

  • 2 tablespoon olive oil
  • 1 medium onion finely chopped
  • 1 jalapeño seeded and finely chopped
  • 2 cloves garlic minced
  • 1 lb ground beef 90% lean
  • 2 Roma tomatoes chopped
  • 1 tablespoon chili powder
  • 1 tablespoon ground cumin
  • 1½ teaspoon Kosher salt
  • 1 teaspoon black pepper
  • 1 cup beer preferably Mexican

For the Enchiladas

  • 2 cups red enchilada sauce
  • Vegetable oil
  • 8 corn tortillas
  • 2 cups beef filling
  • 2 cups cheddar cheese shredded
  • green leaf lettuce for garnish
  • pico de gallo for garish

Instructions

Make the Red Enchilada Sauce

  • Heat a large skillet over medium-high heat. Add the chiles and roast for about 10 minutes, stirring occasionally.
    5 ancho chiles, 5 guajillo chiles
  • Use a pair of kitchen scissors to cut away the stems and then remove as many of the seeds inside the pepper as possible (don't worry if you don't get them all, you'll strain the liquid later).
  • Place the chiles in a large bowl and cover them with hot tap water. Place a small plate on top of the chiles to keep them submerged. Let them rest in the water for at least 1 hour.
  • Use a pair of tongs (or your hands) to transfer the soaked chiles to a blender. Add the tomatoes, garlic, onion, and 3 cups of the chili soaking water. Securely place the lid on the blender and purée until smooth.
    2 plum tomatoes, 3 cloves garlic, 1 medium onion
  • Strain the sauce through a fine-mesh sieve or colander into a heatproof bowl.
  • Heat the oil in a large skillet over medium heat. Stir in the flour and cook for 1 minute.
    2 tablespoon olive oil, 2 tablespoon all-purpose flour
  • Gently whisk in the strained chili sauce and 1 cup of the soaking broth. Stir in the oregano, garlic powder, cumin, and salt. Stir until slightly thickened, about 5 minutes. Set aside.
    1 teaspoon oregano, 1 teaspoon garlic powder, 1 teaspoon ground cumin, 1½ teaspoon Kosher salt

Make the Beef Filling

  • Heat the oil over medium heat in a large skillet. Add the onion and peppers and sauté until soft, about 5 minutes. Stir in the garlic and sauté for another 30 seconds.
    2 tablespoon olive oil, 1 medium onion, 1 jalapeño, 2 cloves garlic
  • Add the ground beef and cook until no longer pink. Spoon off excess rendered grease and safely discard.
    1 lb ground beef
  • Stir in the chopped tomatoes, chili powder, cumin, salt, and pepper. Cook, stirring frequently, for another 5 minutes, until the tomatoes are starting to break down.
    2 Roma tomatoes, 1 tablespoon chili powder, 1 tablespoon ground cumin, 1½ teaspoon Kosher salt, 1 teaspoon black pepper
  • Stir in the beef and cook until the mixture thickens somewhat and most of the liquid is gone, about another 5 to 8 minutes. The mixture should be very moist (even wet); if too dry, add a little more beer. Set aside.
    1 cup beer

Prepare the Enchiladas

  • Preheat oven to 350°F.
  • Ladle a thin layer of the enchilada sauce into the bottom of a sheet pan or baking dish. Add the rest of the sauce into a shallow bowl.
    2 cups red enchilada sauce
  • Heat a thin layer of the vegetable oil in a small skillet over medium heat. Once the oil is simmering, quickly pass a tortilla through the oil, flipping after 1 to 2 seconds. Lightly fry for another second or two. Just long enough to soften the tortilla. Quickly transfer to a plate lined with paper towels. Flip the tortilla over to remove excess oil.
    Vegetable oil, 8 corn tortillas
  • Submerge the lightly fried tortilla in the red sauce. Place the coated tortilla in the sheet pan or dish. Spoon 2 to 3 tablespoons of the meat mixture down the middle of the tortilla. Bring the sides of the tortilla over the filling and press to seal the edges on top. Repeat with the remaining tortillas, adding more oil to the skillet as needed.
    2 cups beef filling
  • Top with the cheese and bake until the cheese has melted and the filling is hot, about 15 to 20 minutes.
    2 cups cheddar cheese
  • Top with chopped green leaf lettuce and pico de gallo. Serve at once!
    green leaf lettuce, pico de gallo

Video

Notes

NOTE: Watch the video near the top of the recipe for visual guidance.
The enchilada sauce and beef filling can be made up to 3 days in advance. 
Beef broth can be substituted for the beer. 
Leftovers will keep in an air-tight container in the fridge for up to 3 to 4 days. Reheat in the microwave or on a baking dish (covered with foil) in the oven at 325°F for 20 minutes, or until heated through. 
The enchiladas can be assembled and frozen (covered tightly with foil) for up to 2 months. Allow to thaw completely before baking them. 

Nutrition

Calories: 789kcal | Carbohydrates: 85g | Protein: 46g | Fat: 29g | Saturated Fat: 12g | Polyunsaturated Fat: 2g | Monounsaturated Fat: 7g | Trans Fat: 1g | Cholesterol: 137mg | Sodium: 648mg | Potassium: 889mg | Fiber: 22g | Sugar: 33g | Vitamin A: 15300IU | Vitamin C: 36mg | Calcium: 550mg | Iron: 9mg

Best-Ever Ham Salad

April 23, 2025 by Kris Longwell 5 Comments

A shallow white bowl filled with best-ever ham salad surrounded by a plate of green leaf lettuces, slices of bread, plates, and glasses of iced tea.

Best-Ever Ham salad is bursting with flavor, combining the savory richness of leftover holiday ham with creamy mayonnaise and zesty seasonings for a delightful spread. It’s the perfect way to transform those extra holiday leftovers into a delicious dish that can be enjoyed on sandwiches, crackers, or as a refreshing salad.

A shallow white bowl filled with best-ever ham salad surrounded by a plate of green leaf lettuces, slices of bread, plates, and glasses of iced tea.
[feast_advanced_jump_to]

🥚 The Ingredients

The ingredients, such as mayonnaise, Dijon mustard, and crunchy vegetables, work harmoniously to enhance the ham’s flavor, creating a deliciously balanced and satisfying dish. Find ingredient notes (including substitutions and variations) below.

The ingredients for ham salad arranged on a wooden board, including chopped leftover ham, mayonnaise, mustard, chopped celery, diced onions, and seasonings, all neatly organized for easy preparation.

🌿 Substitutions and Variations

  • Ham – We always make a batch of this salad when we have leftover ham from a holiday feast. However, you can purchase deli ham (thickly sliced) and prepare it in the same way. You can also often find finely chopped (or cubed) fully cooked ham in the meat section of most well-stocked supermarkets.
  • Onions – We like a combination of slightly sweet red onions and the milder-tasting green onions (scallions). The flavor is not overpowering, however, you can soak the red onions in white wine vinegar or apple cider vinegar to pickle them, also, which mellows the onion flavor considerably. If you don’t care for onions, then omit them.
  • Celery – The celery adds a little “crunch” to the salad. Chop it finely if you don’t want too much “crunch.”
  • Flavor enhancers – The Dijon adds a subtle depth of flavor to the dressing. Plain yellow mustard can be substituted. Fresh parsley adds an herbaceous pepper flavor, but can be substituted with dried parsley. Other herbs, such as basil, thyme, or rosemary, are excellent flavor enhancers.

See the recipe card (with video) below for a full list of ingredients and measurements.

Expert Tip

Be sure to allow the salad to chill for at least an hour, or even better, overnight. The flavors will meld, and the taste just gets better. We recommend allowing the salad to sit out for about 30 minutes to take some of the chill off of it.

👩🏼‍🍳 How To Make Best-Ever Ham Salad

A person holding up chopped ham from the bowl of a food processor that has just finely chopped cooked ham.
  1. Step 1: Process chunks of ham in a food processor until uniformly chopped.  
A person standing behind a glass bowl filled with the un-mixed ingredients of ham salad on a wooden cutting board.
  1. Step 2: Add the chopped ham, pickles, eggs, celery, onion, parsley, and green onions to a large bowl.
A person using a small whisk to mix together a mayonnaise and Dijon dressing for ham salad.
  1. Step 3: In a separate bowl, whisk the mayo, Dijon, white wine vinegar, lemon juice, salt, and pepper until combined.  
A person pouring a mayonnaise and Dijon dressing from a small glass bowl into a large bowl filled with the ingredients for ham salad.
  1. Step 4: Pour the dressing over the dry ingredients and stir to combine. 
A person using one hand to hold a large glass bowl filled with best-ever ham salad and the other hand on the door handle of the refrigerator that he is getting ready to open.
  1. Step 5: Chill the salad for at least 1 hour or up to overnight. 
A white plate topped with a thick slice of white bread topped with a layer of green leaf lettuce and a serving of ham salad.
  1. Step 6: Serve on a bed of greens or as a sandwich. 

🍽️ How To Serve

  • This salad is very versatile. It makes an amazing sandwich on your favorite sliced bread. Serve it with potato chips or fresh veggies for the perfect lunch.
  • It’s also perfect to serve as a spread for special gatherings, such as birthday parties or showers. Serve the salad on a platter lined with green leaf lettuce. Guests can build their sandwich or on its own.
  • They also make fantastic sliders.
  • The recipe can easily be doubled or tripled if serving a crowd.

🙋🏽‍♂️ Frequently Asked Questions

What type of ham is best for ham salad?

Leftover cooked ham is best. However, quality ham steaks from the supermarket will work, too.

How long can homemade ham salad be stored in the refrigerator?

4 to 6 days, making it a great option for meal prep or using up leftovers.

Is ham salad healthy?

In moderation. To make it healthier, use plain Greek yogurt in place of the mayo. Don’t add any additional salt, as leftover hams tend to have a high sodium content. Add plenty of vegetables to the salad.

A white plate topped with a thick slice of white bread topped with a layer of green leaf lettuce and a serving of ham salad.

😋 Other Classic “Salad” Recipes

  • A croissant the is stuffed with Best-Ever Chicken Salad sitting on a cutting board next to another croissant also stuffed with the salad also resting near grapes, celery, and herbs.
    Best-Ever Chicken Salad
  • Three tuna salad sandwiches sitting a white lunch plate next to a colorful napkin.
    Best-Ever Tuna Salad
  • A straight-on view a best-ever egg salad sandwich with toasted whole wheat sliced bread, egg salad, and arugula on a white plate next to a jar filled with dill pickles.
    Best-Ever Egg Salad
  • An overhead view of best-ever potato salad in a large colorful serving bowl with a sprig of fresh dill resting on top.
    Best-Ever Potato Salad

Ready to take the leftover ham to the next level? Go for it!

And when you do, be sure to take a photo of it, post it on Instagram, and tag @HowToFeedaLoon and hashtag #HowToFeedaLoon!

A white serving bowl filled with best-ever ham salad with a large spoon inserted off to the side.
Print Recipe
5 from 3 votes

Best-Ever Ham Salad

Ham salad is a delicious and versatile dish that transforms leftover ham into a flavorful spread, perfect for sandwiches or crackers. With a creamy base and a mix of crunchy vegetables and seasonings, it offers a delightful combination of textures and tastes that makes it a favorite for using up holiday leftovers.
Prep Time20 minutes mins
Chill time1 hour hr
Total Time1 hour hr 20 minutes mins
Course: Lunch / Sandwich
Cuisine: American
Servings: 8
Calories: 261kcal
Author: Kris Longwell

Equipment

  • Food processor or meat grinder, or a large sharp knife (for finely chopping the ham)

Ingredients

  • 3 hard-boiled eggs roughly chopped
  • 1 lb cooked ham Cut into pieces, about 3 cups (before being processed)
  • ¼ cup cornichons finely chopped, see NOTES
  • ¼ cup celery finely chopped
  • ¼ cup red onion finely chopped
  • 2 green onions chopped, aka scallions
  • ¾ cup mayonnaise
  • 2 teaspoon Dijon mustard
  • 1 teaspoon white wine vinegar
  • Kosher salt and black pepper to taste

Instructions

Do Ahead – Make the Hard-Boiled Eggs

  • Bring a pot of water to a boil. Gently add the chilled eggs to the water for 11 minutes. Use a slotted spoon to remove the eggs and place them in a bowl filled with water and ice. Once cooled, peel away the shells and roughly chop them.
    3 hard-boiled eggs

Make the Ham Salad

  • Place the cut-up ham in your food processor and pulse until the desired consistency.
    1 lb cooked ham
  • Transfer the chopped ham into a large bowl along with the cornichons, celery, onions, and green onions.
    ¼ cup cornichons, ¼ cup celery, ¼ cup red onion, 2 green onions
  • Add the mayonnaise, Dijon, white wine vinegar, and a pinch of salt and pepper into a small bowl. Whisk until combined.
    ¾ cup mayonnaise, 2 teaspoon Dijon mustard, 1 teaspoon white wine vinegar, Kosher salt and black pepper
  • Pour the dressing over the dry ingredients and stir until completely combined. Cover and chill for at least 1 hour, or even better, overnight.

Video

Notes

NOTE: Watch the video near the top of the recipe for visual guidance.
Cornichons can be found in the pickle section of most well-stocked supermarkets. However, chopped dill pickles are perfect, too. You can also use dill pickle relish or sweet pickle relish, if desired. 
The ham salad will keep in an air-tight container in the refrigerator for 4 to 6 days. It can be frozen for up to 2 to 3 months. 

Nutrition

Calories: 261kcal | Carbohydrates: 1g | Protein: 13g | Fat: 22g | Saturated Fat: 4g | Polyunsaturated Fat: 10g | Monounsaturated Fat: 6g | Trans Fat: 0.04g | Cholesterol: 120mg | Sodium: 887mg | Potassium: 214mg | Fiber: 0.3g | Sugar: 1g | Vitamin A: 165IU | Vitamin C: 14mg | Calcium: 20mg | Iron: 1mg

Smoked Pork Brisket

April 16, 2025 by Kris Longwell 4 Comments

A sliced smoked brisket that is resting on cutting board with a large butcher's knife just underneath the meat.

Smoked pork brisket is a succulent cut of meat that is slow-cooked to perfection, resulting in a tender and juicy texture. Seasoned with the perfect pork rub smoked over low heat for several hours, the brisket develops a rich, smoky flavor and a beautifully caramelized crust. Pair it with classic sides like homemade coleslaw and Southern baked beans to deliver an unforgettable BBQ experience.

A sliced smoked brisket that is resting on cutting board with a large butcher's knife just underneath the meat.
[feast_advanced_jump_to]

🧂 The Ingredients

Once you have a pork brisket, the other ingredients are few but work together to enhance the meat’s natural flavors, creating a deliciously savory and satisfying dish. Find ingredient notes (including substitutions and variations) below.

An arrangement of ingredients on a wooden cutting board for smoked pork brisket including an uncooked pork brisket, salt, yellow mustard, pork rub, and apple cider vinegar.

🐖 Where Can I Find a Pork Brisket?

  • You most likely will not find a pork brisket in the meat department at your supermarket.
  • Butchers often don’t carry them either, although you could always ask. He/she could probably order one for you.
  • Your best option is to order one from Mangalitsa Estates. Mangalitsa is considered the Wagyu of pork. Use Discount Code: LOON15 for 15% off your order!

🪵 The Tools You Will Need

  • Smoker – We use an electric smoker from Smokin’ Tex and have excellent results. Use Discount Code LOON10 for 10% off your entire order.
  • Wood chips – We recommend hickory, pecan, or maple. You can find these in some supermarkets, at home improvement stores, or online.
  • Digital thermometer – This is an important tool to ensure you reach the perfect internal temperature. Order from ThermoPro and receive an automatic LOON discount.
  • Pink butcher paper – This really does make a difference. You can find it in most supermarkets in the south, or order it online.
  • Towel and Cooler – Dig out a clean towel and a cooler that you can let the brisket hang out in for an hour or two.

👨‍🍳 How To Make Smoked Pork Brisket

A person sprinkling salt all over an uncooked pork brisket resting in a metal baking pan.
  1. Step 1: Liberally salt the brisket and chill for at least 1 hour.
A person with a black latex glove on is sprinkling pork rub all over a pork brisket that has been smeared with yellow mustard.
  1. Step 2: Smear yellow mustard all over the brisket and then liberally sprinkle on the pork rub.
A person using a squirt bottle to spray apple cider vinegar all over a pork brisket that is being smoked in an electric smoker.
  1. Step 3: Smoke at 225°F until the internal temperature reaches 165°F. Spritz with an apple cider and water mixture every hour.
A person wearing heat-resistant gloves wrapping a partially smoked pork brisket in pink butcher paper.
  1. Step 4: Remove the brisket, wrap in pink butcher paper, and return to the smoker until internal temperature reaches 190°F.
A smoked pork brisket that has been wrapped in pink butcher paper resting in a cooler that has been lined with a bath towel.
  1. Step 5: Remove the brisket and wrap a towel around it, and place it in a cooler for 1 to 2 hours.
A person wearing a heat-resistant glove on one hand using a large knife in the other hand to slice a smoked pork brisket.
  1. Step 6: Slice and serve!

🍽️ How To Serve

  • You’ll want to make sure you reach an internal temperature of 190°F to 200°F. This will ensure the brisket is juicy and tender. This takes about 6 to 7 hours in the smoker for a 3½ lb brisket. Then it will need to rest for 1 to 2 hours, wrapped in the cooler.
  • The meat will stay hot in the cooler. It is best served warm.
  • For off-the-charts flavor, serve the brisket with homemade Carolina Mustard Sauce.
  • It pairs perfectly with traditional BBQ sides such as Creamy Potato Salad, 4 Cheese Mac n Cheese, Slow-Cooker Corn on the Cob, and Classic Pasta Salad.
  • This pork brisket makes amazing sandwiches, too.

🔥 How To Store and Reheat

  • Wrap leftovers in foil and place in a container with an air-tight lid. Refrigerate for up to 5 to 6 days.
  • Reheat the brisket slices in foil in a low-temperature oven (250°F) for about 15 to 20 minutes, or on the grill (indirect heat) until heated through.
  • Leftovers can also be wrapped in butcher paper and frozen for up to 2 to 3 months. L

🙋🏽‍♂️ Frequently Asked Questions

Where is a pork brisket cut located?

Lower front of the shoulder. The same as beef.

What does a pork brisket taste like?

Somewhere between pork belly, pork tenderloin, and beef brisket. It is amazing. Plenty of folks say they prefer it to a beef brisket.

Is a pork brisket tender?

Very. Especially if you go with a Mangalitsa pork brisket. Very marbled and deeply flavorful. (Remember, use Discount Code LOON15 for 15% off!)

A person using a spoon to pour a line of Carolina mustard sauce over sliced pork brisket.

💨 Other Amazing Smoked Meat Recipes

  • An overhead view of a rack of smoked St. Louis-style ribs that have been partially cut up with a bowl of homemade barbecue sauce nearby.
    Smoked St. Louis-Style Ribs
  • A close-up view of a slice of cheese-stuffed smoked meatloaf resting on a pile of mashed potatoes on a black plate.
    Cheese-Stuffed Smoked Meatloaf
  • An overhead view of two smoked pork wings that are fully cooked and slathered with homemade barbecue sauce.
    Smoked Pork Wings
  • An overhead view of a whole smoked turkey that is resting on a platter of parsley and orange slices and a carving knife nearby.
    Smoked Turkey with Orange Honey Brine

Ready to make the best smoked meat in town? Go for it!

And when you do, be sure to take a photo of it, post it on Instagram, and tag @HowToFeedaLoon and hashtag #HowToFeedaLoon!

A sliced smoked brisket that is resting on cutting board with a large butcher's knife just underneath the meat.
Print Recipe
5 from 1 vote

Smoked Pork Brisket

Smoked pork brisket is a culinary delight, boasting tender, juicy meat infused with rich smoky flavors that melt in your mouth. When paired with zesty Carolina Mustard Sauce, the combination elevates the dish, adding a tangy kick that perfectly complements the savory brisket for an unforgettable barbecue experience.
Prep Time15 minutes mins
Cook Time6 hours hrs 30 minutes mins
Chill (salt brine) and resting time2 hours hrs
Total Time8 hours hrs 45 minutes mins
Course: Main Dish
Cuisine: American / BBQ
Servings: 8
Calories: 468kcal
Author: Kris Longwell

Equipment

  • 1 Smoker
  • 8 oz wood chips hickory, maple, or pecan
  • 1 pan of water at the bottom of the smoker
  • squirt bottle to spritz the brisket
  • Digital thermometer
  • pink butcher paper
  • towel and cooler

Ingredients

  • 1 3.5 lb pork brisket boneless, trimmed of excess fat
  • Kosher salt
  • 1 cup yellow mustard
  • 1 cup pork rub
  • ½ cup apple cider vinegar
  • Carolina mustard sauce for serving

Instructions

  • Prepare your smoker with wood chips and place a pan of water on the bottom rack.
  • Sprinkle salt all over the brisket. Place on a baking sheet and chill for at least one hour, or overnight. (No need to cover the brisket.)
    1 3.5 lb pork brisket, Kosher salt
  • Smear yellow mustard all over the brisket and then liberally sprinkle on the pork rub. In a spritzer bottle, combine the apple cider vinegar with ½ cup water.
    1 cup yellow mustard, 1 cup pork rub, ½ cup apple cider vinegar
  • Smoke the brisket, fat side up, until an internal temperature reaches 165°F, usually about 3 hours. Spray the brisket with the apple cider vinegar mixture once an hour.
  • Remove the brisket from the smoker and wrap it in butcher paper.
  • Return the wrapped brisket to the smoker and cook until an internal temperature reaches 190°F.
  • Remove the brisket from the smoker and place it in a cooler (still in the wrapper) that has been lined with a clean towel. Wrap the towel over the brisket and close the cooler for 1 to 2 hours.
  • Remove the brisket from the cooler and take off the butcher paper. Use a sharp knife to cut into slices.
  • Serve at once with Carolina mustard sauce on the side (if desired).
    Carolina mustard sauce

Video

Notes

NOTE: Watch the video near the top of the recipe for visual guidance.
The rub can be made up to 3 weeks in advance. The Carolina mustard sauce can be made up to 1 week in advance. 
The mustard acts only as a binder for the rub, it does not impart a mustard taste at all. 
To wrap the brisket, place it in the middle of a rectangular piece of butcher paper, closest to you. Wrap the sides in over the brisket, and then gently turn the brisket over, like a present, until it is covered. See the video for reference. 
Leftovers will keep covered in the fridge for 5 to 6 days. Wrap in foil and heat in a low-temp oven (250°F) until heated through, about 15 to 20 minutes. Or, nuke briefly in the microwave. 

Nutrition

Calories: 468kcal | Carbohydrates: 21g | Protein: 5g | Fat: 18g | Saturated Fat: 9g | Polyunsaturated Fat: 4g | Monounsaturated Fat: 6g | Trans Fat: 4g | Sodium: 351mg | Potassium: 260mg | Fiber: 5g | Sugar: 1g | Vitamin A: 800IU | Vitamin C: 4mg | Calcium: 315mg | Iron: 11mg

Carolina Mustard Sauce

April 16, 2025 by Kris Longwell Leave a Comment

A spoon filled with Carolina mustard sauce being raised from a jar filled with the sauce with a sliced brisket nearby.

Homemade Carolina Mustard Sauce is vibrant and deeply flavorful, combining tangy mustard with hints of sweetness and spice for a truly unique taste experience. It pairs exceptionally well with grilled or smoked meats, making it the perfect complement to dishes like Smoked Pork Brisket or Classic Pulled Pork.

A spoon filled with Carolina mustard sauce being raised from a jar filled with the sauce with a sliced brisket nearby.

🌶️ The Ingredients

The ingredients for this sauce may not be exotic, but they harmoniously blend to create an amazing sauce that elevates many grilled meats and sandwiches with its bold and zesty flavor. Find ingredient notes (including substitutions and variations) below.

The ingredients for Carolina mustard sauce arranged on a wooden background, including yellow mustard, apple cider vinegar, sugar, Worcestershire sauce, and spices, all neatly organized for easy preparation.

🥫 Substitutions and Variations

  • Mustard – Yellow mustard delivers the classic flavor. However, for added depth of flavor, you can use a combination of Dijon, brown, or whole grain mustard.
  • Ketchup – Tomato sauce or tomato paste can be substituted for the ketchup.
  • Vinegar – This is a key ingredient for most Carolina sauces and mops. You can also use white wine vinegar or distilled white vinegar with a splash of lemon juice.
  • Sugar – We recommend granulated white sugar. However, brown sugar (light or dark) will give excellent flavor, too. Honey can be substituted, too.

See the recipe card (with video) below for a full list of ingredients and measurements.

Expert Tip

For a smooth and silky sauce, we grind all of the dry ingredients in a spice grinder before mixing them in with the other ingredients. This is optional, but we love the smooth texture of the sauce it creates.

👩🏼‍🍳 How To Make Carolina Mustard Sauce

A person dumping ground spices from a spice grinder into a glass bowl on a cutting board.
  1. Step 1: Grind dried rosemary, celery seeds, chicken bouillon, dry mustard, onion powder, and garlic powder and add to a bowl.
A person using a spoon to transfer ketchup from a small bowl into a larger bowl filled with dried spices.
  1. Step 2: Add in the hot sauce and ketchup.
A person transferring salt from a small bowl into a larger bowl filled with spices, ketchup, and hot sauce.
  1. Step 3: Add the sugar, salt, and pepper.
A person pouring apple cider vinegar from a glass measuring cup into a glass bowl filled with yellow mustard, spices, ketchup, and hot sauce.
  1. Step 4: Add the apple cider vinegar.
A Carolina mustard sauce simmering in a silver saucepan with a wooden spoon in the middle of the pan in the sauce.
  1. Step 5: Stir everything until smooth, then transfer to a saucepan and simmer for 5 minutes.
Carolina mustard sauce being poured from a saucepan into a glass jar on a cutting board.
  1. Step 6: Let cool, then transfer to a jar with a lid.

🌭 How To Store and Serve

  • This sauce gets even better after it chills for a day or two.
  • Be sure to place it in a jar or container with a tight-fitting lid and chill in the fridge until ready to use.
  • We recommend serving the sauce at room temperature or warm. Let it sit out on the counter for a couple of hours, and be sure to give it a good stirring before serving.
  • This sauce is amazing on grilled meats, including hot dogs, bratwurst sliders, the best grilled chicken, and smoked pork brisket.

🙋🏽‍♂️ Frequently Asked Questions

How long will Carolina Mustard Sauce keep?

It will stay good in a jar with a lid in the fridge for 2 to 3 weeks.

Is Carolina Mustard Sauce spicy?

No. It has a punch of flavor from the vinegar, mustard, and a tiny bit of heat from the hot sauce. Add additional hot sauce for increased heat.

What does Carolina Mustard Sauce taste like?

It’s similar to regular BBQ sauce, but has more of a vinegar flavor profile, and mustard is the base ingredient, as opposed to ketchup. It’s amazing!

A person using a spoon to pour a line of Carolina mustard sauce over sliced pork brisket.

😋 Other Classic BBQ Condiment Recipes

  • A person holding a tall thin bottle that is filled with easy BBQ sauce over a sheet pan filled with barbecue chicken.
    Easy Homemade BBQ Sauce
  • A straight-on view of a small glass jar filled with Alabama white sauce next to grilled chicken on metal skewers.
    Alabama White Sauce
  • A small white bowl filled with authentic chimichurri sauce with a spoon with some of the sauce nearby all on a white background.
    Easy Chimichurri Sauce
  • A small spoon drizzling homemade steak sauce down the top and center of a grilled steak on a white plate next to roasted potatoes.
    Homemade Steak Sauce

Ready to take your BBQ to the next level with an amazing sauce? Go for it!

And when you do, be sure to take a photo of it, post it on Instagram, and tag @HowToFeedaLoon and hashtag #HowToFeedaLoon!

A spoon filled with Carolina mustard sauce being raised from a jar filled with the sauce with a sliced brisket nearby.
Print Recipe
No ratings yet

Carolina Mustard Sauce

Carolina mustard sauce is a tangy and flavorful condiment that hails from the southern United States, particularly the Carolinas. Made primarily from yellow mustard, apple cider vinegar, and a blend of spices, this sauce offers a delightful balance of sweetness and acidity, making it a perfect accompaniment for grilled or smoked meats, especially pork. Its vibrant yellow color and zesty taste add a unique twist to classic barbecue dishes, enhancing the flavor profile of any meal. It keeps in the fridge for up to 3 weeks!
Prep Time10 minutes mins
Cook Time5 minutes mins
Cooling1 hour hr
Total Time1 hour hr 15 minutes mins
Course: Condiment
Cuisine: American / BBQ
Servings: 8
Calories: 133kcal
Author: Kris Longwell

Equipment

  • 1 spice grinder optional
  • 1 Medium saucepan

Ingredients

  • 2 teaspoon dried rosemary
  • 1 teaspoon celery seeds
  • 2 chicken bouillon cubes crumbled
  • 1 tablespoon dry mustard
  • 2 teaspoon onion powder
  • 2 teaspoon garlic powder
  • ¾ cup sugar
  • 1½ teaspoon Kosher salt
  • 1 teaspoon black pepper
  • 2 cups yellow mustard
  • 3 tablespoon ketchup
  • ⅔ cup apple cider vinegar
  • ½ teaspoon hot sauce ie, Tabasco, Louisiana, Frank's

Instructions

  • Place the rosemary, celery seeds, bouillon cubes, mustard, onion powder, and garlic powder in a spice grinder and grind until very fine (this is optional, but it helps to make a smooth sauce).
    2 teaspoon dried rosemary, 1 teaspoon celery seeds, 2 chicken bouillon cubes, 1 tablespoon dry mustard, 2 teaspoon onion powder, 2 teaspoon garlic powder
  • In a bowl, add the remaining ingredients and then add the ground spices. Stir until combined and smooth.
    ¾ cup sugar, 1½ teaspoon Kosher salt, 1 teaspoon black pepper, 2 cups yellow mustard, 3 tablespoon ketchup, ⅔ cup apple cider vinegar, ½ teaspoon hot sauce
  • Transfer to a saucepan and bring to a simmer. Simmer for 5 minutes, stirring often.
  • Let the sauce cool completely and then transfer to a jar (or container) with a tight-fitting lid. Store in the refrigerator for up to 3 weeks. Serve at room temperature or warmed.

Video

Notes

NOTE: Watch the video near the top of the recipe for visual guidance.
This sauce gets even better after it chills in the fridge for at least 24 hours. 
It can be stored in the fridge for up to 3 weeks. 

Nutrition

Calories: 133kcal | Carbohydrates: 25g | Protein: 3g | Fat: 3g | Saturated Fat: 0.2g | Polyunsaturated Fat: 1g | Monounsaturated Fat: 2g | Trans Fat: 0.01g | Cholesterol: 0.1mg | Sodium: 865mg | Potassium: 155mg | Fiber: 3g | Sugar: 21g | Vitamin A: 76IU | Vitamin C: 1mg | Calcium: 54mg | Iron: 1mg

Bucatini all’Amatriciana

March 30, 2025 by Kris Longwell 6 Comments

A large, deep skillet filled with Bucatini all’Amatriciana with a block of cheese nearby.

Classic Bucatini all’Amatriciana is a culinary delight that showcases the incredible flavors of its simple ingredients, creating a dish that is both comforting and satisfying. Just like Pasta Carbonara and Pasta Pomodoro, its straightforward preparation often results in the most memorable and delicious meals.

A large, deep skillet filled with Bucatini all’Amatriciana with a block of cheese nearby.
[feast_advanced_jump_to]

🥫The Ingredients

The humble ingredients —pasta, tomatoes, guanciale, and cheese—come together harmoniously to create an authentic Italian pasta dish that bursts with rich flavor and tradition. Find ingredient notes (including substitutions and variations) below.

A collection of ingredients for Bucatini all’Amatriciana
including tomatoes, bucatini, guanciale, wine, salt, red pepper flakes, and cheese on a brown cutting board.

🧀 Substitutions and Variations

  • Pasta – Bucatini is a thick, hollow spaghetti pasta that can be found in many well-stocked supermarkets or at Italian food markets. Regular spaghetti, linguine, or fettuccini are all great substitutions.
  • Pork – Guanciale is pork jowl and can be difficult to find outside of Italy. Check your local specialty markets. If you can’t find it, cubed pancetta or thick-cut bacon is perfectly suitable.
  • Tomatoes – Whole tomatoes, especially certified San Marzano, are going to be best. If you can get whole Roma tomatoes that are fresh and in peak season, you can use them. Place them briefly in boiling water and then peel away the skin. Squeezing the whole tomatoes into the skillet will give you the perfect texture.
  • Cheese – Pecorino Romano is traditional, however, regular Parmesan will work great, too. Grating a block just before preparing the dish will elevate the flavor significantly. However, pre-grated cheese will work (in a pinch).

See the recipe card (with video) below for a full list of ingredients and measurements.

Expert Tip

Take care when adding the wine to the hot rendered grease. Stand back as it might flame or sputter. Immediately add the red pepper flakes and then the tomatoes. Most of the alcohol will cook off during the cooking process, just as it does with Shrimp Scampi.

How To Make Bucatini all’Amatriciana

Cubed guanciale being sautéed in a large skillet on a portable induction stove.
  1. Step 1: Sauté the guanciale in a large skillet over medium heat until starting to get crispy. 
A person using a metal spatula to remove cripsy guanciale from a hot skillet.
  1. Step 2: Use a slotted spoon to remove the guanciale. 
A person pouring white wine from a small carafe into a skillet with simmer pork grease.
  1. Step 3: Carefully add the wine to the skillet with the rendered fat.
A person dumping red pepper flakes into a skillet filled with simmering white wine and pork grease.
  1. Step 4: Stir in the red pepper flakes. 
A person placing a bundle of dried bucatini pasta into a pasta pot filled with boiling water.
  1. Step 5: Add the pasta to a pot of salted boiling water. 
A skillet filled with hand-squeezed San Marzano tomatoes.
  1. Step 6: Use your hands to squeeze the tomatoes into the skillet. 

🍝 Finishing the Dish

A person dumping cooked guanciale from a white bowl into a skillet filled with a simmering tomato sauce.
  1. Step 7: Stir the cooked guanciale into the tomatoes. 
A person using a pair of metal tongs to toss cooked pasta into a skillet filled with a tomato sauce.
  1. Step 2: Add the al dente pasta into the skillet and toss to coat.  
A person using a wooden spatula to transfer grated Pecorino-Romano cheese from a white plate into a skillet filled with pasta in a tomato sauce.
  1. Step 3: Add the cheese to the pasta.
A person using a pair of metal tongs to toss cooked pasta in an Amatriciana sauce.
  1. Step 4: Toss to coat and serve with more grated cheese as garnish. 

🍽️ How To Serve

  • As soon as you have tossed the pasta with the cheese, you’ll want to plate the dish. For an attractive appearance, use tongs to grab the pasta and then gently twist it as you place it in each guest’s pasta bowl.
  • Be sure to have plenty of grated cheese available for guests to add more. Chopped Italian parsley adds a nice touch of color to the dish.
  • For an amazing Italian feast, start the meal with Cheesy Garlic Bread and a Classic Caesar Salad!

🔥 How To Store and Reheat

  • Keep leftovers in an air-tight container in the fridge for up to 5 days.
  • This pasta (and sauce) has so much flavor, it is still incredible when reheated.
  • Simply reheat on the stove in a skillet over medium heat. Add a splash of chicken broth, if necessary, to loosen the sauce up.

🙋🏽‍♂️ Frequently Asked Questions

Why is the dish called all’Amatriciana?

The dish originated in the Italian town Amatrice in the Lazio region of Italy. This is where the name comes from. It has been prepared for centuries. It has become a staple in Rome, about 2 hours from Rome.

Can Bucatini all’Amatriciana be made in advance?

Although we think it is best served fresh, you can make the dish in its entirety up to 24 hours in advance and then reheat on the stove over medium heat (adding a splash of broth, if necessary). Since the dish only takes about 20 minutes to prepare, it’s easy to prepare shortly before you plan to serve it.

What’s the best pasta for all’Amatriciana?

Bucatini is a thick, hollow, tubular pasta similar to spaghetti, and it is traditionally served with the dish. However, any long pasta will work, such a spaghetti, linguine, fettuccine, or pappardelle.

A white pasta bowl with a wide lip is filled with bucatini all'Amatriciana and garnish with chopped Italian parsley.

🇮🇹 Other Classic Italian Pasta Recipes

  • A white dinner plate filled with a serving of tonnarelli cacio e pepe with a glass of white wine nearby.
    Tonnarelli Cacio e Pepe
  • An overhead view of a large stainless steel skillet filled with spaghetti all vongole with opened clams resting on top of the cooked pasta and two serving utensils inserted into the side of the dish.
    Spaghetti alle Vongole (Pasta with Clam Sauce)
  • A close-up view of an antique bowl that is filled with a serving of homemade beef ravioli that is topped with a tomato sauce, shredded parmesan cheese, and chopped basil.
    Homemade Beef Ravioli with Tomato Sauce
  • A large patterned Italian pasta bowl filled with Pappardelle Bolognese and a small bowl of Parmesan cheese next to it.
    Pappardelle Bolognese

Ready to make the best pasta dish this side of Rome? Go for it!

And when you do, be sure to take a photo of it, post it on Instagram, and tag @HowToFeedaLoon and hashtag #HowToFeedaLoon!

A large, deep skillet filled with Bucatini all’Amatriciana with a block of cheese nearby.
Print Recipe
5 from 4 votes

Bucatini all’Amatriciana

Here is a classic Italian pasta dish that features thick, spaghetti-like bucatini noodles coated in a savory sauce made from guanciale, tomatoes, and Pecorino Romano cheese. This hearty and flavorful dish embodies the essence of Roman cuisine, showcasing how simple ingredients can create a truly unforgettable meal.
Prep Time10 minutes mins
Cook Time20 minutes mins
Total Time30 minutes mins
Course: Entree / Pasta
Cuisine: Italian
Servings: 4
Calories: 645kcal
Author: Kris Longwell

Equipment

  • 1 large (12-inch) skillet
  • Pot for boiling pasta

Ingredients

  • 8 oz guanciale cubed, or pancetta
  • ¼ cup white wine
  • ½ teaspoon red pepper flakes
  • 1 28 oz can whole tomatoes San Marzano
  • Salt
  • 12 oz bucatini pasta dried
  • ⅔ cup Pecorino-Romano cheese freshly grated, divided
  • ¼ cup Italian parsley chopped, for garnish (optional)

Instructions

  • Bring a pot of salted water to a boil.
  • Heat a large skillet over medium heat and add the guanciale. Stir until slightly crispy, about 3 to 5 minutes. Use a metal slotted spoon to remove the guanciale and place it on a plate lined with paper towels. Don't remove the rendered grease.
    8 oz guanciale
  • Stand back, and carefully add the white wine to the skillet. Stir in the red pepper flakes, and then use your hands to squeeze the tomatoes into the skillet. Hold the liquid from the canned tomatoes off to the side (you may not need it). Add a healthy pinch (½ tsp) of salt and then simmer on medium-low for 10 minutes.
    ¼ cup white wine, ½ teaspoon red pepper flakes, 1 28 oz can whole tomatoes, Salt
  • Meanwhile, add the pasta to the boiling water. You'll want to cook the pasta until just al denté (don't overcook it!), usually about 10 minutes.
    12 oz bucatini pasta
  • Stir the cooked guanciale into the sauce and simmer for 1 minute, stirring often. Use tongs to remove cooked pasta from the water and place it in the sauce (it's okay if the pasta has water on it). Stir to coat the pasta.
  • Add ½ cup of the grated cheese to the pasta and toss to coat.
    ⅔ cup Pecorino-Romano cheese
  • Serve the pasta at once, garnished with chopped parsley (if using) and the remaining grated cheese at the table.
    ¼ cup Italian parsley

Video

Notes

NOTE: Watch the video near the top of the recipe for visual guidance.
See the blog post for substitutions for all ingredients. 
The cheese is best if grated from a block just before preparing the dish. 
Leftovers will keep in an air-tight container in the fridge for up to 5 days. Reheat in a skillet over medium heat (add a splash of broth to help loosen the sauce). 

Nutrition

Calories: 645kcal | Carbohydrates: 65g | Protein: 23g | Fat: 31g | Saturated Fat: 12g | Polyunsaturated Fat: 1g | Monounsaturated Fat: 1g | Cholesterol: 78mg | Sodium: 698mg | Potassium: 241mg | Fiber: 3g | Sugar: 3g | Vitamin A: 461IU | Vitamin C: 5mg | Calcium: 203mg | Iron: 2mg

Pork Chop Agrodolce with Mushrooms

March 23, 2025 by Kris Longwell 5 Comments

A serving of pork chop agrodolce with mushrooms on a white dinner plate with a glass of white wine next to it.

Pork Chop Agrodolce with Mushrooms is a delightful dish that perfectly balances sweet and tangy flavors, creating a mouthwatering experience with each bite. When paired with creamy, homemade buttery mashed potatoes, it transforms into a comforting and satisfying meal that is sure to impress.

A serving of pork chop agrodolce with mushrooms on a white dinner plate with a glass of white wine next to it.
[feast_advanced_jump_to]

🍶 Recipe Ingredients

The ingredients for this dish are simple yet work together to create a luxurious taste that beautifully complements the richness of the pork.

Using Mangalitsa pork chops from Mangalitsa Estates guarantees a delectable flavor and tenderness, elevating this dish to an unforgettable culinary experience.

Use Discount Code: LOON15 for 15% off!

A collage of ingredients for Pork Chop Agrodolce with Mushrooms, featuring Mangalitsa pork chops, fresh mushrooms, balsamic vinegar, honey, butter, and herbs, all arranged on a rustic wooden surface.

🍯 Substitutions and Variations

  • Pork Chops – We recommend a center-cut, bone-in pork chop for this dish. However, you can use boneless if desired. Order the New York Mangalitsa Pork Chop from Mangalitsa Estates for the best possible pork chop.
  • Agrodolce Sauce – Go with an aged balsamic vinegar for the best flavor. Granulated sugar can be substituted for the honey.
  • Mushrooms – We love baby bella mushrooms, but any type will work. Great options are white button, cremini, shiitake, or any combination of wild mushrooms.
  • Flavor Enhancers – Fresh rosemary gives a depth of flavor to the sauce. Fresh thyme can be substituted. For this sauce, we don’t recommend dried herbs.

See the recipe card (with video) below for a full list of ingredients and measurements.

👩🏼‍🍳 How To Make Pork Chop Agrodolce with Mushrooms

A person sprinkling salt and pepper over two uncooked pork chops on a cutting board.
  1. Step 1: Season the pork chops liberally with salt and pepper all over.
Whole button mushrooms in a large skillet that have been sautéed.
  1. Step 2: Sauté the whole mushrooms in butter until soft.
Balsamic vinegar being poured from a glass cup into a skillet filled with honey and sautéed whole mushrooms.
  1. Step 3: Pour the honey and balsamic vinegar over the mushrooms and bring to a simmer.
Whole sautéed mushrooms simmering in an agrodolce sauce with a sprig of rosemary also in the sauce.
  1. Step 4: Simmer the sauce, stirring often, until it thickens to a glaze.
A person using a small brush to baste two pork chops with agrodolce sauce on a gas grill.
  1. Step 5: Cook the pork chops on a hot grill, basting with the agrodolce sauce occasionally.
A person spooning an agrodolce sauce with mushrooms over a grilled pork chop on a white dinner plate.
  1. Step 6: Plate the cooked pork chop and top with the agrodolce mushroom sauce.

Expert Tip

It is important to cook the pork chops until they reach an internal temperature of 140°F. The internal temperature will rise another 5 degrees as it rests for about 10 minutes once it comes. A digital thermometer ensures a perfectly cooked pork chop!

🍽️ How To Serve

  • The sauce can be made several hours in advance. Be sure to spoon some of the sauce into a bowl that you’ll use for basting the chops on the grill.
  • The pork chops can also be seared in a skillet or in an oven at 350°F for about 30 minutes (for 1-inch thick chops).
  • Buttery mashed potatoes, roasted broccoli, and perfectly steamed rice all make excellent sides.

🔥 How To Store and Re-heat

  • Store leftovers in an air-tight container with a lid in the fridge for 3 to 5 days.
  • To reheat, place the pork and mushrooms in a dish and spoon the sauce over the top. Cover with foil and heat in the oven at 350°F for 20 minutes.
  • You can also reheat in a large skillet over medium heat until heated through. Add beef (or chicken) broth to thin the sauce, if necessary.

🙋🏽‍♂️Frequently Asked Questions


What is the best cut for Pork Chop Agrodolce with Mushrooms?

We recommend a thick center-cup pork chop, preferably bone-in. For the best pork chop, order from Mangalitsa Estates.

Is Agrodolce with Mushrooms good with other proteins?

Absolutely! It’s amazing with grilled chicken, steak, and fish. Try our Baked Halibut with Agrodolce for an amazing seafood version.

Can Agrodolce Sauce be made in advance?

Yes, the sauce will thicken considerably after it cools off. However, it can easily be reheated (with the mushrooms). You can make the sauce up to 24 hours in advance. If necessary, add a little broth to thin the sauce, if too thick.

A partially eaten pork chop agrodolce with mushrooms sitting on a white dinner plate.

😋 Other Amazing Mangalitsa Pork Recipes

  • A straight-on view of a half smoked bourbon glazed ham resting on a large white platter with numerous slices cut from the roast on stacked also on the platter.
    Bourbon Orange Glazed Ham (Holiday Ham)
  • An overhead view of sliced best-ever pork tenderloin topped with a cranberry reduction on a large white platter with sprigs of parsley and a large serving fork next to the sliced meat.
    Best-Ever Pork Tenderloin
  • An overhead view of two smoked pork wings that are fully cooked and slathered with homemade barbecue sauce.
    Smoked Pork Wings
  • An overhead view of a white dinner plate with a grilled Delmonico pork steak on it next to a sprig of rosemary and roasted new potatoes.
    Delmonico Pork Steak

Ready to make the best pork chop this side of Rome? Go for it!

And when you do, be sure to take a photo of it, post it on Instagram and tag @HowToFeedaLoon and hashtag #HowToFeedaLoon!

A serving of pork chop agrodolce with mushrooms on a white dinner plate with a glass of white wine next to it.
Print Recipe
5 from 3 votes

Pork Chop Agrodolce with Mushrooms

Grilled Pork Chop Agrodolce with Mushrooms is a flavorful dish that features succulent pork chops grilled to perfection and topped with a tangy-sweet agrodolce sauce, which balances the richness of the meat. The addition of earthy mushrooms enhances the dish, creating a delightful combination of textures and flavors.
Prep Time15 minutes mins
Cook Time25 minutes mins
Resting time10 minutes mins
Total Time50 minutes mins
Course: Entree
Cuisine: Italian
Servings: 2
Calories: 719kcal
Author: Kris Longwell

Equipment

  • Gas, charcoal, or electric grill
  • large (12-inch) skillet
  • Digital thermometer

Ingredients

  • 2 pork chops preferably at least 1 inch thick
  • salt and pepper
  • 6 tablespoon unsalted butter divided
  • 8 oz mushrooms button or baby Bella, whole
  • ¼ cup honey
  • ½ cup balsamic vinegar
  • 2 sprigs rosemary fresh

Instructions

  • Liberally sprinkle salt and pepper all over the pork chops.
    2 pork chops, salt and pepper
  • Melt 4 tablespoon butter in a large skillet over medium heat. Add the mushrooms and sauté, stirring often, until soft, about 10 minutes. Season with a pinch of salt and pepper.
    6 tablespoon unsalted butter, 8 oz mushrooms
  • Add the honey, balsamic vinegar, and rosemary to the skillet and bring to a simmer. Cook, stirring constantly, until thickened, about 5 to 8 more minutes. Stir in ½ teaspoon salt and pepper, each. Use a large spoon (or ladle) to remove about ¼ cup of the sauce to use for basting the chops on the grill.
    ¼ cup honey, ½ cup balsamic vinegar
  • Meanwhile, turn your grill to high heat. Place the pork chops over the direct heat and cook for about 10 minutes. Turn the chops over and baste them with the sauce. Grill for another 8 to 10 minutes. Turn the chops over and baste the other side. Continue grilling and basting until an internal temperature reaches 140°F.
  • Allow the chops to rest for 10 minutes. Heat the sauce over low heat and stir in the remaining 2 tablespoon of butter. Remove the rosemary.
  • Plate the pork chops and spoon the agrodolce mushroom sauce over the top.

Video

Notes

NOTE: Watch the video near the top of the recipe for visual guidance.
Use a digital thermometer to ensure the chops reach an internal temperature of 140 to 145°F. 
We order our chops from Mangalitsa Estates. Use code LOON15 for a 15% discount! 
The sauce can be made up to a day in advance. Reheat on the stove over medium heat, adding broth to thin, if necessary. 
Leftovers will keep covered in the fridge for up to 5 days. 

Nutrition

Calories: 719kcal | Carbohydrates: 50g | Protein: 33g | Fat: 24g | Saturated Fat: 9g | Polyunsaturated Fat: 3g | Monounsaturated Fat: 6g | Trans Fat: 1g | Cholesterol: 180mg | Sodium: 91mg | Potassium: 965mg | Fiber: 1g | Sugar: 47g | Vitamin A: 1058IU | Vitamin C: 3mg | Calcium: 44mg | Iron: 2mg

Creamy Irish Potato Soup

March 16, 2025 by Kris Longwell 6 Comments

Two soup bowls filled with creamy Irish potato soup topped with crumbled bacon and snipped chives.

Creamy Irish Potato Soup is delicious and easy to prepare, making it a perfect choice for a comforting meal. With simple ingredients that combine beautifully, this soup pairs wonderfully with homemade Irish soda bread for a hearty and satisfying dining experience!

Two soup bowls filled with creamy Irish potato soup topped with crumbled bacon and snipped chives.
[feast_advanced_jump_to]

Recipe Ingredients

This soup features a handful of humble ingredients, but the authentic preparation methods are essential to unlocking its rich, comforting flavors. Find ingredient notes (including substitutions and variations) below.

A collection of uncooked ingredients for creamy Irish potato soup.

Substitutions and Variations

  • Flavor Enhancers – Chopped onions and celery don’t add an overpowering taste, but they add depth to the flavor profile. We season the soup with garlic powder, salt, and pepper. However, the garlic powder can be omitted and you’ll still have amazing flavor. Fresh garlic can also be sautéed with the onion and celery.
  • Dairy – Butter is ideal for sautéing the vegetables. Seek out Irish butter, if possible. We love Kerrygold, which can be found in most supermarkets. Olive oil or vegetable oil can be substituted. For the cream, we recommend whole milk, however, heavy cream (or double) or half and half can be substituted.
  • Broth – If you have the time, homemade chicken broth adds even more flavor, but, store-bought is perfectly acceptable. Homemade vegetable stock (or store-bought) is an excellent substitution.

Refer to the recipe card (with video) below for a full list of ingredients and measurements.

Expert Tip

“Floury” potatoes are traditionally used in Ireland for preparing Irish potato soup. These types of potatoes are known for their dry texture and high starch content. The most popular varieties are Maris Piper and Kerr’s Pink. In North America, Russet or Gold potatoes are the ideal choices. These are the spuds utilized in recipes such as Buttery Mashed Potatoes and Loaded Potato Skins.

How To Make Creamy Irish Potato Soup

Chopped onion and celery being sautéed in butter in a large black pot.
  1. Step 1: Sauté the chopped onion and celery in the butter over medium heat.
Peeled and cubed Russet potatoes being sautéed in a large black pot.
  1. Step 2: Stir in the cubed (and peeled) potatoes.
A person pouring chicken broth from a large glass measuring cup into a black pot filled with cubed potatoes.
  1. Step 3: Pour the broth into the pot, bring it to a boil, and then simmer (on low) for 25 minutes.
An immersion blender being used to purée potatoes for creamy Irish potato soup
  1. Step 4: Use an immersion blender to purée the potatoes and sautéed veggies.
A person pouring whole milk from a small glass milk jug into a pot of puréed Russet potatoes.
  1. Step 5: Stir in the milk and the seasonings. Heat for a few more minutes.
A person sprinkling crumbled cooked bacon onto a bowl filled with creamy Irish potato soup.
  1. Step 6: Transfer to soup bowls and garnish with snipped chives and crumbled bacon. Serve at once!

How To Serve

  • This soup is always best served nice and hot. We love to place the pot right on the table and let guests fill their bowls.
  • Be sure to have plenty of crumbled cooked bacon and snipped chives available for garnish. In our opinion, these two additions take the soup to the next level.
  • This is the perfect beginning to a St. Patrick’s Day feast starring Braised Corned Beef and Cabbage or Pub-Style Guinness Beef Pot Pie!

How To Store and Reheat

  • The soup can be made several days in advance of serving. We think it’s even better the next day!
  • Store the soup in an air-tight container in the fridge for up to 5 days. The soup can be frozen, though it may lose some of its creamy texture after it thaws.
  • Reheat in a sturdy pot on the stove over medium heat until bubbly. Be sure to have cooked bacon on hand!

Frequently Asked Questions

What is the best potato for Irish potato soup?

In North America, go with Russet or gold potatoes. If you have access to them, any kind “floury” potatoes such as Maris Piper, Kerr’s Pink, Maritiema are perfect.

Can Irish potato soup be frozen?

It can be, however, the soup may not be as silky as it was before freezing it.

Is Irish potato soup vegan?

If you use cream, then, no, the soup is not vegan. If you choose to omit the cream, you’ll need to increase the broth (vegetable) by at least one cup, or until you reach the desired consistency.

A soup spoon being raised from a bowl of creamy Irish potato soup with bacon and chives on top.

More Popular Soup Recipes

  • A white soup filled with roasted tomato basil soup next to sliced grilled cheese sandwiches.
    Roasted Tomato Basil Soup
  • An overhead view of a black pot and a large wooden ladle lifting a serving of classic minestrone soup up out of the pot.
    Classic Minestrone Soup
  • An overhead view of a white soup bowl that is filled with homemade chicken and dumplings including sautéed carrots and celery.
    Homemade Chicken and Dumplings
  • Two white soup bowl filled with homemade French onion soup with slices of a toasted baguette nearby.
    Homemade French Onion Soup

Ready to make the best potato soup this side of Dublin? Go for it!

And when you do, be sure to tag @HowToFeedaLoon and hashtag #HowToFeedaLoon!

A blue soup bowl filled with creamy Irish potato soup and garnished with crumbled bacon and snipped chives.
Print Recipe
4.67 from 3 votes

Creamy Irish Potato Soup

This soup is pure comfort food. It's easy to prepare and reheats beautifully. If you don't have an emulsion blender, then you can purée the soup (in batches) in a food process or even a blender. Or, you can mix it with an electric hand mixer.
Prep Time20 minutes mins
Cook Time40 minutes mins
Total Time1 hour hr
Course: Appetizer or Soup
Cuisine: Irish
Servings: 8
Calories: 269kcal
Author: Kris Longwell

Equipment

  • 1 Large pot 6 quart, or larger
  • Immersion blender see NOTES

Ingredients

  • 4 tablespoon butter preferably Irish
  • 1 cup onion chopped
  • 1 cup celery chopped
  • 3 lbs russet potatoes or gold, peeled and cubed
  • 5 cups chicken broth or vegetable
  • 1 cup whole milk
  • 1 teaspoon garlic powder
  • 2½ teaspoon Kosher salt
  • 1 teaspoon black pepper ground
  • 4 strips bacon cooked and crumbled, for garnish
  • 2 tablespoon chives snipped, for garnish

Instructions

  • Melt the butter in a large pot over medium heat. Add the onion and celery and sauté until soft, stirring often, about 4 to 6 minutes.
    4 tablespoon butter, 1 cup onion, 1 cup celery
  • Add the potatoes and stir to coat with the butter. Add the chicken broth and bring to a boil. Lower the heat to low and simmer for 25 minutes, or until the potatoes can easily be pierced with a sharp knife.
    3 lbs russet potatoes, 5 cups chicken broth
  • Use an immersion blender to purée the potatoes. The mixture will be very thick. Stir in the milk, garlic powder, salt, and pepper. Simmer for another 5 to 10 minutes. Taste and add more salt, if desired.
    1 cup whole milk, 1 teaspoon garlic powder, 2½ teaspoon Kosher salt, 1 teaspoon black pepper
  • Serve hot garnished with crumbled bacon and snipped chives (if desired).
    4 strips bacon

Video

Notes

If you don’t have an immersion blender, you can purée the potato mixture (very carefully and in batches) in a food processor or blender. Or, use an electric hand mixer. Or, if you prefer your soup to be chunky, just mash the potatoes with a masher or wooden spatula until you’ve reached the desired consistency.
Leftovers are wonderful and can be reheated on the stove over medium heat. Store in an air-tight container in the fridge for up to 5 to 6 days.  
The soup can be frozen but won’t be as silky once it has thawed and reheated. 

Nutrition

Calories: 269kcal | Carbohydrates: 36g | Protein: 7g | Fat: 12g | Saturated Fat: 6g | Polyunsaturated Fat: 1g | Monounsaturated Fat: 4g | Trans Fat: 0.2g | Cholesterol: 29mg | Sodium: 1421mg | Potassium: 877mg | Fiber: 3g | Sugar: 4g | Vitamin A: 324IU | Vitamin C: 12mg | Calcium: 80mg | Iron: 2mg

Colcannon (Irish Mashed Potatoes)

March 12, 2025 by Kris Longwell 1 Comment

A straight-on view of a large white serving bowl filled with colcannon (Irish mashed potatoes) topped with two melty tabs of butter and garnished with chopped scallions.

There is just something so comforting about Irish food. No frills, just good-tasting food. This dish is the perfect example of that.

There’s no question about it, mashed potatoes are one of the most beloved dishes in the world. It would make sense that the Irish take the most basic potato dish and make it even more perfect. Easy, simple, and incredibly delicious!

An overhead view of a large bowl filled colcannon (Irish mashed potatoes) with a couple tabs of butter in the center and whole russet potatoes resting nearby.

Table of Contents

  • The Ingredients (Including Substitutions)
  • Steps for Making Colcannon (Irish Mashed Potatoes)
  • Frequently Asked Questions
  • How To Store and Reheat
  • Can It Be Frozen?
  • What to Serve with Colcannon

The Ingredients (Including Substitutions)

Potatoes – Any type of starchy potato will work. Russet or gold potatoes are best. The Irish use a potato that has a “floury” texture and high starch content, such as Maris Piper. If you have access to this type of potato, grab it! These are also wonderful in Creamy Irish Potato Soup!

Green vegetables – Green cabbage or kale are traditional. Both are delicious. We boil them briefly with a little butter to help them wilt. Scallions (or green onions) are a delicious addition, too. Red cabbage can be substituted for green.

Dairy – The amount of butter is a matter of preference. We think the more buttery the better (2 sticks!). Pick up some Irish butter for the best results. For the cream, we use whole milk, but half and half, or heavy (double) cream can be substituted.

Bacon – This is optional, but we think it adds an amazing depth of flavor. Seek out traditional “back” bacon, which is also known as Canadian bacon. Regular bacon can certainly be substituted.

Seasonings – Nothing fancy is needed. Salt and pepper is all you need. If you’re adding bacon, taste before you start adding the salt, as some bacon is already quite salty. We usually go with 2 teaspoons of salt for 3 lbs of potatoes.

EXPERT TIP: The potatoes for colcannon are typically steamed with the skins on. Once very tender, the skin is removed (with a knife). For medium-sized Russet potatoes, it will take about 35 to 40 minutes for them to easily be pierced with a knife. If desired, you can peel the potatoes first, roughly chop them, and then boil them until soft (this is quicker), but, not as traditional.

An overhead view of four large Russet potatoes resting inside a stock pot that is lined with a steamer basket in the bottom underneath the potatoes.

Steps for Making Colcannon (Irish Mashed Potatoes)

  1. Roughly cut the back bacon (7 oz) and cook in a skillet until lightly browned.
  2. Steam the potatoes (3 lbs) until a knife (or fork) can easily pierce all the way through the spud.
  3. Carefully remove the skin from the potatoes, roughly chop them, and place them in a large bowl
  4. Core and chop about half a head of green cabbage. Place the cabbage in boiling water for 2 minutes along with two tablespoons of butter. Drain, and add to the potatoes. Add the green onions (Half to 1 cup, chopped).
  5. Melt the butter (1 to 2 sticks, 4 to 8 ounces) and pour it onto the potatoes and cabbage. Heat the milk in the microwave or on the stove. If desired, heat the milk with the scallions.
  6. Add the cooked bacon and about a quarter cup of the warmed milk.
  7. Slowly mash everything together, adding more warm milk until the desired consistency is reached. Season with 1 to 2 teaspoon of salt and 1 teaspoon black pepper. (taste before adding more than 1 teaspoon salt).
  8. Serve at once with extra butter and scallions for garnish.
Four images with first being a person mashing cooked potatoes with a masher and then the person pouring in cream with scallions, then adding in cooked chopped cabbage, and then topping with crispy pieces of back bacon.

Frequently Asked Questions

Do the cabbage and scallions impart a strong flavor?

No, not at all. It is a subtle flavor that enhances the dish. The scallions have a more pronounced flavor than the cabbage. If you are not a fan of any type of onion flavor, then pull back on the scallions or omit them. The cabbage will wilt and reduce somewhat during the cooking process.

Should the potatoes be creamy or lumpy?

This is a matter of taste. Many Irish cooks will tell you they prefer the dish not to be creamy, but to have plenty of texture. We don’t recommend mixing with an electric mixture. If possible, use a bean or potato masher, or even just a large wooden spoon or spatula. Go easy when adding the cream; the more you add, the creamier the colcannon will be.

Can the dish be made in advance?

Yes, you can make the dish up to 3 days in advance of serving. Place in a container with an air-tight lid and refrigerate. You can reheat in the oven (325°F) in a covered baking dish for about 30 minutes (or until heated through), stirring a couple of times, and adding a splash of milk to help loosen it up. You can also transfer it to your slow cooker and cook on LOW for 2 to 3 hours, stirring often, and adding milk as needed.

A straight-on view of a large white serving bowl filled with colcannon (Irish mashed potatoes) topped with two melty tabs of butter and garnished with chopped scallions.

How To Store and Reheat

  • If making ahead, keep the colcannon refrigerated for an hour or so before serving.
  • Store leftovers in an air-tight container in the fridge for up to 5 days.
  • As with mashed potatoes, colcannon reheats wonderfully in the microwave. See FAQs for reheating a large quantity.

Can It Be Frozen?

  • Yes, however, it is important that the butter is incorporated into the potatoes before adding to a freezer baggie or container; otherwise, the potatoes will separate after thawing.
  • Don’t freeze for more than 3 months. You could get freezer burn if longer.
  • Allow to completely thaw either in the fridge for a couple of days or on the counter for a few hours, depending on how much you are thawing.

What to Serve with Colcannon

  • Corned Beef and Cabbage (Oven/Braised)
  • Classic Guinness Beef Stew (Oven or Stovetop)
  • Corned Beef and Cabbage (Instant Pot)
  • Irish Soda Bread
  • Marinated Grilled Lamb Chops
  • Slow-Cooker Irish Coddle
  • Guinness Beef Stew
  • Irish Apple Cake with Vanilla Sauce
A close-up view of a wooden spoon being used to hold up a large serving of colcannon (Irish mashed potatoes) with a pad of melting butter on top.

Ready to make the best side dish this side of Dublin? Go for it!

And when you do, be sure to take a photo of it, post it on Instagram, and tag @HowToFeedaLoon and hashtag #HowToFeedaLoon!

An overhead view of a large bowl filled colcannon (Irish mashed potatoes) with a couple tabs of butter in the center and whole russet potatoes resting nearby.
Print Recipe
5 from 1 vote

Colcannon (Irish Mashed Potatoes)

Colcannon is a traditional Irish potato dish that is simple but loaded with amazing flavor. The dish can be made a day or two in advance, simply reheat (covered) in the oven. See NOTES for more details. Perfect for St. Patrick's Day, or anytime of the year!
Prep Time15 minutes mins
Cook Time1 hour hr
Total Time1 hour hr 15 minutes mins
Course: Side Dish
Cuisine: Irish
Servings: 8
Calories: 437kcal
Author: Kris Longwell

Equipment

  • Steamer or pressure cooker
  • 1 large bowl for mixing
  • potato (or bean) masher or large wooden spatula or spoon

Ingredients

  • 3 lbs russet potatoes skin on (or gold potatoes)
  • 7 oz back bacon aka Canadian bacon, cut into pieces
  • 8 cups green cabbage cored and roughly chopped, usually half a cabbage
  • 18 tablespoon butter 2 sticks + 2 tbsp, see NOTES
  • 1 cup whole milk warmed, see NOTES
  • ½ cup scallions chopped, plus extra
  • Salt and pepper see NOTES

Instructions

  • Steam the potatoes until a knife can easily pierce all the way through, usually about 40 to 45 minutes for 3 lbs of medium-sized potatoes. Set aside until just cool enough to remove the skins, roughly chop, and place in a large bowl.
    3 lbs russet potatoes
  • While the potatoes are steaming, add the cut bacon into a large skillet over medium heat and cook, stirring often, until lightly browned, about 8 to 10 minutes. Set aside.
    7 oz back bacon
  • Bring a pot of water to a boil. Add the chopped cabbage and 2 tablespoon butter. Bring back to a boil and simmer for 2 minutes. Drain and add to the potatoes in the bowl.
    8 cups green cabbage
  • Melt the butter (1 to 2 sticks, see NOTES). Warm the milk in the microwave or on the stove. To infuse scallion taste into the milk, add them while the milk is warmed (optional). Drain back into the measuring cup, reserving the scallions.
    18 tablespoon butter, 1 cup whole milk
  • Add the scallions (½ cup) and melted butter to the bowl. Use a masher or large spatula to begin mashing and mixing the ingredients. Stir in the warmed milk slowly, and keep stirring until the desired consistency is reached (you may not use a full 1 cup). Stir in the bacon, salt, and pepper. Start with 1 teaspoon salt and 1 teaspoon pepper. Taste, and add more salt, if desired.
    ½ cup scallions, Salt and pepper
  • Serve at once with additional butter and scallions for garnish.

Video

Notes

NOTE: Watch the video in the recipe card for visual guidance.
For the butter and milk: We love to make these potatoes nice and buttery, so we go with 2 full sticks, melted (8 ounces, 16 tbsp). If you prefer less butter, go with 1½ sticks, or just 1 stick. The more butter you use, the less cream you’ll likely need to reach the desired consistency. 
For the salt: We typically add about 2 teaspoon of salt to the dish. However, some bacon has a higher salt content than others. After you stir in the bacon, add 1 teaspoon salt (and pepper), and do a taste test. You’ll likely want to add a little more salt, but maybe not!
Leftovers heat easily in the microwave. The dish can be made 2 to 3 days in advance. Reheat (covered) in the oven at 325°F until heated through, about 30 minutes, stirring once or twice. 
 

Nutrition

Calories: 437kcal | Carbohydrates: 37g | Protein: 11g | Fat: 28g | Saturated Fat: 17g | Polyunsaturated Fat: 1g | Monounsaturated Fat: 8g | Trans Fat: 1g | Cholesterol: 84mg | Sodium: 460mg | Potassium: 984mg | Fiber: 4g | Sugar: 5g | Vitamin A: 969IU | Vitamin C: 36mg | Calcium: 102mg | Iron: 2mg

Crispy Coconut Shrimp

March 9, 2025 by Kris Longwell 1 Comment

A straight-on view of a pile of crispy coconut shrimp on a white plate with a colorful bowl of Thai sweet chili sauce sitting next to the shrimp.

This shrimp dish was popular back in the 1990s and 2000s – and in our house, it’s still just as popular.

We love all kinds of shrimp, including Southern fried shrimp, grilled shrimp, and even curried shrimp. But there is something about the flavors of this dish that is special. The Thai Sweet Chili Sauce is easy to prepare and the perfect match to the crunchy, slightly sweet shrimp! And it’s so easy to prepare!

A straight-on view of a pile of crispy coconut shrimp on a white plate with a colorful bowl of Thai sweet chili sauce sitting next to the shrimp.
[feast_advanced_jump_to]

The Ingredients You Will Need (with Substitutions)

  • Dry Batter Ingredients – All-purpose flour is best, but bread flour can be substituted. You’ll need salt and pepper for seasoning.
  • Wet Batter Ingredients – Eggs, melted butter (preferably unsalted, but salted butter can be substituted), and orange juice (with or without pulp).
  • For Dredging – Panko breadcrumbs give more texture, but regular breadcrumbs can be substituted. We prefer the hint of sweetness with the sweetened coconut flakes, but unsweetened can be substituted.
  • Oil for Frying – We recommend vegetable oil, but canola or peanut oil can be used. Don’t use olive oil or extra-virgin olive oil.

EXPERT TIP: The wet batter when combined with the dry batter will be somewhat thick. If leaving the tails on, use them as a handle to submerge the body of the shrimp. Then press the coconut/breadcrumb mixture into the wet batter. Be sure to dredge all the shrimp before you begin frying them (they fry quickly!).

Two images with the first being a person plunging an uncooked peeled shrimp into a thick batter and then that shrimp being dredged in a coconut breadcrumb mixture.

Frequently Asked Questions

Can they be made in advance?

Don’t fry them too far in advance. You can fry them for up to 20 minutes before serving and then place them on a baking rack on a baking sheet in a low-temp oven (250°F) until ready to serve. You can batter them for up to an hour before frying. Remember, they fry up very quickly!

What size shrimp works best?

We’ll say the bigger the better. Although they’ll still be delicious when smaller. These are great finger food, so the larger the shrimp, the easier they are to grab onto. We go with large or extra-large. Collosol is fine, but if it costs more, no need to spend the extra money.

Can they be baked (or air-fried)?

Absolutely. They won’t be quite as crispy, but they will still be delicious. We provide the two techniques below

A straight-on view of a metal spider being used to hold up three crispy coconut shrimp over a vat of hot oil.

How To Serve Coconut Shrimp

These make for a wonderful appetizer for guests. However, they would be a great entrée served with homemade French fries, hush puppies, and mango salsa.

You will definitely want a dipping sauce to serve with them. Our preference is Thai Sweet Chili Sauce, but Kickin’ Remoulade, Honey Mustard, Ranch, or just a simple apricot marmalade mixed with a little chili sauce works wonderfully, too.

These can be served individually or buffet style (on a platter). Consider providing small bowls for guests to fill with the dipping sauce. This helps to reduce double-dipping!

EXPERT TIP: We love to serve the Thai dipping sauce warm. If it’s too thick in the skillet, simply thin it with a little extra broth!

A close-up view of a wooden spoon being raised from a skillet filled with a simmering Thai sweet chili sauce on a gas stove.

How To Bake in the Oven

  • Preheat oven to 425°F.
  • Line a large baking sheet with parchment paper or a silicone mat.
  • Create a dredging station of a wet batter and coconut/breadcrumb mixture (just as written in the recipe card).
  • Coat the peeled shrimp with the wet batter and then dredge in the coconut/breadcrumbs. Place on the prepared baking sheet.
  • Bake until crispy, usually about 12 minutes. Serve at once.

How To Fry in an Air-Fryer

  • Set your air-fryer to 400°F.
  • Spray the basket with cooking spray.
  • Create a dredging station of a wet batter and coconut/breadcrumb mixture (just as written in the recipe card).
  • Coat the peeled shrimp with the wet batter and then dredge in the coconut/breadcrumbs. Place in a single layer in the basket (this may need to be done in batches).
  • Air fry for 4 minutes and then open the basket and carefully flip the shrimp. Fry another 4 to 5 minutes, until lightly browned and crispy. Serve at once.
An overhead view of a white plate filled with a pile of crispy coconut shrimp resting next to a white and blue bowl filled with a thick Thai sweet chili sauce.

This may be considered an old-school appetizer, but we think it’s time to make it all the rage again.

The ingredients are not exotic or highly expensive. The method for preparing them is quick and easy.

And when you pair the crispy shrimp with homemade Thai Sweet Chili Sauce, you have a savory treat that guests will be raving about for days on end!

A person holding a crispy coconut shrimp by the tail and plunging the rest of it into a bowl of Thai sweet chili sauce.

Ready to make the best shrimp appetizer (or entree) in town? Go for it!

And when you do, be sure to take a photo of it, post it on Instagram, and tag @HowToFeedaLoon and hashtag #HowToFeedaLoon!

A close-up view of crispy coconut shrimp on a white plate next to a colorful bowl of Thai sweet chili sauce.
Print Recipe
5 from 1 vote

Crispy Coconut Shrimp

The classic appetizer (or entrée) was hugely popular back in the 90s and 00s, but it's making a big comeback! There is so much to love! It comes together very quickly, so it's easy to serve just as guests are arriving! Be sure to serve with the Thai Sweet Chili Dipping Sauce!
Prep Time15 minutes mins
Cook Time15 minutes mins
Total Time30 minutes mins
Course: Appetizer / Entree
Cuisine: American
Servings: 6
Calories: 422kcal
Author: Kris Longwell

Equipment

  • 1 Sturdy skillet for frying, or a deep fryer
  • metal spider or metal slotted spoon, or metal tongs (for removing the shrimp from the oil)
  • candy/deep fry thermometer see NOTES

Ingredients

  • vegetable oil for frying
  • 1 cup all-purpose flour
  • 1 teaspoon Kosher salt
  • ½ teaspoon black pepper
  • 2 large eggs
  • 1 tbsp unsalted butter melted and slightly cooled
  • 1 cup orange juice
  • 3 cups sweetened coconut flakes
  • 1 cup Panko breadcrumbs
  • 1 lb extra-large shrimp peeled and deveined, (leave tails on, if desired).
  • Thai sweet chili sauce for serving

Instructions

  • Pour enough oil into a sturdy skillet (preferably cast iron) about halfway up (don't overfill!). Heat over medium heat until the oil reaches 335 to 350°F. See NOTES.
    vegetable oil
  • Meanwhile, whisk together the flour, salt, and pepper in a medium bowl. Set aside.
    1 cup all-purpose flour, 1 teaspoon Kosher salt, ½ teaspoon black pepper
  • In another medium bowl, whisk together the eggs and melted butter. Stir in the orange juice. Stir the flour mixture into the wet mixture until just smooth.
    2 large eggs, 1 tablespoon unsalted butter, 1 cup orange juice
  • In a shallow bowl, platter, or pan, mix the coconut flakes and Panko.
    3 cups sweetened coconut flakes, 1 cup Panko breadcrumbs
  • One by one, dip the shrimp into the batter and then press into the coconut mixture until coated (if tails are still on, leave them still visible).
    1 lb extra-large shrimp
  • Carefully add the breaded shrimp to the hot oil and fry until golden, flipping halfway through (about 4 minutes, total).
  • Drain on a plate lined with paper towels. Repeat with the remaining shrimp.
  • Serve at once with dipping sauce.
    Thai sweet chili sauce

Video

Notes

NOTE: Watch the video near the top of the recipe card for visual guidance. If you liked the video, please subscribe to our YouTube channel.
If you don’t have a thermometer, you can check the oil temperature by tossing a small piece of bread into the hot oil. If it browns in about 10 seconds, the oil is ready. If it browns very quickly, the oil is too hot. If it takes more than 15 seconds for the bread to brown, it’s not hot enough.
See the blog post for instructions on baking or air-frying the shrimp. Just a reminder, the shrimp won’t be as crispy as when you fry them, but they will still be delicious. 
The shrimp can be breaded for up to 1 hour before frying.  We recommend serving the shrimp soon after they have been fried. They only take a matter of minutes, so just before your guests arrive, fry them. If you’d like, you can keep them warm on a baking rack on a baking sheet in a 250°F oven before serving. 

Nutrition

Calories: 422kcal | Carbohydrates: 50g | Protein: 18g | Fat: 17g | Saturated Fat: 13g | Polyunsaturated Fat: 1g | Monounsaturated Fat: 2g | Trans Fat: 0.1g | Cholesterol: 162mg | Sodium: 1035mg | Potassium: 389mg | Fiber: 5g | Sugar: 20g | Vitamin A: 368IU | Vitamin C: 21mg | Calcium: 82mg | Iron: 3mg

Thai Sweet Chili Sauce

March 9, 2025 by Kris Longwell 1 Comment

An overhead view of a colorful bowl filled with a thick Thai sweet chili sauce and topped with chopped scallions and is on a plate filled with crispy coconut shrimp.

This sauce has a little sweetness and a little heat which makes it irresistible and delicious.

We love this sauce for so many reasons. It’s super easy and tastes so much better than the store-bought variety. It takes Crispy Coconut Shrimp to the next level!

A straight-on view of a pile of crispy coconut shrimp on a white plate with a colorful bowl of Thai sweet chili sauce sitting next to the shrimp.

Table of contents

  • Ingredients (Including Substitutions)
  • Frequently Asked Questions
  • How To Serve

Ingredients (Including Substitutions)

Most of the ingredients for this flavorful sauce can be found a most well-stocked supermarkets. Here’s what you’ll need to have on hand:

  • Cornstarch Slurry – You’ll need to mix about 1 tablespoon of cornstarch with 2 tablespoon water. If you like your sauce thin, cut the slurry in half.
  • Soy sauce, fish sauce, and garlic chili sauce – These can usually be found in the Asian section of your supermarket. Go with low-sodium soy, if desired.
  • Broth – Chicken broth (or stock) or vegetable broth are both great options.
  • Brown sugar – We use dark, but light can be substituted.
  • Lime juice – Don’t overdo it. Usually, the juice from 1 lime is enough.
  • Seasoning – We use Kashmiri chili powder, but, regular chili powder is perfectly fine. Add ground cayenne for additional heat.
  • Garnishes – Chopped scallions or chives are excellent, but also optional.

EXPERT TIP: Both soy sauce and fish sauce are high in sodium. If you like your sauce nice and salty, go with regular soy. To reduce your sodium levels, go with low-sodium soy sauce.

A person pouring soy sauce into a small skillet filled with a simmering Asian garlic chili sauce on a gas stove.

Frequently Asked Questions

Can the sauce be made in advance?

Absolutely! You can make the sauce up to 3 days in advance. The sauce is best served warm or at room temperature. If chilling for future use, allow the sauce to sit out for at least an hour, or warm gently in a small saucepan. If necessary, the sauce can be thinned with a little broth.

Is this sauce spicy?

This sauce does carry a little heat to it, but it’s not overly spicy. To make it with very little heat, only go with 1 to 2 tablespoon of the garlic chili sauce, and 1 teaspoon of chili powder, and don’t use any cayenne.

What if my sauce is too thick?

The cornstarch slurry will naturally thicken the sauce for you. This can take anywhere from 15 seconds to 2 minutes. If you feel like the sauce gets too thick, simply add small amounts of broth until you reach the desired consistency. Keep in mind that the sauce will thicken more as it cools off.

What do you serve the sauce with?

Any appetizer or dish that is made even better with a dipping sauce. It’s perfect for fried shrimp, dumplings, breadsticks, crackers, and sliced veggies!

A person pouring a cornstarch slurry from a small glass bowl into a stainless silver skillet filled with a simmering Asian sauce.

How To Serve

As mentioned, we love to serve this sauce warm or at room temperature.

If the sauce has been stored in the refrigerator, you’ll want the sauce to come to room temperature before serving. The sauce will thicken once it has cooled off.

EXPERT TIP: If serving this as part of meal, you may want to consider providing each guest their invididual small bowl of the sauce. If serving buffet-style, allow folks to spoon out as much as they want with a small lade. This helps to prevent double-dipping.

A person holding a crispy coconut shrimp by the tail and plunging the rest of it into a bowl of Thai sweet chili sauce.

Ready to make the best dipping sauce this side of Bangkok? Go for it!

And when you do, be sure to take a photo of it, post it on Instagram, tag @HowToFeedaLoon and hashtag #HowToFeedaLoon!

An overhead view of a colorful bowl filled with a thick Thai sweet chili sauce and topped with chopped scallions and is on a plate filled with crispy coconut shrimp.
Print Recipe
5 from 1 vote

Thai Sweet Chili Sauce

This dipping sauce is wonderful on so many levels. The recipe as written has a low to medium level of spice/heat. To reduce the spice level to very low, reduce the amount of garlic chili sauce, and chili powder, and don't use cayenne. Perfect for appetizers such as fried shrimp, dumplings, breadsticks, crackers, and cut veggies.
Prep Time10 minutes mins
Cook Time5 minutes mins
Total Time15 minutes mins
Course: Condiment
Cuisine: Asian / Thai
Servings: 6
Calories: 98kcal
Author: Kris Longwell

Equipment

  • 1 medium skillet

Ingredients

  • 1 tablespoon cornstarch
  • 2 tablespoon water
  • 2 tablespoon soy sauce
  • ½ cup chicken broth or vegetable broth
  • 1 tablespoon fish sauce
  • ¼ cup garlic chili sauce
  • 1 tablespoon lime juice from 1 lime
  • 2 tablespoon scallions chopped, divided
  • ½ cup dark brown sugar
  • 1 tablespoon chili powder
  • ½ teaspoon cayenne pepper optional

Instructions

  • In a small bowl, whisk together the cornstarch and water until fully combined. Set aside.
    1 tablespoon cornstarch, 2 tablespoon water
  • In a medium-sized saucepan over medium-high heat, add the soy sauce, broth, fish sauce, garlic chili sauce, lime juice, 1 tablespoon scallions, brown sugar, chili powder, and cayenne (if using). Bring to a boil.
    2 tablespoon soy sauce, ½ cup chicken broth, 1 tablespoon fish sauce, ¼ cup garlic chili sauce, 1 tablespoon lime juice, 2 tablespoon scallions, ½ cup dark brown sugar, 1 tablespoon chili powder, ½ teaspoon cayenne pepper
  • Reduce heat to medium and simmer for 2 minutes, stirring with a wooden spoon often.
  • Stir in the cornstarch slurry and cook, stirring constantly, until slightly thickened, about 1 to 2 minutes more.
  • Serve warm or at room temperature. Garnish with chopped scallions. If the sauce becomes too thick, thin it with a little more broth.

Video

Notes

NOTE: Watch the video near the top of the recipe for visual guidance. If you liked the video, please subscribe to our YouTube channel.
The sauce can be made up to 3 days in advance. Store in a jar (or container) with a lid in the fridge. Let come to room temperature (or warm on the stove) before serving. 
The sauce can be frozen for up to several months. Thaw completely and re-warm before serving. 
If the sauce has become too thick, warm it on the stove and add in small amounts of broth (1 tablespoon at a time) until you’ve reached the desired consistency. 

Nutrition

Calories: 98kcal | Carbohydrates: 23g | Protein: 1g | Fat: 1g | Saturated Fat: 0.04g | Polyunsaturated Fat: 0.1g | Monounsaturated Fat: 0.1g | Cholesterol: 0.4mg | Sodium: 857mg | Potassium: 87mg | Fiber: 1g | Sugar: 20g | Vitamin A: 487IU | Vitamin C: 1mg | Calcium: 25mg | Iron: 1mg

Bananas Foster

February 26, 2025 by Kris Longwell 1 Comment

An overhead view of two oval dessert dishes that are filled with bananas foster and topped with a scoop of melting vanilla ice cream and a mug of creamed coffee nearby.

There are so many reasons to love New Orleans. This dessert is one of the top reasons.

This classic dessert originated in the world-famous Brennan’s Restaurant down in the French Quarter of New Orleans back in the 1950s. It is still one of the most popular dishes in the Big Easy, and you will be surprised how easy it is to make at home! Serve a big bowl of gumbo and then this dessert for a Louisiana meal you won’t soon forget! Don’t forget the vanilla ice cream!

An overhead view of two oval dessert dishes that are filled with bananas foster and topped with a scoop of melting vanilla ice cream and a mug of creamed coffee nearby.

The Ingredients You Will Need

There are just a handful of ingredients in this classic dessert. You have options when it comes to alcohol. You can keep this spirit-free by substituting vanilla extract, but the flambéed rum is classic. Here’s what you’ll need to have on hand:

Butter – Unsalted.
Brown sugar – We prefer dark, but light can be substituted.
Cinnamon – Ground.
Banana Liqueur – This may require a quick trip to your liquor store. We like Drillaud. Quality makes a big difference.
Bananas – Get them slightly green. You don’t want them too ripened, meaning, too soft. They should be nice and solid. They will be softened significantly during the caramelization process.
Rum – Both white and spiced (or dark) are excellent choices.
Ice cream – Homemade vanilla is best, or your favorite purchased.

EXPERT TIP: It’s important to stir the sauce constantly once the butter melts. The sauce will thicken, and the sugar will dissolve into the butter.

A straight-on view of a large silver skillet filled with a simmering brown sugar and butter sauce that has a large wooden spoon resting the middle.

Tips for Making Perfect Bananas Foster

Use Ripe Bananas – Choose bananas that are ripe but not overripe. They should have a few brown spots for optimal sweetness and flavor, which will enhance the dish when cooked.

Select Quality Banana Liqueur and Rum – Use a good-quality liqueur and rum for the flambé. This will add depth and richness to the sauce. You can also experiment with a light rum for a slightly different flavor profile. White, dark, and spiced rum are acceptable, just don’t use the cheap variety.

Properly Caramelize the Sugar – When making the sauce, ensure that you allow the brown sugar to melt and caramelize slightly before adding the bananas. This creates a rich, caramel flavor that is essential to the dish.

Flambé with Care – When flambéing, make sure to stand back and use a long lighter or match to ignite the rum. This step adds a dramatic flair and enhances the flavor, but safety should always come first. Ensure that there are no flammable materials nearby.

Serve While Hot – The dish is best when the bananas and sauce are still hot. This will start to melt the ice cream and make the most amazing combination of flavors.

EXPERT TIP: Place the bananas into the sauce cut-side down. Then, when you flip them, the tender cut side will flambé perfectly and caramelize the tender banana.

An overhead view of a large stainless steel skillet filled with a layer of quartered bananas simmering in a thick caramel sauce on the stove.

How To Serve

It is really exciting for guests to see you flambé the bananas. Just be sure to take precautions. There is a fairly large flame that will occur. Have everyone stand back (including you).

If you want to bring the flambé table-side, be sure to take the skillet over directly from the stove while the sauce is still simmering. You’ll get the best flame when everything is very hot. But, be careful!

Also, have your ice cream slightly softened so scooping will be quick and easy.

We serve these in our oval individual baking dishes, but any small to medium bowl will work. Serve with a fork or spoon, or both.

A straight-on view of a silver skillet on gas stove that is filled with simmering banana pieces in a caramel sauce and rum that is has been ignited and is flaming.

Other Classic Dessert Recipes to Try

Every great meal deserves an equally great dessert to finish off the meal. Here is a collection of some of our all-time favorites:

  • Mardi Gras King Cake
  • New Orleans Beignets
  • Homemade Chocolate Delight
  • Old Fashioned Vanilla Ice Cream
  • Classic Churros
  • Southern Chess Pie
  • Blueberry Buttermilk Pie
  • Coconut Cream Pie
  • Chocolate Lava Cake

These are all amazing in their own way, without a doubt. But, in the meantime, isn’t this classic dessert calling your name?

A person using a large silver spoon to drizzle a thin caramel sauce over a serving of bananas foster in small oval dessert dish next to a glass mug of creamed coffee.

No trip to New Orleans is complete without a reservation at Brennan’s Restaurant, which, of course, includes a round of this epic dessert.

But if you’re in the mood for one of the best desserts ever created, but, not planning on heading to the Big Easy any time soon, then make it at home! It’s surprisingly easy!

Impress your guests with this gorgeous and delicious dessert! Happy Mardi Gras!

An overhead view of a single serving of bananas foster in an oval white dessert dish with a spoon inserted into the side next to the caramelized bananas and ice cream.

Ready to make the best dessert this side of NOLA? Go for it!

And when you do, be sure to take a photo of it, post it on Instagram, and tag @HowToFeedaLoon and hashtag #HowToFeedaLoon!

An overhead view of a single serving of bananas foster in an oval white dessert dish with a spoon inserted into the side next to the caramelized bananas and ice cream.
Print Recipe
5 from 1 vote

Bananas Foster

This recipe originated in the famous Brennan's Restaurant in New Orleans. It's served tableside with an impressive flambé presentation. If replicating at home, just be careful! The flames are impressive, but stand back! Homemade vanilla ice cream puts this epic dessert over the top!
Prep Time10 minutes mins
Cook Time10 minutes mins
Total Time20 minutes mins
Course: Dessert
Cuisine: American
Servings: 4
Calories: 560kcal
Author: Kris Longwell

Equipment

  • 1 large (12-inch) skillet
  • Long lighter or a long match. See NOTES

Ingredients

  • 6 tablespoon unsalted butter
  • ¾ cup dark brown sugar
  • ½ teaspoon ground cinnamon
  • ¼ cup banana liqueur
  • 4 bananas peeled and quartered
  • ⅔ cup rum white, dark, or spiced
  • vanilla ice cream for serving

Instructions

  • Add the butter, sugar, and cinnamon into a large skillet over medium-high heat. Cook, stirring often, until sugar is dissolved and the sauce is bubbling and starting to thicken, about 4 minutes.
    6 tablespoon unsalted butter, ¾ cup dark brown sugar, ½ teaspoon ground cinnamon
  • Carefully stir in the liqueur. Place the bananas into the simmering sauce, cut side down, and cook until soft and starting to caramelize, gently flipping the bananas after about 2 minutes (cook for another 2 minutes).
    ¼ cup banana liqueur, 4 bananas
  • Pour the rum over the top (don't stir!) and then quickly ignite with a long lighter or match and flambé until all of the flames die out, usually about 45 seconds to 1 minute.
    ⅔ cup rum
  • Serve immediately with ice cream, spooning extra sauce over the ice cream and bananas.
    vanilla ice cream

Video

Notes

Watch the video for visual guidance. If you liked the video, please subscribe to our YouTube channel. 
Be sure to use an extended lighter or match. The flames could be a couple of feet high. Don't worry, they will burn off within about 1 minute. Just, be sure nothing is over the skillet, and have guests stand back if they are close. 
Be sure to ignite the rum soon after adding to the skillet. If the rum sinks into the sauce, you won't get much flame. But, the taste will still be delicious. 
Most of the alcohol will burn off, but not all of it. To serve without alcohol, you can substitute 1 tablespoon of vanilla extract for the rum, but, the taste won't be as authentic. 

Nutrition

Calories: 560kcal | Carbohydrates: 73g | Protein: 2g | Fat: 17g | Saturated Fat: 11g | Polyunsaturated Fat: 1g | Monounsaturated Fat: 4g | Trans Fat: 1g | Cholesterol: 45mg | Sodium: 15mg | Potassium: 484mg | Fiber: 3g | Sugar: 60g | Vitamin A: 601IU | Vitamin C: 10mg | Calcium: 48mg | Iron: 1mg

Chicken Paprikash (Paprika)

February 23, 2025 by Kris Longwell 2 Comments

An overhead view of a large black cast-iron skillet filled with chicken paprikash including a vibrant red sauce and browned chicken pieces.

The flavor in this classic Hungarian dish is gentle but deeply flavorful.

The deep red sauce may make you think it is spicy, but it’s not unless you go with hot paprika or a combination of sweet and hot. Seek out Hungarian sweet paprika, and you will not be disappointed. This can be made with bone-in chicken pieces or boneless chicken pieces. Serve over egg noodles or homemade spaetzle!

An overhead view of a large black cast-iron skillet filled with chicken paprikash including a vibrant red sauce and browned chicken pieces.

How To Make Chicken Paprikash (Paprika)

The Ingredients You Will Need

As you would probably guess, the most important ingredient in this dish is the paprika. Don’t go with plain grocery-store paprika. See below for more information. Once you have that in hand, everything else is very easy to find. Here’s what you’ll need to have on hand:

Lard – Pork lard can be found in most supermarkets or at Hispanic markets. It is commonly used in Hungarian cooking. Canola oil can be substituted.
Chicken – You have options. You’ll need about 3 lbs. We love a combination of skin-on, bone-in chicken thighs and legs. But you can also go with a whole cut-up chicken, or boneless (and skinless) chicken thighs or breasts, whole or cut into pieces.
Seasonings – Salt, pepper, and sweet Hungarian paprika. Be sure to seek out the paprika. It is what makes or breaks this dish.
Onion – Chopped.
Hungarian hot pepper – Found in the produce section of most supermarkets. See our video for reference. Banana peppers, Italian peppers, or even green bell peppers can be substituted, seeded, and chopped.
Tomatoes – Ripe plum tomatoes are perfect, or a nice, juicy fresh tomato. Canned whole tomatoes, drained and crushed by hand are a good substitute.
Stock – Broth of stock. Homemade is great, but quality store is fine.
Sour cream – Plain (whole) yogurt can be substituted.
Egg Noodles – Extra-wide are great. Homemade spaetzle is similar to the Hungarian noodle called Nokedli and is often served with the dish.

EXPERT TIP: Searing the chicken in the lard (or oil) helps to keep the chicken juicy during the simmering process. If using boneless chicken, cook until just starting to brown. The chicken will finish cooking as it simmers in the broth.

An overhead view of a bone-in chicken legs and chicken thighs with skin that have been seared and browned in a large black cast-iron skillet in lard.

Tips for Making Perfect Chicken Paprikash

Choose the Right Chicken

Cut Selection – Use bone-in, skin-on chicken pieces (like thighs and drumsticks) for the best flavor and moisture. The bones add richness to the sauce while the skin helps to keep the meat juicy during cooking. However, boneless is delicious, too.
Browning – Sear the chicken pieces in a hot skillet until they are golden brown on all sides. This step enhances the overall flavor of the dish by developing a fond at the bottom of the pan.

Use Quality Hungarian Paprika

Paprika Type – Opt for authentic Hungarian paprika for the best flavor. You can use sweet, hot, or a combination of both to achieve the desired depth and complexity. Avoid using low-quality paprika, as it can result in a dull taste.
Blooming the Spices – After browning the chicken, add the paprika to the pan and cook it briefly (about 30 seconds) before adding liquids. This blooming process releases the essential oils in the paprika, intensifying its flavor.

Create a Rich Sauce

Aromatics – Sauté onions and garlic in the same pan after browning the chicken to build a flavorful base. Once softened, add Hungarian peppers and tomatoes for additional flavor and texture.
Liquid Balance – Use a combination of chicken broth and sour cream to create a creamy, tangy sauce. Add the sour cream at the end of cooking to prevent curdling, and adjust the consistency with broth as needed.

Serve with Traditional Accompaniments

Noodles or Dumplings – Serve chicken paprikash over egg noodles, spaetzle, or dumplings to soak up the delicious sauce. Cook these according to package instructions and toss them with a bit of butter for extra flavor.
Garnishing – Finish your dish with a sprinkle of fresh parsley and a dollop of sour cream for added richness and a pop of color.

EXPERT TIP: After adding the paprika to the browned onions, be sure to allow them to sauté for another 2 minutes. This brings out the oils and flavor of the paprika and fuses it with the onion.

An overhead view of chopped onion that has been sautéed in a large black non-stick skillet and then blended with Hungarian paprika.

How To Serve

As mentioned, this dish is wonderful when served over cooked noodles. Egg noodles, or even elbow macaroni, are excellent choices. If you’re feeling adventurous, make homemade spaetzle. It is amazing with this dish.

If you prefer a sauce that is more like gravy, you can thicken it up by making a cornstarch slurry by combining 2 tablespoon of cornstarch with ¼ cup of water. Mix and then stir in the sour cream. Continue to stir until slightly thickened.

Leftovers are wonderful and can be easily heated up in a skillet on the stove. Store leftovers in a container with an air-tight lid in the fridge for several days.

EXPERT TIP: Near the end of the cooking process, remove the chicken from the sauce and then stir in the sour cream. You’ll need to whisk the sauce until the sour cream fully combines with the sauce. Place the chicken back into the sauce and spoon the sauce all over the chicken. The dish is ready at this point.

A person using a pair of metal tongs to nestle a seared chicken thigh into a large skillet of a bright red simmering sauce with other chicken pieces in the sauce, as well.

Other Weeknight Chicken Dinner Recipes to Try

Chicken is universally loved by adults and kids alike. Here is a collection of some of our favorite chicken recipes that are perfect any time of the week, but can easily be whipped up on a busy weeknight.

  • Chicken Spaghetti
  • Roasted Honey Mustard Chicken
  • Easy Tuscan Chicken
  • Easy Chicken Tinga Tacos
  • Hot Honey Chicken
  • Creamy Chicken Florentine
  • Chicken and Mushroom Stir-Fry
  • Chicken Saltimbocca with White Wine Sauce
  • Slow-Cooker Coconut Chicken Curry
  • Chicken and Broccoli Casserole with Cheese
  • Baked Teriyaki Chicken

These are all delicious and easy to prepare. They are family favorites, without a doubt. But, in the meantime, isn’t this chicken dinner calling your name?

A close-up view of a person using a serving spoon to transfer chicken paprikash sauce over a cooked chicken leg in a shallow bowl also filled with cooked egg noodles.

This chicken dish is not difficult to make at all and comes together in about 45 minutes.

You will want to seek out the Hungarian paprika, however. We order online and then use it up within a couple of months. This dish is so good we make it at least once a month.

And if it looks like it’s overly spiced, trust us, it’s not. The deep red color comes from the flavorful (but mild) sweet paprika. If you want some heat, add in some hot paprika, but remember, a little goes a long way.

You may also enjoy our Hungarian Goulash. It’s authentic and stick-to-your-bones delicious!

But this chicken dish is truly a winner!

A straight-on view of two shallow white bowls filled with a serving of chicken paprikash over cooked egg noodles.

What to Serve with Chicken Paprikash

Here are some side dishes that you could serve along with the chicken paprika. However, the dish (with the noodles) is really a meal in and of itself. But here are some other possible side dishes:

  • Stewed Okra and Tomatoes
  • Sautéed Okra with Garlic
  • Southern-Style Green Beans
  • White Beans with Spinach
  • German-Style Potatoes
  • Foil-Wrapped Potatoes with Onions
    Cloverleaf Dinner Rolls

No matter how you serve it, the centerpiece of this feast is beautiful, filling, and incredibly delicious. An instant family favorite!

An overhead view of a white shallow bowl holding a serving of chicken paprikash which included two pieces of cooked chicken and topped with a bright red paprika sauce with tomatoes.

Ready to make the best chicken dish in town? Go for it!

And when you do, be sure to take a photo of it, post it on Instagram, and tag @HowToFeedaLoon and hashtag #HowToFeedaLoon

A close-up view of a shallow white bowl that is filled with a serving of chicken paprikash and cooked egg noodles garnished with chopped Italian parsley.
Print Recipe
5 from 1 vote

Chicken Paprikash (Paprika)

This chicken dinner is about as flavorful as it gets. Seek out the Hungarian sweet paprika, and the dish comes together easily. If you prefer, use boneless chicken (thighs or breasts) and leave them whole or cut them into bite-sized pieces. The flavors are deep, but not spicy at all.
Prep Time15 minutes mins
Cook Time35 minutes mins
Total Time50 minutes mins
Course: Entree
Cuisine: Hungarian / American
Servings: 4
Calories: 594kcal
Author: Kris Longwell

Equipment

  • 1 large (12-inch) skillet

Ingredients

  • Olive oil optional
  • 3 lbs chicken pieces see NOTES
  • Salt and pepper
  • ¼ cup lard or canola oil
  • 1 medium onion chopped, about 1 cup
  • 3 tablespoon Hungarian sweet paprika
  • 1 Hungarian hot pepper seeded and chopped
  • 2 plum tomatoes roughly chopped
  • 2 cups chicken broth
  • ½ cup sour cream
  • 2 tablespoon Italian parsley chopped, for garnish (optional)

Instructions

  • Lightly brush the chicken all over with oil (olive, canola, or vegetable). Sprinkle salt and pepper all over the chicken.
    Olive oil, 3 lbs chicken pieces, Salt and pepper
  • Heat the lard (or oil) in a large skillet over medium heat.
    ¼ cup lard
  • Add the chicken, skin-side down, and cook (moving the chicken around occasionally to help prevent sticking) for about 5 minutes, or until the skin is golden. Flip and cook for another 4 to 5 minutes. Transfer the chicken to a platter and set aside.
  • Tilt the skillet to the side and use a spoon to remove all but about 2 tablespoon of the lard (or oil) into a heatproof bowl. Discard safely.
  • Over medium-high heat, add the onions and sauté until very soft and starting to brown, about 10 minutes.
    1 medium onion
  • Stir in the sweet paprika and cook for another 2 minutes, stirring occasionally.
    3 tablespoon Hungarian sweet paprika
  • Add the peppers and tomatoes and sauté for 1 minute. Stir in the broth and bring to a boil. Nestle the chicken (and accumulated juices) into the broth, lower the heat to medium, partially cover the pan, and simmer for 20 to 25 minutes.
    1 Hungarian hot pepper, 2 plum tomatoes, 2 cups chicken broth
  • While the chicken is simmering, bring a pot of salted water to a boil. Cook the noodles until al dente, usually about 8 to 9 minutes (check packaging directions).
  • Remove the chicken to a clean platter. Stir in the sour cream and whisk until all lumps are gone. Return the chicken to the sauce and simmer for another couple of minutes. Drain the pasta. Serve the chicken with sauce over the cooked noodles. Garnish with chopped parsley, if desired.
    ½ cup sour cream, 2 tablespoon Italian parsley

Video

Notes

NOTE: Watch the video in the recipe card for visual guidance.
You have options for the chicken. You can go with a whole chicken that has been cut into 8 pieces. You can use bone-in, skin-on chicken pieces, such as legs and thighs. Boneless, skinless chicken is a great option, too. Boneless, skinless chicken breasts or thighs can be used, whole or cut into pieces. Sear them just as you would the bone-in pieces. You'll only need to simmer them in the sauce for 15 to 20 minutes. 
Leftovers are wonderful and will keep (covered) in the fridge for up to 5 to 6 days. It can also be frozen for up to 2 to 3 months. Reheat on the stove in a skillet over medium until heated through. You may need to add a little more broth to reach the desired consistency. 

Nutrition

Calories: 594kcal | Carbohydrates: 9g | Protein: 46g | Fat: 21g | Saturated Fat: 7g | Polyunsaturated Fat: 6g | Monounsaturated Fat: 9g | Trans Fat: 0.2g | Cholesterol: 193mg | Sodium: 614mg | Potassium: 743mg | Fiber: 3g | Sugar: 4g | Vitamin A: 3631IU | Vitamin C: 14mg | Calcium: 89mg | Iron: 4mg

Udon Noodle Soup with Pork

February 19, 2025 by Kris Longwell 6 Comments

A straight-on view of two colorful Asian soup bowls filled with servings of udon soup with pork topped with hard boiled eggs and chopped scallions.

There is just something so comforting about a bowl of homemade soup. And this one checks all the right boxes.

A soup like this needs a wonderful broth as a base for all the other components. We go with a slow-cooked beef broth with a hint of ginger and cinnamon. This is a comfort soup just like homemade chicken pho is. The extra-large udon noodles are delicious and fun to gobble up.

A straight-on view of two colorful Asian soup bowls filled with servings of udon soup with pork topped with hard boiled eggs and chopped scallions.

How To Make Udon Noodle Soup with Pork

NOTE: If you liked this video, please subscribe to our YouTube channel. Remember to click the little ‘bell’ icon so you’ll never miss a new video. Thank you!

The Ingredients You Will Need

The ingredients in this soup are not hard to find, except you may need to run to your local Asian market to pick up the udon noodles and the enoki mushrooms. Or, you can easily replace them with easy-to-find substitutions. Here’s what you’ll need to have on hand:

For the Broth

Beef short ribs – Or any kind of meat beef shanks. Available in the meat section of most well-stocked supermarkets or at your local meat market.
Onions – Yellow or red, quartered.
Carrot – Medium-sized, peeled and cut into chunks.
Cinnamon sticks – These can be found in the spice section of most supermarkets. We don’t recommend ground cinnamon.
Ginger – Fresh is best. Peeled and cut into chunks.

For the Soup

Udon noodles – We recommend the “extra large” variety. They can be found at Asian markets or online. If you can’t get your hands on them, any type of Asian noodle will work. Egg noodles can be substituted, too.
Pork tenderloin – Most tenderloin packages include two tenderloins. You’ll just need one. Chicken, beef, or even tofu can be substituted.
Carrots – Peeled and julienned. Use a mandolin on the julienne setting, or simply slice it into thin strips with a sharp knife.
Mushrooms – We use fresh shiitake mushrooms and enoki mushrooms, which can be found at Asian markets. Any mushroom will work if you can’t get your hands on enoki, or even shiitake. Sliced button mushrooms will work!
Ginger – Fresh is best. Finely chopped or grated on a box grater.
Red chiles – Thai red chilis are wonderful. They can be found at many well-stocked supermarkets in the produce section, produce markets, or at Asian markets. Serrano or jalapeño peppers can be substituted.
Mirin – Japanese sweet cooking wine. Substitute mirin with Sherry, white wine (ie, Chardonnay), rice vinegar, or Chinese cooking wine.
Soy sauce – Regular or low sodium.
Cabbage – Chinese cabbage, bok choy, or green cabbage. Chinese cabbage can be found in Asian markets.
Garnish – Chopped scallions and toasted sesame seeds.

EXPERT TIP: Fresh enoki mushrooms typically come in bunches that connect at the base. Cut away the tough base and then separate the long thin mushrooms into smaller bunches. The enoki will reduce as they cook, so don’t cut them into small bunches.

A person placing a handful of uncooked enoki mushrooms into a large skilet filled with simmering beef broth with sliced shiitake mushrooms, ginger, and carrot slivers.

Tips for Making Perfect Udon Soup with Pork

Make the Broth – Every great soup starts with a great broth. We love the beef broth version in the recipe, but you can go with traditional chicken stock, beef stock, or even vegetable stock. The stock can be made days in advance.

Go with Quality Udon – If possible, seek our jumbo udon noodles. They can be found in Asian markets. Dried udon noodles aren’t as big (usually), but are still delicious. Cook according to package directions. Don’t overcook them, or they will get mushy.

Briefly Freeze the Pork – Freeze the tenderloin for about 30 minutes before slicing. This makes this step much easier. Cut against the grain. Season with salt and pepper, or, marinate the pork in soy sauce, ginger, and garlic.

Don’t Overcook the Eggs – For authentic taste and texture, you’ll want a semi-hard egg. Don’t overcook them or they will be hard and rubbery. Follow the instructions closely in the recipe and you’ll have perfect eggs.

EXPERT TIP: Any type of cabbage will work. You can find Chinese cabbage at Asian markets. Baby bok choy is another excellent option that can be found in the product section of most supermarkets. Place the leaves in the simmering broth and simmer until they wilt somewhat, usually about 1 to 2 minutes.

A person placing Chinese cabbage leaves into a large skillet that is filled with a simmering beef broth, udon noodles, and sliced mushrooms.

How To Serve

You’ll want to serve this soup in a large and wide soup bowl.

Have chopsticks available for those who prefer them, but, spoons are necessary to capture the broth.

Don’t add the chopped scallions and toasted sesame seeds until just before serving. If desired, have hot chili oil available for guests who prefer a little heat in their soup.

EXPERT TIP: If using fresh udon noodles, you’ll need to cook them in boiling water for only 4 minutes. Do NOT overcook them. If you do, they will start to fall apart. If using dried, cook according to the package directions. You can prepare the noodles in advance and toss them (after draining) in a little olive oil to keep them from sticking together.

A close-up view of cooked udon noodles being transferred from a metal colander into a large skillet filled with a simmering beef broth with mushrooms and slivers of carrots.

Other Broth Soup Recipes to Try

There is just something extra comforting about a soup that has a base of homemade broth. Here is a collection of some of our favorites:

  • Chicken Pho (Vietnamese Chicken Noodle Soup)
  • Ramen with Spinach and Poached Egg
  • Classic Chicken Noodle Soup
  • White Chili with Chicken and Tomatillos
  • Authentic Matzo Ball Soup
  • Chicken Tortilla Soup
  • Italian Wedding Soup
  • Classic French Onion Soup
  • Minestrone Soup

These are all amazing and classic in their own way. But, in the meantime, isn’t this skillet full of comfort calling your name?

A view of a large stainless steel skillet filled with udon soup with pork with several cooked Chinese cabbage leaves and sliced mushrooms visible within the soup.

What To Serve with Udon

This udon soup is very filling. It’s perfect on a chilly day for a very satisfying lunch.

When serving guests, if desired, serve in smaller soup bowls as a first course. We love to serve this with a big platter of sautéed baby bok choy.

Sake is the perfect wine, but any white wine (dry or sweet) pairs nicely with the deep flavors of the soup.

A straight-on view of a large shallow colorful bowl filled with udon noodle soup with pork including two halves of hard boiled eggs and Chinese cabbage in the soup.

If you love a heartwarming soup as much as we do, this soup will make you very happy.

Probably the most important part of this comforting component of this soup is the broth. Remember, it can be made several days in advance. We recommend making it and then chilling it. This makes removing any congealed solid fat on the surface super easy.

This is one of our favorite soups and you can adjust the filling to your own tastes! And, is often the case, it’s even better the next day!

And those extra-large noodles are so satisfying!

A close-up view of a pari of chop sticks being used to lift up cooked udon noodles from a bowl of udon soup with pork.

Ready to make the best soup in town? Go for it!

And when you do, be sure to take a photo of it, post it on Instagram, and tag @HowToFeedaLoon and hashtag #HowToFeedaLoon!

A straight-on view of a large shallow colorful bowl filled with udon noodle soup with pork including two halves of hard boiled eggs and Chinese cabbage in the soup.
Print Recipe
5 from 3 votes

Udon Noodle Soup with Pork

This soup is so comforting and it's all because of the deeply flavorful broth. The broth can be made up to 3 days in advance. Chill and then easily scrape off any congealed fat from the surface of the broth. Udon noodles can be found in Asian markets or online. Adapt the soup components to your tastes.
Prep Time15 minutes mins
Cook Time20 minutes mins
Cooking and chilling broth6 hours hrs
Total Time6 hours hrs 35 minutes mins
Course: Appetizer or Soup
Cuisine: Japanese
Calories: 645kcal
Author: Kris Longwell

Equipment

  • 1 Large pot 8 QT, for simmering the broth
  • 1 Large skillet 12-inch, or stock pot for preparing the soup

Ingredients

For the Broth (Do Ahead)

  • 4 lbs beef short ribs or beef shanks
  • 2 medium onions peeled and quartered
  • 1 medium carrot peeled and cut into chunks
  • 1 medium cinnamon stick don't use ground
  • 1 3-inch piece ginger fresh

For the Soup

  • 1 lb pork tenderloin
  • 4 whole eggs
  • ½ lb Udon noodles fresh, or ¼ lb dried noodles
  • 2 quarts beef broth
  • 1 large carrot peeled and julienned
  • 3½ oz shiitake mushrooms stems removed and sliced
  • 5 oz enoki mushrooms cut into smaller portions (if connected)
  • 1 tablespoon ginger fresh, minced
  • 2 red chilis
  • ¼ cup mirin
  • 2 tablespoon soy sauce
  • 1 teaspoon sugar
  • 1 teaspoon Kosher salt
  • 2 medium Chinese cabbage or baby bok choy
  • 2 bunches scallions chopped, plus extra for garnish
  • 2 tablespoon sesame seeds toasted

Instructions

Do Ahead - Prepare the Broth

  • In a large pot, add the short ribs, onions, carrots, cinnamon stick, and ginger. Cover with 2½ quarts (10 cups) of water and bring to a boil. Lower the heat and simmer, stirring occasionally, for 3 hours. Add more water if needed to keep the ingredients covered. Let cool, remove the bones, pull off the meat, and keep for another use. Strain into a pot and chill for 3 hours, or overnight. Use a spoon to remove any solid, congealed fat from the surface. Store the broth until ready to use.
    4 lbs beef short ribs, 2 medium onions, 1 medium carrot, 1 medium cinnamon stick, 1 3-inch piece ginger

Make the Soup

  • Place the pork in the freezer for about 20 minutes.
    1 lb pork tenderloin
  • To cook the eggs, add enough water to a pot to cover the eggs. Bring to a boil and then gently lower the eggs into the water. Boil for exactly 8 minutes then remove with a slotted spoon and place in a bowl filled with cool water. Set aside.
    4 whole eggs
  • Bring a pot of water to a boil over high heat. If using fresh udon, carefully add the udon and boil for about 1 minute. If using dried, cook until just tender, usually about 5 to 7 minutes. Drain into a colander and rinse with cool water. Set aside.
    ½ lb Udon noodles
  • Remove the pork from the freezer and slice it against the grain into thin slices, then cut those slices into smaller strips. Set aside.
  • Add the broth to a large skillet (or pot) and bring to a simmer.
    2 quarts beef broth
  • Increase the heat to high, and add the carrots, shiitake and enoki mushrooms, ginger, chilis, mirin, soy sauce, sugar, and salt, and bring to a boil. Lower the heat to medium and simmer for 5 minutes. While the soup is simmering, peel the eggs.
    1 large carrot, 3½ oz shiitake mushrooms, 5 oz enoki mushrooms, 1 tablespoon ginger, 2 red chilis, ¼ cup mirin, 2 tablespoon soy sauce, 1 teaspoon sugar, 1 teaspoon Kosher salt
  • Add the pork and cook for another couple of minutes. Stir in the cooked noodles, cabbage, and scallions. Simmer until the cabbage has started to wilt, about another 3 minutes.
    2 medium Chinese cabbage, 2 bunches scallions
  • Remove from the heat and remove the chilis. Taste and add more soy (or salt) if desired. Ladle into bowls. Slice the eggs in half and place them on top of the soups. Garnish with additional chopped scallions and sesame seeds.
    2 tablespoon sesame seeds

Video

Notes

See the video near the top of the blog post for visual guidance. If you liked this video, please subscribe to our YouTube channel. 
If you can't find udon noodles or enoki mushrooms, go with any type of ramen noodles, rice noodles, or even egg noodles. Use your favorite type of mushrooms for the soup.
Leftovers will keep in the fridge (covered) for up to 1 week. Reheat on the stove over medium heat until simmering and heated through. 

Nutrition

Calories: 645kcal | Carbohydrates: 128g | Protein: 210g | Fat: 18g | Saturated Fat: 9g | Polyunsaturated Fat: 5g | Monounsaturated Fat: 8g | Trans Fat: 0.2g | Cholesterol: 621mg | Sodium: 702mg | Potassium: 752mg | Fiber: 33g | Sugar: 64g | Vitamin A: 798IU | Vitamin C: 199mg | Calcium: 918mg | Iron: 53mg

Crab Cake Benedict

February 16, 2025 by Kris Longwell 1 Comment

A close-up view of an untouched crab cakes egg Benedict with hollandaise flowing over the top of the poached egg and pooling on a white plate.

This brings two culinary classics together for one unforgettable dish.

Crab cakes, from Southern-style to New England-style, are delicious and exploding with flavor. Bring it together with a perfectly poached egg, a toasty English muffin, and amazing, easy hollandaise sauce, and you’ll have a brunch dish that your guests will be talking about for a very long time.

A close-up view of an untouched crab cakes egg Benedict with hollandaise flowing over the top of the poached egg and pooling on a white plate.
[feast_advanced_jump_to]

The Ingredients You Will Need

In our opinion, this is one of those “special occasion” dishes mainly because it’s pretty spectacular, and, let’s be honest, lump crab meat isn’t cheap. But you have options. Here’s what you’ll need to have on hand:

For the Crab Cakes

Butter – Unsalted.
Onion – Chopped.
Bell pepper – We recommend chopped red bell pepper, but green, yellow, or orange will all work. Or, a combination of any of them!
Garlic – Minced.
Parsley – Fresh, Italian flat-leaf. Chopped.
Crab Meat – We prefer lump crab meat, but you can go with crab meat from the claws and legs. Jumbo lump crab is very expensive and not ideal for crab cakes. We don’t recommend canned crab meat.
Eggs – You’ll need one for the crab cakes, and two for dredging.
Mayonnaise – Homemade is good, but store-bought is great (and binds a little better than homemade).
Dijon – Regular, or deli-style (we go with regular).
Red wine vinegar – You can substitute white wine vinegar, champagne vinegar, or in a pinch, apple cider vinegar.
Capers – Non-pareils are best (they are smaller).
Worcestershire sauce
Hot sauce – Tabasco, Louisiana, or Crystals are all great choices.
Seasonings – Old Bay, salt, and pepper.
Breadcrumbs – Panko is recommended, but Italian fine breadcrumbs are a good choice, too.
Oil – For frying. Vegetable oil is ideal.

For the Poached Eggs

Eggs – Room temperature is best, but not 100% necessary.
Vinegar – Distilled white wine is perfect. You’ll need just a drop per egg.
Water – You’ll create a spinning vortex with the handle of a wooden spoon once the water starts to boil. You’ll also need a bowl of warm water to hold the poached eggs.

For the Easy Hollandaise Sauce

Butter – Unsalted.
Egg yolks – Preferably room temperature.
Seasonings – Cayenne pepper, salt, and pepper.
Warm water – As needed to reach the perfect consistency.

How To Make Crab Cake Benedict

EXPERT TIP: Before frying your crab cakes, you’ll want to get the oil to a temperature of about 330°F. This will get the breading nice and golden, but not too fast. If you don’t have a thermometer, toss a piece of bread in the oil. If it browns in about 10 to 15 seconds, the oil is just right. If it browns too quickly, it’s too hot. If it takes more than 10 seconds, it’s not hot enough.

A person holding a metal spatula that has a crispy crab cake on it that is being lifted from a cast-iron skillet filled with hot oil.

Tips for Making Perfect Crab Cake Benedict

Make Flavorful Crab Cakes

Quality Crab Meat – Use fresh or high-quality crab meat found in the seafood department of most well-stocked supermarkets. We don’t recommend canned crab. for the best flavor.
Chill Before Cooking – After forming the crab cakes, refrigerate them for at least 30 minutes before cooking. This helps them hold their shape while frying and enhances the flavors.

Prepare Easy Blender Hollandaise Sauce

Simple Ingredients – In a blender, combine egg yolks, lemon juice, salt, and a pinch of cayenne. Blend briefly, then slowly drizzle in melted butter while blending until the sauce is smooth and creamy. Add warm water to reach the desired consistency.
Keep Warm – To maintain the sauce’s warmth and prevent it from thickening too much, place the blender container in a warm water bath or set it aside in a warm spot while you prepare the rest of the dish.

Master Vortex-Style Poached Eggs

Create the Vortex – In a pot of simmering water, use a spoon to create a gentle vortex before adding the eggs. This swirling motion helps the egg whites wrap around the yolk, resulting in beautifully shaped poached eggs.
Timing – Poach the eggs for about 3-4 minutes for a runny yolk. Use a slotted spoon to remove them and gently place them on a paper towel to drain excess water. Or, store them briefly in a bowl of warm water (no longer than 10 minutes).

Assemble with Care

Mise en Place – Once the crab cakes are made, have everything else in place (mise en place) and ready to go. Have the water boiling (for the poached egg), your blender ready with the ingredients (for the hollandaise sauce), and the English muffins cut and ready to toast. You’ll want to work quickly so everything is served warm and fresh.
Layering – Start with the toasted muffin halves, place the crab cake on top, add the poached egg, and generously drizzle with hollandaise sauce. Garnish with fresh herbs like chives or parsley for an elegant touch.

A silver slotted spoon lifting up holding two fluffy poached eggs over a pan full of hot steaming water.

How To Serve

We’ve mentioned this before, but it’s important to be prepared for all of the components of this egg Benedict. It’s a bit of a “crunch time” right before serving, but if you plan in advance, it’s a snap.

Once the crab cakes are about ready, be sure your water is boiling and your eggs are ready to go. Do the same with the hollandaise sauce, and then have your English muffins sliced and ready to toast.

Pour the hollandaise sauce into a small pitcher (or jar) and if it thickens, simply add some of the egg poaching water (while it’s hot) to maintain a pourable consistency. Keep the poached eggs in warm water. Cover the crab cakes with foil to keep them warm (or in a low-temperature oven).

A close-up view of hollandaise sauce being poured from a small white pitcher onto a poached egg that is resting on top of a crispy crab cake and the bottom of an English muffin.

What To Serve With Crab Cake Benedict

This dish is quite filling, so you don’t need a lot more to fill your guests up.

However, if you prefer to serve this buffet style, you can let folks build their own and give them more options to fill their plates.

Fresh fruit is always perfect for breakfast and brunch. A side of breakfast potatoes or diner-style hash browns is classic and delicious.

Juice and coffee are standard. And, if so desired, we love to create a mimosa bar with freshly squeezed fruit juice, with the option of guests adding their own Champagne.

EXPERT TIP: Allow the eggs to sit in the hot water (after you’ve removed them from the heat source) for 3 minutes for a runny yolk. For a yolk that’s less runny, let them rest for 4 to 5 minutes. We love a runny yolk, but remember, guests with a compromised immune system will most likely need their eggs cooked through. Check with everyone first.

There is just something extra special about this dish. It is stunning on the plate.

It truly has that “special occasion” feel about it.

And then when your guests take that first bite. Wow. Heavenly!

A close-up view of a half-eaten crabs cake Benedict on a white dinner plate sitting in a pool of egg yolk with a fork resting nearby.

Other Classic Brunch Recipes to Try

  • A serving of eggs Benedict on a white plate with a glass cup of coffee and a carafe of orange juice in the background.
    Classic Eggs Benedict
  • A serving of huevos rancheros on a black plate garnished with crumbled Cotija cheese and chopped fresh cilantro.
    Authentic Huevos Rancheros
  • Two savory crêpes on a plate with one that has been broken open with mushrooms and spinach spilling out of it.
    Stuffed Savory Crêpes
  • A plate filled with Southern biscuits and gravy sitting next to a white mug of black coffee and a glass of orange juice.
    Southern Biscuits and Gravy

Ready to make the best brunch dish this side of Baltimore? Go for it!

And when you do, be sure to take a photo of it, post it on Instagram, and tag @HowToFeedaLoon and hashtag #HowToFeedaLoon!

A close-up view of a fork being used to break open a poached egg that is resting on top of a crab cake that is on the bottom of a toasted English muffin.
Print Recipe
5 from 1 vote

Crab Cake Benedict

If you love crab cakes and eggs benedict, you will flip for this dish. When forming the crab cakes, resist making them too thick. Once the breading is on, it will be even thicker. You want a want a nice ratio of egg, crab cake, and sauce. Be sure to have all of the components ready to quickly prepare once the crab cakes are made. Then, everything will come together quickly and served nice and warm!
Prep Time20 minutes mins
Cook Time15 minutes mins
Resting time10 minutes mins
Total Time45 minutes mins
Course: Breakfast / Brunch
Cuisine: American / French
Servings: 4
Calories: 752kcal
Author: Kris Longwell

Equipment

  • 1 medium skillet for sautéing
  • 1 large sturdy skillet for frying
  • 1 pot for stirring the egg the poached eggs
  • 1 Blender for making the easy hollandaise sauce

Ingredients

For the Crab Cakes

  • 2 tablespoon unsalted butter
  • ½ cup onion chopped
  • ½ cup red bell pepper seeded and chopped
  • 3 cloves garlic minced
  • 8 oz lump crab meat picked over for cartilage or shells
  • 2 tablespoon Italian parsley chopped
  • 3 whole eggs divided, lightly beaten
  • ⅓ cup mayonnaise
  • 1 tablespoon Dijon mustard
  • 1 tablespoon capers drained, non-pareil
  • 1 tablespoon red wine vinegar
  • 1 tablespoon Worcestershire sauce
  • 1 teaspoon hot sauce
  • 1 teaspoon Old Bay seasoning
  • ¾ teaspoon Kosher salt
  • ½ teaspoon black pepper
  • 2½ cups Panko breadcrumbs plus more, if needed
  • vegetable oil for frying

For the Vortex-Style Poached Eggs

  • 8 whole eggs
  • 1 tablespoon white wine vinegar

For the Eggs Benedict

  • 2 cups hollandaise sauce click the link for the easy recipe
  • 4 English muffins split in half
  • 1 teaspoon paprika for garnish
  • 2 tablespoon chives snipped, for garnish

Instructions

Make the Crab Cakes

  • Melt the butter in a large skillet over medium heat. Add the onion and bell pepper and cook until softened, about 4 minutes. Stir in the garlic and sauté for another 30 seconds. Place in a bowl and set aside to completely cool (can cool in the fridge to expedite this).
    2 tablespoon unsalted butter, ½ cup onion, ½ cup red bell pepper, 3 cloves garlic
  • Add to the sautéed vegetables the crab meat, parsley, ½ cup Panko breadcrumbs, 1 egg, mayonnaise, Dijon, capers, red wine vinegar, Worcestershire sauce, hot sauce, Old Bay, salt, and pepper. Stir until completely combined. We recommend allowing the mixture to chill in the fridge for 30 minutes (or up to overnight).
    8 oz lump crab meat, 2 tablespoon Italian parsley , 3 whole eggs, ⅓ cup mayonnaise, 1 tablespoon Dijon mustard, 1 tablespoon capers, 1 tablespoon red wine vinegar, 1 tablespoon Worcestershire sauce, 1 teaspoon hot sauce, 1 teaspoon Old Bay seasoning, ¾ teaspoon Kosher salt, ½ teaspoon black pepper
  • Remove the crab mixture from the fridge. Place the remaining 2 lightly beaten eggs in a shallow bowl and add 1 tablespoon water. Stir to combine. In another shallow bowl, add the remaining 2 cups of the Panko.
    2½ cups Panko breadcrumbs
  • Form the crab cakes into patties about ½-inch thick and about the diameter of your English muffin bottom (about 2½ inches). Use a metal spatula (or your fingers) to carefully place the formed cake into the egg wash, and gently turn it over until fully coated. Lift out of the egg wash and allow the excess to drip away. Place the cake into the Panko breadcrumbs and carefully flip until completely coated. (You can use a spoon to help.) Repeat with the remaining crab cakes. Place on a parchment paper-lined baking sheet and chill for 30 minutes. (You may need to replenish your Panko if doing 8 cakes.)
  • Meanwhile, add the oil to a sturdy skillet and heat over medium-high heat until it reaches 330°F, or until a piece of bread tossed in turns golden after about 10 seconds.
    vegetable oil
  • Remove the chilled crab cakes from the fridge and use a metal spatula to gently lower the cakes into the hot oil. Fry until golden brown all over (flipping a time or two). This usually takes about 7 to 9 minutes. Place on a plate lined with a paper towel.

Make the Crab Cake Eggs Benedict

  • While the crab cakes are chilling in the fridge (before frying), bring a pot of water to a boil.
  • Working in batches, crack each egg into small bowls (or any kind of vessel that will hold 1 egg). Drizzle a drop of the white vinegar over the tops of each egg.
    8 whole eggs, 1 tablespoon white wine vinegar
  • Use the handle of a wooden spoon to create a vortex in the boiling water by stirring vigorously in a circular motion. Once the water is swirling, swiftly transfer the eggs into the water. Turn off the heat and allow the eggs to rest in the hot water for 3 minutes (for a runny yolk) or 5 minutes for a less runny yolk.
  • Meanwhile, add water to a medium-sized bowl and heat in the microwave until warm (or use hot tap water). Use a slotted spoon to lift the eggs from the hot vortex water in the pot and transfer them to the warm water in the bowl. Repeat the entire process with the remaining eggs.
  • Melt the butter for the Easy Hollandaise and add the remaining ingredients to a blender. Follow the steps for making the sauce. Set aside and add more hot water (from the vortex pot) if the sauce is too thick (it will thicken as it sits.
    2 cups hollandaise sauce
  • Toast the English muffins.
    4 English muffins
  • Place the toasted muffins on a plate. Top each with a crab cake, then use a slotted spoon to carefully transfer the poached eggs from the warm water to the tops of each crab cake. Pour hollandaise sauce over the tops of the poached eggs, and garnish with paprika and chives. Serve at once.
    1 teaspoon paprika, 2 tablespoon chives

Video

Notes

NOTE: Watch the video near the top of the recipe for visual guidance.
The crab cakes can be made an hour (or two) in advance. Keep them warm (and crisp) in a low-temp oven (250°F) until ready to serve. 
Be sure to look at the Easy Hollandaise Sauce recipe before you get started. The eggs and hollandaise sauce should be prepared around the same time. You can gently reheat the hollandaise sauce on the stove over low heat with the addition of a little water. You can also add the hot water from poaching the eggs to get the sauce to your desired consistency. 
Even if only serving two people, we make the recipe as is, except with half the eggs and muffins, and freeze the extra crab cake mixture. 
The crab cakes can be frozen (cooked or uncooked) for up to 2 months. Thaw and reheat in the oven or preferably in hot oil. 

Nutrition

Calories: 752kcal | Carbohydrates: 70g | Protein: 25g | Fat: 32g | Saturated Fat: 11g | Polyunsaturated Fat: 8g | Monounsaturated Fat: 3g | Trans Fat: 0.3g | Cholesterol: 74mg | Sodium: 903mg | Potassium: 458mg | Fiber: 5g | Sugar: 5g | Vitamin A: 1359IU | Vitamin C: 36mg | Calcium: 166mg | Iron: 4mg

Chana Masala

February 12, 2025 by Kris Longwell 2 Comments

A straight-on view of a bowl of homemade chana masala toped with chopped cilantro and two slivers of red onion with homemade poori bread nearby.

There is just something magical about homemade Indian food. And this is one of our favorites.

This dish will require you to take a fun trip to your local Indian food market for a few items; however, you can find them online, too. Making the chana masala powder from scratch is easy (once you have the ingredients), and it takes the flavor to the next level. It is similar to garam masala, but with a fruity note. Made even better when served with homemade poori (Indian fried puff bread). 

A straight-on view of a bowl of homemade chana masala toped with chopped cilantro and two slivers of red onion with homemade poori bread nearby.

How To Make Chana Masala

The Ingredients You Will Need

You will need to make a fun-filled trip to an Indian market to get many of these ingredients, but, it’s fun and don’t worry, they have a long shelf life. Here’s what you’ll need to have on hand:

For the Chana Masala Powder

Coriander seeds
Cumin seeds – Jeera
Black peppercorns – Whole
Cloves – Whole
Cardamom pods– Black
Cinnamon sticks– Preferably Indian
Fennel seeds
Kashrmiri peppers– Dried, stems and seeds removed
Aamchur powder– Dried mango powder, also spelled: amchoor and amchur
Kasoori methi– Dried fenugreek leaves
Turmeric powder

For the Chana Masala

Dried chickpeas – Preferably white
Water – For soaking
Black tea bag – Optional, but adds nice color and flavor
Oil – Canola, vegetable, olive oil, or ghee
Cardamom pods – Black
Bay leaf – Preferably Indian
Cinnamon sticks – Preferably Indian
Mace – This comes from the outer covering a whole nutmeg
Onion – Chopped red or yellow
Green chili – Indian green chili, or Serrano
Turmeric powder
Garlic ginger paste
Salt – Table salt or Kosher
Chana masala powder – Homemade (preferred) or purchased.
Tomatoes – Roughly chopped (they will be puréed)
Cilantro – Chopped

EXPERT TIP: You’ll want the onions, bay leaf, cinnamon sticks, and mace to cook until the onions have started to brown slightly. Keep the whole bay leaf, cinnamon stick, and mace in the sauce until the very end. It’s traditional to leave them in the sauce.

An overhead view of a large, deep skillet filled with chopped red onions, a bay leaf, several cinnamon sticks, mace, and chopped green pepper being sautéed.

Tips for Making Perfect Chana Masala

Prepare Chana Masala Powder

Spice Selection – Create a homemade chana masala powder using spices like cumin seeds, coriander seeds, black pepper, cloves, cinnamon, and dried mango powder (amchur). Toast the whole spices in a dry pan until fragrant before grinding them to enhance their flavors.
Balancing Flavors – Adjust the proportions of the spices based on your taste preferences. For example, adding more amchur will give a tangy flavor, while increasing cumin will add earthiness.

Soak and Cook the Chickpeas Properly

Soaking -If using dried chickpeas, soak them in water overnight or for at least 8 hours. This not only reduces cooking time but also improves the texture of the chickpeas.
Cooking Method – Cook the soaked chickpeas in a pressure cooker or stovetop until they are tender but not mushy. If you prefer canned chickpeas, rinse and drain them thoroughly before using.

Layering and Balancing Flavors

Adding Spices – Add your homemade chana masala powder along with other spices like turmeric and red chili powder after the tomatoes have cooked down. This helps to bloom the spices and release their essential oils.
Finishing Touches – Once the chickpeas are added, let the dish simmer to allow the flavors to meld. Adjust seasoning with salt and cilantro. Garnish with additional fresh cilantro, onion slices, and yogurt (optional) before serving.

A person transferring homemade chana masala powder from a small glass bowl into a large deep skillet filled with simmering puréed tomatoes, onions, and spices.

This dish is hearty and makes a wonderful main dish. However, it can also serve as a first course to a dish with a protein, such as Tikka Chicken Masala.

We love to serve the chana directly from the pot into individual serving bowls.

If you have the time, make a batch of poori (puri), which is Indian puffed fried bread. It is traditional and perfect for scooping up the chickpeas and amazing sauce.

Three images with the first being soaked chickpeas being transferred into a large skillet filled with simmering puréed tomatoes, and then the soaking broth being poured in, and then a wooden spatula being used to stir the mixture.

Other Amazing Indian Recipes to Try at Home

We love to make authentic Indian cuisine at home. We are building our recipe collection and will keep adding to it. Here are some of our all-time favorites:

  • Homemade Garam Masala
  • Homemade Hyderabadi Chicken Biryani
  • Tikka Chicken Masala
  • Dal Makhani
  • Classic Chicken Korma
  • Butter Chicken (Instant Pot)
  • Authentic Curry Chicken
  • Homemade Curry Powder
  • Poori (Pori) Indian Deep-Fried Bread

These are all amazing in their own right. But in the meantime, isn’t this dish calling your name?

An overhead view of a large, deep skillet filled with chana masala with cooked chickpeas visible and chopped cilantro scattered on top.

If you love Indian food or are interested in giving it a try, this is the perfect recipe to get you started.

The flavors are classic and incredibly layered. And it’s meatless and healthy.

Leftovers are even better the next day. We can’t rave about this incredible dish enough! Don’t forget to make the homemade poori!

An overhead view of a white bowl sitting on a white plate with a serving of homemade chana masala in the bowl topped with chopped cilantro and onion slivers and several pieces of Indian puff bread nearby.

Ready to make the best Indian dish in town? Go for it!

And when you do, be sure to take a photo of it, post it on Instagram, and tag @HowToFeedaLoon and hashtag #HowToFeedaLoon!

A close-up view of a white bowl holding a serving of chana masala topped with chopped cilantro and two slivers of red onion and a gold spoon next to the bowl.
Print Recipe
5 from 2 votes

Chana Masala

Chana Masala is a beloved Indian and Pakistani dish that is composed of slowly simmered chickpeas that are melt-in-your-mouth tender and simmered in a classic Indian sauce. Make a trip to your local Indian market or order the hard-to-find ingredients online. It's fun and incredibly delicious!
Prep Time15 minutes mins
Cook Time40 minutes mins
Soaking time8 hours hrs
Total Time8 hours hrs 55 minutes mins
Course: Entree
Cuisine: Indian / Pakistani
Servings: 4
Calories: 340kcal
Author: Kris Longwell

Equipment

  • 1 large, deep skillet

Ingredients

Do Ahead - Make the Chana Masala Powder

  • ¼ cup coriander seeds
  • ¼ cup cumin seeds
  • 2 teaspoon black peppercorns
  • 1 teaspoon whole cloves
  • 2 black cardamom pods
  • 2 1-inch cinnamon sticks
  • 1 teaspoon fennel seed
  • 6 medium dried kashmiri chilis
  • 2 tablespoon amchur powder
  • 2 tablespoon kasoori methi
  • 1 tablespoon turmeric powder

For the Chana Masala

  • 1¼ cups dried chickpeas preferably white
  • 4 black cardamom pods divided
  • 1 black tea bag optional
  • Kosher salt
  • 2 tablespoon vegetable oil or canola, or olive oil
  • 1 bay leaf
  • 2 1-inch cinnamon sticks
  • 1 piece mace
  • 1 cup onion red or yellow, chopped
  • 1 green chili chopped
  • 1 teaspoon Kosher salt
  • ½ teaspoon turmeric powder
  • ¼ cup garlic ginger paste
  • ¼ cup chana masala powder
  • 3 medium tomatoes quartered and puréed, about 2 cups
  • 2 cups chickpea simmering water plus a little extra
  • ¼ cup cilantro chopped, save some for garnish
  • sliced red onion for garnish, optional

Instructions

Make the Chana Masala Powder

  • In a large skillet over medium-high heat, add the coriander seeds, cumin seeds, peppercorns, cloves, cardamom pods, cinnamon sticks, and fennel seeds. Cook, stirring often, until crackling (just a little) and aromatic, about 4 minutes.
    ¼ cup coriander seeds, ¼ cup cumin seeds, 2 teaspoon black peppercorns, 1 teaspoon whole cloves, 2 black cardamom pods, 2 1-inch cinnamon sticks, 1 teaspoon fennel seed
  • Add the dried chilies and cook, stirring often, until they have crisped up somewhat, usually 3 to 4 minutes.
    6 medium dried kashmiri chilis
  • Carefully transfer to a spice grinder (or a clean coffee grinder) and grind to a fine powder. You may need to do this in batches. Transfer to a small bowl and mix in the amchur powder, kasoori methi, and turmeric powder. Place in an airtight container (or jar) until ready to use.
    2 tablespoon amchur powder, 2 tablespoon kasoori methi, 1 tablespoon turmeric powder

Make the Chana Masala

  • Place the chickpeas in a large bowl and pour in enough water to cover the chickpeas by a couple of inches. Let them soak overnight.
    1¼ cups dried chickpeas
  • Drain the chickpeas and place them in a large pot (or stockpot). Add 2 black cardamom pods, a black tea bag (if using), and 1 teaspoon salt. Add enough water to cover by 2 inches. Bring to a boil, then lower the heat to low and simmer, stirring occasionally, for about 1½ to 2 hours, or until the chickpeas are very tender and can easily be squished between your fingers. Drain into a colander, then into a bowl (you'll need most of the liquid for later use). Set aside.
    4 black cardamom pods, 1 black tea bag, Kosher salt
  • Heat the oil in a large skillet over medium-high heat. Add the bay leaf, cinnamon sticks, 2 black cardamom pods, and the mace, and stir until aromatic and beginning to crackle a little, about 4 minutes.
    2 tablespoon vegetable oil, 1 bay leaf, 2 1-inch cinnamon sticks, 1 piece mace
  • Add the onion and green chili and cook until starting to brown, about 8 to 10 minutes.
    1 cup onion, 1 green chili
  • Stir in the 1 teaspoon salt, turmeric, and garlic-ginger paste and cook, stirring often, for 3 minutes.
    1 teaspoon Kosher salt, ½ teaspoon turmeric powder, ¼ cup garlic ginger paste
  • Mix in the chana masala powder and puréed tomatoes. Cook, stirring often, for another 5 to 8 minutes, until the mixture is thickened. Stir in ¼ cup of the reserved chickpea water and simmer for another couple of minutes.
    ¼ cup chana masala powder, 3 medium tomatoes
  • Stir in the drained chickpeas and 2 cups of the chickpea cooking water. Smash some of the chickpeas with the side of a spatula or spoon. Simmer for another 10 to 15 minutes. The sauce should thicken somewhat.
    2 cups chickpea simmering water
  • Stir in the cilantro and cook for another couple of minutes.
    ¼ cup cilantro
  • Serve at once, garnished with more chopped cilantro and red onion slices (if desired).
    sliced red onion

Video

Notes

NOTE: Watch the video in the recipe card for visual guidance.
Seek out an Indian market to get all of the hard-to-find ingredients for this dish. We also include links to many of the ingredients in the body of the post.
This dish is mildly spicy. If you desire very little heat, leave out the green chili and only use 3 Kashmiri chilis in the chana masala powder.
Leftovers will keep in the fridge (covered) for up to 1 week. Reheat on the stove, adding a little water or broth, as needed. 

Nutrition

Calories: 340kcal | Carbohydrates: 58g | Protein: 16g | Fat: 7g | Saturated Fat: 1g | Polyunsaturated Fat: 2g | Monounsaturated Fat: 3g | Sodium: 661mg | Potassium: 1134mg | Fiber: 19g | Sugar: 11g | Vitamin A: 978IU | Vitamin C: 23mg | Calcium: 222mg | Iron: 11mg

Poori (Puri) Indian Deep-Fried Bread

February 12, 2025 by Kris Longwell 1 Comment

A close-up view of a person holding a puffy Indian fried bread poori in his hand over a black circular platter holding more poori.

There is so much to love about homemade Indian food, and this delectable bread is no exception.

This bread is wonderful on so many levels. It’s only a handful of ingredients and it’s a lot of fun to make. But, most of all, it’s delicious! It is a traditional bread to serve with channa masala and we just can’t get enough of it. It’s great served warm, but they can also be made several hours before serving!

A close-up view of a person holding a puffy Indian fried bread poori in his hand over a black circular platter holding more poori.

How To Make Poori (Puri)

NOTE: If you liked this video, please subscribe to our YouTube channel. Remember to click the little ‘bell’ icon so you’ll never miss a new video. Thank you!

The Ingredients You Will Need

All of these ingredients can be found in most supermarkets. However, if you’re making this to go along with homemade channa masala, then it’s fun to grab the ingredients from your local Indian food market. Most of the items are imported from India and are excellent! Here’s what you’ll need to have on

Whole wheat flour – Also known as atta.
Semolina – Also known as Sooji.
Salt – Table salt is fine, or coarse Kosher.
Oil – Canola or vegetable oil is fine. You’ll need some for the dough as well as deep-frying.
Water – Warm tap water is perfect.

EXPERT TIP: The dough is considered a “hard” dough. It should not be too sticky. Add the warm water to the flour mixture slowly and use your hands to bring the dough together into a tight ball.

A person holding an orange-shaped ball of poori dough in the middle of a colorful shallow bowl.

Tips for Making Perfect Poori (Puri)

Use the Right Flour

Whole Wheat Flour – Use high-quality whole wheat flour (atta) for the best texture and flavor. You can also blend in a small amount of all-purpose flour for a lighter texture, but traditional poori is primarily made with whole wheat flour.
Semolina – This is extra-fine flour that adds to the perfect texture for the poori. At an Indian market, look for sooji or rava.

Knead the Dough Properly

Hard Dough – Add water gradually while kneading to form a hard, yet pliable dough. The dough should not be too sticky or too dry. Aim for a consistency similar to that of pizza dough, but not quite as pliable.
Resting Time – Allow the dough to rest for at least 10-20 minutes, covered with a damp cloth. This resting period helps the gluten relax, making it easier to roll out the pooris.

Roll Evenly and Thinly

Rolling Technique – Divide the rested dough into small balls (about the size of a golf ball) and roll them out evenly. Aim for a thickness of about ⅛ inch. Ensure that the edges are not thicker than the center to promote even puffing when frying.
Use a Little Oil – Add a small amount of oil to a cool surface to roll out the dough. You can add some oil to the palms of your hands to help flatten the dough. This will keep the doughs from sticking to each other if you are not frying them immediately.

Fry at the Right Temperature

Oil Temperature – Heat oil in a deep frying pan until it reaches around 350°F (175°C). To test, drop a small piece of dough into the oil; it should sizzle and rise to the surface quickly.
Frying Technique – Gently slide the rolled poori into the hot oil. Use a slotted spoon to gently press down on the poori to encourage it to puff up. Fry until golden brown on both sides, then drain on paper towels to remove excess oil.

Two images with the first being golf ball-sized ball of dough in a large shallow colorful bowl and then the next being the dough flattened by a marble rolling pin on a dark marble counter.

How To Serve and How To Store

As mentioned, poori (puri) is best served nice and hot. Once they come out of the oil, you can loosely wrap them in a kitchen towel and they will stay warm for about 30 minutes.

They can be reheated (covered) in an oven or even in the microwave on HIGH in increments of about 30 seconds (they reheat quickly).

Poori is also delicious at room temperature. They are addictively delicious and will eventually all get gobbled up, even after they cool off.

Extras can be stored in a container or baggie at room temperature for several days.

EXPERT TIP: Once you carefully lower the flattened dough into the hot oil, use a metal spatula or spider to hold the disc of dough down in the oil for just a few seconds. Then as it floats to the top and starts to puff, use a small metal ladle (or spoon) to pour hot oil over the top of the poori. Flip after about 1 minute.

A close-up view of an Indian puff bread called poori that is being deep-fried in a black cast-iron skillet filled with hot oil and a small ladle being used to pour the hot oil over the top of the poori.

Amazing Indian Recipes to Try at Home

  • Chicken Korma
  • Dal Makhani
  • Butter Chicken (Instant Pot)
  • Channa Masala
  • Creamy Chicken Tikka Masala
  • Authentic Chicken Curry
  • Homemade Curry Powder
  • Homemade Garam Masala

These are wonderful, and even better when served with this classic Indian fried bread!

A close-up view of a pile of puffy fried Indian bread called poori and they are sitting on top of each other on a black plate.

We love all kinds of Indian food, and like so many cuisines, each dish is made even better with bread.

This bread is not only delicious, but, it’s the perfect vessel for scooping up your main dish.

They are fun to make and are always such a huge hit.

A person using his two hands to open up a freshly fried poori revealing the open interior.

Ready to make some of the best Indian bread in town? Go for it!

And when you do, be sure to take a photo, post it on Instagram, and tag @HowToFeedaLoon and hashtag #HowToFeedaLoon!

A close-up view of a person holding a puffy Indian fried bread poori in his hand over a black circular platter holding more poori.
Print Recipe
5 from 1 vote

Poori (Puri) Indian Deep-Fried Bread

Poori is a staple in India and Pakistan and we absolutely love it. It's light, fluffy, and delicious. And it's the perfect vessel for scooping up your favorite Indian main dish. Serve hot and at room temperature.
Prep Time15 minutes mins
Cook Time20 minutes mins
Resting time15 minutes mins
Total Time50 minutes mins
Course: Bread
Cuisine: Indian
Servings: 8
Calories: 225kcal
Author: Kris Longwell

Equipment

  • 1 Sturdy skillet for frying the bread

Ingredients

  • 2 cups whole wheat flour atta
  • 2 teaspoon semolina sooji or rava (fine)
  • ½ teaspoon salt
  • 1 teaspoon oil canola or vegetable, plus more for frying
  • ¾ cup water warm, usually a little more than ¾ cup

Instructions

  • In a large, shallow bowl, mix together the whole wheat flour, semolina, and salt.
  • Add the oil (1 tsp) and mix with your hands. Gradually add in the warm water and work the dough with your hands until a ball comes together (this may take a little more than ¾ cup of water). The dough will be somewhat hard, and not too soft or sticky. Cover with a kitchen towel for 10 minutes, or up to 1 hour.
  • Heat oil in a sturdy skillet (about halfway up the sides) over medium-high heat until the temperature reaches 350°F, or when a small piece of bread sizzles and turns golden after about 1 minute. If it turns dark too soon, the oil is too hot, if it takes more than 1 minute, the oil needs to be hotter.
  • Pinch off some dough and make a ball with your palms about the size of a golf ball. Set aside and cover with the kitchen towel. Continue until all the balls of dough have been formed.
  • Add a little oil (new oil, not hot oil) to a cool surface (such as your kitchen counter) and add a small bit of oil to the palm of your hands. Take a dough ball and place it on the surface with the small amount of oil. Use your palm to slightly flatten the dough. Use a roller to roll the dough to a flat circular shape, about an eighth inch in thickness (about the thickness of a flour tortilla).
  • Carefully lower the flattened dough into the hot oil. Use a metal spatula (or spider) to hold the poori down under the oil for a few seconds. Then, let is rise. Use a spoon or small ladle to pour the hot oil over the top of the poori. The poori should start to puff. Continue adding hot oil over the top. After about 1 to 2 minutes, carefully flip the poori over and cook for another minute.
  • Transfer the poori to a paper towel-lined plate or cutting board. Continue this process with the remaining dough balls. Serve at once.

Video

Notes

See the video near the top of the blog post for visual guidance. If you liked the video, please subscribe to our YouTube channel. 
The dough can be flattened into discs (slightly oil) and stacked between parchment paper or wax paper and covered for several hours, if desired. 
Poori will keep in a container or baggie on the counter for up to 4 or 5 days. They can easily be reheated in the microwave. 

Nutrition

Calories: 225kcal | Carbohydrates: 22g | Protein: 4g | Fat: 12g | Saturated Fat: 2g | Polyunsaturated Fat: 1g | Monounsaturated Fat: 1g | Trans Fat: 1g | Sodium: 147mg | Potassium: 111mg | Fiber: 3g | Sugar: 0.1g | Vitamin A: 3IU | Calcium: 11mg | Iron: 1mg

Lobster Bisque

February 9, 2025 by Kris Longwell 1 Comment

A straight-on view of two white shallow bowl filled with servings of lobster bisque with two glasses of white wine near by and chunks of fresh lobster on top of the soups.

Is there anything more luxurious, comforting, and delicious than this gorgeous bowl of culinary greatness?

If you are a lobster fan, then you will love this bisque. It’s one of those special occasion dishes. The perfect lead into a perfectly cooked steak, lobster tails, and French fondant potatoes. We show you all the classic techniques to make this beloved soup at home.

A straight-on view of two white shallow bowl filled with servings of lobster bisque with two glasses of white wine near by and chunks of fresh lobster on top of the soups.

How To Make Lobster Bisque

The Ingredients You Will Need

As you might guess, this isn’t a super inexpensive dish to put together. Lobster can be pricey, but, you have options. Here’s what you’ll need to have on hand:

Lobster – Here is where you have options: You need about 2 lbs of lobster meat. From 2 live lobsters, 2 steamed lobsters, frozen (or fresh) lobster tails, or frozen (or fresh) packaged lobster meat. We order our lobster from MaineLobsterNow.com. See NOTES for more information.
Butter – Unsalted.
Brandy – You will use this to flambé the lobster. This means lighting the alcohol and letting the flame burn out on the lobster. It infuses amazing flavor, however, if you don’t want to cook with alcohol, then omit it.
Fresh herbs – Parsley, thyme, and a bay leaf tied together with a string is perfect. Fresh is definitely best.
Cloves – Whole are best, not ground.
Fish stock – Homemade fish/shellfish stock is great, but store-bought is fine. Hopefully, you’ll have some lobster shells to simmer with the stock as you build the bisque.
Mirepoix – Onion, celery, and carrots. Roughly chopped.
Long grain rice – This makes a wonderful thickener.
Tomato paste – Adds a wonderful depth of flavor and color.
White wine – Chardonnay or Sauvignon Blanc are both great choices. A good Sherry is great, too.
Heavy cream – Half and half can be substituted, but, heavy cream (or double cream) is best.
Salt – Kosher is recommended.

EXPERT TIP: Sautéing the lobster parts (ie, cut-up steamed lobster or lobster tail) infused amazing lobster flavor into the butter then will be used to sauté the vegetables and rice. This adds an amazing depth of lobster flavor.

An overhead view of four lobster tails that have been cut in half and are being cooked in bubbling butter in a large deep skillet.

Tips for Making Perfect Lobster Bisque

Utilize Fresh Lobster for a Rich Flavor

Quality Ingredients – For the best flavor, use fresh lobster. If fresh is not available, high-quality frozen lobster can work as well. Reserve the shells after cooking the lobster to enhance the broth’s flavor during the cooking process.
Sauté the Shells – Before adding liquid, sauté the lobster shells in butter or oil with aromatics like onions, carrots, and celery to release their flavors.

Create a Flavorful Base

Aromatics and Stock -Start by cooking diced onions, shallots, garlic, and other vegetables in butter until softened. Add in the sautéed lobster shells and then deglaze the pan with white wine to lift any flavorful bits from the bottom. Follow this with a good seafood or lobster stock to build a rich base.
Herbs and Seasonings – Incorporate fresh herbs like thyme, bay leaves, and a touch of cayenne or paprika for added depth.

Incorporate Long Grain Rice Wisely

Cooking the Rice – Add the long-grain rice to the simmering broth early in the cooking process. It should be cooked until tender, which will allow it to absorb flavors and break down, thickening the bisque naturally.
Blending for Smoothness – Once the rice is cooked, remove the bay leaves and use an immersion blender or a regular blender to puree the soup until smooth. This will create a creamy texture without the need for heavy cream.

Finish with Cream and Lobster Meat

Adding Cream – After blending, stir in a splash of heavy cream for richness and a silky mouthfeel. Adjust the amount based on your preference for creaminess, but avoid overpowering the lobster flavor.
Incorporate Lobster Meat – Finally, add in the chopped lobster meat and heat gently until just warmed through. This ensures the lobster remains tender and flavorful. Taste and adjust the seasoning with salt, pepper, and a squeeze of lemon juice before serving.

EXPERT TIP: It may seem strange to add long-grain rice to the vegetables as they sauté. Once you purée everything, the rice acts as a natural thickener. Not too much, just the perfect consistency for bisque.

An overhead view of a large deep skillet filled with sautéed pieces of carrot, celery, and onion mixed with long-grain white rice and tomato paste.

How To Serve

The bisque can be made up to 24 hours in advance of serving. Simply gently reheat on the stove until simmering and then serve.

Be sure to save plenty of the cooked lobster meat for garnishing the final dish.

We recommend serving the bisque in shallow bowls, but a standard soup cup will work, too. If desired, you can serve the bisque with oyster crackers on the side.

The bisque is definitely best served warm. Not scalding, but plenty warm.

EXPERT TIP: You can purée the mixture with an emulsion blender or a blender. We’ve done both. The immersion blender is convenient, but puréing gets the texture very smooth. Passing the bisque through a sieve isn’t 100% necessary, but, it gives you a very silky finish.

Two images with the first a close-up view of a large skillet filled with a broth and chunks of cooked vegetables, rice, and lobster chunks with an immersion blender in it and then the next is the same skillet after everything has been blended.

Other Amazing Soup Recipes to Try

Soup is just so versatile. It’s great for a comforting lunch all by itself, or alongside a sandwich or salad. But, it can be an amazing way to start a special dinner, too. Here is a collection of some of favorite soups and stews that we are sure you will love, too.

  • Cream of Mushroom Soup
  • Creamy Tortellini with Spinach and Sausage
  • Chilled Carrot and Ginger Soup
  • French Onion Soup
  • Italian Wedding Soup
  • Best-Ever Broccoli Cheddar Soup
  • Brunswick Stew
  • German Smoked Ham and Kale Soup
  • Classic Minestrone Soup
  • New England Clam Chowder
  • Portuguese-Style Clam Chowder

These are all amazing in their own right. But, in the meantime, isn’t this gorgeous bisque your name:

An overhead view of a large white soup terrine filled with lobster bisque with a meat from a lobster claw resting in the middle of the soup.

How To Store

Because there is not a lot of cream in the bisque, it can be frozen for a couple of months.

Allow to thaw completely and then gently reheat over medium heat on the stove.

Though the bisque is best served fresh, you will still enjoy a nice bowl of it, even if it’s been frozen.

Fresh will keep in the refrigerator in a container with a tight lid for up to 5 days.

Lobster bisque in a white bowl with blue rim next to a spoon and white napkin

This bisque is so good, that we can honestly say it is “restaurant-quality.” We’ve even had guests say it’s the best they ever had.

It takes a little effort, and, as mentioned, lobster is not cheap, but for a special occasion, it just doesn’t get much better.

Remember, it can be made in advance and then reheated before serving. Your guests will be blown away by how good it is. It’s seriously that delicious.

Every spoonful is lobster heaven.

Lobster bisque in a white bowl with blue rim next to a spoon and white napkin

Ready to make the best bisque this side of the Maine coast? Go for it!

And when you do, be sure to take a photo of it, post it on Instagram, and tag @HowToFeedaLoon and hashtag #HowToFeedaLoon!

A close-up view of a bowl of lobster bisque in a shallow white bowl with a blue thin-line rim and there is fresh lobster chunks resting on top.
Print Recipe
No ratings yet

Lobster Bisque

This Lobster Bisque recipe is a stunning presentation and is divine in taste and texture. Use either live or steamed whole lobster, frozen (or fresh) lobster tails, or a combination for your lobster meat. Then, follow these steps to make a truly epic bowl of deliciousness.
Prep Time30 minutes mins
Cook Time45 minutes mins
Total Time1 hour hr 15 minutes mins
Course: Appetizer or Soup, Soup
Cuisine: French
Servings: 6 people
Calories: 490kcal
Author: Kris Longwell

Equipment

  • 1 large skillet (12") or large stew pot with a lid
  • Blender or immersion blender (or both)
  • Sieve for straining

Ingredients

  • 6 sprigs fresh parsley
  • 6 sprigs fresh thyme
  • 1 bay leaf
  • 8 cups fish stock plus more if needed
  • 4 lobster tails see NOTES
  • 6 tablespoon butter
  • 1 lb lobster meat cooked and roughly chopped, see NOTES
  • ¼ cup brandy
  • 3 shallots chopped
  • 1½ cup carrots 3 medium, peeled and roughly chopped
  • 3 celery stalks roughly chopped
  • 1 medium onion chopped
  • ½ cup long-grain rice
  • 2 tablespoon tomato paste
  • 1½ teaspoon Kosher salt
  • 2 cups dry white wine
  • ½ cup heavy cream

Instructions

  • Tie the parsley, thyme, and bay leaf together with kitchen twine to make a bouquet garni. In a pot, bring the seafood stock to a simmer over medium heat.
    6 sprigs fresh parsley, 6 sprigs fresh thyme, 1 bay leaf, 8 cups fish stock
  • Meanwhile, melt the butter in a deep skillet over medium-high heat. Add the lobster tails and cook, turning once or twice, until bright red. Cover and cook for another 2 to 3 minutes.
    6 tablespoon butter, 4 lobster tails
  • Turn off the heat and remove the tails from the skillet, pour the lobster-infused butter into a bowl, and set aside. Place lobster tails back into the skillet (with no heat on) and pour the brandy over them. Ignite with a match. When the flame subsides, transfer the tails to a plate, remove the meat, and add to the other reserved lobster meat. Set aside.
    ¼ cup brandy
  • Add the bouquet garni and lobster shells to the simmering stock and continue simmering while you prepare the bisque.
  • Return the lobster-infused butter to the large skillet over medium-high heat. Add the shallots, carrots, celery, onion, and rice and cook, stirring occasionally, until the onion is soft, about 15 to 20 minutes. Stir in the tomato paste and cook for another 5 minutes, stirring often. Stir in the salt.
    3 shallots, 1½ cup carrots, 3 celery stalks, 1 medium onion, ½ cup long-grain rice, 2 tablespoon tomato paste, 1½ teaspoon Kosher salt
  • Add the wine, bring to a boil, and then simmer for 4 minutes. Strain the stock and then add to the skillet, reduce the heat to medium-low, and simmer gently until the rice is fully cooked, about 15 minutes.
    2 cups dry white wine
  • Meanwhile, dice half of the reserved lobster meat and save for garnish. Stir the remaining lobster meat into the stock and simmer for another 3 to 5 minutes.
    1 lb lobster meat
  • Working in a couple of batches, carefully transfer the soup to a blender and purée until the mixture is very smooth and silky. Strain the soup through a fine-mesh strainer into the cleaned-out skillet, pressing on the solids with the back of a spatula or spoon. Discard any solids that do not pass through. (This may take a little elbow grease).
  • Gently reheat the bisque and whisk in the cream. See NOTES about consistency.
    ½ cup heavy cream
  • Divide the bisque among bowls and garnish with the reserved diced lobster meat. Serve immediately.

Video

Notes

See the video near the top of the blog post for visual guidance. If you liked the video, please subscribe to our YouTube channel. 
You have options when purchasing lobster for this bisque. You will need 1½ to 2 lbs of lobster meat. Here are your options (or, use a combination of them):
  • Two 2-lbs live lobsters (How To Humanely Kill a Crustacean). 
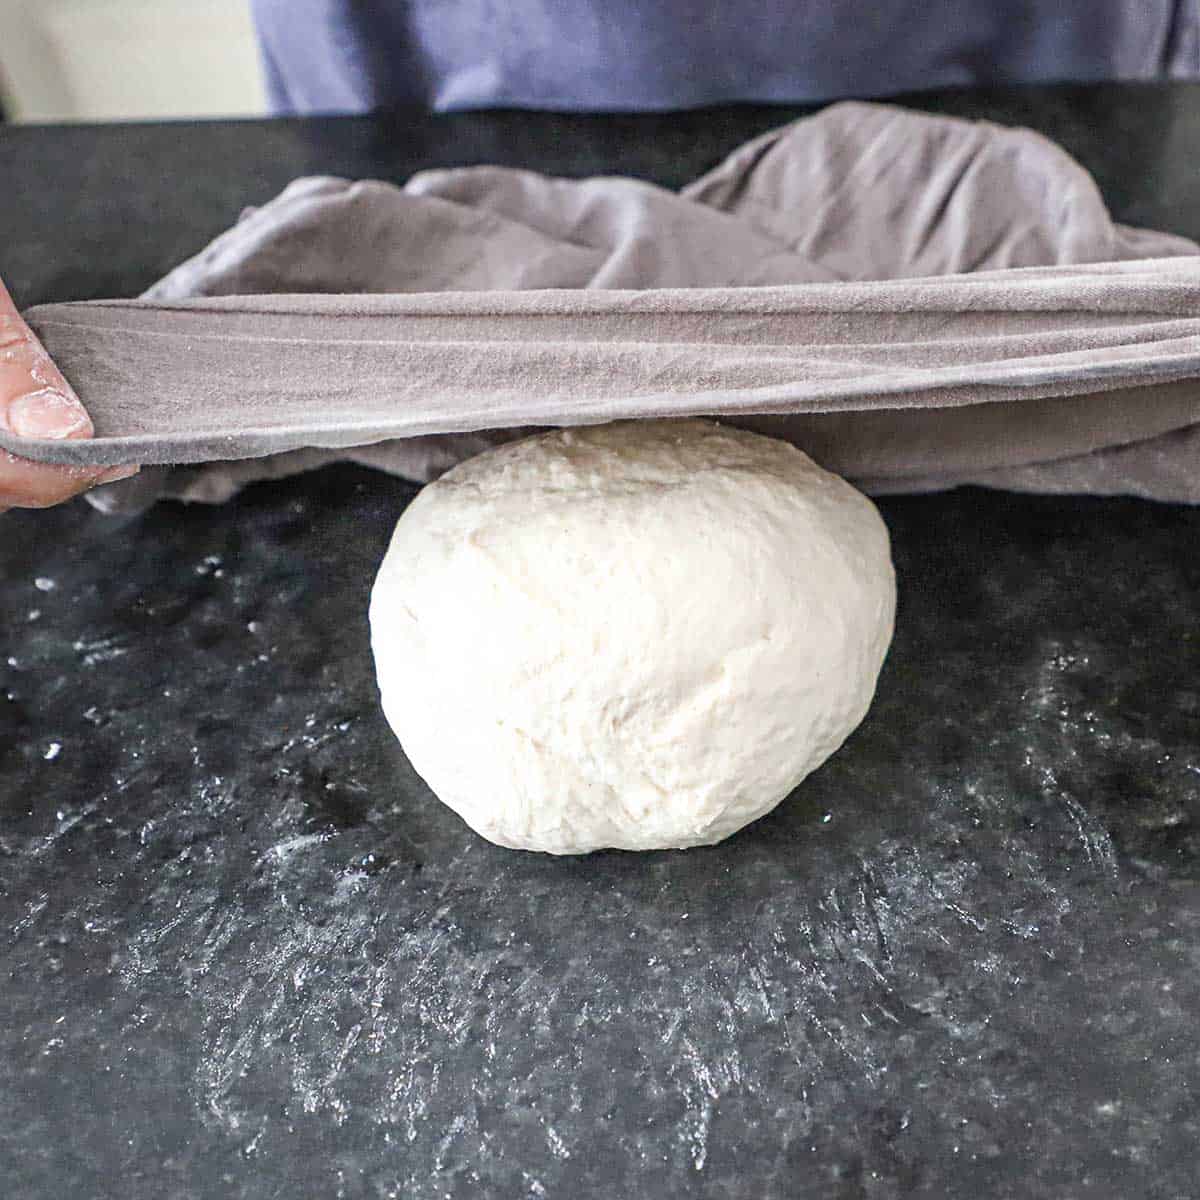
  • Two steamed whole lobsters. 
  • 8 frozen (or fresh lobster tails). 
  • 4 lobster tails with 1 lb lobster meat (fresh or frozen). This is how we prepare our bisque.
  • 2 lbs lobster meat (fresh or frozen). The only downside is you won't have any shells for the stock. 
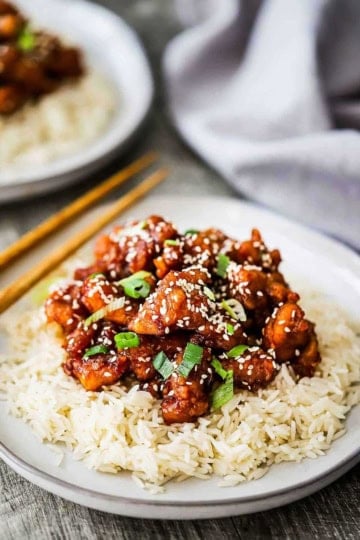
We order our lobster from MaineLobsterLive.com.
The bisque can be made up to 24 hours in advance of serving. Gently reheat on the stove. The bisque is best served fresh, but, it can be frozen for up to 2 months. Thaw and then heat on the stove. 

Nutrition

Calories: 490kcal | Carbohydrates: 24g | Protein: 29g | Fat: 22g | Saturated Fat: 12g | Polyunsaturated Fat: 2g | Monounsaturated Fat: 5g | Trans Fat: 0.5g | Cholesterol: 202mg | Sodium: 751mg | Potassium: 843mg | Fiber: 2g | Sugar: 6g | Vitamin A: 6097IU | Vitamin C: 6mg | Calcium: 247mg | Iron: 2mg

POST UPDATE: This was originally published in March 2018, but was updated with improved tweaks to the recipe with new tips and photography and a fabulous new video in February, 2025!

Homemade Corn Tortillas

February 7, 2025 by Kris Longwell 3 Comments

A spread-out stack of homemade corn tortillas that are nestled into a colorful napkin sitting on a wooden background and surround by whole limes, a jalapeño pepper, avocados, and a jar of salsa.

Homemade Corn Tortillas are fun to prepare, and the taste and texture are sublime. Using instant corn flour (finely-ground masa harina), you can create homemade corn tortillas that are somewhere between warm flour tortillas and corn tortillas. Serve with butter and restaurant-style salsa for a magical experience.

A spread-out stack of homemade corn tortillas that are nestled into a colorful napkin sitting on a wooden background and surround by whole limes, a jalapeño pepper, avocados, and a jar of salsa.

💦 The Ingredients

With just three simple ingredients—corn masa harina, water, and a pinch of salt—homemade corn tortillas come together perfectly, creating fluffy, delicious results every time.

A arrangement three ingredients for homemade corn tortillas on a white background including finely-ground masa harina, salt, and water in a glass measuring cup.

Expert Tip

There are numerous types of masa harina that can be found in many markets. For making tortillas, we find that extra-fine corn flour is best. We highly recommend King Arthur’s Masa Harina for Tortillas or Masaienda Masa Harina. Coarse masa harina is best for making homemade tamales.

🔥 The Tools You Will Need

  • Tortilla press – This ensures you have perfectly round tortillas every time.
  • Liners (for the press) – You purchase liners for the tortilla press, or simply cut out two large pieces from a large freezer baggie.
  • Comal – This was a game-changer for us. The non-stick surface is ideal. It’s also great for making homemade crepes.
  • Tortilla warmer – The tortillas will continue to steam and soften as they rest after being cooked. The warmer (lined with a napkin) is the perfect vessel for this.

👩🏼‍🍳 How to Make Homemade Corn Tortillas

A person using a large metal whisk to combine finely-ground masa harina and salt in a large, colorful, shallow bowl in a black marble counter.
  1. Step 1: In a large shallow bowl, mix together the masa harina and the salt
  1. Step 2: Slowly work the warm water into the masa.
A person using the palm of his hand to knead corn flour in a large shallow bowl for homemade corn tortillas.
  1. Step 3: Form into a ball and then knead until elastic and smooth.
A person holding a smooth ball of corn tortilla dough and then that same dough that has been flattened between two pieces of plastic and a metal tortilla press.
  1. Step 4: Form into balls, and then flatten in a tortilla press between squares of plastic.  
A flat uncooked corn tortilla on a large comal on a gas stove and then that same tortilla that has puffed during the cooking process.
  1. Step 5: Place on a hot comal for 30 seconds, flip and cook for 1 minute, flip again (it may puff).
A person using a large metal spatula to place a freshly cooked corn tortilla into a tortilla warmer lined with a colorful napkin and is filled with other cooked tortillas.
  1. Step 6: Place in a tortilla warmer and continue with the remaining dough. 

🍽️ How To Serve and How To Store

  • The tortillas are best served warm, soon after coming off the comal or griddle. Be sure to keep the tortillas wrapped in cloth and enclosed, preferably in a tortilla warmer.
  • As the warm tortillas rest in a stack, on top of each other, encased in a cloth, they will steam each other and become even softer and more pliable. This is very important!
  • The tortillas are wonderful served on their own with a little softened butter and Restaurant-Style Salsa, Homemade Guacamole, or Classic Pico de Gallo. You can also use them to make Tex-Mex Beef Enchiladas and Soft Tinga Chicken Tacos.
  • They can be stored in a freezer baggie for several days. Reheat in dampened paper towels in the microwave until warm and soft (this won’t take long, usually about 30 seconds).

🙋🏽‍♂️ Frequently Asked Questions

How do I keep homemade corn tortillas soft and pliable?

To keep tortillas soft, cook them on a hot griddle for about 30-60 seconds per side without overcooking, then store them wrapped in a clean kitchen towel or in a tortilla warmer to retain moisture.

Can I use regular cornmeal instead of masa harina for homemade corn tortillas?

No, regular cornmeal won’t work because it’s not treated the same way as masa harina; masa harina is nixtamalized corn flour, which gives tortillas their unique texture and flavor. Extra-fine corn flour works best.

How long can homemade corn tortillas be made in advance?

They can be made a day or two in advance and stored tightly wrapped at room temperature or in the refrigerator; for longer storage, freeze them in an airtight bag and reheat before serving. However, they are best when served within 30 minutes of preparing them.

🌮 More Tex-Mex and Mexican Recipes

  • An oval white platter with a layer of shredded lettuce on the bottom topped with a row of chicken flautas surrounded by bowls of salsa, guacamole, and pico de gallo.
    Chicken Flautas
  • A straight-on view of an untouched beef chimichanga on a green platter flanked by a serving of Mexican rice and refried beans on the other side.
    Beef Chimichanga
  • An arrangement of ingredients for grilled tacos al pastor on a white background including dried chiles, spices, pineapple, pork shoulder, sugar, vinegar, and corn tortillas.
    Grilled Tacos al Pastor
  • A straight-on view of a small glass bowl that is filled with a serving of Mexican shrimp ceviche and is on a green cocktail plate with corn tortilla chips and a silver spoon on it.
    Mexican Shrimp Ceviche

Ready to make the best tortillas this side of the Alamo? Go for it!

And when you do, be sure to take a photo of them, post it on Instagram, and tag @HowToFeedaLoon and tag #HowToFeedaLoon!

A spread-out stack of homemade corn tortillas that are nestled into a colorful napkin sitting on a wooden background and surround by whole limes, a jalapeño peppers, and an avocado.
Print Recipe
5 from 2 votes

Homemade Corn Tortillas

Homemade Corn Tortillas are truly heavenly. They are not exactly like the corn tortillas you get from the store or at a Mexican restaurant. The process involved in making those is more than most home cooks would want to take on. But, trust us, these are somewhere between a flour tortilla and a corn tortilla. Warm, pliable, deeply flavorful, and perfect for your next Tex-Mex or Mexican feast.
Prep Time10 minutes mins
Cook Time15 minutes mins
Resting time5 minutes mins
Total Time30 minutes mins
Course: Appetizer or Side Dish
Cuisine: Tex-Mex, Mexican
Servings: 4
Calories: 208kcal
Author: Kris Longwell

Equipment

  • Large shallow bowl for mixing together the dough
  • Tortilla press
  • large plastic baggie cut into 2 separate pieces
  • Comal or sturdy skillet, such as cast-iron

Ingredients

  • 2 cups masa harina instant corn flour
  • 1 teaspoon salt
  • 1½ cups warm water

Instructions

  • In a large, shallow bowl, combine together the masa with the salt.
    2 cups masa harina, 1 teaspoon salt
  • Slowly add the water to the flour and begin working it in with your hands or a wooden spatula. The dough should not be too wet or sticky. If it is, add more masa. It should also not crack, which means it's too dry. If too dry, add a pinch more water and work it in. Cover the dough with a kitchen towel.
    1½ cups warm water
  • Pinch a piece of dough and form it into a dough ball about the size of a golf ball, or slighty smaller. Keep the kitchen towel on the dough.
  • Place a piece of plastic (from a large baggie) on the bottom of the tortilla press. Add the dough ball in the middle of the plastic, and gently press down on it with the palm of your hand. Place the 2nd piece of plastic over the top of the dough ball and then close the lid of the press. Use the handle to gently (but firmly) press the top of the tortilla press onto the dough ball. Lift the handle and gently pull the plastic from the top of the tortilla. If the dough is sticking to the plastic, you may need to re-work the dough and add a little more masa (peel any stuck-on dough, return it to the ball, and rework it with more masa). Gently remove the bottom plastic and set the tortilla aside. This process may take a little practice (you'll learn how to maneuver your hands to gently remove the plastic without tearing the tortilla).
  • Heat the camal (or skillet) over high heat. Allow the comal/skillet to heat for a few minutes.
  • Gently place the tortilla onto the hot surface. You should hear a slight sizzle. Wait 30 seconds and then use a spatula to flip the tortilla over. Wait another minute. Flip again, and you should begin to see little brown spots, and the tortilla should puff. (Don't worry if your tortilla doesn't puff, it will still be delicious.)
  • Remove the tortilla to a tortilla warmer that is lined with a cloth napkin. Cover the napkin over the tortilla and repeat this process until all the dough has been used. As the hot tortillas rest in the warmer, they will continue to be steamed and get very soft and pliable.

Video

Notes

NOTE: Watch the video near the top of the recipe for visual guidance.
Masa harina can be found in the baking aisle near the flour section in many well-stocked supermarkets. Definitely at Hispanic markets. Or ordered online. King Arthur’s Organic Finely Ground Masa Harina is excellent. 
Although the tortillas are best served soon after cooking on the comal/skillet, they can be stored in an air-tight container and then reheated up to 1 day in advance. Reheat in damp paper towels (or a kitchen towel) in the microwave on HIGH increments of 30 seconds until heated and pliable. 

Nutrition

Calories: 208kcal | Carbohydrates: 43g | Protein: 5g | Fat: 2g | Saturated Fat: 0.3g | Polyunsaturated Fat: 1g | Monounsaturated Fat: 1g | Sodium: 584mg | Potassium: 150mg | Fiber: 4g | Vitamin A: 122IU | Calcium: 78mg | Iron: 4mg

Weeknight Beef Stroganoff

February 5, 2025 by Kris Longwell 4 Comments

An overhead view of a large skillet filled with Weeknight Beef Stroganoff that is topped with finely chopped Italian parsley.

This Weeknight Beef Stroganoff delivers the same sophisticated flavor profile as our classic gourmet version but with a much faster, family-friendly approach. By using ground beef and simple pantry staples, you can whip up a creamy, comforting meal that tastes like it spent hours simmering on the stove.

An overhead view of a large skillet filled with Weeknight Beef Stroganoff that is topped with finely chopped Italian parsley.
[feast_advanced_jump_to]

🥩 The Ingredients

We’ve streamlined the process by using accessible pantry staples and fresh aromatics that deliver a rich, velvety finish without the need for expensive cuts of meat. Find ingredient notes (including substitutions and variations) below.

An arrangement of ingredients for Weeknight Beef Stroganoff on a grey-wooden background including ground beef, sliced mushrooms, beef broth, onions, egg noodles, butter, herbs, and seasonings.

📝 Ingredients Notes with Substitutions

  • Ground Beef: We recommend using lean ground beef (80/20 or 90/10) for the best flavor; however, you can easily substitute ground turkey or chicken for a lighter version.
  • Mushrooms: White button mushrooms are classic, but Cremini (Baby Bellas) offer a slightly deeper, earthier flavor if you prefer.
  • Beef Broth: Use a high-quality beef stock or broth; if you are watching your salt intake, low-sodium broth works perfectly here.
  • Sour Cream: This provides the iconic creamy tang, but you can swap it for full-fat Greek yogurt for extra protein (just be sure not to let the sauce boil once added to prevent curdling).
  • Dijon Mustard: This adds a necessary zip that cuts through the richness; if you’re out, a tablespoon of Worcestershire sauce or stone-ground mustard is a great alternative.
  • Fresh Dill: Fresh is best for that signature stroganoff aroma, but if you must use dried dill, reduce the amount to about one-third of what the recipe calls for.
  • Egg Noodles: Wide or extra-wide egg noodles are the traditional choice for soaking up the sauce, though any short pasta like rotini or pappardelle will work in a pinch.
  • Smoked Paprika: This adds a subtle woodsy depth; if you only have sweet or Hungarian paprika, it will still be delicious, though it will lack that hint of smokiness.

Refer to the recipe card (with video) below for a full list of ingredients and measurements.

📌 Tips and Tricks for Perfect Stroganoff

  • Don’t Rush the Browning: For the best flavor, let the ground beef get a deep brown sear rather than just graying it. The same goes for the mushrooms—letting them sauté until golden brown adds a “gourmet” depth of flavor to this quick version.
  • Undercook Your Noodles: Since the egg noodles simmer in the sauce for 5 to 10 minutes at the end, cook them just shy of al dente in the boiling water. This allows them to finish cooking in the sauce and soak up all that beefy flavor without becoming mushy.
  • Prevent Curdling: To ensure a silky-smooth sauce, make sure the skillet is at a gentle simmer, not a rolling boil, when you stir in the sour cream. High heat can cause dairy to break and become grainy.
  • Deglaze the Pan: After sautéing your onions and mushrooms, use the beef broth to scrape up all the brown bits (the fond) stuck to the bottom of the pan. That is where all the concentrated flavor lives!
  • Control the Consistency: If the sauce is looking too thick after simmering with the noodles, simply splash in a little extra beef broth until it reaches your desired creaminess.
  • The Flavor Boost: Don’t skip the Dijon mustard or the smoked paprika! These two ingredients provide the “classic” stroganoff tang and warmth that elevate ground beef into something truly special.

👩🏼‍🍳 How To Make Weeknight Beef Stroganoff

An overhead view of a large stainless steel skillet filled with cooked seasoned ground beef.
  1. Step 1: Sauté the ground beef until no longer pink. Discard (safely) most of the rendered grease and season the meat with salt and pepper. Remove from the pan and set aside.
An overhead view of a large stainless steel skillet filled with sliced mushrooms and chopped onions being sautéd in butter.
  1. Step 2: Add the butter over medium heat and sauté the onions and mushrooms until soft, about 5 minutes. Season with a pinch of salt and pepper.
An overhead view of sautéed sliced mushrooms and chopped onions simmering in beef broth in a large skillet.
  1. Step 3: Stir in the beef broth and simmer for 5 minutes.
A person using a large wooden spatula to stir a creamy and beefy broth along with ground beef, sautéed mushrooms, and chopped onions.
  1. Step 4: Stir in the cooked beef, Dijon, and sour cream. Simmer another few minutes.
A person using a large wooden spatula to stir cooked egg noodles into a large skillet filled with ground beef stroganoff.
  1. Step 5: Stir in the dill, paprika, salt, pepper, and cooked noodles. Simmer for 5 to 10 minutes, until the sauce has thickened slightly.
A close-up view of a white pasta bowl filled with a serving of Weeknight Beef Stroganoff garnished with chopped Italian parsley.
  1. Step 6: Serve at once, garnished with chopped parsley.

🙋🏽‍♂️ Frequently Asked Questions

Can I make Weeknight Beef Stroganoff ahead of time?

Absolutely, this dish is great for meal prep, though you may need to add a splash of broth when reheating since the noodles continue to soak up the sauce as they sit.

Can I freeze Weeknight Beef Stroganoff for later?

It is best to freeze the meat and sauce base before adding the dairy and noodles, as sour cream can separate and pasta can become mushy once thawed and reheated.

What should I serve with Weeknight Beef Stroganoff?

Since the pasta is already included, a crisp green salad, simmered Southern green beans, and easy skillet dinner rolls for dipping into the extra sauce are all perfect accompaniments.

How do I prevent the sauce in Weeknight Beef Stroganoff from becoming too thin?

Allowing the mixture to simmer with the noodles for the full recommended time helps the starches from the pasta naturally thicken the liquid into a rich, velvety consistency.

An overhead view of two white pasta bowls filled with servings of Weeknight Beef Stroganoff each with a fork resting nearby.

😋 More Amazing “Weeknight” Recipes

  • An overhead view of a large silver skillet filled with homemade cheesy hamburger helper garnished with finely chopped Italian parsley.
    Homemade Cheesy Hamburger Helper
  • A skillet filled with one-pot chili mac with a layer of melted cheddar cheese over the the surface with colorful checkered napkins near the pan and two glasses of iced tea nearby.
    One-Pot Chili Mac
  • A straight-on view of two white bowls filled with Tex-Mex pasta with colorful bell peppers and cilantro sitting nearby.
    Tex-Mex Pasta with Ground Beef
  • A white dinner plate filled with a serving of cube steak with mushroom gravy resting on a bed of mashed potatoes with braised green beans off to the side.
    Cube Steak with Mushroom Gravy

Ready to make the best weeknight dinner in town? Go for it!

And when you do, be sure to take a photo of it, post it on Instagram, and tag @HowToFeedaLoon and hashtag #HowToFeedaLoon!

An overhead view of a white bowl filled with a serving of weeknight beef stroganoff with a blue napkin wrapped around the base of the bowl.
Print Recipe
5 from 2 votes

Weeknight Beef Stroganoff

This recipe is not quite as simple as opening a can of soup and adding sour cream, but it's still quick to prepare, and the taste is truly sensational. Always a huge hit with kids and adults alike.
Prep Time15 minutes mins
Cook Time20 minutes mins
Total Time35 minutes mins
Course: Entree
Cuisine: American
Servings: 4
Calories: 569kcal
Author: Kris Longwell

Equipment

  • 1 Large skillet
  • Pot for boiling pasta

Ingredients

  • 1 teaspoon vegetable oil
  • 1 lb ground beef 85% lean
  • Salt and pepper
  • 8 oz egg noodles about 3 cups uncooked
  • 2 tablespoon unsalted butter
  • 1 medium onion chopped
  • 8 ounces mushrooms sliced
  • 1½ cup beef broth or stock
  • 1 tablespoon Dijon mustard
  • 1 cup sour cream
  • 1 tablespoon dill fresh, chopped
  • 1 teaspoon smoked paprika
  • Italian parsley fresh, chopped, for garnish

Instructions

  • Bring a pot of lightly salted water to a boil.
  • Meanwhile, heat the oil in a large skillet over medium heat. Add the ground beef, and cook until no longer pink, turning occasionally. Season with ¼ teaspoon of salt and pepper. Tilt the skillet to the side and use a spoon or a folded paper towel to remove most of the rendered grease. Dispose responsibly (not down the drain). Use a slotted spoon to remove the cooked beef from the skillet and place it on a platter or plate.
    1 teaspoon vegetable oil, 1 lb ground beef, Salt and pepper
  • Add the pasta and cook according to package instructions (usually about 8 to 10 minutes). Set aside.
    8 oz egg noodles
  • Melt the butter in the same skillet over medium heat. Add the onions and mushrooms, and sauté until soft, and the mushrooms are releasing their liquid and starting to brown, about 10 to 12 minutes. Sprinkle the mushrooms with a pinch of salt and pepper and stir.
    2 tablespoon unsalted butter, 1 medium onion, 8 ounces mushrooms
  • Stir in the beef broth and simmer for about 5 minutes.
    1½ cup beef broth
  • Stir in the browned beef, Dijon mustard, and sour cream. Simmer for another few minutes.
    1 cup sour cream, 1 tablespoon Dijon mustard
  • Mix in the fresh dill, smoked paprika, 1 teaspoon salt, and ½ teaspoon black pepper. Simmer for another minute or so.
    1 tablespoon dill, 1 teaspoon smoked paprika
  • Drain the egg noodles and stir them into the sauce. Simmer for 5 to 10 minutes until the sauce has thickened slightly. Serve at once, with chopped parsley for garnish, if desired.
    Italian parsley

Video

Notes

NOTE: Watch the video in the recipe card for visual guidance.
Though fresh dill is best, dried dill can be substituted. Go with 1 teaspoon (rather than 1 tablespoon for fresh). 
The sauce may feel thin at first. When you stir in the cooked noodles, they absorb some of it, and the sauce thickens. Be sure to allow the noodles to simmer in the sauce for 5 to 10 minutes. 
Keep leftovers in an air-tight container with a lid in the refrigerator for up to 5 to 7 days. Reheat on the stove with another ½ cup of broth and a dollop of sour cream. The noodles will absorb more of the sauce as it sits. But leftovers are wonderful. They just need a little extra liquid. 

Nutrition

Calories: 569kcal | Carbohydrates: 48g | Protein: 32g | Fat: 27g | Saturated Fat: 11g | Polyunsaturated Fat: 2g | Monounsaturated Fat: 9g | Trans Fat: 2g | Cholesterol: 177mg | Sodium: 446mg | Potassium: 799mg | Fiber: 3g | Sugar: 5g | Vitamin A: 823IU | Vitamin C: 4mg | Calcium: 115mg | Iron: 4mg

Slow Cooker Beef and Barley Soup

January 29, 2025 by Kris Longwell 6 Comments

An overhead view of two white soup bowls filled with slow cooker beef and barley soup with red checker napkins and a piece of bread nearby.

Everyone loves a good bowl of soup, and this version hits all the right notes. Comfort soup perfection!

This soup has a similar flavor profile as our slow cooker beef stew. The barley takes the place of the potatoes and the broth isn’t quite as thick. But the taste is off the charts. Perfect any time of the year, but especially when the temperatures are chilly outside. And let your slow cooker do most of the work!

An overhead view of two white soup bowls filled with slow cooker beef and barley soup with red checker napkins and a piece of bread nearby.

How To Make Slow Cooker Beef and Barley Soup

The Ingredients You Will Need

All of the ingredients in this recipe are easy to find, and many of them you may already have on hand. Here’s what you’ll need:

Beef – We recommend a chuck roast. If there is excess fat, you’ll want to trim that off.
Seasonings – Salt and pepper.
Onion – Chopped.
Carrots – Medium-sized. Peeled and sliced into thin medallions. Fresh carrots are so much better than canned ones! Frozen will work in a pinch. You could also use baby carrots.
Celery – Thinly sliced.
Garlic – Minced.
Barley – Pearl, or “pearled” barley, can be found in the dried beans section of most supermarkets. The barley will expand as it cooks.
Flavor enhancers – Tomato paste, Worcestershire sauce, and smoked paprika.
Herbs – Fresh thyme and rosemary are best. If using dried, go with 1 teaspoon per herb. Bay leaves can be fresh or dried; both are acceptable.
Beef broth – Homemade or store-bought will both work. Go with low sodium, if possible. This will allow you to control how much salt you want in your soup.

EXPERT TIP: Chuck roast is perfect for slow cooking. It will become very tender and retain that wonderful beefy flavor. You can substitute top round, bottom round, or a tri-tip roast, if necessary. Searing the seasoned chunks of beef before adding to the slow cooker deepens the flavor of the soup, but this step can be skipped in a pinch.

An overhead view of a large oval Dutch oven that is filled with bite-sized chunks of seasoned stew meat that have been seared.

Tips for Making Perfect Slow Cooker Beef and Barley Soup

Choose the Right Cuts of Beef

Cut Selection – Use tougher cuts of beef, such as chuck roast or brisket, which become tender and flavorful during slow cooking. Cut the meat into bite-sized pieces for even cooking.
Browning – For maximum depth of flavor, sear the beef in a skillet before adding it to the slow cooker. This caramelization enhances the overall taste of the soup.

Use Quality Broth and Seasonings

Broth Choice – Use a good-quality beef broth or stock as the base for your soup. Homemade stock will yield the best flavor, but store-bought works well too.
Seasoning – Don’t forget to season your soup with thyme, bay leaves, and parsley. Adjust the seasoning towards the end of cooking to ensure it remains balanced.

Adjust Consistency and Flavor Before Serving

Consistency – If your soup is too thick, you can add additional broth or water to reach your desired consistency. Conversely, if it’s too thin, let it cook uncovered for a bit to reduce.
Final Touches – Taste the soup before serving and adjust the seasoning with salt, pepper, or a splash of vinegar or lemon juice for brightness. Fresh herbs can also be added just before serving for a burst of freshness.

A person pouring beef stock from a large glass measuring cup into a slow cooker filled with uncooked barley, sliced vegetables, seared beef chunks, hers, and tomatoes.

How To Serve and How to Store

The soup is ready to serve after 6 to 8 hours of slow cooking on LOW. However, it will stay wonderfully warm for serving if you turn the setting to WARM.

You can allow the soup to cook for up to 10 to 12 hours, but for this extended amount of time, we recommend adding the barley in the last 1 to 2 hours of slow cooking.

This soup reheats beautifully on the stove, and we think it is even better the next day. It is so hardy that a nice crusty piece of bread rounds out a perfect meal.

Leftovers will keep for up to 1 week, and the soup freezes wonderfully for up to several months. Thaw and then reheat on the stove.

An overhead view of a wooden ladle lifting up a helping of beef and barley soup form a slow cooker filled with the same.

Other Slow Cooker Recipes to Try

There’s nothing much better than coming home to the smell of your home when your slow cooker has been hard at work cooking your meal for you all day. Here is a collection of some of our favorite slow cooker recipes:

  • Hearty Beef Stew
  • French Dip Sandwiches
  • Baby Back Ribs
  • Beef Brachiole
  • BBQ Beef Brisket
  • Pulled Pork
  • Chicken Chow Mein
  • Provençal Chicken Stew
  • Coconut Chicken Curry
  • Ham and Potato Gratin
  • Spiral Ham
  • Asparagus Risotto
  • Boston Baked Beans
  • Corn on the Cob

These are all amazing, without a doubt. But, in the meantime, isn’t this soup calling your name?

A straight-on view of a large white soup bowl filled with a serving of slow cooker beef and barley soup with chunks of beef, sliced carrots, and barley visible.

If you’re looking for a delicious, hearty soup that is not difficult to prepare, this is the one for you.

Although it’s good and beefy, it is also very nutritious. Barley is an ancient grain that is loaded with nutrients.

As mentioned before, leftovers are even better the next day. Comfort food never tasted so good!

Grab a spoon and dig in!

A close-up view of a silver spoon holding up a serving of slow cooker beef and barley soup with beef chunks, sliced carrot, and barley visible.

Ready to make the heartiest and most delicious soup on the block?

Go for it, and when you do, be sure to take a photo of it, post it on Instagram, and tag @HowToFeedaLoon and hashtag #HowToFeedaLoon!

A straight-on view of a large white soup bowl filled with a serving of slow cooker beef and barley soup with chunks of beef, sliced carrots, and barley visible.
Print Recipe
5 from 3 votes

Slow Cooker Beef and Barley Soup

This soup has a similar taste profile as a hearty beef stew, but, it's a little lighter and healthier, too. The barley is loaded with nutritional value and is delicious, too. Sear the meat first and then bring it all together in your slow cooker. Leftovers are even better the next day!
Prep Time20 minutes mins
Cook Time7 hours hrs
Total Time7 hours hrs 20 minutes mins
Course: Entree / Slow Cooker
Cuisine: American
Servings: 8
Calories: 399kcal
Author: Kris Longwell

Equipment

  • 1 6-7 quart slow cooker
  • skillet for searing beef

Ingredients

  • 2½ lbs beef chuck roast
  • Salt and pepper
  • 1 tablespoon olive oil
  • 1 medium onion chopped
  • 3 medium carrots peeled and cut into ¼-inch slices
  • 3 ribs celery sliced
  • 4 cloves garlic minced
  • 1 cup pearl barley aka pearled barley
  • 2 tablespoon tomato paste
  • 1 cube beef bouillon
  • 1 tablespoon Worcestershire sauce
  • 1 tablespoon thyme fresh, chopped
  • 1 tablespoon rosemary fresh, chopped
  • 1 teaspoon smoked paprika
  • 2 bay leaves fresh or dried
  • 1½ teaspoon Kosher salt
  • 1 teaspoon black pepper
  • 6 cups beef broth
  • 2 tablespoon parsley Italain, chopped, for garnish (optional)

Instructions

  • Cut the beef into bite-sized pieces and then season with salt and pepper. Heat the oil in a large skillet over medium heat. Add the beef (working in batches, if necessary) and sear until browned all over, about 5 minutes. Set aside (the beef will not be fully cooked at this point).
    2½ lbs beef chuck roast, Salt and pepper, 1 tablespoon olive oil
  • Place all of the remaining ingredients into the slow cooker. Stir in the beef.
    1 medium onion, 3 medium carrots, 3 ribs celery, 4 cloves garlic, 1 cup pearl barley, 2 tablespoon tomato paste, 1 cube beef bouillon, 1 tablespoon Worcestershire sauce, 1 tablespoon thyme, 1 tablespoon rosemary, 1 teaspoon smoked paprika, 2 bay leaves, 1½ teaspoon Kosher salt, 1 teaspoon black pepper, 6 cups beef broth
  • Cook on LOW for 6 to 8 hours, or on HIGH for 4 to 6 hours.
  • Discard the bay leaves. Taste and add more salt, if desired. Serve at once. Garnish with chopped parsley, if desired.
    2 tablespoon parsley

Video

Notes

NOTE: Watch the video in the recipe card for visual guidance.
You can skip searing the beef, but we do recommend it. It deepens the overall flavor of the soup. 
You can substitute dried herbs for the thyme and rosemary. Fresh is best, but if using dried, then go with 1 teaspoon of each. 
Leftovers are wonderful and will keep in an air-tight container in the fridge for up to 1 week. The soup also freezes wonderfully for up to several months. Reheat leftovers in a pot on the stove over medium heat until simmering and fully heated through. 

Nutrition

Calories: 399kcal | Carbohydrates: 26g | Protein: 33g | Fat: 16g | Saturated Fat: 7g | Polyunsaturated Fat: 2g | Monounsaturated Fat: 8g | Trans Fat: 1g | Cholesterol: 98mg | Sodium: 728mg | Potassium: 856mg | Fiber: 6g | Sugar: 3g | Vitamin A: 4236IU | Vitamin C: 7mg | Calcium: 76mg | Iron: 5mg

Smoked Pork Wings

January 26, 2025 by Kris Longwell 1 Comment

An overhead view of two smoked pork wings that are fully cooked and slathered with homemade barbecue sauce.

Chances are you’ve never had a pork wing. Or, even heard of them. We are here to change that.

The smokey flavor of these incredible “wings” is off-the-charts delicious. It is actually part of the ham shank, and the slow cooking makes them melt-in-your-mouth tender. The homemade BBQ sauce takes them to a new level. Perfect for tailgating, an outdoor BBQ, or just a fun Sunday afternoon with the family. Unforgettably delicious!

An overhead view of two smoked pork wings that are fully cooked and slathered with homemade barbecue sauce.

How To Make Smoked Pork Wings

NOTE: If you liked this video, please subscribe to our YouTube channel. Remember to click the little ‘bell’ icon so you’ll never miss a new video. Thank you!

The Ingredients You Will Need

As you would guess, these are all about the pork wings. Well, the rub and the BBQ sauce are important, too.

But, let’s talk about the “wings.” Pork wings are from the shank (lower leg) and the meat is dense and extremely flavorful. Once fully cooked, they have a similar texture as wings but are very tender.

You won’t find them at your local grocery store, or even your local meat market. But, they are easy to order. We always get them from Mangalitsa Estates. Mangalitsa pork is considered the best of the best. It’s popular in top-notch restaurants across the country.

Order yours today and get a special 15% discount on your entire order! Just use discount code: LOON15. Place your order here.

Once you have the ribs, all you need is:

Oil – Olive oil or vegetable oil.
Salt – Coarse Kosher is great, but table salt will work, too.
Pork rub – Homemade is what we recommend, but you can use your favorite rub. Pork rub is typically slightly sweeter, which is the perfect match for pork.
BBQ sauce – Again, homemade is easy and so good. But, you can use your favorite purchased variety, too.

EXPERT TIP: We highly recommend using homemade pork rub. Trust us, you’ll use it time and time again! Our version does not have salt, so we sprinkle salt on the pork wings before adding the rub. If using purchase rub, check the sodium content, you may not need to add more salt.

A person sprinkling a pork rub onto two uncooked pork wings that are resting on a wooden cutting board next to a jar half-filled with the rub.

Tips for Making Perfect Smoked Pork Wings

Use a Flavorful Pork Rub
Ingredients – We highly recommend making the rub from scratch. However, if using purchased, seek out a rub that is specifically for pork. Also, keep an eye on salt content.
Application – Generously coat the pork wings with the rub and let them marinate for at least an hour, or overnight in the refrigerator for deeper flavor.

Choose the Right Smoking Wood
Wood Selection – Use fruit woods like apple or cherry for a sweeter flavor, or hickory or pecan for a stronger smoke. We love pecan for our pork wings.
Temperature – Maintain a smoking temperature between 225°F to 250°F for even cooking and to allow the wings to absorb the smoke flavor. The overall cooking time will be about 3 to 3½ hours.

Monitor Cooking Time and Temperature
Cooking Duration – Smoke the wings for about 1½ to 2 hours, or until they reach an internal temperature of 175°F. Use a meat thermometer to ensure accuracy. You’ll continue smoking for about another 1½ hours.
Setting the Bark and Then Basting – After they’ve cooked in the foil for an additional hour, you’ll want the wings to smoke on their own to allow the bark to set, about 10 to 15 minutes. Then, another 10 minutes to let the BBQ sauce set.

Finish with a Crisp
Crisping the Skin – This is optional, but, for extra crispiness, you can finish the wings on a grill or under a broiler for a few minutes after smoking. This helps render the fat and crisps up the skin beautifully.
Serving – Brush the wings in additional BBQ sauce before serving. Remember, homemade BBQ sauce takes the wings to another level.

EXPERT TIP: Wrapping the pork wings in foil with butter will help to make them super tender. After an hour in the foil in the smoker, they will lighten in color. You’ll add them back to the smoker (without the foil) to allow the bark to set.

How to Cook Pork Wings

We think smoking pork wings from Mangalitsa Estates produces a flavor that is off-the-charts good. They can easily be smoked, packed up in a heatproof container, and then transferred later to a grill for finishing them. This makes them one of the best tailgating recipes of all time!

The smoker we highly recommend is an Electric Smoker from Smokin’ Tex. It is reliable and produces some of the best smoked meats, cheese, and veggies, that you could imagine.

Order any of the amazing array of products from Smokin’ Tex and use LOON10 for 10% off your entire order! Click here to browse and select from their amazing products.

How To Grill Pork Wings

  1. Simply set 2-zone heating areas on your grill (one side with heat and the other side with no heat). You’ll need a lid for your grill.
  2. Season the pork wings and cook them over the “no-heat” zone for about 1 hour, with the grill on medium-low heat.
  3. The internal temperature should be in the range of 160 to 175°F.
  4. Baste with sauce and cook longer for another 30 minutes on no heat.
  5. Baste again, and then finish off over direct heat until lightly charred and the meat is tender, usually another 20 minutes.

A close-up view of a person using a small kitchen brush to apply barbecue sauce onto a pork wing that is on a metal grate of an electric smoker.

Other Smoked or Grilled Meats Recipes to Try

We just love any kind of meat that has been smoked or grilled to perfection! Here is a collection of some of our all-time favorites!

  • Cheese-Stuffed Smoked Meatloaf
  • Grilled Buffalo Wings with Homemade Blue Cheese Dressing
  • Smoked Steakhouse Burger with Crispy Onion Strips
  • Grilled Pulled Pork Pizza
  • Best-Ever Smoked St. Louie-Style Ribs
  • Classic Grilled Beer-Can Chicken
  • Grilled Chicken Skewers with White Alabama Sauce
  • Grilled Buffalo Shrimp

These are all amazing, without a doubt. But, in the meantime, aren’t these babies calling your name?

A straight-on view of two pork wings stacked against each other and each have been smoked and then slathered with barbecue sauce.

Chances are you’ve never had pork wings before. Folks, they are nothing short of amazing.

Order from Mangalitsa Estates and use code LOON15 for a 15% discount!

And, of course, don’t forget to make the pork rub and homemade BBQ sauce. They can be made well in advance. It all comes together to be a meat-lover’ dream come true!

A straight-on view of a person plunging a piece of BBQ pork wings into a small silver vessel filled with homemade barbecue sauce.

Ready to make pigs fly? Go for it and smoke these pork wings!

And when you do, be sure to take a photo of them, post it on Instagram, and tag @HowToFeedaLoon and hashtag #HowToFeedaLoon!

An overhead view of two smoked pork wings that are fully cooked and slathered with homemade barbecue sauce.
Print Recipe
5 from 1 vote

Smoked Pork Wings

These are a meat lover's dream come true. They are similar in texture to ribs, but the meat is deeply flavorful and the pork rub and homemade BBQ sauce put them over the top. See in NOTES where you can easily order the pork wings (with a 15% discount!). Perfect for tailgating, parties, or a fun Sunday afternoon at home!
Prep Time10 minutes mins
Cook Time3 hours hrs
Total Time3 hours hrs 10 minutes mins
Course: Appetizer
Cuisine: American
Servings: 4
Calories: 468kcal
Author: Kris Longwell

Equipment

  • 1 Smoker
  • wood chips pecan, hickory, or cherry

Ingredients

  • 4 8 oz pork wings
  • olive oil
  • Kosher salt
  • ½ cup pork rub
  • 4 tablespoon unsalted butter cut into 4 slices
  • 1 cup BBQ sauce plus more for serving

Instructions

  • Place the pork wings on a cutting board and brush olive oil all over them. Sprinkle salt all over (see NOTES) and then liberally coat with the pork rub. Let rest for 15 minutes to several hours (or overnight) in the fridge.
    4 8 oz pork wings, olive oil, Kosher salt, ½ cup pork rub
  • Load your smokebox with 8 ounces of wood chips. Place the pork wings on a grate and turn your smoker to 250°F. Smoke for 90 minutes. The internal temperature of the pork should be in the range of 165 to 175°F.
  • Remove the pork wings from the smoker. On your counter, place four large square pieces of aluminum foil. Add a pat of butter (about 1 tbsp) in the middle of each piece of foil. Top the butter with a pork wing. Lightly coat the pork wings all over with the BBQ sauce. Fold the foil up tightly around the pork wings and place back in the smoker (butter side up) for another hour.
    4 tablespoon unsalted butter, 1 cup BBQ sauce
  • Remove the pork wings from the smoker and carefully remove the foil. Be careful, there will be a little excess hot butter. Return the pork wings back to the smoker for another 10 minutes, to help set the bark.
  • Pull the grate holding the pork wings out slightly, and liberally brush more of the BBQ sauce over the tops. Close the door and cook for another 10 minutes.
  • Remove from the smoker and allow to cool just enough to handle (usually 5 to 10 minutes). Serve with extra BBQ sauce on the side.

Video

Notes

See the video near the top of the blog post for visual guidance. If you liked the video, please subscribe to our YouTube channel. 
For the best pork ribs, order from Mangalitsa Estates. Use Discount Code LOON15 for 15% off your entire order. 
The pork rub and BBQ sauce can be made days in advance. Leftover rub will keep in a jar with a lid for several months. The BBQ sauce will keep covered in the fridge for several weeks. 
If not making the pork rub from scratch and using a purchased rub, check the salt content. If the rub contains salt, you won't need to season the pork wings with salt. 

Nutrition

Calories: 468kcal | Carbohydrates: 49g | Protein: 18g | Fat: 14g | Saturated Fat: 8g | Polyunsaturated Fat: 1g | Monounsaturated Fat: 3g | Trans Fat: 0.5g | Cholesterol: 30mg | Sodium: 614mg | Potassium: 372mg | Fiber: 4g | Sugar: 25g | Vitamin A: 1288IU | Vitamin C: 4mg | Calcium: 322mg | Iron: 11mg

Turkey Burrito Bowl

January 22, 2025 by Kris Longwell 1 Comment

An overhead view of two white bowls that are both filled with a serving of a turkey burrito bowl and they are surrounded by smaller bowls of salsa, pico de gallos, cheese, and corn salsa.

There is so much to celebrate about this bowl of goodness. It’s yummy, it can be made in advance, and it’s good for you! What more is there to love? Just wait and see!

We love ordering a big ole burrito bowl from Chipotle®. In fact, we even did our own version of their Chicken Burrito Bowl. But, even though the ingredients are fresh, the huge helping is loaded with calories. With our version, we trim back the calories significantly, but keep all the flavor!

An overhead view of two white bowls that are both filled with a serving of a turkey burrito bowl and they are surrounded by smaller bowls of salsa, pico de gallos, cheese, and corn salsa.

How To Make Turkey Burrito Bowl

The Ingredients You Will Need

One of the great things about a burrito bowl is that you can control what you add to it and how much. Homemade is always best, and so many of the components can be prepared in advance. For our version, here’s what you’ll need to have on hand:

For the Cilantro Lime Brown Rice

Brown rice – We recommend long-grain, but you can substitute Minute rice or microwavable steamed rice, too.
Bay leaf – Dried or fresh.
Lime juice – Fresh is best. Usually from half of a juicy lime.
Oil – We add a splash of olive oil, but this is optional. We find it helps in the overall texture of the rice.
Salt – Kosher is great, but table salt will work, too.

For the Ground Turkey Taco Meat

Oil – Olive oil or extra-virgin olive oil.
Onion – Chopped.
Garlic – Minced.
Ground turkey – 93% or 99% lean. We usually go with 93%. 99% is almost dry, in our opinion.
Seasonings – Chili powder, ground cumin, dried oregano, garlic powder, onion powder, smoked paprika, salt, and pepper.
Flour – All-purpose.
Broth – Chicken, beef, or vegetable. Or, you can substitute water.

For the Seasoned Beans

Canned beans – We love red kidney beans, but go with your favorite. Pinto beans, black beans, or even black-eyed peas are all great options.
Broth – Chicken is recommended. But vegetable stock can be substituted.
Seasonings – Chili powder, ground cumin, salt.

Burrito Bowl Fillings

Lettuce – Chopped romaine or iceberg is recommended.
Corn salsa – Homemade is easy and so good, but store-bought will work, too.
Shredded cheese – Cheddar, Monterey Jack, Colby, or Cotija are all wonderful options.
Pico de Gallo – Fresh Pico de Gallo is fresh and easy. However, store-bought can work in a pinch.
Jalapeños – Fresh or pickled (nacho slices).
Salsa – Roasted tomato salsa is wonderful. But your favorite purchased salsa will work, too.
Sour cream – Mexican crema or Mexican sour cream are wonderful options, too.
Cilantro – Fresh, chopped.
Avocado – Fresh and sliced.

EXPERT TIP: When preparing long-grain brown rice, you’ll need to give it plenty of time to simmer and become soft. It can take anywhere from 30 to 50 minutes. Check after 20 minutes, and add more liquid as necessary. Stir the rice every now and then to help keep the rice from sticking to the bottom of the pan.

An overhead view of a person holding a serving spoon filled with a serving of cooked brown rice with cilantro and lime in a medium-sized saucepan on a gas stove.

Tips for Making the Best Turkey Burrito Bowl

Homemade Is Best – There are numerous components to our burrito bowl. Making the taco meat, rice, corn salsa, and tomato salsa all from scratch takes a little more effort, but the difference in taste is night and day. And they can all be made well in advance!

Don’t Overcook the Turkey Taco Mixture – After you add the liquid to the seasoned meat, let it simmer until most of the liquid has evaporated, but not all of it. You want to keep it juicy, but not dripping.

Keep Warm Items Warm – This bowl is definitely best when the taco meat, rice, and beans are served warm. After you prepare them, cover them with a lid to keep them warm.

Distribute the Components Evenly – Resist the temptation to overdo it with any of the components of the bowl. Start with a thin foundation of rice, and then add scoops of the remaining ingredients. This will create a perfectly balanced bowl without one flavor overpowering any of the others.

A close-up view of large silver skillet that is filled with cooked ground turkey that is simmering in saucy taco sauce.

How To Serve

If you have ever dined at a Chipotle, you see the assembly line of ingredients as you let the food preparers know how you want your bowl.

You can create a similar lineup at home. Letting everyone build their own bowl lets them pick and choose the components they prefer, plus, it’s just fun!

This is one of those dishes that is perfect for do-ahead meal planning. Store each component (consolidate where it makes sense) in individual containers and then heat and serve each day of the week you want a burrito bowl. The individual containers travel easily, too!

EXPERT TIP: If you’re in a crunch for time, simply drain the beans from the can and serve as is. Simmering them in seasoned broth deepens the flavor, but you’ll still get good taste and texture straight from the can.

An overhead view of a slotted silver spoon holding a large serving of red kidney beans in a sauce over a saucepan of the simmering beans on a gas stove.

Other “Low Cal, Big Taste” Recipes to Try

There’s no need to sacrifice taste when you’re trying to eat healthy. Here is a collection of some of our low-calorie dishes that are always a huge hit with the family.

  • Stuffed Bell Peppers with Turkey and Rice
  • Pasta Ragu with Ground Turkey and Sweet Peppers
  • Best-Ever Turkey Chili
  • Veggie Fajitas
  • Curry Turkey Burgers with Grilled Pineapple
  • Plant-Based Pasta Bake
  • California Burgers with Impossible (Plant-Based) Burgers
  • Vegetarian Steamed Dumplings
  • Veggie Stir-Fry

These are all amazing in their own way. But, in the meantime, isn’t this bowl of yumminess calling your name?

A close-up view of a white shallow bowl holding a turkey burrito bowl topped with slices of fresh avocado and streaks of Mexican crema.

This dish is so deeply flavorful, especially when you make most of it from scratch.

We love to make all of the components on a Sunday afternoon, and then enjoy amazing burrito bowls all week.

Stir everything together, and the taste is truly restaurant-quality. Without all the calories and sodium! The best!

A close-up view of a white bowl filled with a turkey burrito bowl that has been stirred together and partially eaten with a fork inserted into the side.

Ready to make the yummiest (and healthiest) dish in town? Go for it!

And when you do, be sure to take a photo of it, post it on Instagram, and tag @HowToFeedaLoon and hashtag #HowToFeedaLoon!

An overhead view of a white bowl holding a serving of turkey burrito bowl topped with slices of avocado, kidney beans, and sour cream and surround by bowls of salsa, pico de galls, and corn.
Print Recipe
5 from 1 vote

Turkey Burrito Bowl

All of the components of this burrito bowl can be made in advance. Simply reheat on the stove, or in the microwave, and then assemble with your desired components. When possible, go with low-sodium ingredients to control the amount of salt you have in your bowl. The taste is as good as it gets, and super healthy, too!
Prep Time30 minutes mins
Cook Time1 hour hr 30 minutes mins
Total Time2 hours hrs
Course: Lunch / Dinner
Cuisine: American / TexMex / CalMex
Servings: 6
Calories: 263kcal
Author: Kris Longwell

Ingredients

For the Turkey Taco Meat

  • 1 tablespoon olive oil
  • 1 medium onion chopped
  • 3 cloves garlic minced
  • 1 lb ground turkey 93% lean
  • 2 teaspoon chili powder
  • 1 teaspoon ground cumin
  • 1 teaspoon oregano
  • 1 teaspoon smoked paprika
  • 1 teaspoon garlic powder
  • 1 teaspoon onion powder
  • 1 teaspoon Kosher salt
  • ½ teaspoon black pepper ground
  • 1 tablespoon all-purpose flour
  • 1 cup chicken broth low-sodium

For the Cilantro Lime Brown Rice

  • 1¼ cup long-grain brown rice
  • 1⅔ cup water or broth
  • 1 bay leaf
  • ¼ cup cilantro fresh, chopped
  • 1 tablespoon lime juice usually from half of a lime
  • 1 teaspoon olive oil optional
  • ½ teaspoon salt

For the Seasoned Beans

  • 1 15 oz can red kidney beans drained and rinsed
  • ¼ cup chicken broth low-sodium
  • ½ teaspoon chili powder
  • ¼ teaspoon ground cumin
  • ¼ teaspoon Kosher salt

For the Bowl

  • 2 cups romaine lettuce chopped
  • 2 cups roasted corn salsa
  • ¾ cup Colby Jack cheese grated
  • 1 cup pico de gallo
  • 1 cup roasted tomato salsa
  • jalapeños sliced, fresh or pickled
  • cilantro fresh, chopped
  • sour cream

Instructions

Make the Ground Turkey Taco Meat

  • Heat the oil in a large skillet over medium heat. Add the onions and sauté until soft, about 5 minutes. Stir in the garlic and sauté for another 30 seconds.
    1 tablespoon olive oil, 1 medium onion, 3 cloves garlic
  • Add the ground turkey and break it up with a wooden spoon or spatula. Cook, stirring often, until no longer pink. If excess grease has rendered, soak it up with a paper towel, or tilt the skillet and spoon it off (discard safely).
  • Stir in the chili powder, cumin, oregano, paprika, garlic powder, onion powder, salt, and pepper. Stir and cook until the meat is fully coated and aromatic, about 1 minute. Stir in the flour and cook for another minute.
    2 teaspoon chili powder, 1 teaspoon ground cumin, 1 teaspoon oregano, 1 teaspoon smoked paprika, 1 teaspoon garlic powder, 1 teaspoon onion powder, 1 teaspoon Kosher salt, ½ teaspoon black pepper, 1 tablespoon all-purpose flour
  • Stir in the broth and simmer until most of the liquid has evaporated but not dry, usually about 10 minutes. Cover and set aside.
    1 cup chicken broth

Make the Cilantro Lime Brown Rice

  • Add the rice, water, and bay leaf into a medium-sized saucepan (with a lid). Bring to a boil. Stir and lower the heat to LOW. Cover and simmer until the rice is tender, about 40 to 50 minutes. Check the rice after 20 minutes, and add a little more water if needed. Continue this process until the rice is fluffy and soft. Remove from the heat and remove the bay leaf.
    1¼ cup long-grain brown rice, 1⅔ cup water, 1 bay leaf
  • Stir in the cilantro, lime juice, olive oil, and salt. Cover and set aside.
    ¼ cup cilantro, 1 tablespoon lime juice, ½ teaspoon salt

Prepare the Seasoned Beans

  • In a small saucepan, add the rinsed beans, broth, chili powder, cumin, and salt. Bring to a simmer and cook, stirring occasionally, for about 5 minutes. Cover and set aside.
    1 15 oz can red kidney beans, ¼ cup chicken broth, ½ teaspoon chili powder, ¼ teaspoon ground cumin, ¼ teaspoon Kosher salt

Build the Burrito Bowls

  • Scoop about ⅓ cup of the rice into individual serving bowls. Top with turkey taco meat, seasoned beans, and other desired toppings. Serve at once.
    2 cups romaine lettuce, 2 cups roasted corn salsa, ¾ cup Colby Jack cheese, 1 cup pico de gallo, 1 cup roasted tomato salsa, jalapeños, cilantro, sour cream

Video

Notes

NOTE: Watch the video in the recipe card for visual guidance.
All of the components of this dish can be prepared and prepped 1 to 2 days in advance. Keep refrigerated until ready to use. The meat and rice can be reheated on the stove or in the microwave. This is great for meal planning for the busy week. 
Watch the sodium levels for all components. Be sure to do a taste test before adding more salt. 
Leftovers will keep in a container (consolidate them sensibly) in the fridge for up to 5 days. The salsas will keep for a couple of weeks. 

Nutrition

Calories: 263kcal | Carbohydrates: 21g | Protein: 24g | Fat: 10g | Saturated Fat: 4g | Polyunsaturated Fat: 1g | Monounsaturated Fat: 4g | Trans Fat: 0.01g | Cholesterol: 58mg | Sodium: 1287mg | Potassium: 397mg | Fiber: 2g | Sugar: 5g | Vitamin A: 2197IU | Vitamin C: 6mg | Calcium: 152mg | Iron: 2mg

Best-Ever Veggie Fajitas

January 19, 2025 by Kris Longwell 3 Comments

An overhead view of a fajita skillet filled with a serving of veggie fajitas with small bowls of cheese, limes, salsa, and cilantro surrounding the pan.

These Best-Ever Veggie Fajitas are bursting with bold, smoky flavor and vibrant color! Tender portobello mushrooms, sweet bell peppers, and caramelized onions are sautéed to perfection with classic fajita seasonings for a hearty, satisfying meal that even meat lovers will crave.

An overhead view of a fajita skillet filled with a serving of veggie fajitas with small bowls of cheese, limes, salsa, and cilantro surrounding the pan.
[feast_advanced_jump_to]

🌶️ The Ingredients

With a savory blend of garlic, soy sauce, chili powder, cumin, and onion powder, these veggie fajitas come together in sizzling harmony—delivering an authentic, restaurant-style flavor wrapped in warm flour tortillas with all the classic fixings. Find ingredient notes (including substitutions and variations) below.

An arrangement of ingredients for veggie fajitas on a grey wooden background including portobello mushrooms, bell peppers, onion, garlic, oil, soy sauce, cilantro, seasonings, tortillas, sour cream, salsa, and cheese.

🍆 Substitutions and Variations

  • Portobello mushrooms:
    Swap with cremini or button mushrooms for a milder flavor, or use zucchini, eggplant, or jackfruit for a different texture. (Note: Portobellos add meaty depth and soak up the fajita seasoning beautifully.)
  • Bell peppers:
    Use a mix of red, yellow, and orange for sweetness, or add poblano or Anaheim peppers for a smoky twist. (Note: Roasting or charring the peppers enhances their natural sweetness.)
  • Onions:
    Red onions bring a touch of sweetness, while white or yellow onions give a sharper bite. You can also add shallots for a milder, more refined flavor.
  • Garlic:
    Fresh minced garlic gives the best flavor, but garlic powder can be used in a pinch (about ½ teaspoon per clove).
  • Soy sauce:
    Substitute with tamari for a gluten-free option or liquid aminos for a slightly sweeter, lower-sodium alternative. (Note: Soy sauce adds umami depth that mimics the savoriness of traditional fajita marinades.)
  • Chili powder:
    Replace with smoked paprika for a milder, smoky heat or a blend of cayenne and paprika for more kick.
  • Ground cumin:
    Essential for that earthy, Tex-Mex flavor—if you’re out, try ground coriander or taco seasoning as a backup.

See the recipe card (with video) below for a full list of ingredients and measurements.

🔥 Tips and Tricks for the Best-Ever Veggie Fajitas

  • et the pan hot: Use a large cast-iron skillet or heavy pan and let it heat until it’s almost smoking before adding the vegetables — this ensures a beautiful char and that signature fajita sizzle.
  • Don’t overcrowd the pan: Cook the vegetables in batches if needed. Overcrowding traps steam and prevents those caramelized edges that make fajitas irresistible.
  • Slice evenly: Cut all the vegetables (especially peppers and onions) into similar-sized strips so they cook evenly and stay tender-crisp.
  • Marinate briefly: Toss the mushrooms and veggies in the soy sauce, garlic, and spices for 10–15 minutes before cooking to deepen the flavor.
  • Add spices at the right time: Sprinkle the chili powder, cumin, and onion powder during cooking — this helps the seasonings bloom in the heat and coat the veggies evenly.
  • Finish with lime juice: A quick squeeze of fresh lime right before serving brightens the flavors and balances the savory notes.
  • Warm the tortillas: Heat flour tortillas briefly over an open flame, in a dry skillet, or wrapped in foil in a warm oven — this keeps them soft and pliable.

👩🏼‍🍳 How To Make Veggie Fajitas

A wooden spoon being used to stir and sauté sliced portobello mushrooms in a cast-iron skillet.
  1. Step 1: Sauté the mushrooms in the oil until soft. Set aside.
A wooden spoon being used to stir and sauté strips of red, yellow, and orange bell peppers, as well as caramelized onions.
  1. Step 2: Add a little more oil and sauté peppers and onion until soft, about 10 minutes.
A person transferring dried spices from a small white bowl into a skillet that is filled with sautéed strips of portobello mushrooms, bell peppers, and onions.
  1. Step 3: Return the mushrooms to the pan and stir in the chili powder, paprika, cumin, and onion powder. Sauté for 2 minutes.
A person using a pair of metal tongs to lightly char a flour tortilla over a gas flame on a gas stove.
  1. Step 4: Heat the tortillas over a gas flame, in a skillet, or warm in the microwave. Wrap in linen until ready to serve.
A person placing sautéed strips of mushrooms, bell peppers, and onions onto a fajita skillet that is being heated over a gas stove.
  1. Step 5: Heat your fajita skillet (or regular skillet) over medium-high heat and then add the veggies.
A close-up view of veggie fajitas that are sizzling on a hot fajita skillet with lime wedges sitting on the side of the pan.
  1. Step 6: Serve while still sizzling with lemon wedges.

💃🏻 How To Serve

  • Build-your-own fajita bar:
    Serve the sizzling veggies straight from the skillet with warm flour tortillas and a variety of toppings so everyone can customize their own fajitas.
  • With classic toppings:
    Offer guacamole, sour cream, pico de gallo, shredded cheese, homemade salsa, and fresh cilantro for authentic flavor and texture contrast.
  • Add a squeeze of lime:
    A touch of fresh lime juice brightens the flavors and ties everything together.
  • With sides:
    Pair with Mexican rice, refried or black beans, or a simple corn salad for a complete meal.
  • As a bowl:
    Skip the tortillas and serve the seasoned veggies over steamed rice, quinoa, or cauliflower rice, topped with avocado and salsa for a lighter option.
  • With a crunchy element:
    Add tortilla chips or strips for extra texture, especially if serving fajita bowls.
  • For a crowd:
    Keep the veggies warm in a skillet or on a griddle and serve with a stack of tortillas wrapped in a clean towel to stay soft.

🙋🏽‍♂️ Frequently Asked Questions

Can I make Best-Ever Veggie Fajitas ahead of time?

Yes! You can slice and marinate the vegetables up to a day in advance. Cook them just before serving for the best texture and flavor.

Are Best-Ever Veggie Fajitas spicy?

They have a mild to medium heat from the chili powder and seasonings, but you can easily adjust the spice level—add more chili powder or a pinch of cayenne for extra kick, or reduce it for a milder flavor.

What’s the best way to reheat Best-Ever Veggie Fajitas?

Reheat the veggies in a hot skillet for a few minutes to bring back their char and keep them from getting soggy. Avoid microwaving if possible.

Can I grill the vegetables for Best-Ever Veggie Fajitas instead of cooking them on the stovetop?

Absolutely! Grilling adds a wonderful smoky flavor—just slice the veggies thick enough to stay on the grates and cook until tender and lightly charred.

A white dinner plate filled with an open-face veggie fajita with a glass of beef nearby.

😋 Other Classic Tex-Mex Recipes To Try

  • Tex-Mex chicken fajitas sitting on large oval fajita pan and topped with fresh pico de gallo and chopped cilantro with bowls of grated cheese and pico de gallo nearby.
    Tex-Mex Chicken Fajitas
  • A cast iron fajita skillet of steak fajitas with limes and green onions nearby.
    Authentic Steak Fajitas
  • A close-up view of best shrimp fajitas resting on an over-sized fajita pan with sautéed strips of red and yellow bell peppers under the sizzling seasoned shrimp.
    Best-Ever Shrimp Fajitas
  • Place the shredded pork carnitas on a corn tortilla with pico de Gallo, cilantro and fresh lime.
    Carnitas Tacos

Ready to make the best Tex-Mex vegetarian dish this side of El Paso? Go for it!

And when you do, be sure to take a photo of them, post it on Instagram, and tag @HowToFeedaLoon and hashtag #HowToFeedaLoon!

An overhead view of veggie fajitas on a large fajita skillet resting on a wooden board with charred flour tortillas resting nearby.
Print Recipe
5 from 1 vote

Best-Ever Veggie Fajitas

You will never miss the meat with these amazing vegetarian fajitas. The portobello mushrooms have an almost 'beefy' taste and texture to them and the flavor is classic in every way. They are healthy and off-the-charts delicious!
Prep Time15 minutes mins
Cook Time25 minutes mins
Total Time40 minutes mins
Course: Entree
Cuisine: Tex-Mex, Mexican
Diet: Vegetarian
Servings: 4
Calories: 341kcal
Author: Kris Longwell

Equipment

  • 1 Large skillet
  • fajita skillet optional

Ingredients

  • 3 tablespoon olive oil divided
  • 3 large portobello mushroom caps stem and gills removed, cut into strips
  • 3 bell peppers seeded and cut into strips
  • 1 large red onion sliced into strips
  • 3 cloves garlic
  • 2 tablespoon soy sauce
  • 1 tablespoon chili powder
  • ½ teaspoon smoked paprika
  • ½ teaspoon cumin ground
  • ½ teaspoon onion powder
  • 8 flour tortillas heated (preferably over gas flame)
  • fresh limes for garnish
  • cilantro chopped, for garnish
  • sour cream for garnish, optional
  • salsa for garnish
  • Cotija cheese crumbled, for garnish, optional

Instructions

  • Heat 2 tablespoons of the oil in a large skillet (ie, cast iron) over medium-high heat. Add the mushrooms and sauté, stirring occasionally, until soft and darkened, about 8 minutes. Remove from the skillet onto a platter.
    3 tablespoon olive oil, 3 large portobello mushroom caps
  • Use the same skillet (no need to wipe it clean) and heat the remaining tablespoon of oil over medium-high heat. Add the peppers and onion and sauté, stirring often, until very soft and the onions have begun to caramelize, about 10 minutes. Stir in the garlic and sauté for another 30 seconds.
    3 bell peppers, 1 large red onion, 3 cloves garlic
  • Return the mushrooms to the skillet and gently stir to combine. Stir in the soy sauce and cook, stirring often, for 1 minute. Stir in the chili powder, paprika, cumin, and onion powder. Sauté for 2 more minutes.
    2 tablespoon soy sauce, 1 tablespoon chili powder, ½ teaspoon smoked paprika, ½ teaspoon cumin, ½ teaspoon onion powder
  • Meanwhile, heat your tortillas, preferably over a gas flame, if possible. If using, heat your fajita skillet on the stove until very hot (be careful, handle it with a hot pad).
    8 flour tortillas
  • If using, transfer the vegetables to the heated fajita skillet and serve at once. Garnish with a squeeze of fresh lime and a sprinkle of cilantro. Serve with the heated tortillas and desired toppings.
    fresh limes, cilantro, sour cream, salsa, Cotija cheese

Video

Notes

NOTE: Watch the video near the top of the recipe for visual guidance.
Feel free to use any variety of vegetables. Squash, zucchini, carrots, and eggplant are all wonderful additions. 
Leftover will keep (refrigerated) for several days. Reheat in a skillet on the stove over medium heat until heated through. 

Nutrition

Calories: 341kcal | Carbohydrates: 43g | Protein: 9g | Fat: 13g | Saturated Fat: 3g | Polyunsaturated Fat: 3g | Monounsaturated Fat: 6g | Trans Fat: 0.003g | Sodium: 989mg | Potassium: 613mg | Fiber: 6g | Sugar: 9g | Vitamin A: 3514IU | Vitamin C: 117mg | Calcium: 119mg | Iron: 4mg

Korean Beef Tacos with Kimchi

January 12, 2025 by The Loon 6 Comments

An overhead view of three Korean beef tacos with kimchi pressed against each other and topped with Korean bbq sauce and slivers of green onions.

This incredible dish combines two of our favorite cuisines: Mexican and Korean.

You just won’t believe how incredible the Korean beef (bulgogi) matches against the homemade kimchi, all wrapped up in a flour tortilla and topped with deeply flavorful Korean BBQ sauce. You will want to make these tacos time and time again, and they aren’t hard to prepare, either!

An overhead view of three Korean beef tacos with kimchi pressed against each other and topped with Korean bbq sauce and slivers of green onions.

How To Make Korean Beef Tacos with Kimchi

The Ingredients You Will Need

Most of the ingredients for these tacos can be found in the Asian section of your local supermarket, at Asian food markets, or online. Here’s what you’ll need to have on hand:

For the Korean Beef

Steak – Look for a nicely marbled cut of beef, such as a ribeye, strip, or sirloin.
Garlic – Minced.
Green onions and yellow onions – Chopped.
Soy sauce – Regular or low-sodium.
Sesame oil – Found in the Asian section of most supermarkets.
Sugar – Granulated.
Seasonings – Black pepper, smoked paprika, cayenne powder, chili powder.
Sesame seeds – Preferably toasted.
Oil – You’ll need an oil that can handle high-heat stir-frying, such as peanut, canola, or vegetable oil. We don’t recommend olive oil.

For the Kimchi

Napa cabbage – You’ll only need about half of it. Cut the end off, and then coarsely chop the leaves.
Salt – Kosher is best.
Vinegar – Rice wine, or rice vinegar (either will work).
Garlic and fresh ginger– Minced. Fresh is highly recommended.
Green onions – Chopped.
Fish sauce – Found in the Asian section of many well-stocked supermarkets, at Asian markets, or online.
Sugar – Granulated.
Seasonings – Chili powder and red pepper flakes.

For the Korean BBQ Sauce

Gochujang – Korean red pepper paste found in the Asian section of many well-stocked supermarkets, at Asian markets, or online.
Sesame oil – Found in the Asian section of most supermarkets.
Sugar – Granulated.
Vinegar – Apple cider or rice vinegar.
Garlic – Minced.

EXPERT TIP: Place the meat in the freezer for about 15 minutes for slicing. This firms the meat up and allows you to get that classic thinly sliced Korean beef.

An overhead view of a glass bowl that is filled with thin strips of ribeye steak that has been coated in a Korean marinade.

Tips for Perfect Korean Beef Tacos with Kimchi

Choose the Right Cut of Beef – Use tender cuts like ribeye, flank steak, or sirloin for your tacos, as they are flavorful and stir-fry well. Marinate the beef for no less than two hours (overnight is best) to enhance its flavor and tenderness before cooking.

Cook at High Heat – Sear the marinated beef over high heat in a wok (or skillet), on a grill, or in a hot skillet to achieve a nice caramelized crust while keeping the inside juicy. Aim for medium-rare to medium doneness for optimal tenderness.

Make the Kimchi – Store-bought kimchi will work in a pinch. But our version is not difficult and takes a fraction of the time to make authentic kimchi from scratch. The flavor is still far superior to the bottled variety.

Assemble with Fresh Toppings – When assembling your tacos, use warm, lightly charred flour tortillas and layer the sliced beef, homemade kimchi, and drizzle with Korean BBQ sauce. Add fresh toppings like cilantro, sliced jalapeños, or a squeeze of lime to enhance the flavors and provide a burst of freshness.

EXPERT TIP: You’ll notice there will be some liquid in the pan as you are searing the beef. This is normal. If you prefer a less ‘wet’ filling, then remove the beef from the marinade and shake off the excess before adding it to the hot pan.

A close-up view of a person using a wooden spatula to stir-fry strips of steak in a large black cast-iron skillet with a Korean sauce and marinade.

How To Serve

We love to serve this right out of our wok, but you can also easily transfer the meat mixture to a serving platter.

If you have a gas stove or if you have a grill, we recommend charring your flour tortillas just slightly. It gives them a warm, smoky taste and texture.

The kimchi is best if it’s allowed to come to room temperature. You can even make it several days in advance. It gets better with time! The Korean BBQ sauce can be made in advance, too.

EXPERT TIP: When simmering the kimchi in the plastic bag, take care not to allow the baggie to reach the hot sides of the pan. It should rest easily in the middle of the simmering water. Again, the kimchi can be made up to 3 days in advance of serving. Keep in an air-tight jar in the fridge and then let it come to room temperature before serving.

An overhead view of a white bowl that is holding homemade kimchi with a spoon inserted into the side.

Classic Korean and Other Asian Recipes to Try

We’re adding more and more Korean recipes to the blog. Below is a collection of our favorites, as well as some of our other Asian dishes, too. We think you and your family will love them, as well!

  • Bulgogi (Korean Beef) Lettuce Wraps
  • Classic Bibimbap
  • Bulgogi Burgers with Kimchi
  • Authentic Shrimp Pad Thai
  • Kung Pao Shrimp
  • Mongolian Beef
  • Vegetarian Stir-Fry
  • Pork Dumplings in Peanut Sauce
  • Beef Negimaki
  • Scallion Pancakes

These are all amazing in their own way, but, in the meantime, isn’t this fusion dish calling your name?

A straight-on view of three Korean beef tacos with kimchi on lightly charred flour tortillas all resting on a black dinner plate.

Practically everyone loves a good taco, right?

Folks, this Korean beef with kimchi is one of the best tacos we’ve ever made, served, or eaten. And, we’re certain you will feel the same way.

Get the beef prepped the night before, make the kimchi and BBQ sauce ahead of time, and then everything comes together in a matter of minutes!

Perfect for entertaining or just a yummy taco for chowing on a lazy weekend afternoon. Big win either way!

Ready to make the best fusion taco of all time? Go for it!

And when you do, be sure to take a photo of it, post it on Instagram, and tag @HowToFeedaLoon and hashtag #HowToFeedaLoon!

An overhead view of three Korean beef tacos with kimchi pressed against each other and topped with Korean bbq sauce and slivers of green onions.
Print Recipe
5 from 3 votes

Korean Beef Tacos with Kimchi

Much of this can be done in advance. Prep the meat in the marinade the night before, make the kimchi and BBQ sauce up to several days in advance, and then it all comes together in a matter of minutes! The flavor is off-the-charts!
Prep Time20 minutes mins
Cook Time40 minutes mins
Marinating Time2 hours hrs
Total Time3 hours hrs
Course: Lunch / Dinner
Cuisine: Asian / Mexican
Servings: 4 people
Calories: 502kcal
Author: Kris Longwell

Equipment

  • Wok or sturdy skillet
  • Pot for simmering water and large freezer baggie

Ingredients

For the Korean Beef

  • 1½ lbs ribeye trimmed, and sliced into very thin pieces (See NOTES)
  • 2 garlic cloves minced
  • 3 green onions chopped
  • 1 medium yellow onion chopped
  • 2 tablespoon soy sauce
  • 1 tablespoon sesame oil
  • 1 tablespoon sugar
  • ½ teaspoon black pepper ground
  • ½ teaspoon smoked paprika
  • ½ teaspoon cayenne power
  • 1 tablespoon sesame seeds toasted, if desired
  • 1 tablespoon chili pepper
  • 2 tablespoon peanut oil

For the Kimchi

  • Half a head Napa cabbage coarsely chopped
  • ¾ cup Kosher salt
  • 6 cups water
  • ½ cup rice vinegar
  • 4 cloves garlic minced
  • 3 tablespoon fresh ginger minced
  • ½ cup green onions chopped
  • ¼ cup fish sauce
  • 2 tablespoon sugar
  • 1 tablespoon chili powder
  • 1 teaspoon crushed red pepper

For the Korean BBQ Sauce

  • 2 tablespoon gochujang
  • 1 tablespoon sesame oil
  • 1 teaspoon sugar
  • 1 tablespoon water
  • 1 teaspoon apple cider vinegar
  • 1 clove garlic minced

For the Tacos

  • 10 flour tacos
  • green onions thinly sliced, for garnish (optional)
  • lime wedges for garnish (optional)

Instructions

Start the Beef

  • Place the meat in a medium-sized bowl, and add all the ingredients except for the peanut oil.
    1½ lbs ribeye, 2 garlic cloves, 3 green onions, 1 medium yellow onion, 2 tablespoon soy sauce, 1 tablespoon sesame oil, 1 tablespoon sugar, ½ teaspoon black pepper, ½ teaspoon smoked paprika, ½ teaspoon cayenne power, 1 tablespoon sesame seeds, 1 tablespoon chili pepper
  • Let it marinate in the fridge for 2 to 12 hours.

Make the Kimchi

  • Place the coarsely chopped cabbage in a large bowl.
    Half a head Napa cabbage
  • Dissolve the salt in water and pour the solution over the cabbage.
    ¾ cup Kosher salt, 6 cups water
  • Make sure the cabbage is completely submerged and let it soak for at least 1 hour.
  • Combine the remaining ingredients in a bowl to make the kimchi sauce.
    ½ cup rice vinegar, 4 cloves garlic, 3 tablespoon fresh ginger, ½ cup green onions, ¼ cup fish sauce, 2 tablespoon sugar, 1 tablespoon chili powder, 1 teaspoon crushed red pepper
  • Drain and rinse the cabbage, then place it in a large, clean bowl. Pour the sauce over the cabbage.
  • Transfer the contents of the bowl to a leak-proof bag and place it in simmering water for 30 minutes. (A heavy-duty freezer bag works, just don't let it lay on the side of the hot pan).
  • Remove and let cool before transferring to a serving vessel.

Prepare the Korean Beef

  • Heat the peanut oil in a medium skillet over medium-high heat.
    2 tablespoon peanut oil
  • Add the marinated beef to the pan and cook until medium rare (about 4 minutes), or to medium (about 6 or 7 minutes)

Assemble the Tacos

  • Heat tortillas over a medium flame.
    10 flour tacos
  • In a medium bowl, mix together the ingredients for the BBQ sauce.
    2 tablespoon gochujang, 1 tablespoon sesame oil, 1 teaspoon sugar, 1 tablespoon water, 1 teaspoon apple cider vinegar, 1 clove garlic
  • Build the tacos by placing several strips of beef with the sauce. Top with a mound of kimchi, and then drizzle the BBQ sauce over the top.
  • Garnish with chopped green onions and lemon wedges, if desired.
    green onions, lime wedges

Video

Notes

NOTE: Watch the video in the recipe card for visual guidance.
To easily slice the steak, wrap it in plastic wrap and place it in the freezer for about 20 minutes. Unwrap the steak and use a sharp knife to cut the slightly frozen steak into thin strips. 
The kimchi and BBQ sauce can be made up to 48 hours in advance. Keep chilled and then let it come to room temperature before serving. 
This recipe easily feeds 2 to 3 people, possibly 4. Double the meat to feed up to 6 to 8 guests. No need to increase the other ingredients. You'll most likely have leftover kimchi. Save leftovers to put on a burger, eggs, or even a baked potato! 
Gochujang can be found in the Asian section of most supermarkets. You can also find it easily online. It does carry some heat, so go light at first, taste, and then add more if desired. 

Nutrition

Calories: 502kcal | Carbohydrates: 22g | Protein: 38g | Fat: 28g | Saturated Fat: 8g | Polyunsaturated Fat: 5g | Monounsaturated Fat: 8g | Cholesterol: 104mg | Sodium: 23018mg | Potassium: 774mg | Fiber: 3g | Sugar: 14g | Vitamin A: 1160IU | Vitamin C: 15mg | Calcium: 110mg | Iron: 5mg

POST UPDATE: This was originally published in April 2014, but was updated with improved tweaks to the recipe with new tips and photography and a fabulous new video in January, 2025!

Best-Ever Pork Tenderloin

January 8, 2025 by Kris Longwell 8 Comments

An overhead view of sliced best-ever pork tenderloin topped with a cranberry reduction on a large white platter with sprigs of parsley and a large serving fork next to the sliced meat.

We know saying this is the “best-ever” is saying a lot. But, wait until prepare it. You’ll get it.

Pork tenderloin is typically lean, but still very tender and juicy. Go the extra step and order a Mangalitsa tenderloin (use Discount Code: LOON15 for 15% off), and you won’t believe the taste and texture. The cranberry reduction with molasses and Sherry wine vinegar is sublime. Wonderful for a weeknight meal, but also spectacular for entertaining. This ranks up there with the amazing Pork Chop Agrodolce with Mushrooms! 

An overhead view of sliced best-ever pork tenderloin topped with a cranberry reduction on a large white platter with sprigs of parsley and a large serving fork next to the sliced meat.

How To Make the Best-Ever Pork Tenderloin

NOTE: If you liked this video, please subscribe to our YouTube channel. Remember to click the little ‘bell’ icon so you’ll never miss a new video. Thank you!

The Ingredients You Will Need

This dish is all about the tenderloin. Go with quality, preferably a pork tenderloin from Mangalitsa Estates. The pork rub and cranberry reduction take the tenderloin to even higher culinary greatness. Here’s what you’ll need to have on hand:

Pork tenderloin – We highly recommend a pork tenderloin from Mangalitsa Estates. Use Discount Code: LOON15 for 15% off your entire order!
Salt – Coarse Kosher is excellent.
Pork rub – Our homemade pork rub is easy to prepare and so good. See NOTES regarding sodium.
Cranberry juice – Seek out 100% cranberry juice, not cranberry cocktail juice. Pomegranate juice is a good substitution.
Molasses – You could substitute maple syrup (pure) or honey, which still delivers excellent flavor and texture.
Sherry vinegar – White wine, Champagne, or even apple cider vinegar are all perfectly fine substitutes.

EXPERT TIP: As mentioned, our pork rub is the ideal mix of sweet and savory, the perfect complement to pork. However, if you go with a purchased rub, check the sodium. Our homemade version does not include salt. If your purchased rub does include salt, you’ll want to reduce the amount of salt applied to the loin before grilling.

A person dumping pork rub over the top of an uncooked pork tenderloin that is resting on a large wooden cutting board.

Tips for Making the Best-Ever Pork Tenderloin

Marinate for Flavor – Marinate the pork tenderloin with the pork rub for at least 1-2 hours, or preferably overnight. This step infuses the meat with flavor and helps to tenderize it, resulting in a juicier final dish.

Use a Meat Thermometer – Use a meat thermometer to ensure the internal temperature reaches 145°F (63°C) for optimal juiciness. This is critical. Order from ThermoPro (click link) and automatically receive a “How To Feed a Loon” discount!

Prepare the Cranberry Reduction – Make sure you are using fresh cranberry juice, not cranberry cocktail juice. You can use fresh cranberries, too, for a thicker sauce. Allow the juice with the molasses and vinegar to reduce by nearly half. This takes about 15 minutes. It won’t be as thick as sauce, but it should coat the back of a spoon.

Rest Before Slicing – After grilling, let the pork tenderloin rest for about 5-10 minutes before slicing. This resting period allows the juices to redistribute throughout the meat, ensuring each slice is tender and flavorful. Serve with the cranberry reduction drizzled on top for a stunning presentation.

EXPERT TIP: The cranberry reduction can be prepared hours in advance of cooking the tenderloin. You’ll need at least 15 to 20 minutes to allow the liquid to reduce. You can do this while the pork is on the grill, but you may need to allow the meat to rest for a little longer while the mop reduces to the right consistency.

A person pouring Sherry wine vinegar from a small glass carafe into a silver saucepan filled with simmering cranberry juice and molasses.

How To Serve

After you’ve prepared the cranberry reduction, pour about half of it into a vessel that you can serve at the table. Use the rest for “mopping” the tenderloin while grilling.

Slice the tenderloin into about ½-inch pieces. Drizzle some of the cranberry reduction over the sliced meat on a platter.

We love serving the tenderloin with sautéed white beans and spinach. The combination of flavors is incredible.

EXPERT TIP: Depending on the size of the tenderloin, the cooking time on the grill could vary. Typically, it will take about 15 to 20 minutes for the thickest part to reach 135 to 140°F. The loin will increase another 5 to 10 degrees as it rests. Turn the tenderloin 45° after about 5 minutes of grilling to create attractive grill marks. Brush on the “mop” with each turn of the meat.

A straight-on view of a black grill brush that is being used to apply a cranberry mop over the top of a pork tenderloin that is being grilled on an outdoor gas grill.

Other Amazing Pork Recipes to Try

Pork is such a versatile protein and is healthier than red meat. Here is a collection of some of our favorite recipes featuring “the other white meat.”

  • Pork Chops with Caper Sauce
  • Italian Smothered Pork Chops
  • Grilled Balsamic Pork Chops
  • Herb-Stuffed Pork Loin
  • Classic Pork Milanese
  • Grandma’s Roasted Pork Loin
  • Southern Fried Pork Chops with Cream Gravy
  • Pan-Fried Pork Cutlets with Peaches
  • Delmonico Pork Steak
  • Slow-Cooker Pulled Pork Sandwiches
  • German Pork Schnitzel with Mushroom Sauce
  • Glazed Ham Loaf

These are all amazing pork dishes, without a doubt. But, in the meantime, isn’t this calling your name?

An overhead view of a white dinner plate that is filled with a serving of sliced best-ever pork tenderloin topped with a cranberry reduction and next to a serving of sautéed white beans and spinach.

Pork tenderloin is a wonderful cut of meat. We highly recommend going the extra distance and ordering the pork from the incredible Mangalitsa Estates.

Remember to use Discount Code: LOON15 for a 15% discount off your entire order! Have fun checking out all of their amazing products!

This dish is beautiful and absolutely delicious. Perfect for serving guests or just a comforting meal at home with the family.

A close-up view of sliced pork tenderloin with a cranberry reduction sauce drizzled on top with a serving of sautéed white beans and spinach next to it.

Ready to make the best pork dish in town? Go for it!

And when you do, be sure to take a photo of it, post it on Instagram, and tag @HowToFeedaLoon and hashtag #HowToFeedaLoon!

A close-up view of sliced pork tenderloin with a cranberry reduction sauce drizzled on top with a serving of sautéed white beans and spinach next to it.
Print Recipe
5 from 3 votes

Best-Ever Pork Tenderloin

This pork tenderloin is juicy, tender, and exploding with flavor. The cranberry reduction can be made hours in advance. Our pork rub is easy to prepare and great to have on hand for future pork recipes! We serve this with our sautéed white beans and spinach for a wonderful meal.
Prep Time15 minutes mins
Cook Time35 minutes mins
Resting Time10 minutes mins
Total Time1 hour hr
Course: Entree
Cuisine: American
Servings: 4
Calories: 184kcal
Author: Kris Longwell

Equipment

  • Gas, charcoal, or electric grill See NOTES for baking instructions

Ingredients

  • 1 1 lb pork tenderloin
  • Kosher salt
  • ½ cup pork rub
  • 1 cup cranberry juice 100% juice
  • ¼ cup molasses
  • ¼ cup Sherry wine vinegar

Instructions

  • Place the tenderloin on a cutting board and liberally sprinkle salt all over it (see NOTES regarding salt). Next, sprinkle the rub all over the tenderloin, using your fingers to help press it into the surface of the meat. Place in a dish and cover with plastic wrap. Refrigerate for 1 to 2 hours, or up to overnight.
    1 1 lb pork tenderloin, Kosher salt, ½ cup pork rub
  • In a medium saucepan over medium heat, bring the pure cranberry juice to a strong simmer. Simmer until reduced by about a quarter (usually about 10 minutes). Add the molasses and Sherry vinegar and simmer for another 5 to 10 minutes, until it is thick enough to coat the back of a spoon and has reduced another quarter cup (half cup reduction in total). Pour about half of the "mop" into a vessel to save for serving tableside. You'll use the rest for "mopping" the tenderloin as it cooks.
    1 cup cranberry juice, ¼ cup molasses, ¼ cup Sherry wine vinegar
  • Heat your grill to medium heat. Add the marinated meat directly over the heat. Brush on the "mop" and grill for about 8 minutes, or until grill marks appear on the underside. Turn the tenderloin over, brush with the mop, and cook another 8 to 10 minutes, or until an internal temperature of 135 to 140°F is reached. Brush on the mop several times during the grilling process.
  • Remove the meat from the grill and place on a cutting board. Use some of the reserved mop to brush another layer of the mop over the top of the tenderloin. Allow the tenderloin to rest for about 10 minutes.
  • Cut the meat into ½-inch slices and serve immediately, passing the extra cranberry reduction mop at the table.

Video

Notes

See the video near the top of the blog post for visual guidance. If you liked the video, please subscribe to our YouTube channel. 
If using purchased pork rub, check the label to see the salt content. Our pork rub does not include salt, which is why we salt the loin before adding the rub. If using a purchased rub that includes salt, you'll want to pull back on the amount of salt you apply. You may not need to apply any. 
You can roast the tenderloin in the oven at 425°F for about 25 minutes, or until an internal temperature of 135 to 140°F is reached. If desired, you can sear the tenderloin first in a hot skillet (with a little oil), and then finish it off in the oven. Brush with the mop every 5 to 10 minutes. 
Leftovers make amazing sandwiches! Leftovers will keep (covered) in the fridge for up to 5 to 7 days. 

Nutrition

Calories: 184kcal | Carbohydrates: 43g | Protein: 3g | Fat: 8g | Saturated Fat: 1g | Polyunsaturated Fat: 1g | Monounsaturated Fat: 0.4g | Cholesterol: 0.2mg | Sodium: 18mg | Potassium: 565mg | Fiber: 3g | Sugar: 24g | Vitamin A: 807IU | Vitamin C: 10mg | Calcium: 344mg | Iron: 12mg

Sautéed White Beans and Spinach

January 5, 2025 by Kris Longwell 5 Comments

A close-up view of sautéed white beans and spinach on a white dinner plate resting next to sliced pork tenderloin.

If you’re like us, you’re always looking for a new (delicious) side dish. This is so good, you may bump it up to a main dish!

Every great main dish needs great side dishes to complete a fantastic meal. We love this dish because, first and foremost, it is delicious. But, it’s also so easy, can be made in advance, and healthy, too. Perfect alongside Pork Tenderloin with Cranberry Reduction (recipe to come), Baked Honey Mustard Chicken, or Mediterranean Tuna Steaks!

A close-up view of sautéed white beans and spinach on a white dinner plate resting next to sliced pork tenderloin.

How To Make Sautéed White Beans and Spinach

NOTE: If you liked this video, please subscribe to our YouTube channel. Remember to click the little ‘bell’ icon so you’ll never miss a new video. Thank you!

The Ingredients You Will Need

There are just a handful of ingredients in this wonderful dish, but they all come together to make a true taste sensation. Here’s what you’ll need to have on hand:

Oil – Olive oil or extra virgin olive oil.
Garlic – Fresh is best. Finely minced.
Spinach – We highly recommend mature spinach rather than baby spinach. The texture is perfect for sautéing. Wash, dry, and then remove the stems.
Broth – Chicken broth (or stock) is great. Vegetable stock will keep the dish vegetarian (and vegan).
Seasonings – Salt, pepper, and red pepper flakes.
White beans – Canned (drained) are just fine. We recommend Great Northern, Navy, or Cannellini.
Vinegar – Malt vinegar is fantastic, but distilled white, white wine, or apple cider vinegar will work, too.

EXPERT TIP: When sautéing the garlic, keep an eye on it. It should turn a light golden color, but do not let it burn. If it burns, start over. This only takes a few minutes.

Two photos with the first an overhead view of a large skillet filled with sautéed garlic and red pepper flakes and then the same skillet with a person pouring in chicken broth.

How To Serve

As mentioned, this dish can be prepared several hours in advance. Just leave it in the skillet and then gently reheat until the liquid is simmering.

We like to transfer this to serving vessel and serve it at the table. Or, just leave it in the skillet for easy clean-up.

For a one-pot dinner, try adding small cooked Italian sausage balls, or pieces of roasted chicken.

You can also double (or triple) the broth for an amazing soup.

EXPERT TIP: Be sure to use a large skillet (at least 12-inches wide). The lettuce will eventually cook down, but, at first, it will fill the pan completely.

Two photos with the first being an overhead view of a large skillet filled with uncooked spinach leaves and then the other image of white beans on top of the spinach.

Other Amazing Side Dish Recipes to Try

Good side dishes are essential for a stellar meal. These are all classic and so good!

  • Sautéed White Beans with Sage and Tomatoes
  • Southern-Style Green Beans
  • Sautéed Okra with Garlic
  • Stuffed Tomatoes
  • Slow-Cooker Corn on the Cob
  • Roasted Cauliflower with Lemon and Olives
  • Mashed Cauliflower with Roasted Garlic
  • Smashed Potatoes
  • Roasted Balsamic Potatoes with Herbs
  • Shaved Brussels Sprouts with Balsamic Dressing

These are all amazing in their own way. But, in the meantime, isn’t the skillet of yumminess calling your name?

An overhead view of a large silver skillet filled with sautéed white beans and spinach with a large serving spoon in the middle of the skillet.

This has quickly become one of our favorite dishes to throw together when we’re not sure what we’re in the mood to eat.

It’s simple. The flavors are nothing short of amazing. And we can turn it into a main coarse with the addition of our favorite cooked protein.

And, it’s healthy, too! It’s great any time of the year and always a hit when we serve it to guests. A true side-dish scene stealer!

A straight-on view of a serving spoon filled with sautéed white beans and spinach being raised over a skillet filled with the same.

Ready to make the best side dish in town? Go for it!

And when you do, be sure to take a photo of it, post it on Instagram, and tag @HowToFeedaLoon and hashtag #HowToFeedaLoon!

A close-up view of sautéed white beans and spinach on a white dinner plate resting next to sliced pork tenderloin.
Print Recipe
5 from 2 votes

Sautéed White Beans and Spinach

This is a wonderful side dish and comes together very quickly. You can soak dried beans overnight, or, go with quality canned beans. Either way delivers a delicious side dish. Add cooked Italian sausage for a wonderful main dish.
Prep Time15 minutes mins
Cook Time15 minutes mins
Total Time30 minutes mins
Course: Side Dish
Cuisine: American
Servings: 4
Calories: 74kcal
Author: Kris Longwell

Equipment

  • 1 Large skillet 12" is ideal.

Ingredients

  • 2 tablespoon olive oil
  • 6 cloves garlic minced, about 2 tsp
  • ½ teaspoon red pepper flakes add more for more heat
  • 1 teaspoon Kosher salt
  • ½ teaspoon black pepper ground
  • ½ cup chicken broth or vegetable stock/broth
  • 12 oz fresh spinach about 8 to 10 cups, stems removed
  • 2 15 oz cans white beans drained, ie: Great Northern, Navy, Cannellini
  • 2 tablespoon malt vinegar

Instructions

  • Heat the oil in a large skillet over medium heat. Add the garlic and sauté, stirring often, until just turning lightly browned on the edges, about 3 to 4 minutes (don't let it burn!). Add the red pepper flakes, salt, and pepper and stir to combine.
    2 tablespoon olive oil, 6 cloves garlic, ½ teaspoon red pepper flakes, 1 teaspoon Kosher salt, ½ teaspoon black pepper
  • Add the broth and bring to a simmer. Stir in the spinach and then the beans. Cook until the spinach has completely wilted, about 5 minutes.
    ½ cup chicken broth, 12 oz fresh spinach, 2 15 oz cans white beans
  • Stir in the malt vinegar and serve at once.
    2 tablespoon malt vinegar

Video

Notes

See the video near the top of the blog post for visual guidance. If you liked the video, please subscribe to our YouTube channel. 
Baby spinach can be substituted for the mature spinach. If using frozen spinach, thaw it first and then squeeze all of the water from it with a kitchen towel in your kitchen sink. We recommend going with mature spinach (usually two bunches). 
This easily served four people. Cut the recipe in half to serve two. 
Leftovers will keep in an air-tight container in the fridge for up to 5 days. Reheat on the stove over medium heat until simmering. You made need to add a little more broth. 

Nutrition

Calories: 74kcal | Carbohydrates: 2g | Protein: 1g | Fat: 7g | Saturated Fat: 1g | Polyunsaturated Fat: 1g | Monounsaturated Fat: 5g | Cholesterol: 1mg | Sodium: 696mg | Potassium: 35mg | Fiber: 0.3g | Sugar: 0.2g | Vitamin A: 76IU | Vitamin C: 1mg | Calcium: 13mg | Iron: 0.2mg

Chocolate Lava Cake

January 1, 2025 by Kris Longwell 7 Comments

A chocolate lave cake sitting on a white dessert plate that has been dusted with powdered sugar with a fresh cranberry sitting next to it.

If you’re a chocolate lover and looking for a show-stopper dessert, this one is for you.

There is something truly magical about this dessert. When your guests first dig into the tender cake, you will be amazed at their reactions. Then just wait for their reactions when they take the first bite. We love to serve it with a scoop of homemade vanilla ice cream, but even just the cake by itself is unforgettable.

A chocolate lave cake sitting on a white dessert plate that has been dusted with powdered sugar with a fresh cranberry sitting next to it.

How To Make Chocolate Lava Cake


NOTE: If you liked this video, please subscribe to our YouTube channel. Remember to click the little ‘bell’ icon so you’ll never miss a new video. Thank you!

The Tools and Ingredients You Will Need

The Tools You Will Need

Ramekins – 6 oz are best, but 8 oz will work, too.
Double boiler – Or place a metal bowl over a pot of lightly simmering water.
Sharp knife – For cutting around the cooked cakes.

There are just a handful of ingredients for these cakes, but the measurements are critical. Here’s what you’ll need to have on hand:

Butter – Unsalted. You’ll need to melt some for greasing the ramekins and then more for melting with the chocolate.
Cocoa powder – Unsweetened.
Dark chocolate – 60% bittersweet chocolate is recommended. We use Ghiradelli.
Eggs – You’ll need both whole eggs and egg yolks.
Sugar – Granulated.
Flour – All-purpose.

EXPERT TIP: Brush your ramekins with melted butter, chill them, and then brush with a second layer of melted butter and a dusting of cocoa powder not only makes removing the baked cakes easier, it maintains the chocolate appearance for serving.

An overhead view of a six small ramekins that have been greased with butter on the inside and then dusted with cocoa powder.

Tips for Making Perfect Chocolate Lava Cakes

Choose High-Quality Chocolate – Use high-quality dark chocolate for the best flavor and texture. The chocolate should have a cocoa content of at least 60% to ensure a rich taste and a smooth melting consistency.

Melt Chocolate and Butter Together – Gently melt the chocolate and butter together using a double boiler or in short bursts in the microwave. This ensures they combine smoothly and prevents the chocolate from seizing, resulting in a silky batter.

Don’t Overmix the Batter – When combining the melted chocolate with the eggs and flour, mix until just combined. Overmixing can lead to a denser texture, which may prevent the lava center from forming properly.

Properly Grease the Ramekins – Generously grease the ramekins with butter and dust them with cocoa powder to prevent sticking. This step is crucial for ensuring the cakes release easily after baking, allowing you to achieve that perfect molten center when you invert them onto a plate.

EXPERT TIP: Do your best to add equal amounts of batter across all of the ramekins. Start with one large spoonful in the first and then continue with the rest, and then add more across all ramekins that are filled. They should be about two-thirds full.

A person using a silver spoon to transfer a chocolate cake batter into a small ramekin that has been greased and dusted with cocoa powder.

How To Serve

You’ll definitely want to time these so they are served soon after they come out of the oven.

If you wait too long, the molten interior will thicken and no longer flow when cut into

We use a fine-mesh sieve to dust the tops of the cakes with powdered sugar. A nice tart fruit, such as cranberries, is the perfect complement to the richly sweet cake.

A scoop of homemade vanilla ice cream or a dollop of whipped cream is a wonderful addition, too.

EXPERT TIP: Don’t overcook the cakes! The sides will just start to pull away from the edge of the ramekin when you remove them from the oven. There may be some simmering chocolate on the sides of the cake. This is normal. Allow the cakes to rest for 3 to 5 minutes before inverting them. Test one cake, if it’s too gooey, place them all back in the oven for another 2 minutes.

An overhead view of two rows of ramekins that are filled with baked chocolate lava cakes.

Other Amazing Chocolate Dessert Recipes to Try

If you love chocolate as much as we do, you will want to try each and every one of these recipes. They are decadent and so delicious!

  • Classic Chocolate Cake
  • Chocolate Meringue Pie
  • Chocolate Delight from Scratch
  • Ultimate Fudge Brownies
  • Triple Chocolate Mousse Cake
  • Mint Chocolate Ice Cream
  • Chocolate Chunk Cookies
  • German Chocolate Cake
  • Chocolate Cupcakes with Meringue Filling
  • Chocolate Eclairs

These are all a chocolate lover’s dream come true. But, in the meantime, isn’t this chocolate masterpiece calling your name?

A straight-on view of a chocolate lava cake that has been cut into revealing the gooey chocolate interior.

This dessert is not only stunning in presentation, the taste is off the charts.

It’s perfect for any special occasion.

If possible, weigh the ingredients on a kitchen scale, and keep an eye on the cakes as they bake.

Every bite is a chocolate lover’s dream come true.

A spoon being raised with a serving of gooey chocolate lava cake on it with the half-eaten cake in the background.

Ready to make the best chocolate dessert of all time? Go for it!

And when you do, be sure to take a photo of it, post it on Instagram, and tag @HowToFeedaLoon and hashtag #HowToFeedaLoon!

A chocolate lave cake sitting on a white dessert plate that has been dusted with powdered sugar with a fresh cranberry sitting next to it.
Print Recipe
5 from 2 votes

Chocolate Lava Cake

This is one of those "special occasion" desserts that is a chocolate lover's dream come true. A kitchen scale ensures the exact measurements, but, if you don't have a scale, you'll still be okay if you follow the recipe exactly. Be sure to serve the cakes soon after they come out of the oven. Get ready for raves!
Prep Time20 minutes mins
Cook Time13 minutes mins
Resting time3 minutes mins
Total Time36 minutes mins
Course: Dessert
Cuisine: American / French
Servings: 8
Calories: 568kcal
Author: Kris Longwell

Equipment

  • 1 measuring scale not 100% necessary, but very helpful
  • 8 6-oz ramekins
  • 1 Double boiler

Ingredients

  • 3 tablespoon unsalted butter melted
  • cocoa powder for dusting
  • 6 oz dark chocolate 60% bittersweet baking chocolate
  • 13 tablespoon unsalted butter chilled and cubed
  • 4 large eggs
  • 4 large egg yolks
  • 6.7 oz sugar a little less than 1 cup (192 grams)
  • 6.6 oz all-purpose flour a little more than 1 cup (187 grams)
  • confectioners' sugar for dusting
  • 1 cup fresh cranberries for garnish, optional

Instructions

  • Brush melted butter on the inside of the ramekins. Place in the freezer for 10 to 15 minutes. Brush with more melted butter and then sprinkle the cocoa powder inside the ramekins. Shake to completely coat the ramekins, and then tap out excess.
    3 tablespoon unsalted butter, cocoa powder
  • Use a double boiler (with water in the bottom pot) or a heatproof bowl over a bowl of simmering water to gently melt the chocolate and butter. Remove from heat and let cool for 10 minutes.
    6 oz dark chocolate, 13 tablespoon unsalted butter
  • In a large bowl, use an electric hand mixer to beat together the eggs, egg yolks, and sugar until so thick that a spoon dragged across the top of the mixture leaves a trail.
    4 large eggs, 4 large egg yolks, 6.7 oz sugar
  • Sift the flour into the egg mixture and then beat until incorporated. Pour the melted chocolate mixture into the egg mixture one-third at a time, beating well between additions until completely combined.
    6.6 oz all-purpose flour
  • Evenly divide the mixture across the prepared ramekins. Chill them for 20 minutes.
  • Preheat oven to 400°F while the cakes are chilling.
  • Place ramekins on a baking sheet and cook for 13 minutes, or until the tops are solid and just starting to pull away from the sides. Remove from the oven and let rest in the ramekins for 3 to 5 minutes.
  • Use a thin sharp knife to loosen the sides of the cake from the sides of the ramekins. Invert the cakes onto serving plates and gently remove them from the ramekins.
  • Sprinkle with confectioner's sugar and garnish with fresh fruit, if desired. Serve at once.
    confectioners' sugar, 1 cup fresh cranberries

Video

Notes

See the video near the top of the blog post for visual guidance. If you liked the video, please subscribe to our YouTube channel. 
Weighing the dry ingredients ensures the exact volume for each, however, if you measure them out following the notes in the "ingredients" section, you'll be fine. 
After removing from the oven, invert a test cake. If the cake is not fully set around the edges, place the ramekins back in the oven for another couple of minutes. 
Leftovers can be reheated in the microwave on HIGH for about 1 minute. 

Nutrition

Calories: 568kcal | Carbohydrates: 52g | Protein: 9g | Fat: 31g | Saturated Fat: 17g | Polyunsaturated Fat: 2g | Monounsaturated Fat: 8g | Trans Fat: 1g | Cholesterol: 246mg | Sodium: 48mg | Potassium: 228mg | Fiber: 3g | Sugar: 29g | Vitamin A: 966IU | Calcium: 51mg | Iron: 4mg

Glazed Ham Loaf

December 29, 2024 by Kris Longwell 6 Comments

A glazed ham loaf sitting on a small cutting board and has a few slices cut sitting next to sprigs of thyme and rosemary.

Glazed ham loaf is a fantastic way to repurpose your leftover holiday ham into a new and flavorful dish. You can easily grind the ham using a meat grinder or a food processor, ensuring a smooth texture that enhances the savory blend of taste and makes it enjoyable for the whole family. We also love using leftover ham in our Ham Fried Rice!

A glazed ham loaf sitting on a small cutting board and has a few slices cut sitting next to sprigs of thyme and rosemary.
[feast_advanced_jump_to]

🧅 The Ingredients

The ingredients for glazed ham loaf include ground ham and pork, along with traditional meatloaf components like breadcrumbs, eggs, and seasonings, resulting in a moist and delicious loaf bursting with flavor. Find ingredient notes (including substitutions and variations) below.

A large glass bowl filled with ground pork and ham, breadcrumbs, eggs, and seasonings for glazed ham loaf.

🍶 Substitutions and Variations

  • Ham – We use a combination of ground ham and ground pork for this loaf. We use our meat grinder to grind the ham, but you could also grind it in a food processor, working in batches. If you don’t have leftover ham, then purchase a smoked ham, or even a couple of ham steaks from the supermarket, and it will still be delicious!
  • Breadcrumbs – These help to bind the loaf and absorb liquid from the pork. We use Panko breadcrumbs, but any variety will work, even finely ground bread.
  • Dairy – Half and half can be substituted for the milk. We don’t recommend heavy cream (it’s too thick).
  • Flavor enhancers – Go with your favorite herbs. We recommend fresh, but you can easily substitute dried; just use half the amount than what is called for fresh. Chopped onion adds a depth of flavor, but is not overpowering at all. You can substitute 1 tablespoon of onion powder.

🌡️ The Tools You Will Need

  • Meat grinder – If you don’t have a meat grinder, you can grind the ham (in batches) in your food processor. You could also ask your local butcher if he/she could grind it for you. Or, just dice the ham with a large, sharp knife.
  • Loaf pan – A 1 lb. pan works perfectly. Non-stick is great. No matter what, just be sure to grease the pan liberally before adding the loaf mixture.
  • Digital thermometer – This critical kitchen tool will ensure your ham loaf reaches an internal temperature of 145°F.
  • Silicon mat – Or parchment paper. This makes clean-up much, much easier.

See the recipe card (with video) below for a full list of ingredients and measurements.

Expert Tip

We find that your clean hands are the best tools for mixing the ingredients for the loaf. Be sure everything is fully combined before adding to the loaf pan. Be sure to wash your hands immediately after mixing the ingredients.

How To Make Glazed Ham Loaf

Ground ham exuding from a meat grinder into a glass bowl.
  1. Step 1: Grind leftover ham through a meat grinder or in a food processor. 
A large glass bowl filled with ground pork and ham, breadcrumbs, eggs, and seasonings for glazed ham loaf.
  1. Step 2: Add all of the ham loaf ingredients into a large bowl. 
A person pressing compacting a ham mixture for ham loaf into a metal loaf pan on a wooden cutting board.
  1. Step 3: Press the ham mixture into a greased loaf pan. 
A person pulling a loaf pan away from an inverted uncooked ham loaf on a silicone mat-lined baking sheet.
  1. Step 4: Invert the pan to release the meatloaf onto a baking sheet. Bake for 45 minutes. 
A saucepan filled with Dijon mustard, brown sugar, and apple cider vinegar.
  1. Step 5: Boil the brown sugar, vinegar, and Dijon in a saucepan and then simmer for a few minutes. 
A person using a pastry brush to apply a glaze to a baked ham loaf on a baking sheet.
  1. Step 6: Bake for another 45 minutes, basting every 15 minutes. Remove from oven and baste again. 

Expert Tip

It’s important to spray (or grease with softened butter) the inside of the loaf pan before adding the loaf mixture. Once you invert the pan, you will need to whack the top a few times with the handle of a wooden spoon. If the loaf is stubborn, bang the inverted pan a few times to help release it. You can also just form the loaf on the baking sheet with your hands.

🍽️ How To Serve

  • You’ll need to let the loaf rest for at least 15 minutes after it comes out of the oven. If you slice into it too early, it might fall apart on you.
  • This is pure comfort food and is begging for classic sides such as best mashed potatoes and Southern-style green beans.
  • And, remember, you’ll want to save plenty of the glaze to serve at the table. It’s wonderful drizzled over the top of the sliced ham loaf.

🙋🏽‍♂️ Frequently Asked Questions

Can Glazed Ham Loaf Be Made In Advance?

Yes! Form the loaf into the loaf pan and wrap tightly with plastic wrap and refrigerate for up to 3 days.

Can Other Ground Meats Be Substituted for Glazed Ham Loaf?

Yes! Ground turkey works wonderfully. We recommend keeping the ground pork for additional moisture. Ground beef and pork are traditional and delicious.

Can I Freeze Glazed Ham Loaf?

Yes! It freezes wonderfully. Wrap in foil or butcher’s paper and freeze for 2 to 3 months. Allow to thaw before reheating (or baking).

A white dinner plate filled with a serving of  slized glazed ham loaf on a pile of mashed potatoes next to Southern-style green beans.

😋What to Serve with a Ham Loaf

  • The Ultimate Macaroni and Cheese in a large cast iron skillet with a wooden spoon.
    The Ultimate Macaroni and Cheese
  • Roasted broccoli with red pepper flakes in an oval white serving platter with a silver spoon inserted into the dish.
    Roasted Broccoli With a Kick
  • Stir a batch of cooked Southern Baked Beans with a wooden spoon in a large cast iron skillet.
    Southern Baked Beans
  • A person using his fingers to pick up a piece of Classic Southern Fried Okra from a basket filled with the same.
    Classic Southern Fried Okra

Ready to turn leftover ham into one of the most delicious meals of all time? Go for it!

And when you do, be sure to take a photo of it, post it on Instagram, and tag @HowToFeedaLoon and hashtag #HowToFeedaLoon!

A glazed ham loaf sitting on a small cutting board and has a few slices cut sitting next to sprigs of thyme and rosemary.
Print Recipe
5 from 3 votes

Glazed Ham Loaf

If you have leftover ham, or if you're looking for a new way to serve ham, this is the recipe for you. The loaf is tender, juicy, and deep in flavor. Be sure to leave plenty of the glaze for passing at the table. Leftovers are amazing!
Prep Time20 minutes mins
Cook Time1 hour hr 30 minutes mins
Resting time20 minutes mins
Total Time2 hours hrs 10 minutes mins
Course: Entree
Cuisine: American
Servings: 6
Calories: 657kcal
Author: Kris Longwell

Equipment

  • 1 loaf pan
  • 1 Baking sheet lined with a silicon mat or parchment paper

Ingredients

  • Cooking spray
  • 1½ lbs ham ground
  • 1 lb pork ground
  • 1 medium onion chopped, about 1 cup
  • 1 cup Panko breadcrumbs
  • ½ cup tomato sauce
  • ¼ cup whole milk
  • 2 large eggs
  • 1 tablespoon Worcestershire sauce
  • 1 tablespoon thyme fresh, chopped, or 1 teaspoon dried
  • 1 tablespoon parsley fresh, chopped, or 1 teaspoon dried
  • ¼ cup Parmesan cheese grated
  • 1 teaspoon Kosher salt
  • ½ teaspoon black pepper

For the Glaze

  • 1½ cups brown sugar dark or light
  • ½ cup apple cider vinegar
  • 2 tablespoon Dijon mustard

Instructions

  • Preheat oven to 350°F.
  • Liberally spray your loaf pan with cooking spray. Line a baking sheet with a silicon mat or parchment paper (this makes clean-up much easier).
    Cooking spray
  • Add all of the loaf ingredients into a large bowl and use your clean hands (or a couple of wooden spatulas) to mix everything until fully combined.
    1½ lbs ham, 1 lb pork, 1 medium onion, 1 cup Panko breadcrumbs, ½ cup tomato sauce, ¼ cup whole milk, 2 large eggs, 1 tablespoon Worcestershire sauce, 1 tablespoon thyme, 1 tablespoon parsley, ¼ cup Parmesan cheese, 1 teaspoon Kosher salt, ½ teaspoon black pepper
  • Pack the meat mixture into the prepared pan. Invert the pan onto the baking sheet and use the end of a handle on a wooden spatula or spoon to bang the bottom of the pan (this will help free the loaf from the pan). If the loaf is not coming out of the pan, give the pan a few sturdy "bangs" onto the pan. It will eventually come out, keep at it.
  • Bake the loaf for 45 minutes.
  • Meanwhile, add the brown sugar, vinegar, and mustard into a medium-sized saucepan over medium heat. Bring to a boil, then lower the heat and gently simmer for about 3 minutes. Set aside.
    1½ cups brown sugar, ½ cup apple cider vinegar, 2 tablespoon Dijon mustard
  • After 45 minutes of baking, you'll need to bake it for another 30 to 45 minutes, applying the glaze around every 15 minutes. The internal temperature should be 160°F to 165°F. Remove the ham from the oven and add another layer of glaze. Pour the remaining glaze into a vessel to serve at the table with the loaf. Let the ham rest for 15 to 30 minutes before slicing.
  • Slice and serve with extra glaze on the side.

Video

Notes

NOTE: Watch the video near the top of the recipe for visual guidance.
You’ll want to cook the loaf until it reaches an internal temperature of 160 to 165°F. A meat thermometer makes this easy. 
Leftovers are amazing and will keep in an air-tight container in the fridge for up to 5 days. The loaf can be frozen (cooked or uncooked) for up to 3 months. 

Nutrition

Calories: 657kcal | Carbohydrates: 66g | Protein: 43g | Fat: 24g | Saturated Fat: 7g | Polyunsaturated Fat: 4g | Monounsaturated Fat: 8g | Trans Fat: 0.01g | Cholesterol: 191mg | Sodium: 2150mg | Potassium: 821mg | Fiber: 2g | Sugar: 56g | Vitamin A: 351IU | Vitamin C: 6mg | Calcium: 175mg | Iron: 4mg

Southern-Style Green Beans

December 27, 2024 by Kris Longwell 5 Comments

A round pot filled with Southern-style green beans on a white and blue striped place setting.

Southern-Style Green Beans are super tender and loaded with amazing flavor. This recipe hits all the right notes. Fresh string beans slowly simmered in savory chicken broth (or vegetable broth) with herbs and a little bacon grease. The perfect side dish for your holiday ham, roast turkey, or any Sunday dinner!

An overhead view of a pot of Southern-style green beans that have pieces of cooked bacon visible throughout and on top of the cooked beans.

🫛 The Ingredients

The simple, fresh ingredients, including fresh green beans, garlic, bacon, and savory seasonings, create a delicious side dish that perfectly complements any meal. Find ingredient notes (including substitutions and variations) below.

The ingredients for Southern-style green beans arranged on a wooden background, including fresh green beans, garlic cloves, diced onions, bacon, and seasonings, all neatly organized for easy preparation.

🌿 Substitutions and Variations

  • Beans – We highly recommend using fresh green beans. Cut them to whatever length you desire, and snip the ends. Canned can be substituted, in a pinch. You’ll still have a nice flavor, just not as fresh. Simmering the fresh beans for at least an hour will give you very tender beans. If you prefer them not as tender, reduce the simmering time to 30 to 45 minutes.
  • Bacon – It adds a depth of taste and texture that is Southern. Prosciutto or pancetta are wonderful substitutions. For a vegetarian (and vegan) dish, omit the bacon and use vegetable broth.
  • Flavor enhancers – The fresh herbs are not overpowering, but deepen the flavor profile. Dried herbs can be used in place of fresh ones. Go with 1 teaspoon of dried. Thyme, oregano, or marjoram are all delicious options.

See the recipe card (with video) below for a full list of ingredients and measurements.

Expert Tip

Your bacon will render grease, which is loaded with wonderful bacon flavor. However, you don’t want too much grease in your beans. You’ll want about 2 tablespoons, which means you’ll likely need to spoon out some of the grease. Save it for future cooking!

👩🏼‍🍳 How To Make Southern-Style Green Beans

Chopped bacon cooking in a large Dutch oven with a wooden spatula stirring it.
  1. Step 1: Cook the chopped bacon in a large pot until crisp. 
Chopped onion being sautéed in oil in a large oval Dutch oven.
  1. Step 2: Sauté the onions, garlic, and red pepper flakes.
A person pouring chicken broth from a large glass measuring cup into a Dutch oven filled with fresh green beans.
  1. Step 3: Add the green beans, salt, pepper, thyme, bay leaf, and the broth.
Fresh green beans simmering in chicken broth in a large Dutch oven.
  1. Step 4: Simmer for 45 minutes to an hour.
Two pads of butter and a pile of chopped crispy bacon on top of a pot of Southern-style green beans.
  1. Step 5: Remove the herbs and stir in the butter.  
A white serving bowl filled with Southern-style green beans that have pieces of crispy bacon on top.
  1. Step 6: Serve at once, topped with extra bacon. 

🍽️ How To Serve

  • As mentioned, these beans can be prepared in advance and then reheated.
  • If serving at the table, we reheat the beans in a large pot and then transfer them to a serving vessel. It’s easier to pass this way.
  • We recommend waiting to stir in the butter and the cooked bacon until just before serving. The butter makes the beans very silky, and the bacon will stay crisp.

🙋🏽‍♂️ Frequently Asked Questions

What are the best types of green beans for Southern-style green beans?

Fresh green beans, such as haricots verts or snap beans, are ideal for Southern-style green beans, as they provide a tender texture and vibrant flavor.

Can I make Southern-style green beans ahead of time?

Yes, you can prepare Southern-style green beans in advance; simply cook them, let them cool, and store them in an airtight container in the refrigerator for up to three days before reheating.

What dishes pair well with Southern-style green beans?

These are always a hit for any holiday feast. They also pair wonderfully with Southern fried chicken, Texas-style barbecue, homemade meatloaf, or any hearty main course.

🥦 Other Classic Southern Side Dish Recipes

  • A large serving spoon lifting up a helping of broccoli casserole with cheddar and rice over a dish of the same.
    Broccoli Casserole with Cheddar and Rice
  • A person using his fingers to pick up a piece of Classic Southern Fried Okra from a basket filled with the same.
    Classic Southern Fried Okra
  • Stir a batch of cooked Southern Baked Beans with a wooden spoon in a large cast iron skillet.
    Southern Baked Beans
  • A large circular bowl filled with mashed potatoes with melted butter on top.
    Best Mashed Potatoes

Ready to make the best green beans this side of Atlanta? Go for it!

And when you do, be sure to take a photo of them, post it on Instagram, and tag @HowToFeedaLoon and hashtag #HowToFeedaLoon!

A round pot filled with Southern-style green beans on a white and blue striped place setting.
Print Recipe
5 from 2 votes

Southern-Style Green Beans

Slowly simmered green beans with bacon, herbs, and a touch of butter take this side dish to the next level. And, they can be made in advance and then reheated before serving. Perfect for a special holiday feast, but also a Sunday dinner at home.
Prep Time15 minutes mins
Cook Time1 hour hr
Total Time1 hour hr 15 minutes mins
Course: Side Dish
Cuisine: American Southern
Servings: 4
Calories: 220kcal
Author: Kris Longwell

Equipment

  • 1 Large pot with lid the size you would boil pasta in

Ingredients

  • 4 slices bacon thick-cut, cut into bite-sized pieces
  • 1 medium onion chopped, about 1 cup
  • 3 cloves garlic minced
  • ¼ teaspoon crushed red pepper more for extra heat
  • 1½ lbs green beans fresh, trimmed and halved
  • 2½ cups chicken broth plus extra, as needed
  • 2 teaspoon Kosher salt
  • 1 teaspoon black pepper
  • 3 sprigs thyme fresh
  • 1 bay leaf
  • 2 tablespoon butter unsalted

Instructions

  • Cook the bacon in a large pot (or Dutch oven) over medium heat until crispy. Use a slotted spoon to remove the bacon onto a plate lined with paper towels. Spoon out enough of the rendered bacon grease to leave about 2 tablespoons.
    4 slices bacon
  • Add the onions to the pot and sauté in the bacon grease until soft and translucent, about 4 to 5 minutes. Stir in the garlic and red pepper flakes, sauté for another 30 seconds.
    1 medium onion, 3 cloves garlic, ¼ teaspoon crushed red pepper
  • Add the green beans, broth, salt, pepper, thyme, and bay leaf. Bring to a boil and then lower the heat to low and cover the pot. Simmer the beans until they are very tender, about 45 minutes to 1 hour.
    1½ lbs green beans, 2½ cups chicken broth, 2 teaspoon Kosher salt, 1 teaspoon black pepper, 3 sprigs thyme, 1 bay leaf
  • Use tongs to remove the thyme sprigs and bay leaf from the pot. Stir in the butter and cooked bacon. Serve at once.
    2 tablespoon butter

Video

Notes

NOTE: Watch the video near the top of the recipe for visual guidance.
The beans can be trimmed up to 48 hours in advance of cooking them. (Do this ahead of time; it will save you time when you’re ready to start cooking). 
The beans can be simmered several hours in advance of serving. Don’t stir in the butter and bacon until ready to serve. Reheat the beans over medium heat. 
Leftovers are delicious and can be kept in an air-tight container in the fridge for up to 5 days. Reheat on the stove over medium heat. 

Nutrition

Calories: 220kcal | Carbohydrates: 17g | Protein: 7g | Fat: 13g | Saturated Fat: 7g | Polyunsaturated Fat: 2g | Monounsaturated Fat: 3g | Trans Fat: 0.3g | Cholesterol: 33mg | Sodium: 1912mg | Potassium: 494mg | Fiber: 5g | Sugar: 7g | Vitamin A: 1437IU | Vitamin C: 25mg | Calcium: 89mg | Iron: 2mg

Homemade Christmas Cookies

December 22, 2024 by Kris Longwell 1 Comment

An overhead view of a collection of colorful homemade Christmas cookies that in the shape of bells, ornaments, tress, snowmen, and bells.

Christmas is a time of joy, and these festive cookies perfectly fit the bill.

These cookies are simple sugar cookies (without the sugar topping), but their flavor is so satisfying, and they check all the right boxes for cookie lovers. The royal icing isn’t difficult to make and truly puts them into a class all of their own. They are just begging for a cold glass of milk! Santa will be so happy!

An overhead view of a collection of colorful homemade Christmas cookies that in the shape of bells, ornaments, tress, snowmen, and bells.

How to Make Homemade Christmas Cookies

The Tools and Ingredients You Will Need

There are just a handful of ingredients for these cookies, so quality is important. For the tools, you can find most of them at your local craft merchant, kitchen gadget store, or online.

The Tools

Rolling Pin – We love our marble rolling pin.
Parchment paper – Or silicon mats, which is what we recommend.
Baking sheet – You’ll need two. Or, you’ll need to bake the cookies in batches.
Christmas cookie cutters – Found at most craft stores or online.
Thin icing spreader – An offset spatula works well. But a coffee stirrer works wonderfully, too!
Icing bottles – Found at baking supply stores or online.

The Ingredients for the Cookies

Butter – Unsalted, room temperature.
Sugar – Granulated.
Vanilla extract – Or almond extract. Go with good quality.
Egg – Large.
Flour – All-purpose.
Salt – Table salt works best.
Baking powder – Check the expiration date.

The Ingredients for the Royal Icing

Powdered sugar – Also known as Confectioners’ sugar.
Warm – Warm tap water if fine, or heat it in the microwave.
Meringue powder – Found at some craft stores, baking supply stores, or online.
Color gels – Found at some craft stores, baking supply stores, or online.

EXPERT TIP: Be sure to chill the dough before rolling it and cutting it. If the dough is too warm, the cookies will easily become misshapen.

A person pressing a cookie cutter in the shape of a Christmas tree into rolled out sugar cookie dough.

Tips for Making Perfect Homemade Christmas Cookies

Chill the Dough – After preparing your sugar cookie dough, chill it in the refrigerator for at least 1-2 hours (or overnight) before rolling it out. Chilling helps the dough firm up, making it easier to cut out shapes and preventing the cookies from spreading too much while baking.

Use a Reliable Royal Icing Recipe – For decorating, use our royal icing recipe that includes egg whites or meringue powder for stability. This will ensure your icing dries hard and holds its shape, allowing for detailed designs. Adjust the consistency by adding water for flooding or powdered sugar for piping. See NOTES for a recipe with egg whites.

Outline and Flood Technique – Start by outlining your cookies with a thicker consistency of royal icing using a piping bag. Once the outline is set, use a thinner icing to flood the center of the cookie, using a coffee stirrer or toothpick to spread the icing evenly and eliminate air bubbles for a smooth finish.

Let Icing Dry Completely – Allow your decorated cookies to dry completely before stacking or packaging them. This can take several hours or even overnight, depending on humidity. To speed up the process, place the cookies in a cool, dry area to help the icing set firmly without smudging.

EXPERT TIP: You’ll need to mix the royal icing mixture until it is thick enough that a ribbon will appear across the surface when you drag a spoon over it. This takes about 6 yo 7 minutes of mixing.

An overhead view of a person using a hand mixer to thicken white royal icing in a large stainless steel bowl.

How To Store

It’s important to allow the iced cookies to completely dry before serving them. The icing will be fully set after a couple of hours.

Store cooled cookies in an airtight container for 1 to 2 weeks.

These sugar cookies with royal icing will stay fresh without needing to be refrigerated. The meringue powder in the icing is key to keeping the cookies fresh.

A person using a thin wooden stick to spread green royal icing across the surface of a Christmas tree-shaped sugar cookie.

Other Holiday Dessert Recipes to Try

There is so much to love about the holidays, and these delectable desserts are right up near the top of the list!

  • Yule Log (Buche de Noel)
  • Homemade Peppermint Bark
  • Christmas Bundt Cake
  • Gingerbread Cake with Lemon Sauce
  • Red Velvet Sandwich Cookies
  • Biscotti
  • Red Velvet Cake
  • Chocolate Toffee with Almonds
  • Pecan Pie Cheesecake

These are all guaranteed to get you into the holiday spirit, without a doubt. But, in the meantime, aren’t these cookies calling your name?

An overhead view of a box that is lined with brown wax paper and is filled with colorful homemade Christmas cookies.

Nothing spells the holiday season more than these festive Christmas cookies.

Not only are they a hit with kids and adults, but they make wonderful gifts, too.

The recipe can easily be doubled to make an extra-large batch. Make these delicious cookies and spread the Christmas joy.

Merry Christmas!

A straight-on view of a white dessert plate filled with a pile of colorful homemade Christmas cookies next to a glass of milk and a small sign that reads: For Santa.

Ready to make the best cookies this side of the North Pole? Go for it!

And when you do, be sure to take a photo of them, post it on Instagram, and tag @HowToFeedaLoon and hashtag #HowToFeedaLoon!

A straight-on view of a white plate filled with a collection of colorful homemade Christmas cookies.
Print Recipe
5 from 1 vote

Homemade Christmas Cookies

These sugar cookies are easy to make and are the perfect sweet treat for the holiday season. Be sure to let the royal icing completely set before serving. These cookies will stay fresh for 2 to 3 weeks.
Prep Time15 minutes mins
Cook Time14 minutes mins
Icing and Resting Time3 hours hrs
Total Time3 hours hrs 29 minutes mins
Course: Dessert
Cuisine: American
Servings: 8
Calories: 486kcal
Author: Kris Longwell

Equipment

  • Stand mixer or hand mixer
  • 2 cookie sheet pans
  • 2 silicon mats or parchment paper
  • holiday cookie cutters
  • frosting bottles

Ingredients

  • 2 sticks unsalted butter room temperature, 8 oz
  • ⅔ cup sugar
  • 1½ teaspoon vanilla extract
  • 1 large egg
  • 2½ cup all-purpose flour
  • ½ teaspoon salt
  • ¼ teaspoon baking powder

For the Royal Icing

  • 4 cups confectioners' sugar
  • 3 tablespoon meringue powder
  • ½ cup hot water
  • ½ teaspoon vanilla extract

Instructions

  • Beat the butter with the sugar in a stand mixer with the paddle attachment (or with a hand mixer) until light and creamy, about 4 to 5 minutes.
    2 sticks unsalted butter, ⅔ cup sugar
  • Beat in the vanilla and then the egg.
    1½ teaspoon vanilla extract, 1 large egg
  • With the mixer on medium-low, slowly add the flour, salt, and baking powder. Beat until fully mixed.
    2½ cup all-purpose flour, ½ teaspoon salt, ¼ teaspoon baking powder
  • Remove the dough and smooth it into a ball with your hands. Divide the dough into three discs, cover with plastic wrap, and refrigerate for 30 minutes (or up to overnight).
  • Preheat oven to 350°F.
  • Working 1 portion at a time, roll the dough out on a lightly floured surface to about ¼ to ½-inch thickness. Cut the cookies with the cutters. Gather the scraps and reroll to cut more cookies. Place the cookies on two sheet pans lined with a silicone mat or parchment paper. Bake until the edges are just starting to turn a light brown, about 13 to 15 minutes.
  • Allow the cookies to cool completely before icing them.

Make the Royal Icing

  • In a large bowl, add the confectioners' sugar, meringue powder, hot water, and vanilla extract.
    4 cups confectioners' sugar, 3 tablespoon meringue powder, ½ cup hot water, ½ teaspoon vanilla extract
  • Use an electric mixer on medium speed and beat until thick, about 7 minutes. You'll know it's ready when you can drag a spoon across the top of the icing and a ribbon remains on the surface.
  • Divide the icing and stir in desired food coloring gels. Ice cookies with a small spatula, coffee stirrer, or toothpick. Decorate with icing bottles.

Video

Notes

See the video near the top of the blog post for visual guidance. If you liked the video, please subscribe to our YouTube channel. 
Bake the cookies until the edges are just starting to brown. Depending on your oven, this can take anywhere between 10 and 16 minutes. Keep an eye on them and switch the pans in the oven about halfway through baking. Be sure to allow the cookies to completely cool before icing them.
It takes at least a couple of hours for the royal icing to fully set and become hard. 
The cookies will stay fresh in an air-tight container for 2 to 3 weeks, but are best served within a few days of baking them. 

Nutrition

Calories: 486kcal | Carbohydrates: 107g | Protein: 5g | Fat: 16g | Saturated Fat: 8g | Polyunsaturated Fat: 1g | Monounsaturated Fat: 4g | Trans Fat: 1g | Cholesterol: 84mg | Sodium: 160mg | Potassium: 73mg | Fiber: 1g | Sugar: 76g | Vitamin A: 740IU | Calcium: 23mg | Iron: 2mg

Cheesy Skillet Rolls (Pull-Apart Bread Wreath)

December 15, 2024 by Kris Longwell 2 Comments

An overhead view a bread wreath with a ramekin in the center filled with marinara sauce and is surround by festive herbs.

These rolls are nothing short of sublime. The smell, as they are baking, is intoxicating.

Then once you pull that first warm and cheesy roll out of the skillet and take a bite…you will be transported to a place that dreams are made of. They are wonderful all year round, but, they are especially festive during the holiday season. We place an oven-safe ramekin in the middle, and then serve the ‘wreath’ with our homemade marinara sauce!

An overhead view a bread wreath with a ramekin in the center filled with marinara sauce and is surround by festive herbs.

How To Make Cheesy Skillet Rolls


NOTE: If you liked this video, please subscribe to our YouTube channel. Remember to click the little ‘bell’ icon so you’ll never miss a new video. Thank you!

The Tools and Ingredients You Will Need

We love to make these rolls in a cast-iron skillet. Depending on the size of the dough balls you form, you can use a 9-inch skillet (or baking pan) or up to a 12-inch skillet. If you’re making the holiday bread wreath, you’ll need a small oven-proof ramekin to place inverted in the center of the rolls.

For the ingredients, here’s what you’ll need to have on hand:

Flour – All-purpose.
Yeast – Either ‘active’ or ‘instant’ will work. Check the expiration date! Very important!
Salt – Table salt is best (not coarse salt).
Sugar – Granulated.
Water – Warm in the microwave until 120°F to 125°F, or go with warm tap water.
Oil – Olive oil, or extra virgin olive oil is best.
Mozzarella – Fresh is definitely your best option. You can also find small mozzarella balls called “Ciliegine” or “pearls” usually located in the specialty cheese section of your supermarket.
Butter – Unsalted.
Parsley – Fresh, chopped
Seasonings – Dried oregano, basil, and garlic powder.
Parmesan – Grated.

EXPERT TIP: After the dough has nearly doubled in size after the first round of proofing, you’ll want to form the dough balls. They should be slightly larger than a golf ball. After you place them in the greased pan, you’ll want them to proof for at least another 30 minutes.

roll dough in a hand over a skillet of other rolled rolls for cheesy skillet rolls

Tips for Making Perfect Cheesy Skillet Rolls

Use Fresh Ingredients – Opt for high-quality, fresh mozzarella to ensure a gooey, melty center. Additionally, using fresh herbs like parsley or basil in the topping enhances the flavor and aroma of the rolls.

Knead the Dough Properly – Make sure to knead the dough (with your stand mixer or by hand) until it’s smooth and elastic, which helps develop the gluten structure. This will give your rolls a light and airy texture. Allow the dough to rise until it has doubled in size for the best results.

Stuff Generously – When forming the rolls, make sure to stuff them generously with mozzarella, but not so much that they burst. Pinch the dough tightly around the cheese to seal in the filling and prevent it from leaking during baking.

Brush with Butter, Cheese, and Herbs – Before baking, you’ll want to brush the tops of the rolls with melted butter. Then for the last five minutes, brush on more butter with a sprinkle of chopped mozzarella and grated Parmesan. Once it’s out of the oven, brush on melted butter mixed with herbs and Parmesan cheese.

Freshly baked cheesy skillet rolls in a cast iron skillet

How To Serve

You have options on how you want to serve this pull-apart bread. If making a holiday wreath, then you can bake it in a cast-iron skillet or a 9-inch cake pan with a small ramekin in the middle.

Or, you could place parchment paper on a baking sheet with a ramekin in the middle. Form the dough balls and place them around the ramekin on the parchment paper in the shape of a wreath.

If you bake in the skillet or pan, you have the option of removing the ramekin and then carefully removing the baked rolls from the pan to place on a serving platter. If the bread pulls apart a bit during this process, don’t fret. Just place them back together and no one will even notice.

And remember to serve this with homemade marinara or ranch dressing for a wonderful dipping sauce.

These rolls are so good, that they can be served as an appetizer or with the main course. Get ready, they must just steal the show!

Cheesy skillet rolls in the background in a cast iron skillet with a single roll on a plate in front

Other Awesome Baked Bread Recipes To Try

There’s nothing better than the smell of homemade bread baking in the oven. Here is a collection of some of our favorites that we are certain will be an instant classic in your home.

  • Homemade Country White Bread
  • Cloverleaf Dinner Rolls
  • Irish Soda Bread
  • Classic Banana Nut Bread
  • Pumpkin Butterscotch Bread
  • Zucchini Bread
  • Southern Buttermilk Biscuits
  • Cinnamon Raisin Swirl Bread
  • Grandma’s Kolaches
  • Olive Oil and Rosemary Focaccia
  • Grissini (Italian Breadsticks)

These are all absolutely amazing and comforting. But, in the meantime, aren’t these rolls calling your name?

A person pulling apart a cheesy skillet rolls with two hands revealing a melty cheese pull with a bowl of marinara in the background.

These rolls are spectacular for any occasion. They make a wonderful appetizer or with a main course.

During the holiday season, turning them into a festive wreath is as gorgeous as it is delicious. Be sure to serve with homemade marinara sauce!

Nothing is much more comforting than pillowy, fluffy, delicious homemade rolls. And these are easy to make and always a huge hit.

A straight-on view of two homemade cheesy skillet rolls that are sitting on a small white plate with the loaf of rolls in the background.

Ready to make the best cheesy dinner rolls in town? Go for it!

And when you do, be sure to take a photo of them, post it on Instagram, and tag @HowToFeedaLoon and hashtag #HowToFeedaLoon!

An overhead view a bread wreath with a ramekin in the center filled with marinara sauce and is surround by festive herbs.
Print Recipe
5 from 1 vote

Cheesy Skillet Rolls

Cheesy Skillet Rolls are amazing.  The smell is intoxicating and the melty, cheesy, garlicky yumminess of these freshly made rolls is something your loved ones will be talking about for days to come.  You won't believe how easy they are to make! Perfect any time of the year, but especially wonderful during the holiday season!
Prep Time20 minutes mins
Cook Time25 minutes mins
Proofing time2 hours hrs
Total Time2 hours hrs 45 minutes mins
Course: Bread
Cuisine: American
Servings: 8 people
Calories: 540kcal
Author: Kris Longwell

Equipment

  • 1 9-inch cast-iron skillet or cake pan or 12-inch skillet for smaller rolls.

Ingredients

  • 4 cups all-purpose flour
  • 2¼ teaspoon instant yeast
  • 2½ teaspoon Kosher salt
  • 1½ teaspoon granulated sugar
  • 1¼ cups warm water (120°F to 125°F)
  • ⅓ cup olive oil
  • Cooking spray
  • 12 oz. fresh mozzarella cut into small cubes or balls, plus extra chopped
  • 6 tablespoon unsalted butter divided
  • 3 tablespoon Parmesan cheese grated, divided
  • 1 tablespoon Italian parsley fresh, chopped
  • ½ teaspoon oregano dried
  • ½ teaspoon basil
  • 1 teaspoon garlic powder
  • 1 cup marinara sauce for serving (optional)
  • fresh herbs for garnishing the wreath, ie, rosemary, sage, bay leaves.

Instructions

  • In the bowl of a stand mixer with the dough hook attached, mix the flour, yeast, salt, and sugar.  With the mixer on low speed, gradually add the warm water and the oil and continue beating until combined.
    4 cups all-purpose flour, 2¼ teaspoon instant yeast, 2½ teaspoon Kosher salt, 1½ teaspoon granulated sugar, 1¼ cups warm water, ⅓ cup olive oil
  • Increase mixer speed to medium, and beat until smooth and elastic, about 7 minutes. If too dry, add small drops of water until smooth.
  • Spray a large bowl with cooking spray and place dough in it, turning the dough to coat it with the oil. Cover with plastic wrap, and let rise in a warm, draft-free place (about 75°F) until doubled in size, about 1 hour to 90 minutes (but could be longer).
    Cooking spray
  • Spray a 9 to 10-inch cast iron skillet, or 9-inch baking pan, with cooking spray. 
  • If making a bread wreath, spray the sides of a small oven-proof ramekin with cooking spray. Place the ramekin upside down in the middle of the prepared skillet or pan.
  • On a lightly floured surface, turn the dough out of the bowl. Knead for about 30 seconds with the heels of your hands. Pinch off a piece of dough, about 2 ounces. Flatten and place a cubed piece of mozzarella in the center. Form the dough around the cheese and form it into a smooth ball, slightly larger than a golf ball. (Be sure to leave about ½ cup of mozzarella to add to the top of the rolls).
    12 oz. fresh mozzarella
  • Place the dough round in the skillet or pan, seam side down. Continue this process until the skillet is full and all of the dough has been used. Place smaller pinches of mozzarella between rolls, filling any holes (about ¼ cup of the mozzarella, you'll use the rest during the baking process). Cover the rolls with a kitchen towel and then return them to a warm, non-drafty area. Allow to proof for 30 minutes to an hour.
  • Preheat oven to 400°F. (If proofing the rolls in your unheated oven, remove them before preheating).
  • Melt 1 tablespoon of the butter and brush over the top of the rolls.
    6 tablespoon unsalted butter
  • Bake for 20 minutes. Remove from oven and brush another 1 tablespoon butter (melted) over the top. Sprinkle 1 tablespoon of grated Parmesan cheese and the remaining chopped mozzarella (about 2 to 3 tbsp) over the top. Bake for another 5 minutes.
    3 tablespoon Parmesan cheese
  • In a small bowl, melt the remaining 4 tablespoon butter, and then stir in the parsley, oregano, basil, garlic powder, and 2 tablespoon Parmesan cheese.  
    1 tablespoon Italian parsley, ½ teaspoon oregano, ½ teaspoon basil, 1 teaspoon garlic powder
  • Brush rolls with butter mixture and then serve immediately. If serving as a wreath, carefully remove the ramekin and then use spatulas to remove the rolls from the skillet or pan. Fill the ramekin with marinara sauce and place in the middle of the rolls. Garnish with fresh herbs, if desired.
    1 cup marinara sauce, fresh herbs

Video

Notes

See the video near the top of the blog post for visual guidance. If you liked the video, please subscribe to our YouTube channel. 
This recipe can be made in a large skillet, dish, or pan. Form smaller balls of dough and be sure to allow the dough to proof a second time, for at least 30 minutes, but preferably 1 hour to 90 minutes. 
This dough makes excellent dinner rolls. Just omit the mozzarella cheese. You can add the butter/herb/cheese topping, or, just top with melted butter. Cook time is about the same. Keep an eye on them, once the tops are slightly browned, they are ready. 
Leftover rolls will keep covered for several days. Reheat in the microwave. 

Nutrition

Serving: 1roll | Calories: 540kcal | Carbohydrates: 53g | Protein: 18g | Fat: 14g | Saturated Fat: 8g | Polyunsaturated Fat: 2g | Monounsaturated Fat: 6g | Trans Fat: 0.3g | Cholesterol: 57mg | Sodium: 648mg | Potassium: 236mg | Fiber: 3g | Sugar: 2g | Vitamin A: 742IU | Vitamin C: 3mg | Calcium: 258mg | Iron: 4mg

POST UPDATE: This was originally published in June 2018, but was updated with improved tweaks to the recipe with new tips, photography, and a fabulous new video in December 2024!

  • « Previous Page
  • 1
  • …
  • 3
  • 4
  • 5
  • 6
  • 7
  • …
  • 24
  • Next Page »

Welcome!

Kris & Wesley (The Loon) live for fun, food, and fabulousness. "How to Feed a Loon" is a celebration of just that. Come join us on this joyous culinary ride.

More about us

Summer Favorites

  • A straight-on view of a Grilled Pesto Chicken Sandwich with Smoked Mozzarella on brown paper with potato chips and a bowl of pesto sauce nearby.
    Grilled Pesto Chicken Sandwich with Smoked Mozzarella
  • A straight-on view of smoked mozzarella that has partially been cut into cubes and is resting on a board next to crackers, pecans, salami, and baby dill pickles.
    How to Smoke Mozzarella
  • A straight-on view of several scoops of homemade peach ice cream with a couple of peach slices all in a white ice cream bowl.
    The Best Homemade Peach Ice Cream
  • A close-up view of five freshly prepared fresh salmon cakes next to a small bowl holding Lemon-Dill and Caper Aioli.
    Fresh Salmon Cakes with Lemon-Dill and Caper Aioli
  • An overhead view of a round white plate filled with a serving of Parmesan Smashed Brussels Sprouts in a pile next to a round bowl filled with homemade Ranch dressing.
    The Best Parmesan Smashed Brussels Sprouts
  • A side-view of a white serving bowl filled with a homemade creamy loaded potato salad topped with crispy bacon bits, chopped scallions, and shredded cheddar cheese.
    Creamy Loaded Potato Salad with Fresh Dill
See more Summer Favorites →

Popular Recipes

  • A close-up view crispy Southern crab beignets sitting on a white platter next to a small bowl of white remoulade sauce.
    Southern Crab Beignets
  • A lemon wedge being squeezed onto a platter of chicken francese
    Chicken Francese
  • this is a baked jumbo crab au gratin in mini cast iron skillets
    Jumbo Lump Crab Au Gratin
  • An overhead view of a large silver skillet filled with a freshly prepares Sautéed White Beans with Garlic, Sage, and Tomatoes with a large wooden spoon in the middle.
    Sautéed White Beans with Garlic, Sage, and Tomatoes
  • An oval white platter filled with slices of beef tenderloin with sprigs of rosemary along the edge and a glass or red wine sitting in the rear.
    Beef Tenderloin with Red Wine Sauce
  • A straight-on view of a shallow white bowl filled with freshly prepared Cajun pasta salad and garnished with chopped parsley.
    Cajun Pasta Salad

Footer

↑ back to top

Explore

  • Recipe Index
  • About Us
  • Subscribe

About

  • Privacy Policy
  • Contact

Copyright © 2026 How to Feed a Loon • This website contains affiliate links, which means that if you click on a product link, we may receive a commission in return. How To Feed a Loon is a participant in the Amazon Services LLC Associates Program, an affiliate advertising program designed to provide a means for sites to earn advertising fees by advertising and linking to Amazon.com.

Rate This Recipe

Your vote:


A rating is required
A name is required
An email is required