


Grilling a whole chicken on the grill may seem challenging. It’s not.
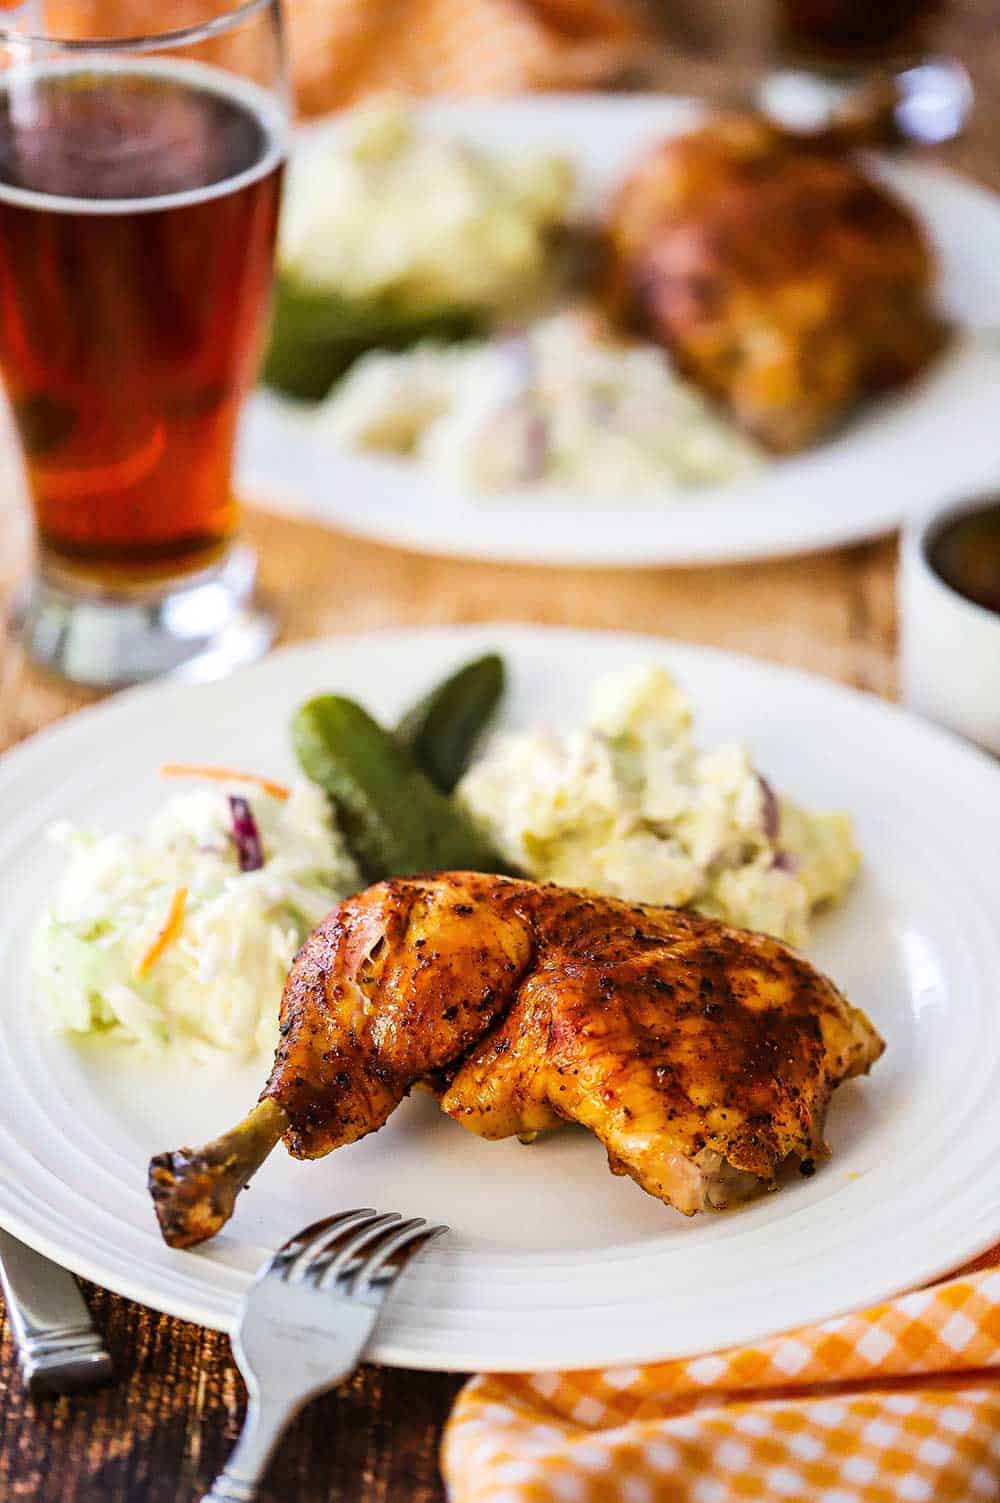
This chicken is truly a revelation. The dry brining helps to create crispy skin and the beer in the can produces an incredibly juicy bird. Serve with a side of Best-Ever Potato Salad and Homemade Coleslaw for the perfect outdoor BBQ!
How To Make Grilled Beer-Can Chicken with BBQ Sauce
This is truly one of the easiest ways to cook a chicken.
Allowing the bird to dry brine in the fridge for anywhere from 8 to 48 hours is ideal (the longer the better).
And the rest comes together in a snap!
NOTE: If you liked this video, please subscribe to our YouTube channel. Remember to click the little ‘bell’ icon so you’ll never miss a new video. Thank you!
The Ingredients You Will Need
The ingredients are simple but work together perfectly. Most of them you will have in your pantry. Here’s what you’ll need:
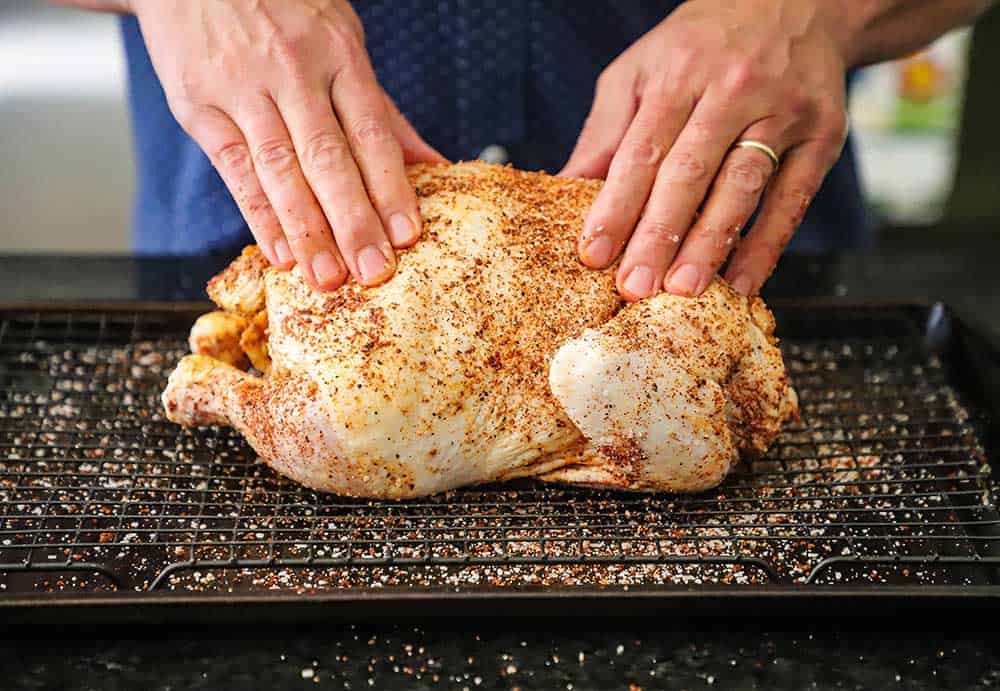
A Whole Chicken – Go with a good-quality bird, you’ll get better results. We usually opt for a farm-raised organic whole chicken. Remember to remove the giblets!
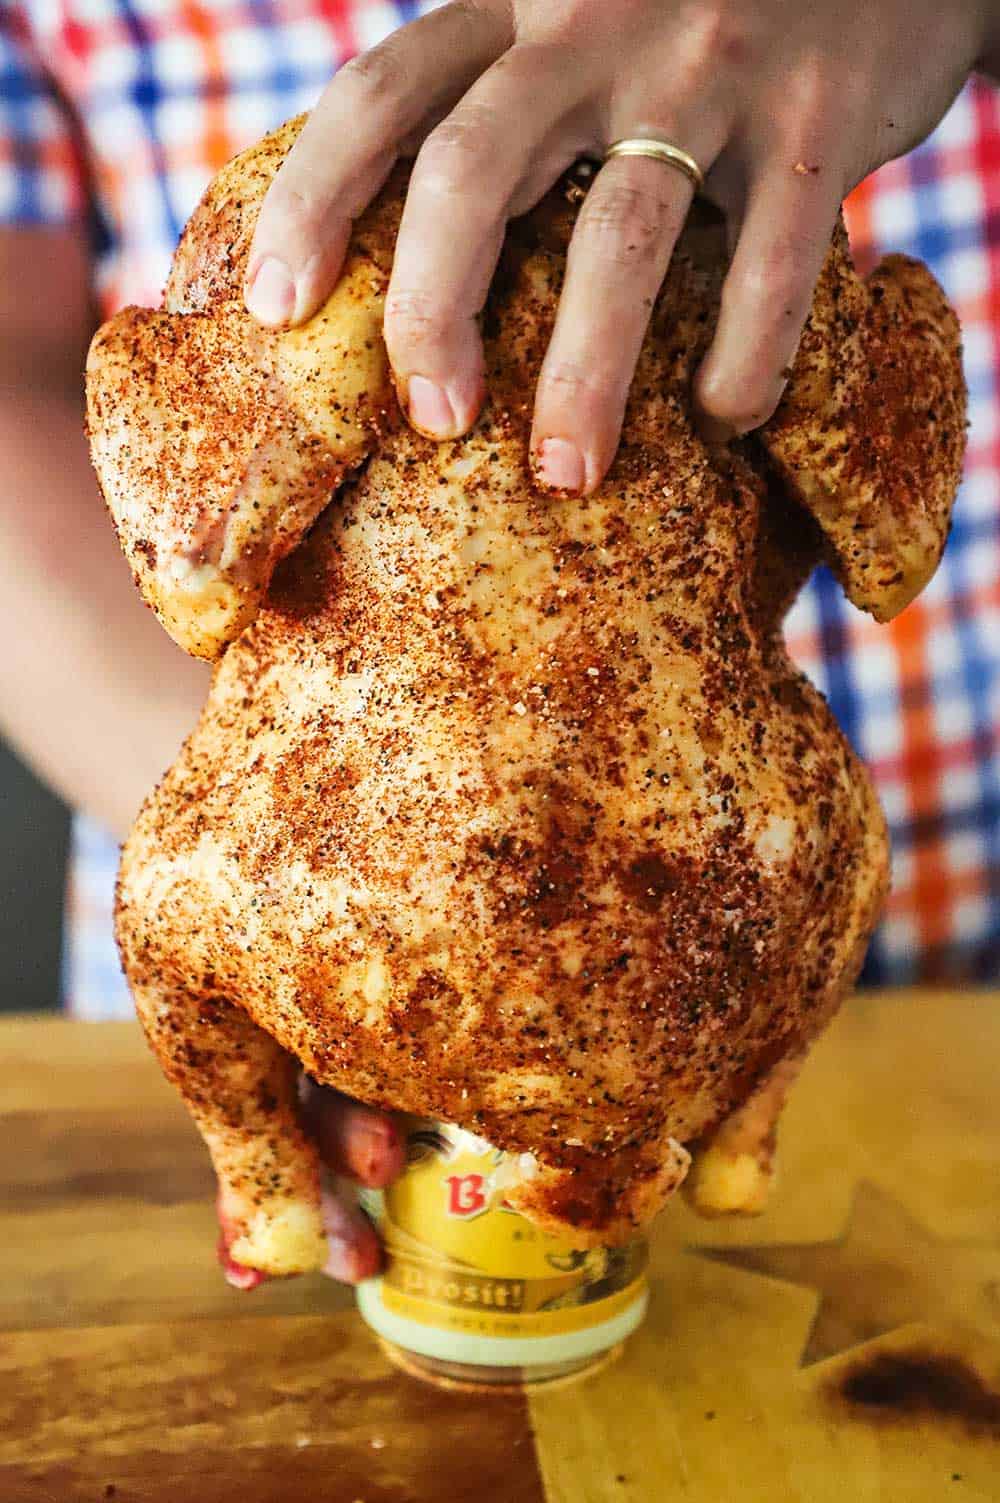
Beer – A lager beer is perfect. You’ll have of the beer for the bird, and the rest for you!
BBQ Rub – Salt, pepper, brown sugar, smoked paprika, chili powder, dry mustard, and garlic powder
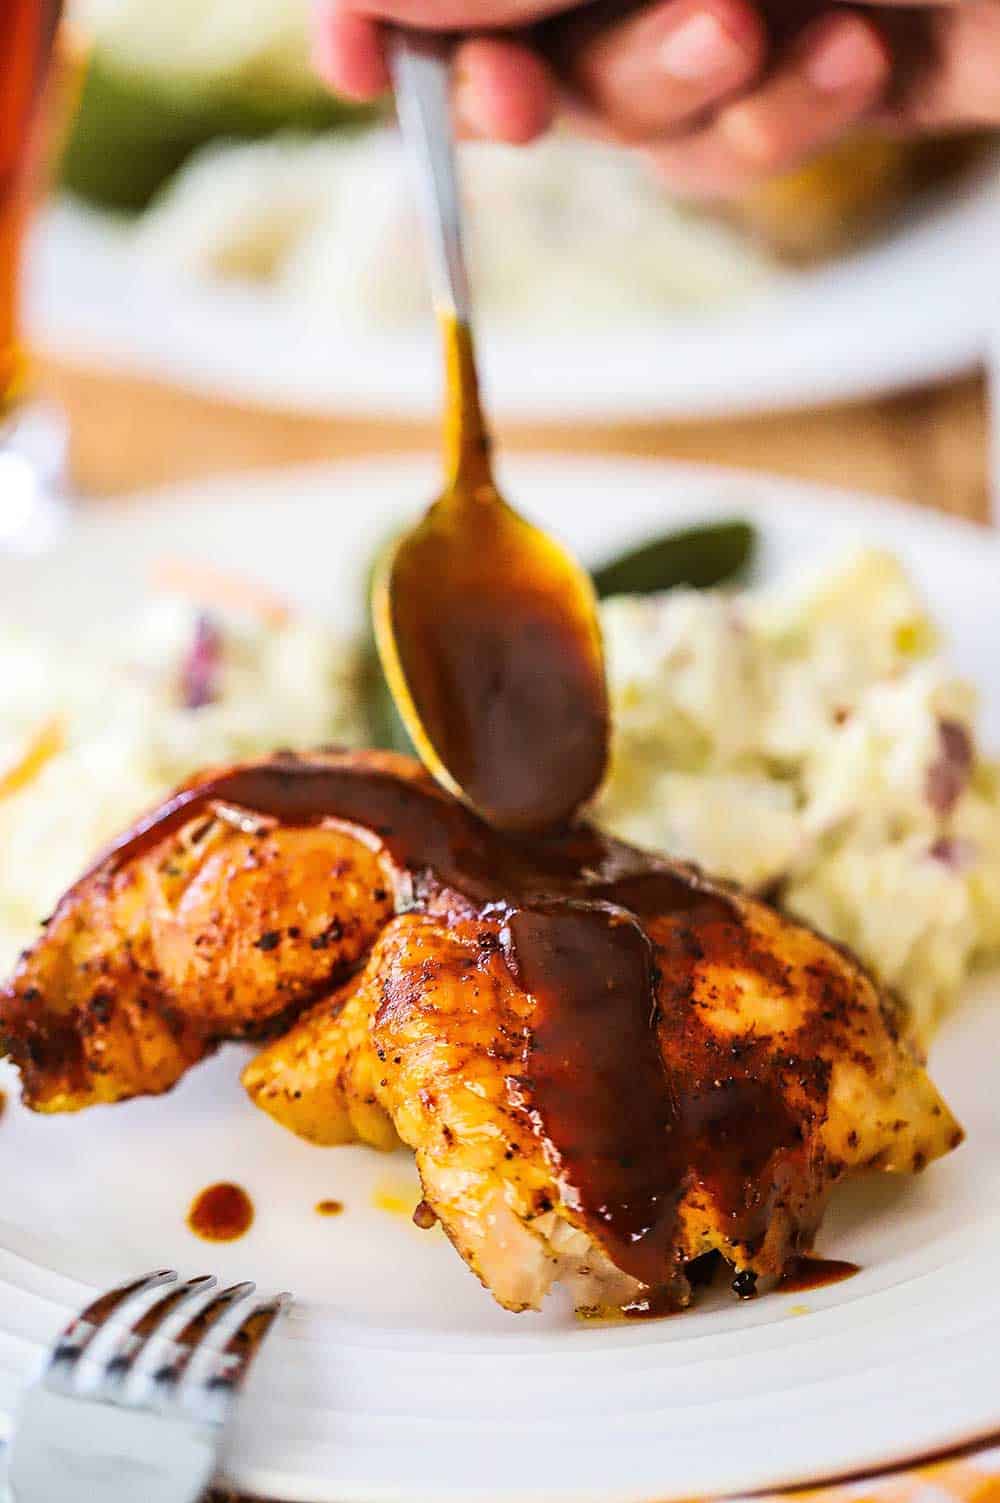
Homemade BBQ Sauce – Get the easy recipe here. This can be made up to a week in advance.
EXPERT TIP: Place the chicken on a baking sheet that is lined with a baking sheet. Place the whole chicken and sprinkle with the rub all over and in the cavity. Use your hands to press the rub into the skin.
Tips for Grilled Beer-Can Chicken
Air Chill – Allowing the chicken with the rub all over it to chill (uncovered) in the kitchen will help to produce a crispy. 8 hours is good. 24 hours is really good. 48 hours is awesome!
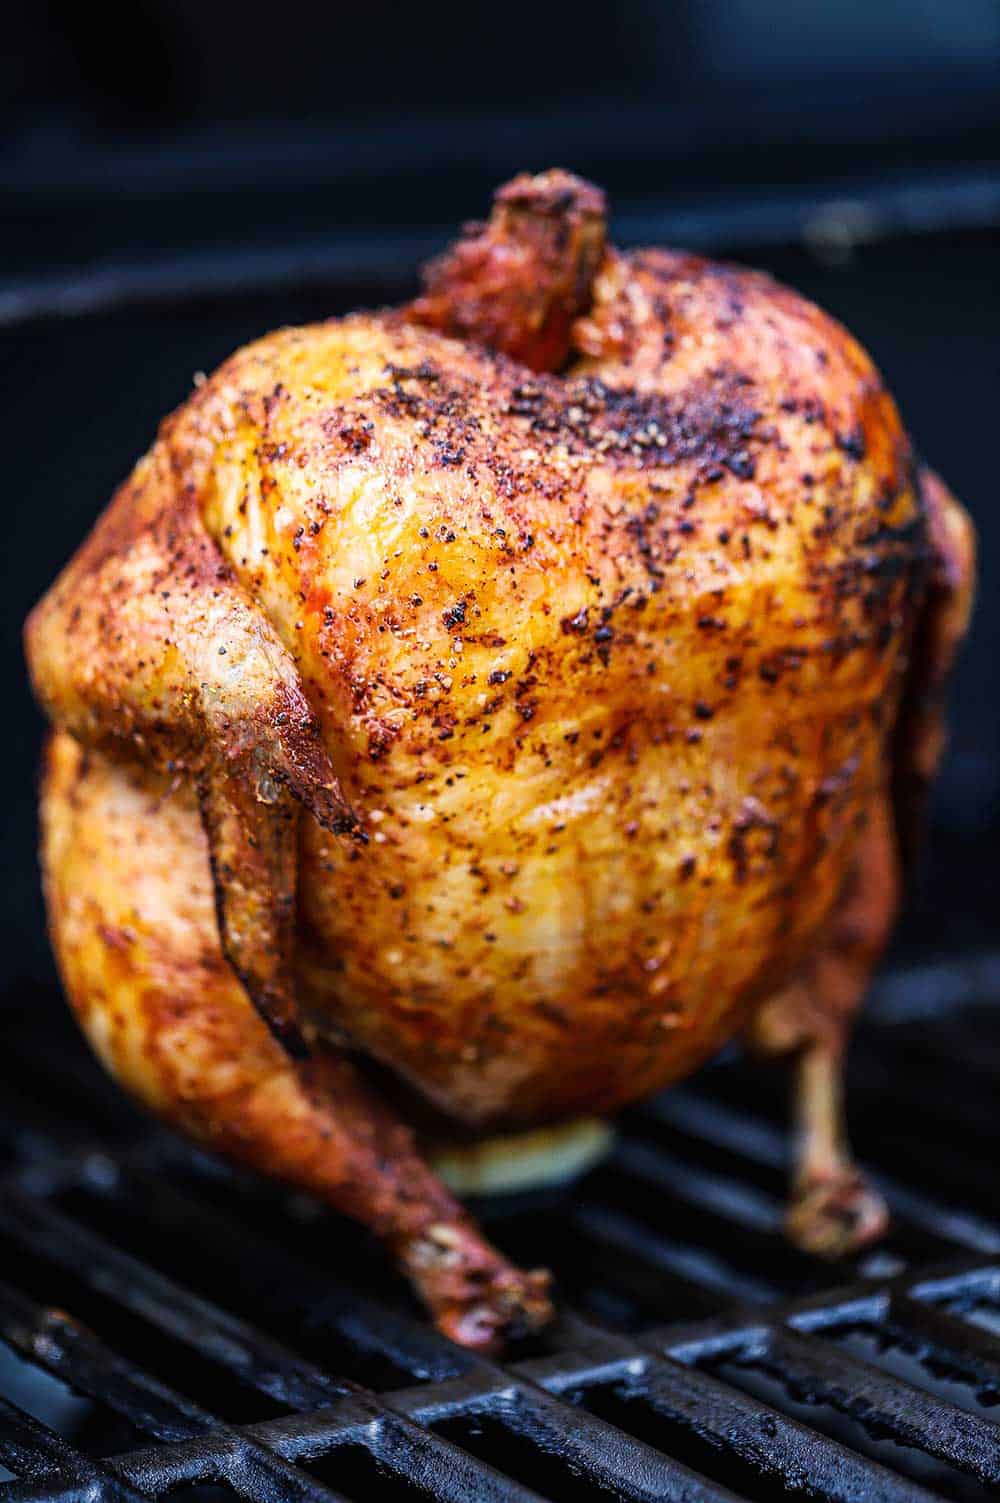
2-Zone Grilling – If you’ve got a gas grill, you’ll want to turn on one side of the grill and leave the other side off. If you have a charcoal grill, light the coals and let the heat until ashy, then move over to one side. You’ll be roasting the chicken over the indirect side. Your grill will need a cover.
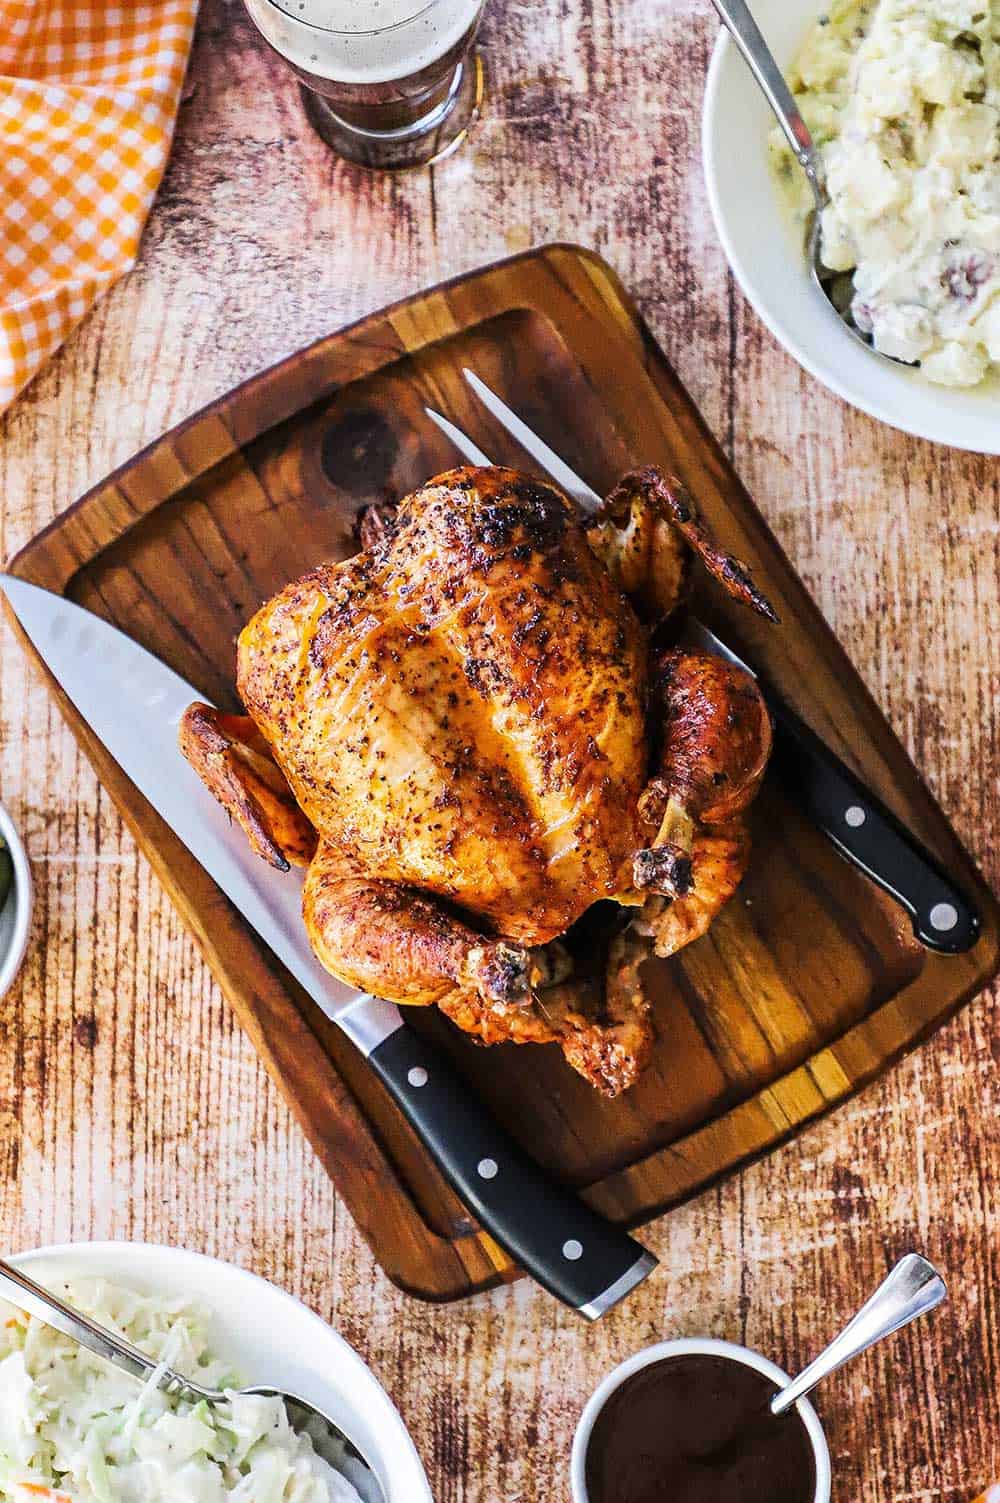
Carving the Chicken – Remove the wings first. Cut the legs into thighs and drumsticks. Next, remove each breast from the bone, then cut each breast into 2 to 4 pieces. This will give you 10 to 12 pieces.
EXPERT TIP: If you can, grab a helper to hold the can in place on a cutting board as you slip the chicken onto the can. Use the legs to hold the chicken up like a tripod. If you don’t have a helper, no problem, just work slowly and do your best to not tip the beer can and lose any of the beer.
How To Serve
If you are serving a crowd, you can easily grill up 2 or 3 of the birds. Just remember to keep the bird over the non-direct heat.
An instant-read thermometer is a must to ensure a perfectly cooked chicken. You’ll want the internal temperature to reach 165°F. This typically takes about 1 hour and 45 minutes in a 400 to 425°F closed grill.
Let the chicken rest for about 10 minutes before carving.
Be sure to bring the kids (and adults) over for the big reveal. It’s so much fun and amazing!
EXPERT TIP: If you have insulted gloves, these work perfectly to transfer the chicken from the grill to a pan with a lip sitting on a cutting board. After letting the chicken rest for about 10 minutes (be sure to capture the juices). Insert a knife through the top of the cavity to push the can out of the bottom cavity.
Other Grilled Chicken Recipes
We love grilling chicken and here are some of our all-time favorites:
Grilled Chicken Kabobs
Best Grilled Chicken Quarters
Chicken Skewers with White Alabama Sauce
Grilled Chicken Wings
Grilled Honey Mustard Chicken Sandwich
Amazing Grilled Chicken Salad
But in the meantime, check out this grilled beer-can chicken!
Trust us folks, this chicken could not be easier to prepare and the juicy flavorful results are incredible.
The only thing that makes it even better is our homemade BBQ sauce.
Talk about a match made in BBQ heaven!
Ready to make a BBQ chicken that folks will be talking about all summer long? Go for it!
And when you do, be sure to take a photo of it, post it on Instagram, and tag @HowToFeedaLoon and hashtag #HowToFeedaLoon!

Grilled Beer-Can Chicken with BBQ Sauce
Video
Equipment
- 1 gas or charcoal grill with lid
Ingredients
- 1 4 lb whole chicken
- ¼ cup Kosher salt
- 2 teaspoon black pepper
- 1 tablespoon brown sugar dark
- 2 teaspoon smoked paprika
- 2 teaspoon chili powder
- 1 teaspoon dry mustard
- 1 teaspoon garlic powder
- 1 12 oz can beer lager
- BBQ sauce for serving
Instructions
- Anywhere from 8 to 48 hours before grilling, remove the giblets from the chicken cavity. Place the chicken, breast side up, on a baking pan that is lined with a baking rack.
- In a small bowl, mix together the salt, pepper, brown sugar, smoked paprika, chili powder, dry mustard, and garlic powder.
- Sprinkle the rub all over the chicken, including inside the cavity. Use your fingers to press the rub into the skin. Place in the fridge, uncovered, for 8 hours, or even better, 24 to 48 hours.
- Remove the chicken from the fridge.
- Open the beer and pour out about half of it (feel free to drink it). Carefully place the chicken, upright, onto the can, pushing it all the way down. Pull the legs forward to create a tripod.
- Create a 2-zone heat area in your grill (turn one side of your burners on or light your charcoal, and then once they turn ashy, move them over to one side).
- Place the beer-can chicken onto the unlit side of the grill. Close the grill and cook until a thermometer inserted into the thickest part of the breast is 165°F, about 1 hour and 45 minutes.
- Carefully remove from the grill and place on a baking sheet with a lip (the chicken will release some juices as it rests). Let chicken rest for about 10 minutes.
- Transfer the chicken to a cutting board. Use a knife inserted into the top cavity to push the can from the bottom cavity. Carve and serve at once with BBQ sauce.

scdler says
Wow, this Grilled Beer Can Chicken looks amazing! I tried it out last weekend and it was a total hit. I made a small tweak though – instead of using a can of beer, I used a can of hard apple cider. It gave the chicken a subtle, sweet flavor that paired really well with the BBQ sauce. The meat came out so juicy and tender! Thanks for sharing this recipe, it’s definitely becoming a staple for our summer cookouts. Anyone else tried any fun variations on this?
Kris Longwell says
Sounds fantastic! Thanks so much for sharing and we are thrilled you had such great success with the chicken!!!
Jennie says
Love it
Kris Longwell says
Yay! So glad you made the beer can chicken and loved it! Thank you, Jennie, for letting us know and for the GREAT review. That means the world to us! Kris & Wesley
Donkey Kong says
this is my favorite food.nice blog
Kris Longwell says
That’s so awesome! Thank you SO MUCH!!!
Jack says
This delicious variation on the classic Beer Can Chicken is completely unique! How could you possibly want to deviate from the original? Instead of a “cola,” I advise you to try this with a half-can of beer that has been mixed with some onions and peppers. Unless your religion forbids alcohol usage, in which case you have never been stopped by it.
Kris Longwell says
Awesome! Thanks for sharing, Jack!!
Wikipedia Writers says
These look so delicious, I want to make one on the BBQ, but our BBQ is not high enough, wanting to talk to hubby to buy a new one, I love Beer Chicken, it’s so delicious.
Kris Longwell says
Hi there! They really are so so delicious! You could do these on a kettle grill (not too expensive) and have plenty of room! Tell your hubby you really need it!!! LOL! Keep us posted! Kris & Wesley
Tonia says
I love watching you guys on YouTube! I was excited to try this recipe and I am so glad I did! I am amazed at how easy this was and it came out so moist and flavorful! So much better than a store-bought rotisserie chicken, in my opinion. Mine took a little longer to reach the proper temperature. In total about 2 hours on indirect heat on my gas grill. I didn’t try the homemade BBQ sauce but maybe next time. This recipe will definitely be on regular rotation in my kitchen. Thank you for your help with making me a better cook!
Kris Longwell says
Hi Tonia! Woo hoo! Beer Can Chicken all the way! So so glad you tried it and had such great success! Cook time really does vary from grill to grill, so we are so happy you waited until you knew it was full cooked. You ARE a GREAT cook (and grill master!). Next time, try making the BBQ sauce…it’s really pretty easy, and sooooo good! And leftovers keep in the fridge for 2 to 3 weeks! Thank you so much for sharing! Stay in touch! xoxo Kris & Wesley
Kris Longwell says
This is one of our most favorite ways to cook a chicken. The homemade BBQ sauce honestly puts it over the top! Air chilling makes the skin crispy and extra yummy!