If you want to have a delicious classic homemade Chinese dish ready when you get home for dinner, this is the one for you.
This dish really lets your slow-cooker do all the heavy lifting for you. And you can cook it on HIGH for a shorter amount of time, or on LOW for a full day. Either way delivers perfect results. If you’re really in the mood for an Asian classic meal, add some homemade egg rolls for starters! A true family favorite!
How To Make Slow-Cooker Chicken Chow Mein
You may be wondering, what’s the difference between chow mein and chow fun? Chow fun noodles are thicker and wider than chow mein, which is round, yellowish, and looks almost like dried spaghetti. Here’s a great chow fun recipe featuring broccoli and beef.
Chow mein noodles can be found in the Asian section of most well-stocked supermarkets, Asian markets, or online. If you can’t find them, chow-fun noodles will work. Or in a real pinch, good ole spaghetti will work, too.
The Ingredients You Will Need
Almost all of the following ingredients can be found at your local market.
Here’s what you’ll need to have on hand
Oil – Vegetable, canola, or even olive oil all work great
Salt and pepper – For seasoning the chicken, not the sauce (no need)
Chicken – Boneless, skinless thighs, or breasts
Carrots – Julienned, matchstick, or cut into small medallions
Green onions – aka Scallions, slices, green and white parts (save extra for garnish)
Celery – Sliced
Ginger – Fresh is definitely best, finely minced
Garlic – Fresh, minced
Bean sprouts – Found in the produce section. You can also use mung bean sprouts. Sometimes you can find canned bean sprouts (in the Asian section)
Soy sauce – Low sodium, if desired
Red pepper flakes – For a little heat, but not too much (optional)
Water chestnuts – Chopped, found in the Asian section
Chicken broth – or Vegetable
Sugar – Don’t skip this, it provides the classic Chinese taste
Cornstarch – Mixed with water to help thicken the sauce
Chow mein noodles – Follow the package instructions for preparing
Toasted sesame seeds – Not 100% necessary, but make a nice garnish
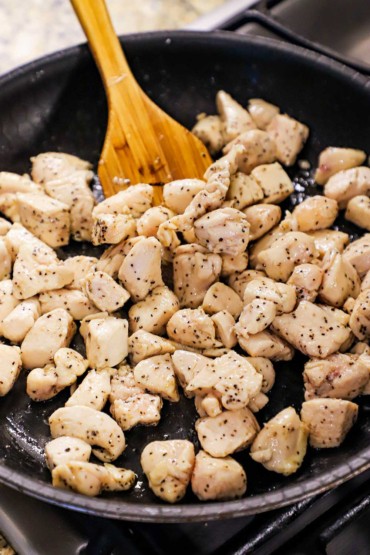
EXPERT TIP: You’ll need to cook the chicken first before adding it to the slow cooker. This can be done up to 2 days in advance of assembling the dish in the slow cooker.
Tips for Perfect Slow-Cooker Chicken Chow Mein
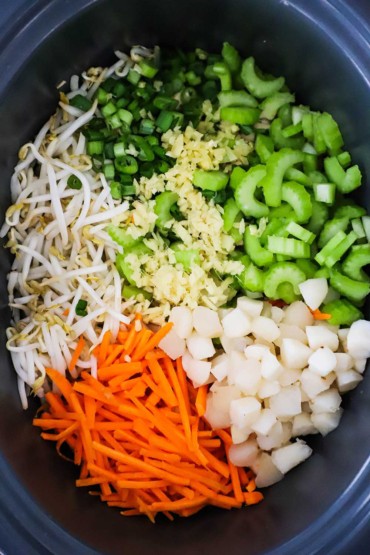
Prep the Ingredients in Advance – The only part of this recipe that can take up to 20 to 30 minutes is getting the ingredients prepped to place in the slow cooker. Chop the veggies the night before. Seek out matchstick carrots. You could even go with baby carrots. And cook the chicken in advance. Once you’re ready to start slow-cooking, it’s as simple as “dump and go.”
Cook on HIGH or LOW – This recipe is not like a slow-cooked pot roast, where you get the best results from truly slow-cooking the meat for 10 to 12 hours. You can cook this recipe on HIGH for 3 to 4 hours, or on LOW for 6 to 10 hours. Either way will give you perfect results. Choose whichever time setting best fits your own schedule.
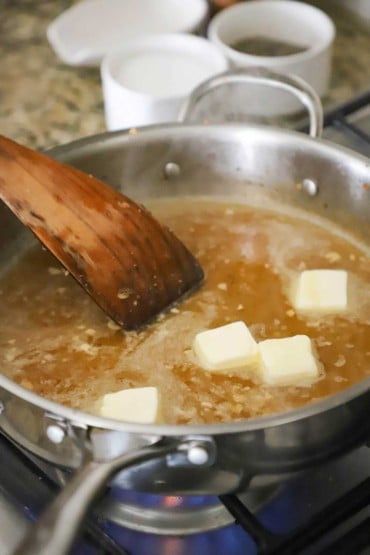
Thicken The Sauce with a Slurry – In the final 10 to 15 minutes of cooking, just before serving, you’ll want to add a cornstarch slurry (¼ cup cornstarch mixed with ½ cup cool water). Stir it in and allow the sauce to thicken. If you skip this step, the sauce will be too thin and not have the classic chicken chow mein texture (and taste).
NOTE: Prepping your ingredients in advance makes it even easier when you are ready to assemble the slow cooker. Or, give yourself about 30 minutes before you turn the slow cooker on, and you’ll be just fine.
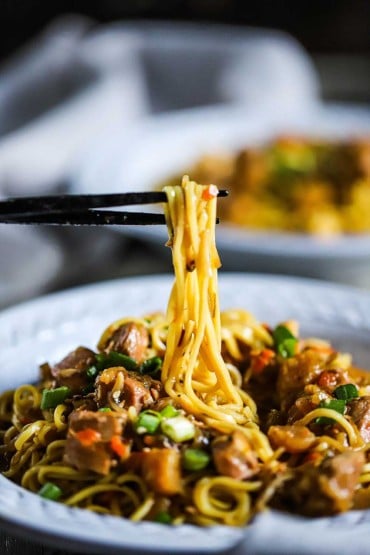
How To Serve
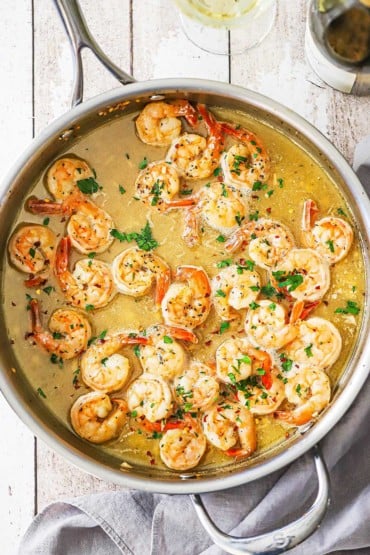
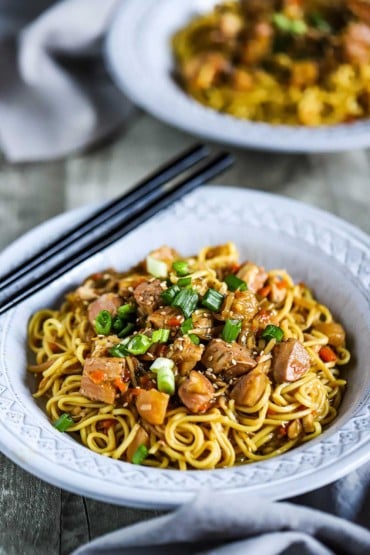
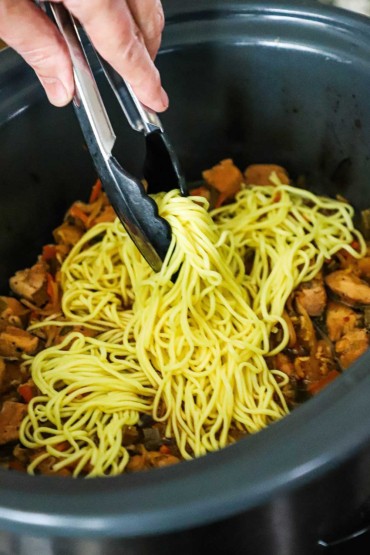
Once you’ve prepared the noodles and they are cooked and softened, you’ll want to stir them into the chicken and veggie mixture until fully combined.
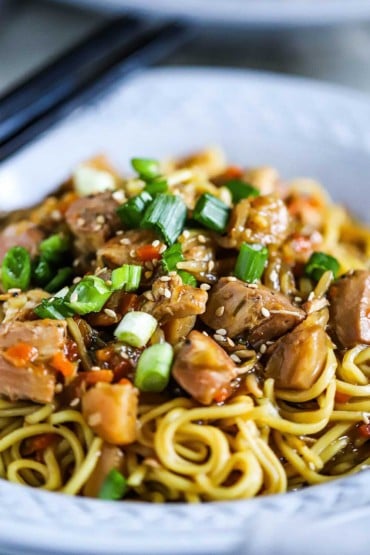
You can plate each guest’s (or family’s) dish before serving. Or, even better, let them serve themselves directly from the slow cooker. Be sure to have extra sliced scallions, red pepper flakes, and toasted sesame seeds for garnishes.
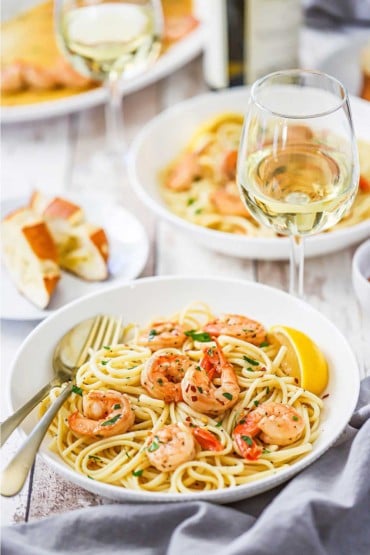
We have also served the chicken chow mein over steamed rice and loved that, too.
Other Amazing Slow Cooker Dishes To Try
So many different types of cuisines can be made in your slow-cooker.
Another amazing Asian favorite is our Slow Cooker Pepper Steak!
Here are some of our all-time favorites:
Slow-Cooker Provencal Chicken Stew
BBQ Pulled Pork
Spiral Ham
Baby Back Ribs
Irish Dublin Coddle (Sausage and Potato Stew)
Hearty Beef Stew
Beef Brisket
Beef Braciole
BBQ Chopped Beef Sandwich
Asparagus Risotto
Corn on the Cob
In the meantime, isn’t this Chinese dish made in your trusty slow cooker making you hungry?
This dish is just amazing in taste, and the preparation hardly takes any effort at all.
It’s fun to make chow mein as a stir-fry in your wok or skillet, but you just can’t argue with the ease of letting your slow cooker do all the heavy lifting for you!
And, leftovers heat up beautifully on the stove and are, honestly, quite possibly even better the next day! Every bite is a taste sensation!
Ready to make one of the best Chinese dishes in town…in your slow cooker? Go for it!
And when you do, be sure to take a photo of it, post it on Instagram, and tag @HowToFeedaLoon and hashtag #HowToFeedaLoon!

Slow-Cooker Chicken Chow Mein
Equipment
Ingredients
- 1 tablespoon vegetable oil or canola, or olive oil
- Salt and pepper
- 1½ lbs chicken breasts boneless, skinless, cut into 1-inch pieces
- 3 medium carrots thinly sliced, or julienned
- 6 green onions aka scallions, thinly sliced, green and white parts, plus extra for garnish
- 3 celery stalks sliced
- 1 tablespoon fresh ginger minced
- 3 cloves garlic minced
- 8 oz. bean sprouts
- ⅓ cup soy sauce low sodium works well
- ¼ teaspoon red pepper flakes more for extra heat, omit for no heat at all
- 1 8 oz. can water chestnuts drained and chopped
- 1 cup chicken stock
- 1 tablespoon granulated sugar
- ¼ cup cornstarch
- ½ cup cold water
- Chow mein noodles cooked, or rice, for serving.
Instructions
- Heat oil in a large skillet over medium-high heat.1 tablespoon vegetable oil
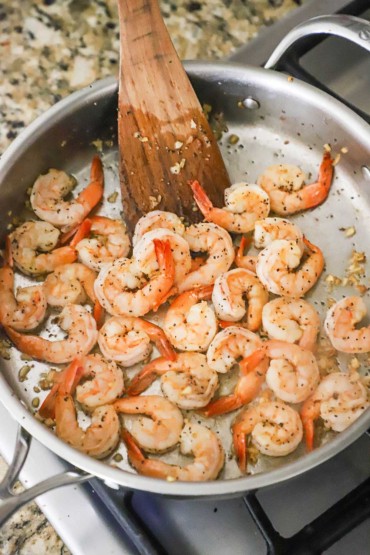
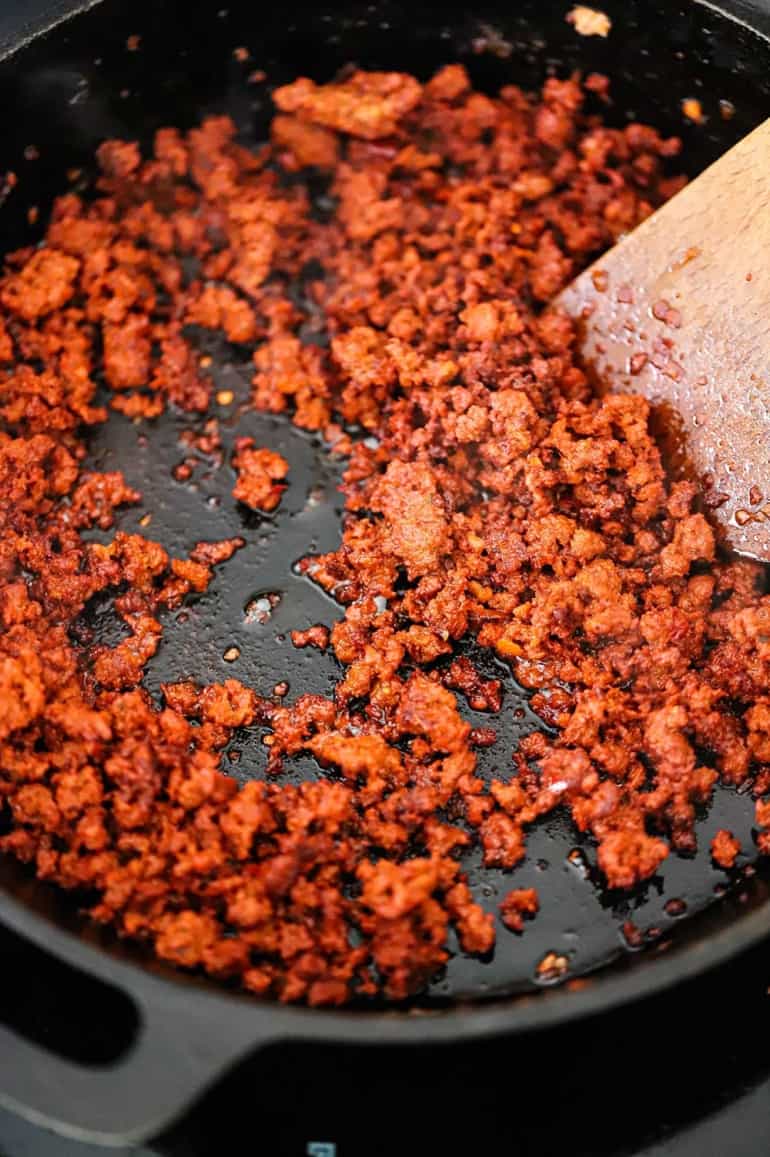
- Season chicken with salt and pepper all over and then add to the skillet and cook until lightly browned, about 10 to 15 minutes.Salt and pepper, 1½ lbs chicken breasts
- Place cooked chicken into the slow cooker.
- Add remaining ingredients, except cornstarch and water (don't include the noodles/rice); stir to combine.3 medium carrots, 6 green onions, 3 celery stalks, 1 tablespoon fresh ginger, 3 cloves garlic, 8 oz. bean sprouts, ⅓ cup soy sauce, ¼ teaspoon red pepper flakes, 1 8 oz. can water chestnuts, 1 cup chicken stock, 1 tablespoon granulated sugar
- Cover and cook on HIGH for 3 to 4 hours, or on LOW for 6 to 10 hours.
- About 10 minutes before serving, mix together the cornstarch with the water in a small bowl or measuring cup. Add to the slow cooker and stir. Stir occasionally until thickened, about 10 minutes.¼ cup cornstarch, ½ cup cold water
- Meanwhile, cook the noodles according to the package instructions and then mix them into the chicken mixture. Stir until fully mixed.Chow mein noodles
- Keep on the WARM setting until ready to serve, or serve at once. Garnish with extra sliced scallions, red pepper flakes, and toasted sesame seeds.
Video
Notes
Nutrition
POST UPDATE: This recipe was originally published in April 2018, but was updated with improved tweaks to the recipe with new tips and photography and a fabulous new video in February 2023!