

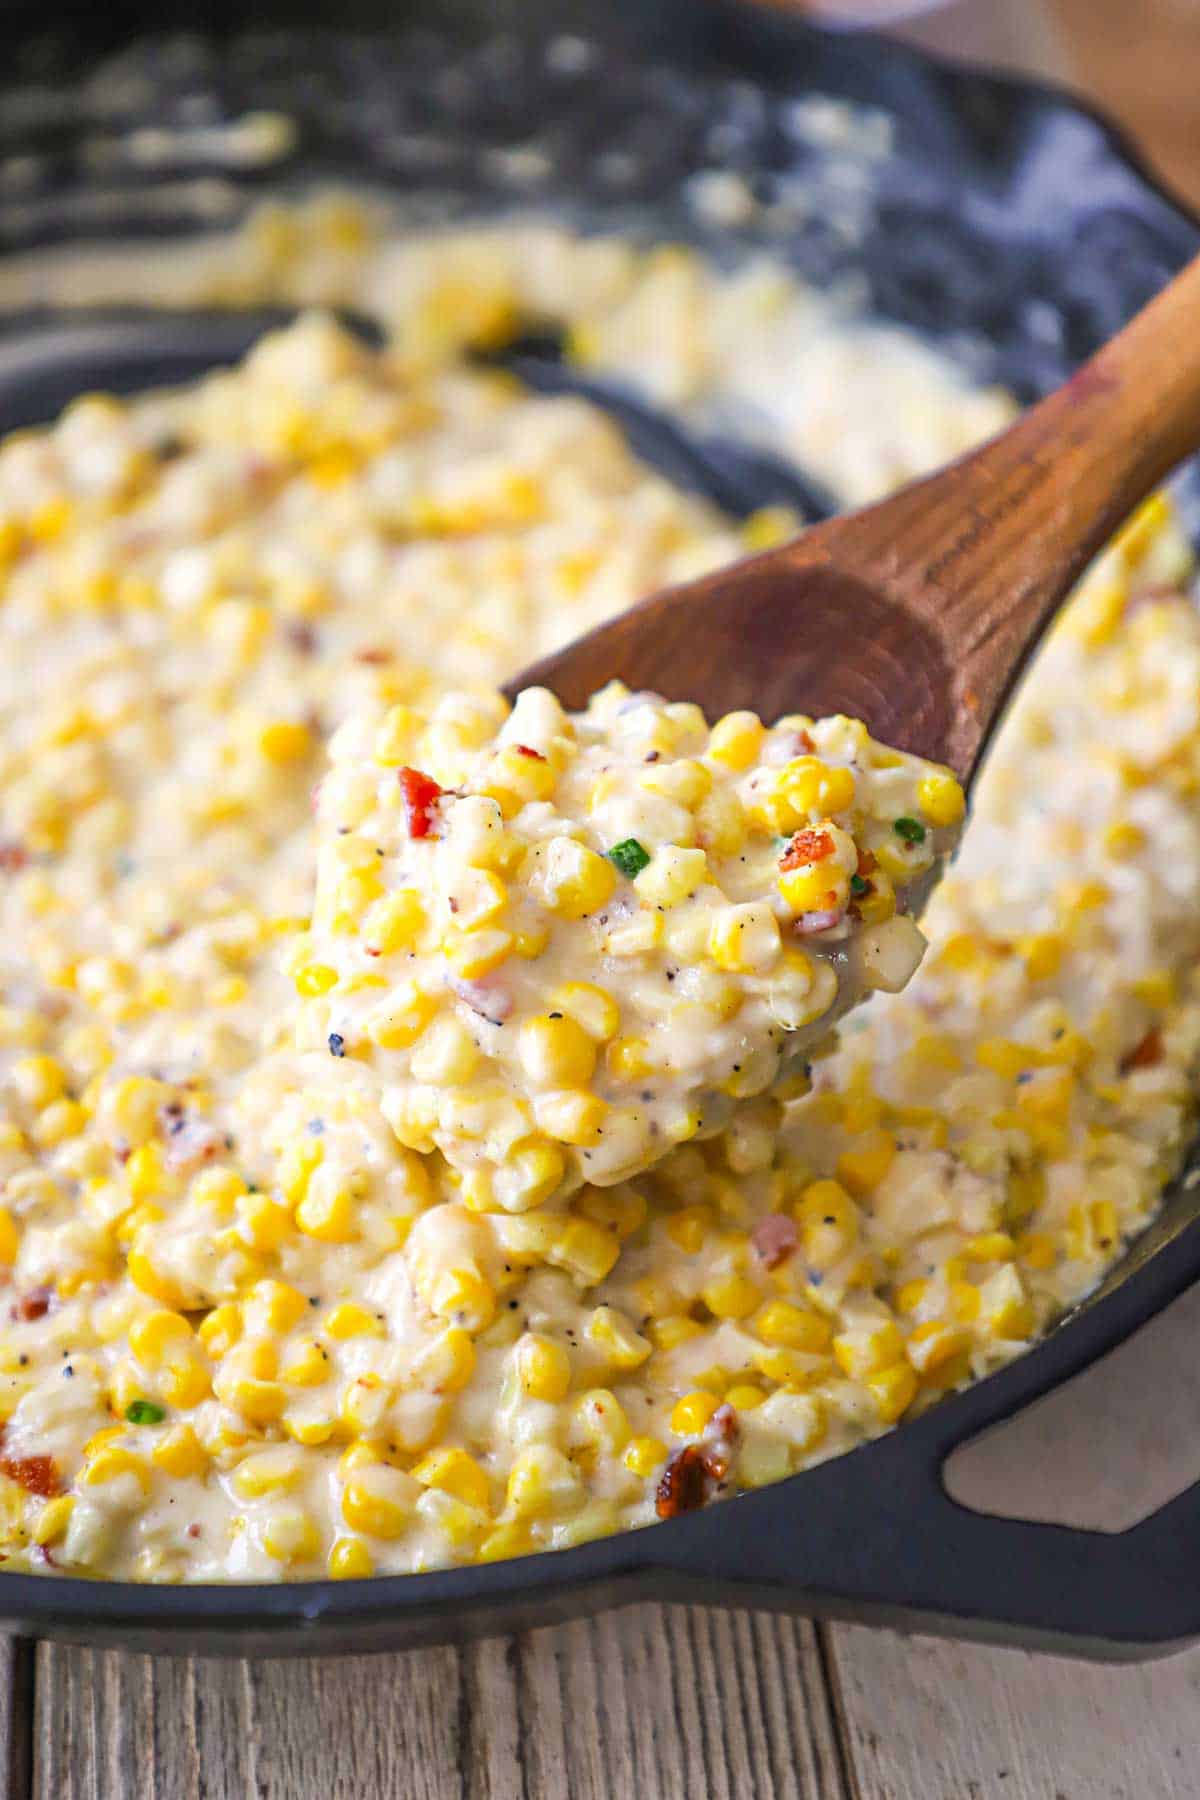
Whether you’re hosting an elegant Easter lunch or firing up the grill for a backyard BBQ, this velvety, homemade creamed corn is the ultimate crowd-pleasing side. It’s incredibly rich and fresh, offering a simple yet sophisticated upgrade that outshines the canned version every time.
Jump to:
🌽 The Ingredients
This dish relies on a handful of high-quality dairy staples and fresh seasonal produce to achieve its signature silky texture and irresistible savory-sweet balance. Find ingredient notes (including substitutions and variations) below.
📝 Ingredient Notes and Substitutions
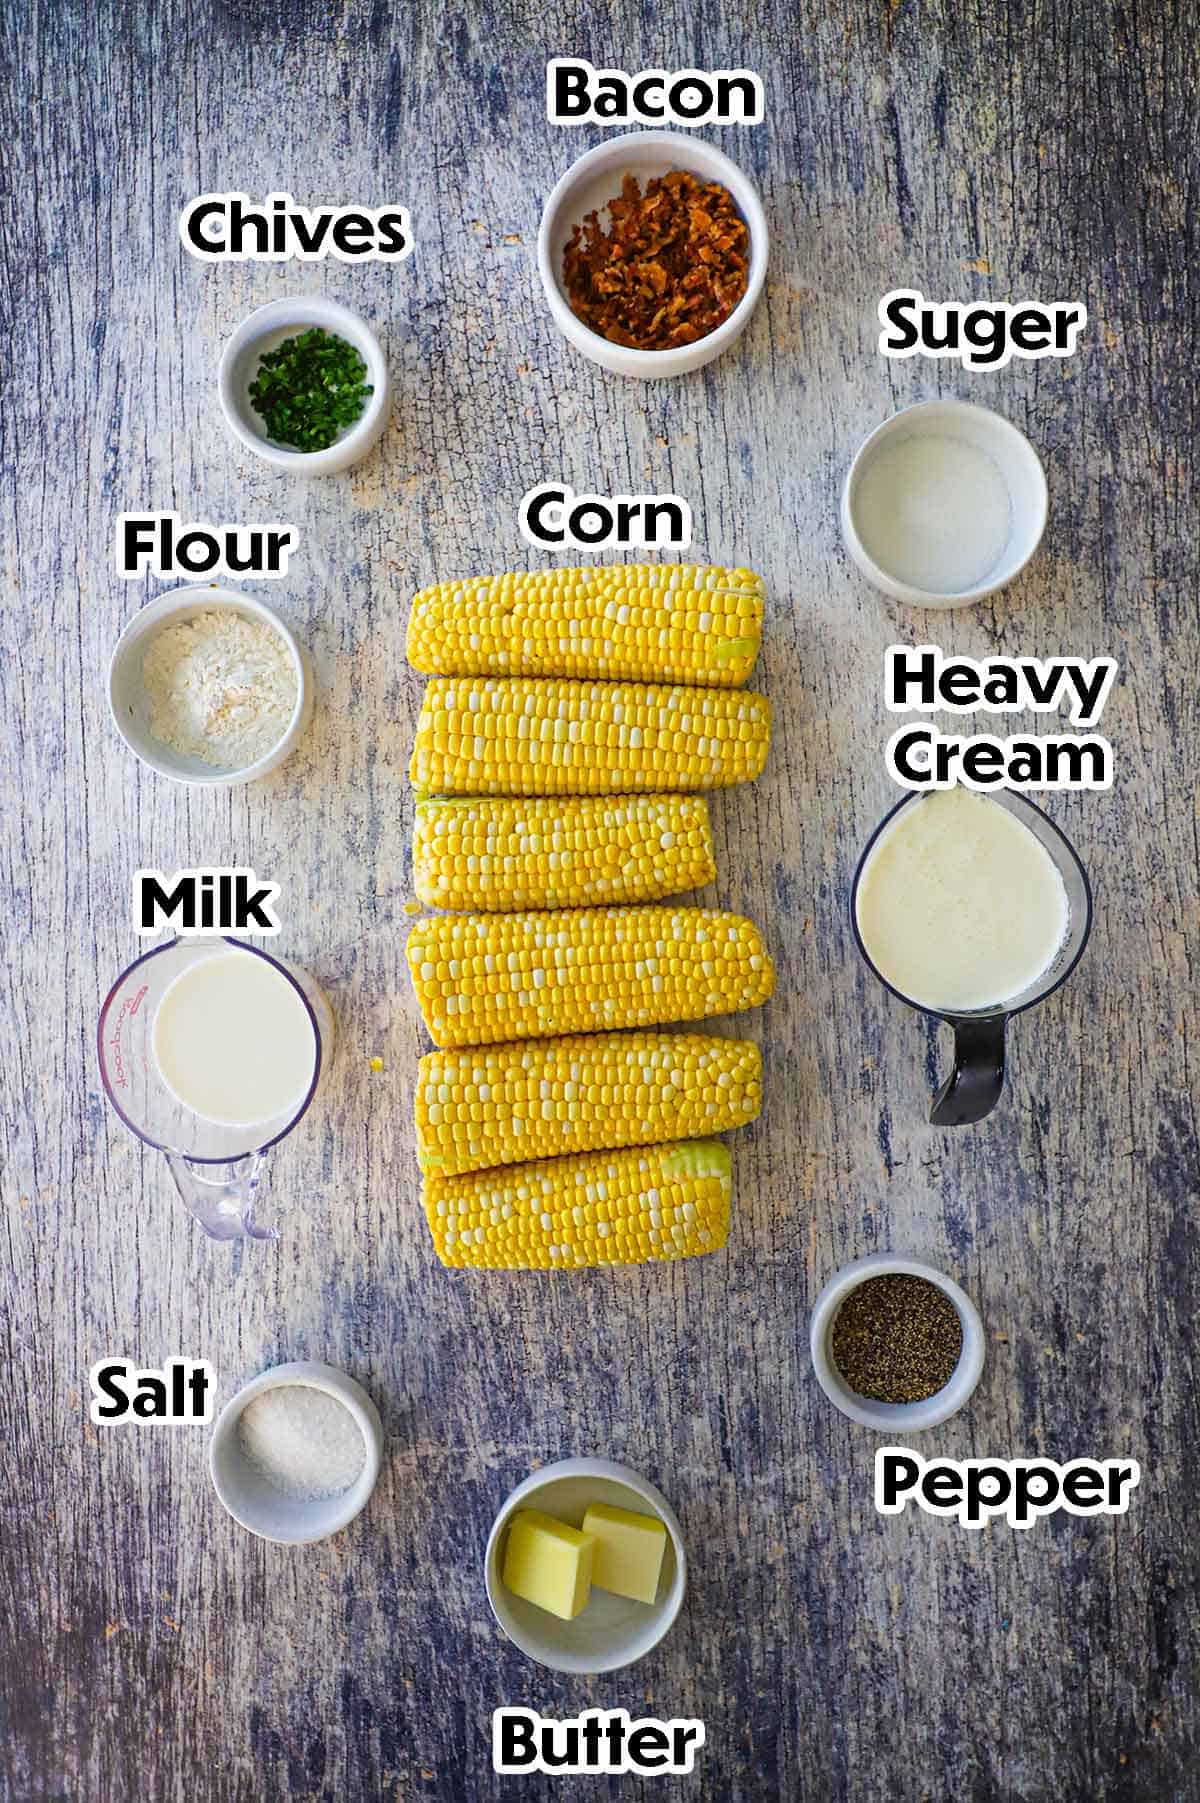
- Corn: Fresh ears of corn are highly recommended so you can scrape the “milk” from the cob for extra flavor, but you can substitute with 20 ounces of frozen (thawed) or canned (thoroughly drained) corn in a pinch.
- The Fat: Use unsalted butter for a clean, classic taste, or swap it for bacon grease to infuse the entire dish with a rich, smoky depth.
- Flour: This acts as the thickening agent for the sauce. If you need a gluten-free option, you can use a 1:1 gluten-free flour blend or substitute with 1 tablespoon of cornstarch (whisked into the cold milk before adding to the pan).
- Heavy Cream & Whole Milk: This combination creates the ultimate velvety texture; however, you can use half-and-half for a slightly lighter version or full-fat canned coconut milk for a dairy-free alternative.
- Sugar: Depending on the natural sweetness of your corn, you can adjust the sugar to your preference or swap it for honey or maple syrup.
- Garnishes: While crispy bacon bits and snipped chives add the perfect crunch and freshness, you can also experiment with a sprinkle of smoked paprika, red pepper flakes, or freshly grated Parmesan cheese.
Refer to the recipe card (with video) below for a full list of ingredients and measurements.
🔥 Tips and Tricks for Perfect Creamed Corn
- The “Bowl-in-a-Bowl” Method: To keep kernels from bouncing off your counter, place a small bowl upside down inside a much larger mixing bowl. Rest the tip of the corn cob on the flat base of the inverted bowl; as you slice downward, the larger bowl will neatly catch all the kernels and juices.
- Don’t Skip the Scrape: After cutting the kernels off, use the back of your knife to scrape the cob. This “corn milk” contains natural starches that help thicken the sauce and provide a much more intense corn flavor.
- Watch the Heat: When adding the heavy cream and milk, keep the heat on medium-low. Boiling dairy too vigorously can cause it to separate or scorch on the bottom of the pan.
- Control Your Consistency: If the sauce is too thick, stir in an extra splash of milk. If it’s too thin, let it simmer for another 2–3 minutes; it will also continue to thicken as it cools slightly before serving.
- Taste Before You Sugar: Fresh summer corn can be incredibly sweet on its own. Always taste a kernel first—if it’s already very sweet, you may want to cut the added sugar in half or omit it entirely.
- Make-Ahead Strategy: You can make this up to two days in advance. When reheating on the stovetop, add a tablespoon of milk or cream to loosen the sauce and restore that velvety, “just-made” texture.
👩🏼🍳 How to Make Homemade Creamed Corn
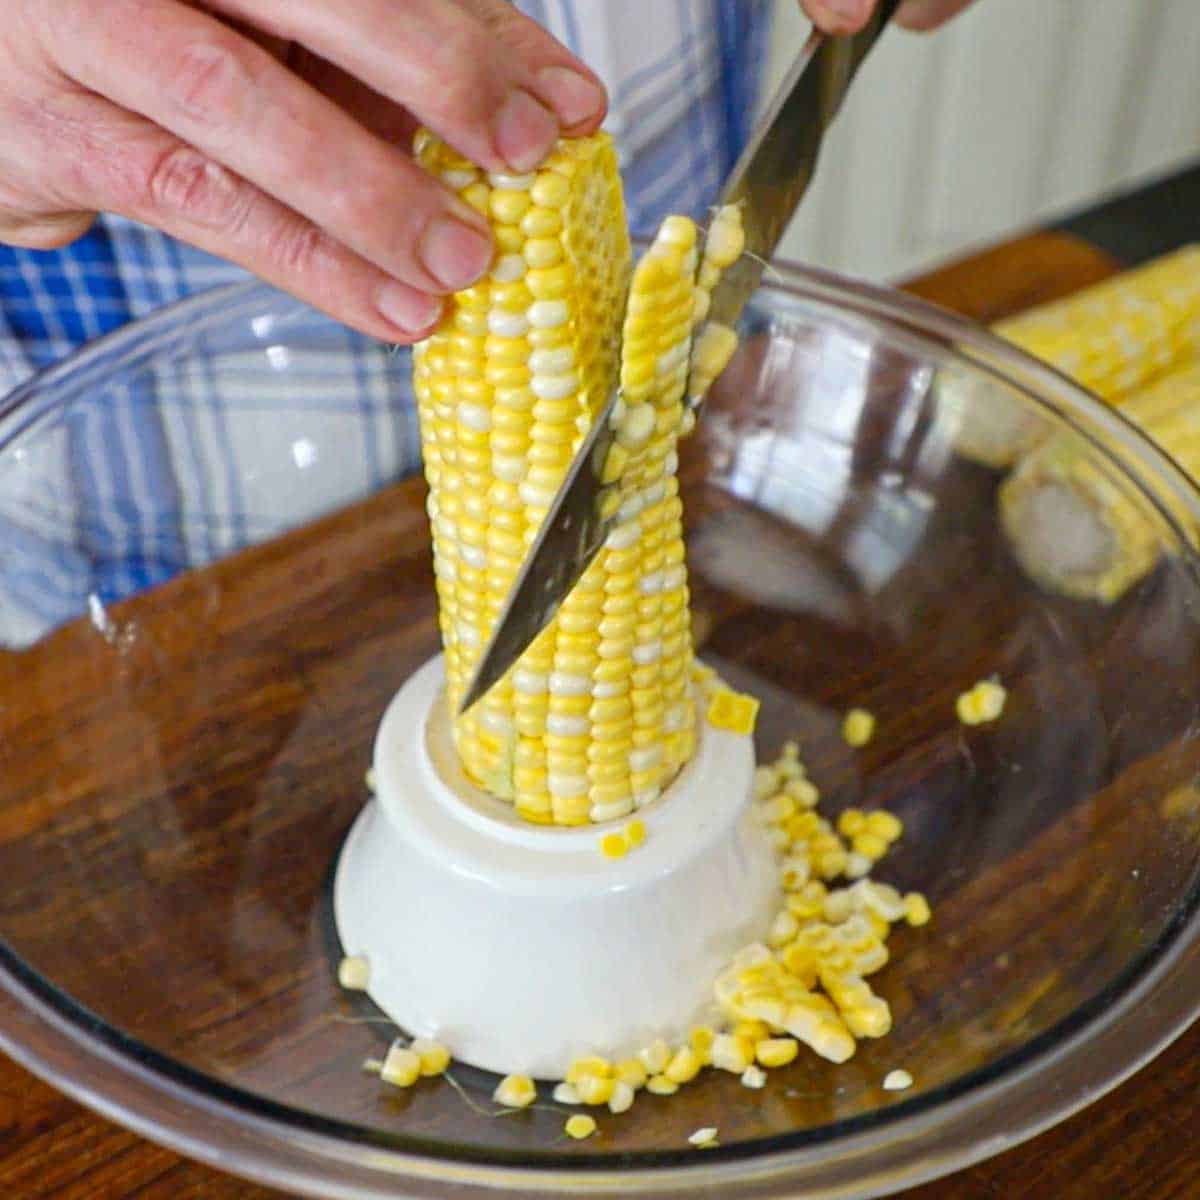
- Step 1: Invert a small bowl into a large bowl. Place the corn on top of the small bowl and use a knife to cut away the kernels. Use the knife for an additional scrape to get that amazing corn milk.
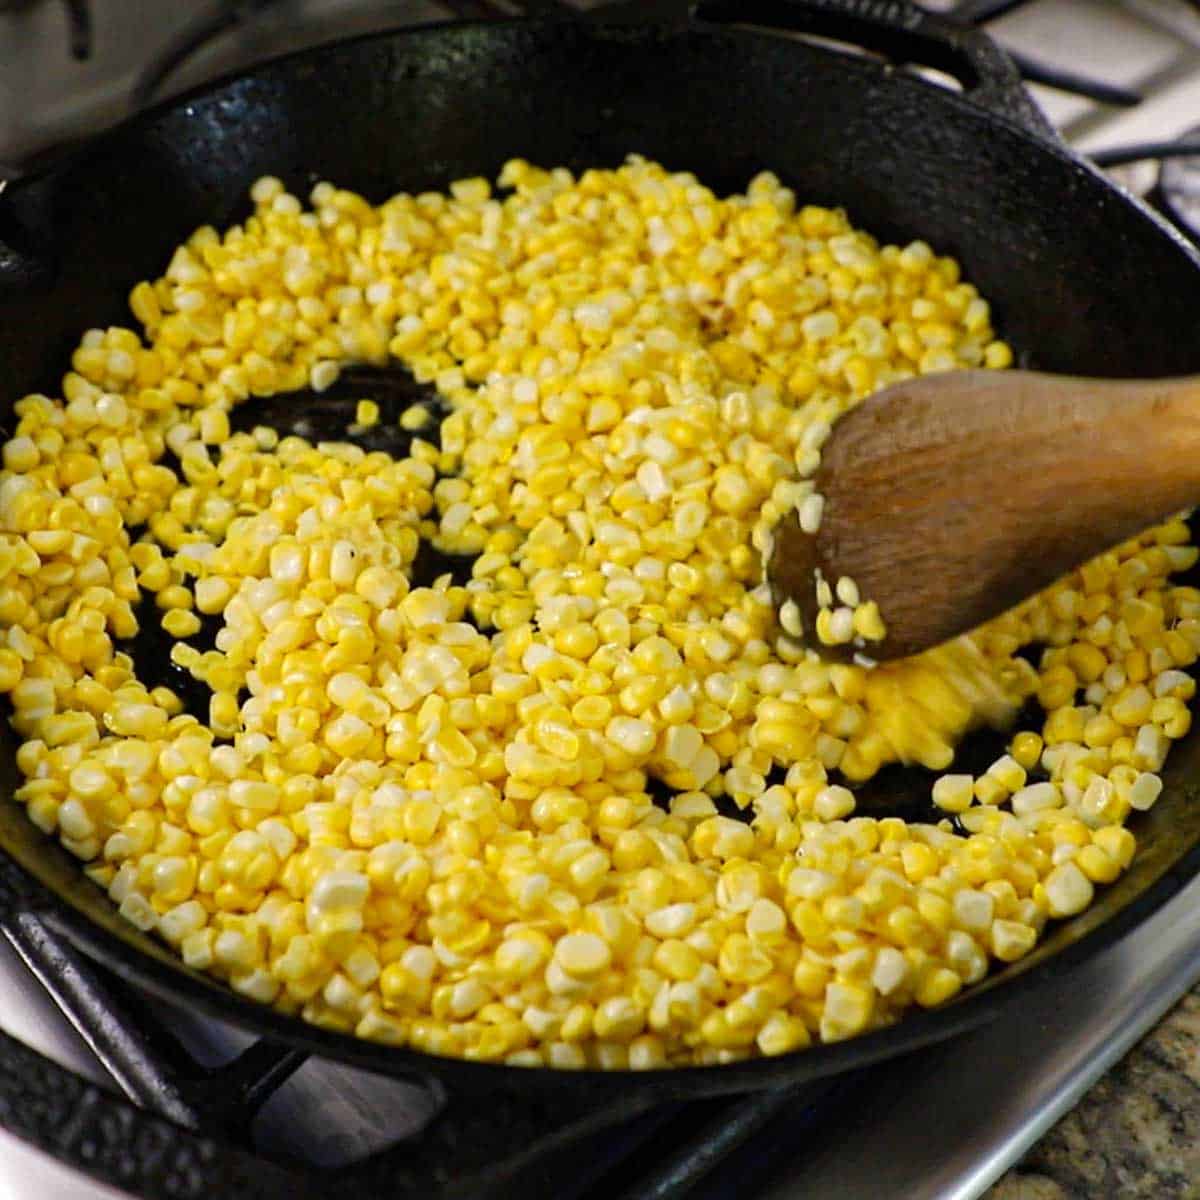
- Step 2: Heat the butter (or bacon grease) over medium heat in a large skillet. Add the corn kernels and corn milk and sauté for 3 to 4 minutes, stirring often.
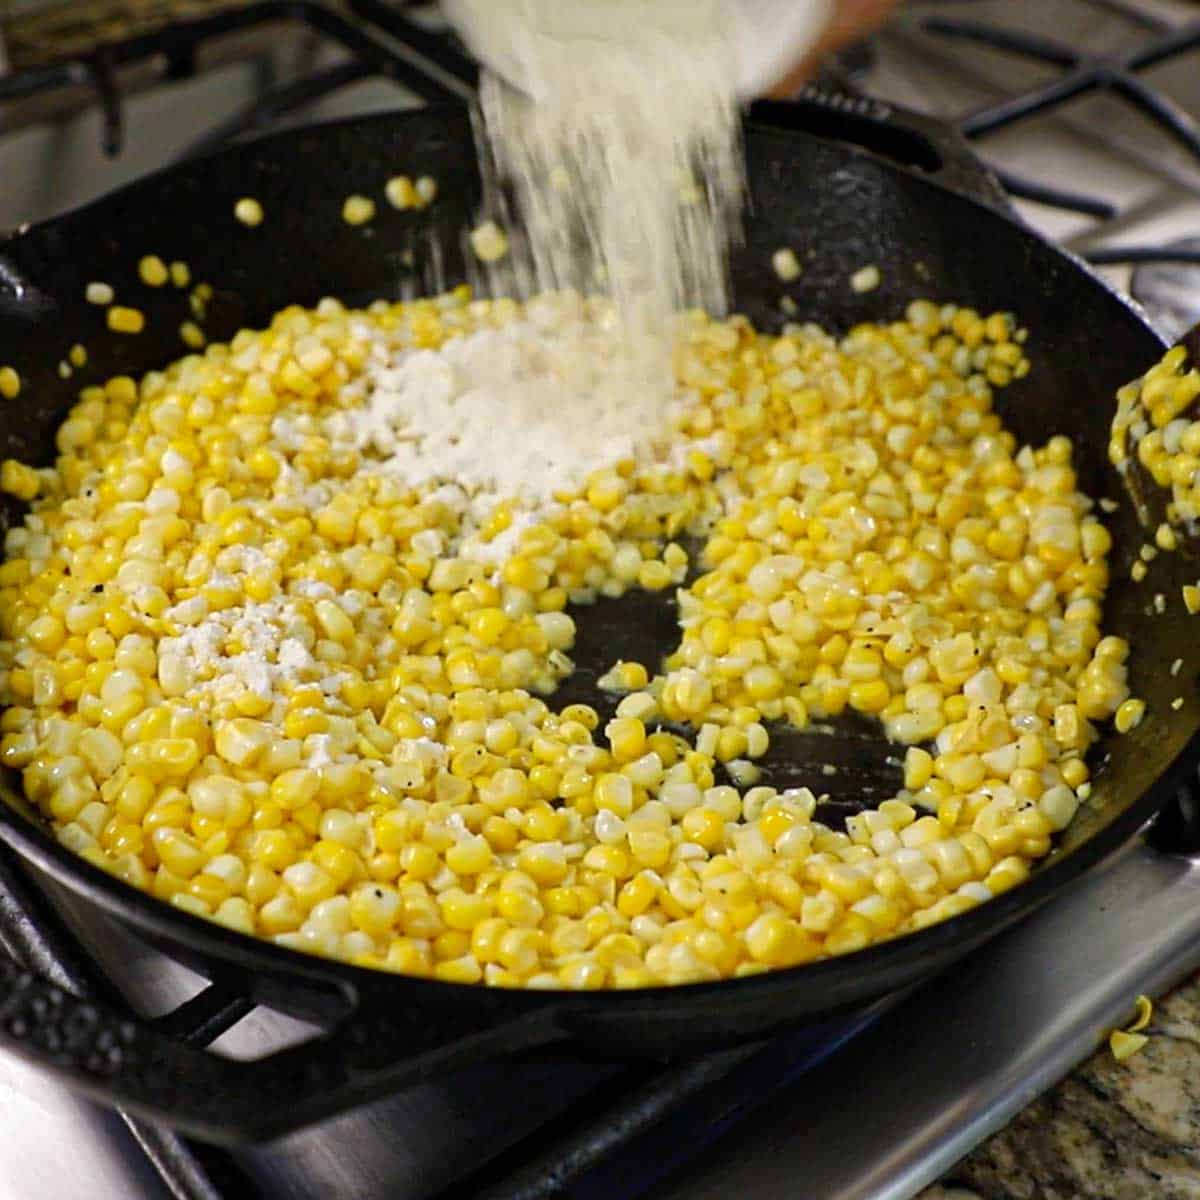
- Step 3: Stir in the flour and cook for 1 minute.
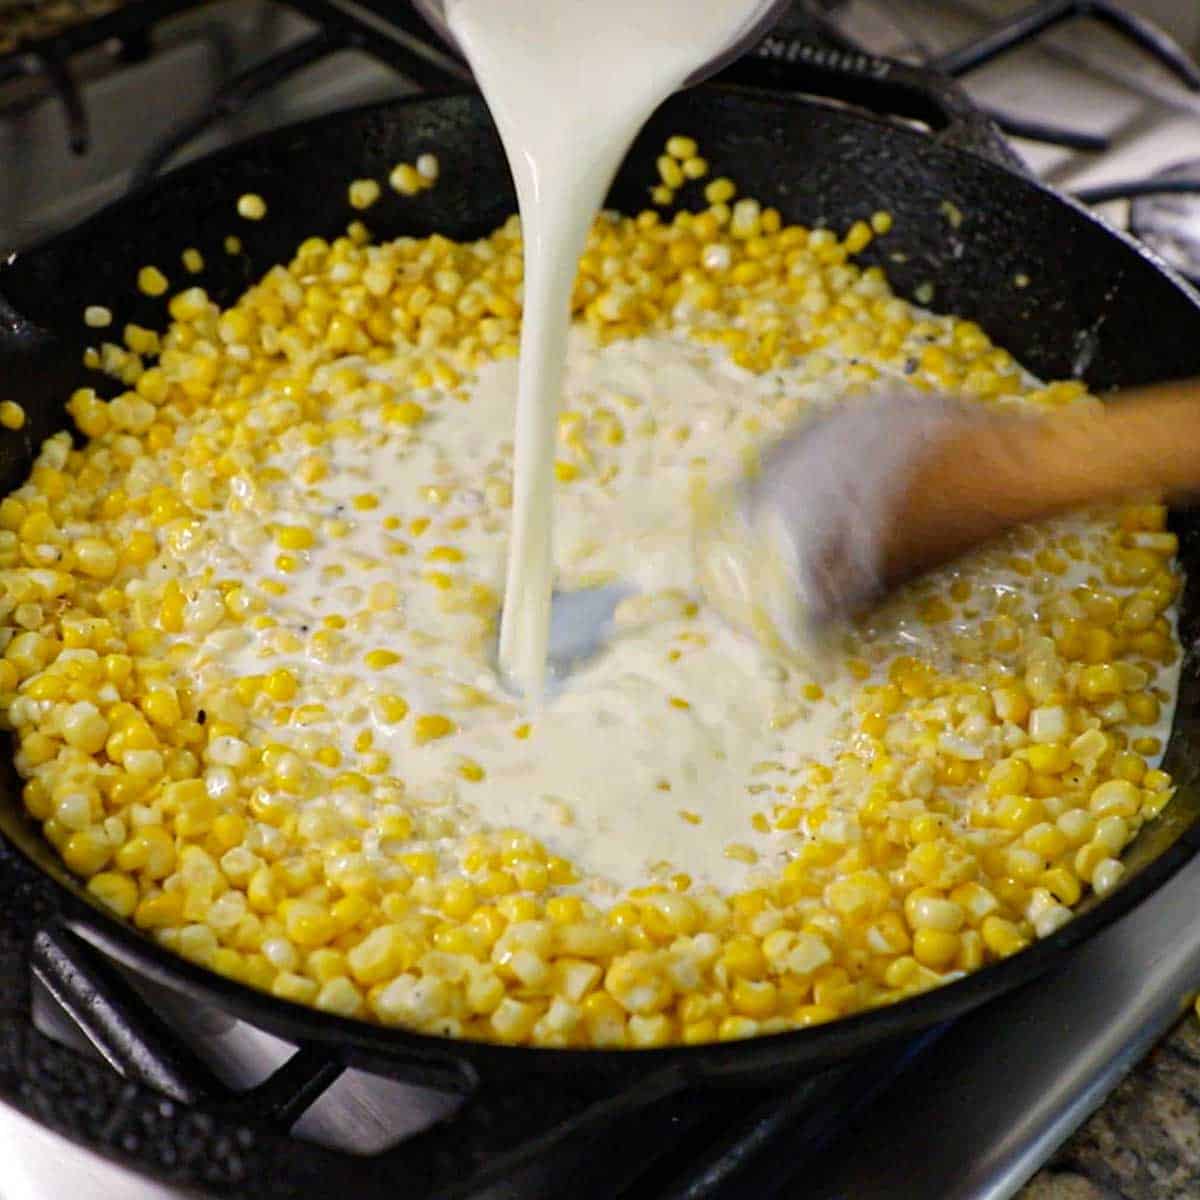
- Step 4: Stir in the cream and milk. Stir to combine.
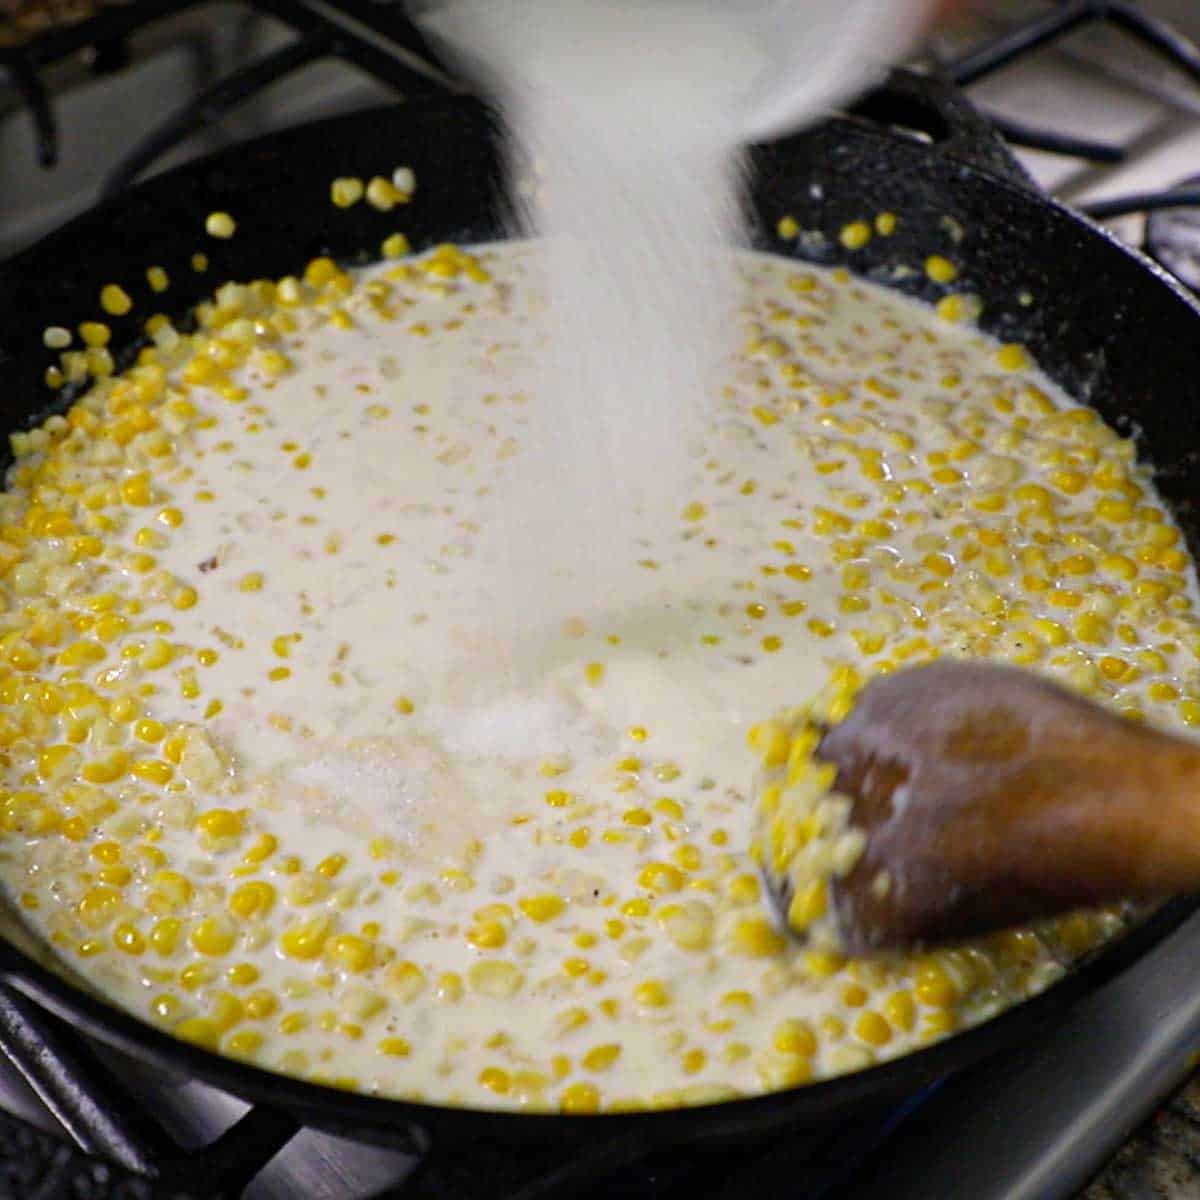
- Step 5: Stir in the sugar, salt, and pepper. Continue stirring and simmering until slightly thickened, about 5 minutes.
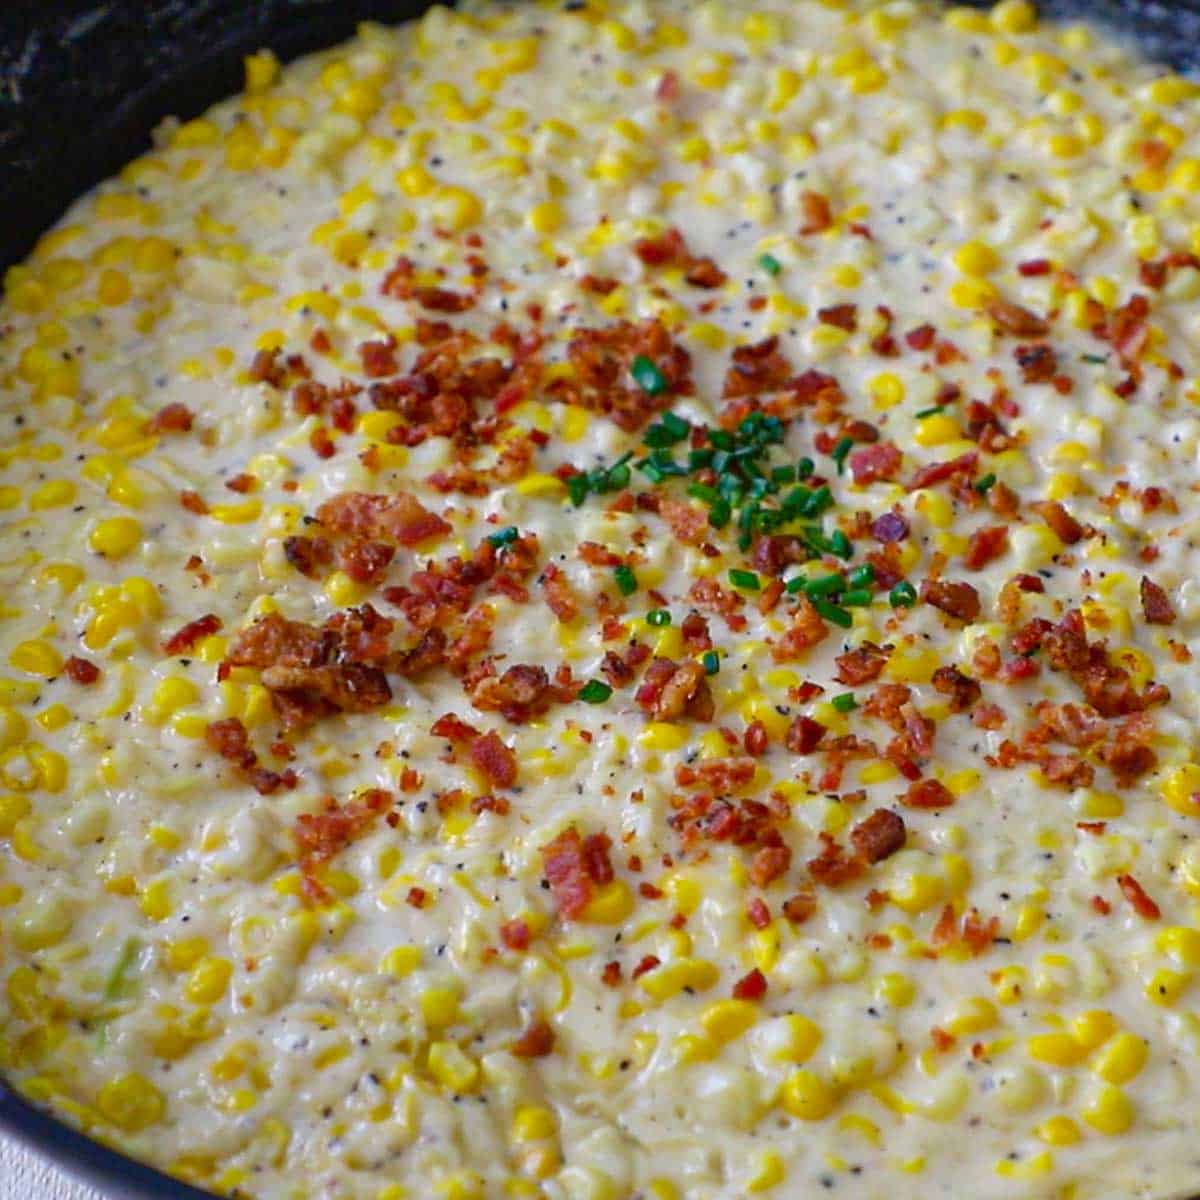
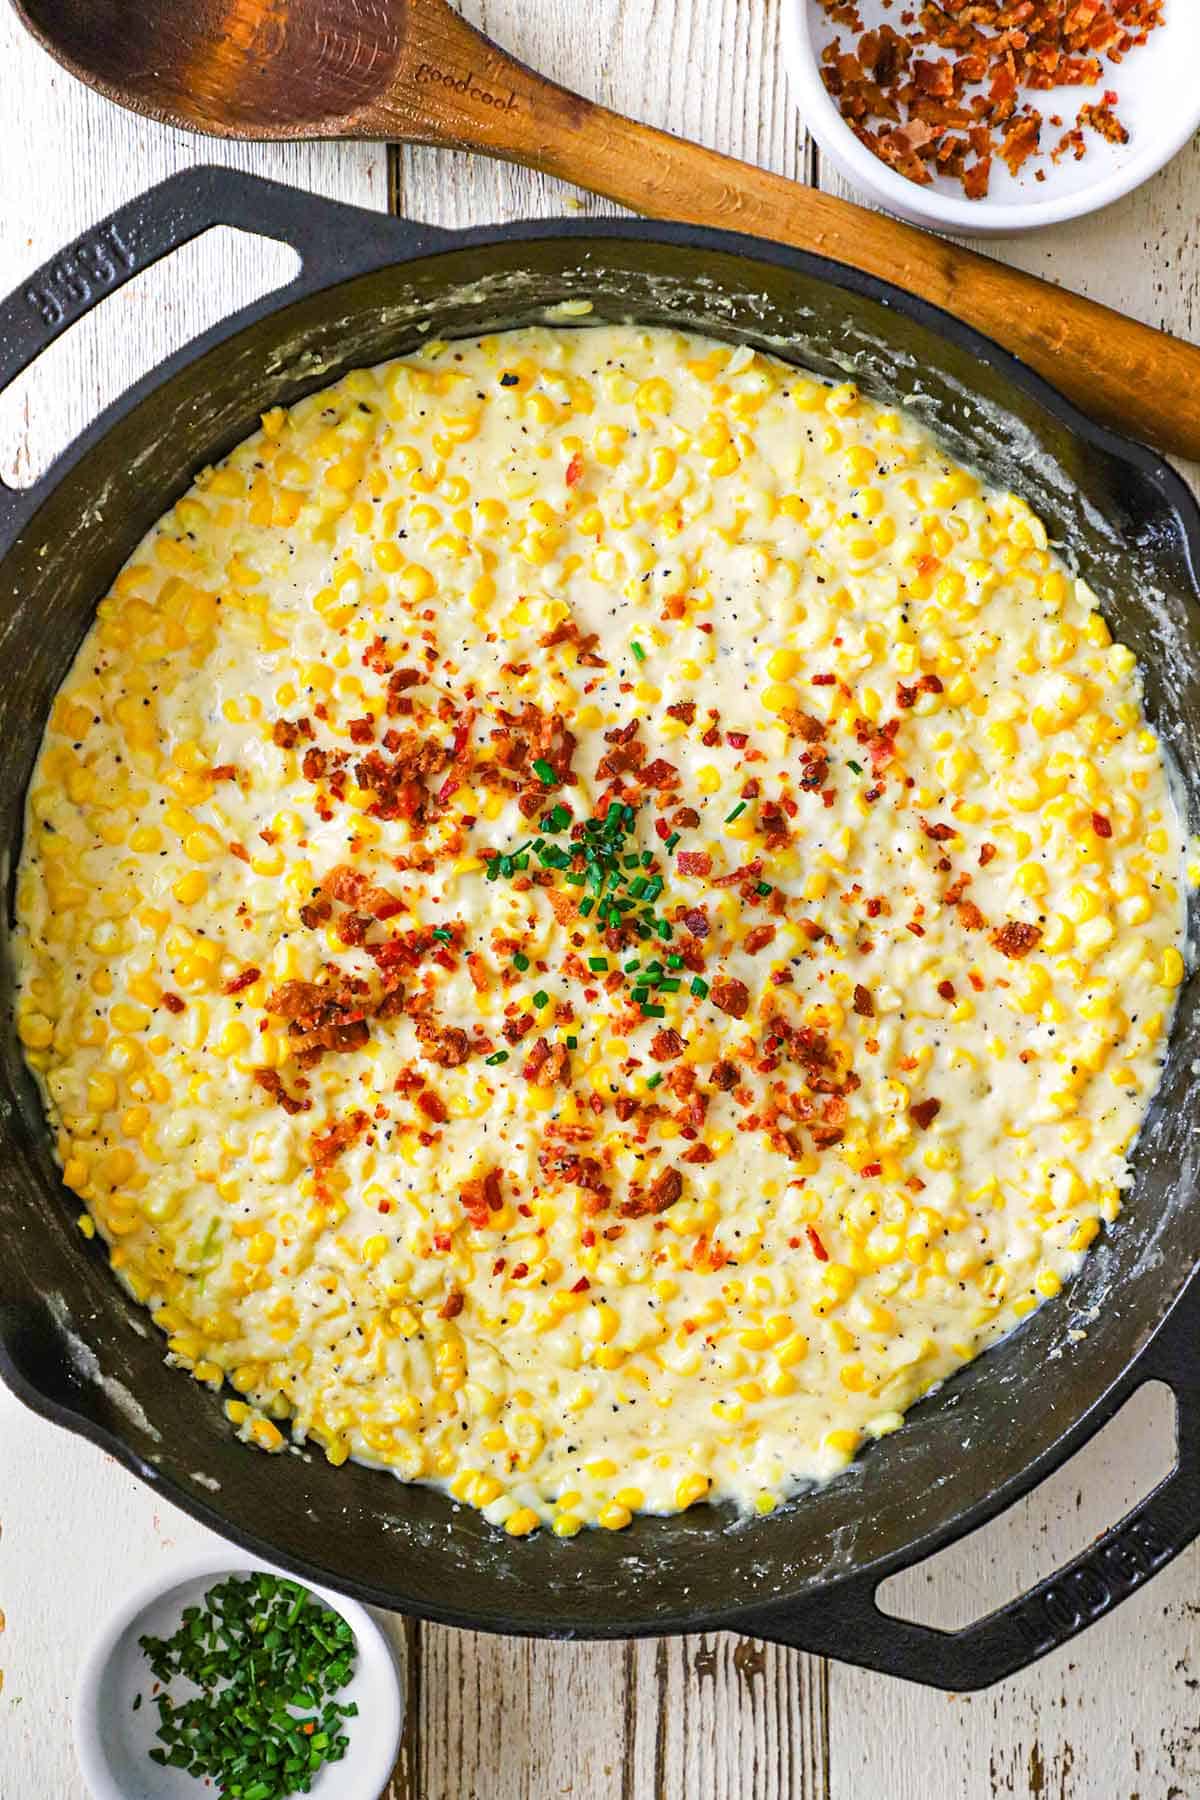
- Step 6: Garnish with crispy bacon bits and snipped chives (if desired) and serve at once.
🍽️ How to Serve
- The Holiday Centerpiece: This dish is a natural partner for a glazed Easter ham, roasted turkey, or a prime rib roast, adding a touch of creamy elegance to your holiday spread.
- BBQ’s Best Friend: Balance out smoky, charred flavors by serving this alongside St. Louis-style ribs, pulled pork, or Texas smoked brisket.
- Comfort Food Classic: For a cozy weeknight meal, pair it with crispy fried chicken, breaded pork chops, or a traditional savory meatloaf.
- Steakhouse Style: Elevate your dinner by serving it as a decadent side to a pan-seared New York strip steak or filet mignon.
- Garnish with Flair: Just before serving, top the bowl with your crispy bacon bits and snipped chives to provide a satisfying crunch and a fresh pop of color.
- Individual Portions: For a more formal presentation, spoon the creamed corn into small individual ramekins or mini cast-iron cocottes so every guest gets their own perfect portion.
🙋🏽♂️ Frequently Asked Questions
Yes! While fresh corn is preferred for its flavor and the “corn milk” from the cob, you can substitute it with about 20 ounces of frozen or canned corn. If you can’t find fresh, frozen corn is the better alternative because canned corn can often have a distinct “canned” aftertaste that interferes with the fresh flavor of the dish.
To make this gluten-free, simply swap the all-purpose flour for a 1:1 gluten-free flour blend. Alternatively, you can omit the flour and use a cornstarch slurry (1 tablespoon of cornstarch mixed with 1 tablespoon of cold milk) stirred into the simmering cream at the very end.
Absolutely. You can prepare this dish up to 2 days in advance. Store it in an airtight container in the refrigerator and reheat it slowly on the stovetop over low heat, adding a splash of milk or cream to bring back its original creamy consistency.
Traditional creamed corn has a subtle sweetness that complements the savory cream sauce. However, the amount of sugar needed depends on the natural sweetness of your corn. We recommend tasting the corn first and adjusting the sugar to your personal preference.
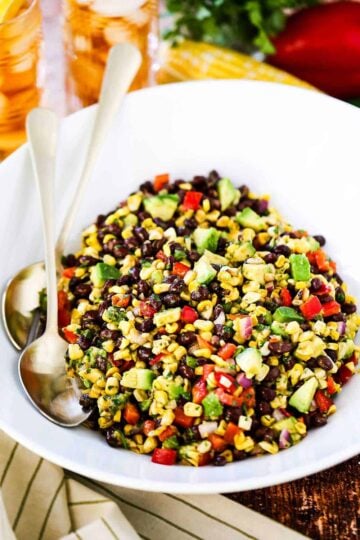
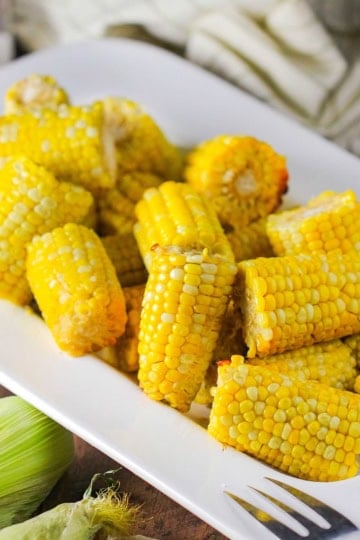
😋 More Amazing Recipes Starring Fresh Corn


Ready to make the best corn dish in town, in just 20 minutes? Go for it!
And when you do, be sure to take a photo of it, post it on Instagram, and tag @HowToFeedaLoon and hashtag #HowToFeedaLoon!

The Best Homemade Creamed Corn
Video
Equipment
- 1 large (12") skillet ie, cast-iron
Ingredients
- 2 strips bacon cooked and chopped, for garnish
- 6-8 ears corn shucked
- 2 tablespoon unsalted butter or bacon grease
- 2 tablespoon all-purpose flour
- 1 cup heavy cream
- ½ cup whole milk
- 1 tablespoon sugar
- 1¼ teaspoon Kosher salt
- ½ teaspoon black pepper
- 1 tablespoon chives snipped, for garnish (optional)
Instructions
- Cook the bacon until crisp. Chop and set aside (if using).2 strips bacon
- Place a small bowl upside down inside a much larger mixing bowl. Rest the tip of the corn cob on the flat base of the inverted bowl. Carefully use a knife to cut the kernels from the cob. Once the kernels are off, use the back of your knife to scrape the cob all the way down. This releases the "corn milk." Repeat with all of the ears.6-8 ears corn
- In a large skillet or saucepan, melt the butter (or grease) over medium heat. Add the corn kernels (and corn milk). Sauté for about 3 – 4 minutes, until the corn is tender and fragrant.2 tablespoon unsalted butter
- Sprinkle the flour over the corn and stir constantly for about 1 minute. Slowly pour in the heavy cream and milk, stirring often. Stir in the sugar, salt, and pepper. Continue stirring for a few minutes until slightly thickened. If it becomes too thick, add a splash or two of milk until the desired consistency is reached.2 tablespoon all-purpose flour, 1 cup heavy cream, ½ cup whole milk, 1 tablespoon sugar, 1¼ teaspoon Kosher salt, ½ teaspoon black pepper
- Taste and add more sugar or salt, if needed. Serve at once, garnished with crispy bacon bits and snipped chives (if using).1 tablespoon chives
Notes
- Corn Selection: Fresh corn is highly recommended, so you can extract the “corn milk” from the cob. If fresh isn’t available, use frozen corn rather than canned, as canned varieties often have a metallic aftertaste that can overpower the delicate cream sauce.
- The Secret Step: Don’t skip scraping the cobs with the back of your knife! This releases natural starches and intense corn flavor that helps thicken the sauce and creates a much richer result.
- Adjusting Sweetness: Always taste your corn before adding the sugar. If you are using peak-season summer corn, it may already be sweet enough to omit the extra sugar entirely.
- Storage & Freezing: Store leftovers in an airtight container in the refrigerator for 3–4 days. You can freeze this dish for up to 2 months, but be aware that the cream sauce may become slightly grainy once thawed; simply reheat it slowly on the stovetop with a splash of milk while whisking to restore the velvety texture.


Wesley says
Heavenly!! Sweet but not too sweet and I love the creamy texture. Sometimes creamed corn can be a little “liquidy” but this is perfect!
Kris Longwell says
Woo hoo!!