Is there any dessert that’s more celebrated and loved than this iconic dish? We think not.
The simplicity of this dessert is partly why it is just so delicious. There are only a handful of ingredients, but the way you work them is critical to getting a smooth custard and a crispy sugar topping. These can be made in advance (up to torching the sugar) and they are perfect for that “special occasion” dinner.
How To Make Crème Brûlée
NOTE: If you liked this video, please subscribe to our YouTube channel. Remember to click the little ‘bell’ icon so you’ll never miss a new video. Thank you!
The Tools and Ingredients You Will Need
Most of the ingredients you will need to make this dish you probably already have on hand. First, you’ll need vessels to hold this custard and then you’ll need a kitchen torch.
6 oz oval custard ramekins – These are traditional, and you’ll have more surface area.
4 oz or 6 oz round ramekins – These are smaller, but deeper, so you’ll get a deeper amount of custard.
Kitchen torch – Be sure to get some butane refill.
Here are the ingredients you’ll need to have on hand:
Heavy cream – Heavy whipping cream and/or double cream work well, too.
Vanilla – We love using a whole vanilla bean (scraping out the beans), but vanilla extract works just fine.
Egg yolks – Save the whites for another use (make a meringue pie!).
Sugar – Seek out “extra fine” sugar. It can be found next to regular granulated sugar in most supermarkets. If you can’t find it, regular granulated sugar will work just fine.
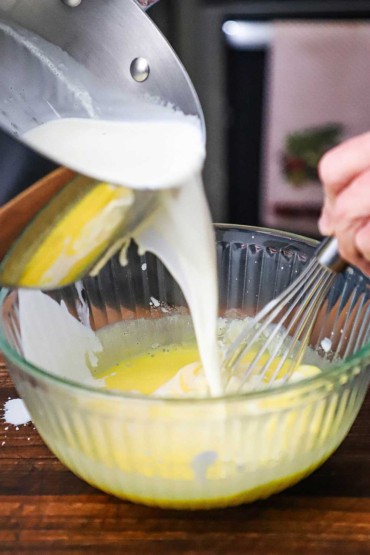
EXPERT TIP: You want the cream to be hot, but not boiling. Just as the cream starts to bubble, immediately turn off the heat and cover for 15 minutes. Only pour half of the cream into the beaten eggs, whisking continuously. This prevents the eggs from curdling.
Tips for Making Perfect Crème Brûlée
Use High-Quality Ingredients – There aren’t a lot of them, so go with quality. Fresh cream, vanilla beans, and free-range eggs, all make the very best flavor and texture.
Be Patient when Tempering the Eggs – This is very important. Rushing this step will curdle the eggs and you won’t yield a smooth custard.
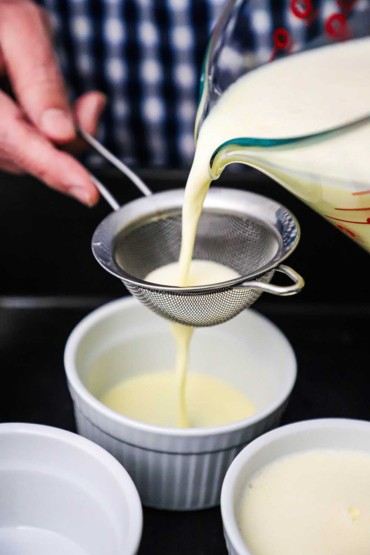
Strain the Custard – Do this when pouring into the ramekins (or before). This is essential to remove any lumps or air bubbles, which will prevent a silky smooth texture.
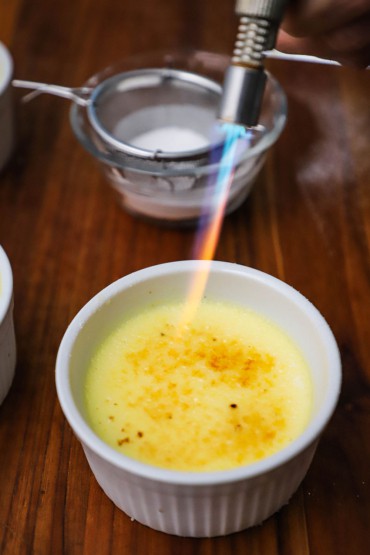
Use a Kitchen Torch – Though you can caramelize the sugar under your broiler, a kitchen torch will deliver an even browning and a satisfying crackly crust.
How To Serve
We used 6-ounce ramekins for this blog post. And we filled them to the rim. We love the extra depth of custard that this will provide, however, you’ll only get for servings.
Fill the ramekins about two-thirds of the way up and you’ll get six servings. Be sure to let the custard completely set in the refrigerator before adding the sugar and caramelizing it.
You can easily double or triple the recipe if feeding a group. The custard can be made up to 24 hours in advance. Keep in the fridge, covered with plastic wrap.
Fire up your kitchen torch just before serving. Otherwise, you run the risk of the sugar losing its crunchy texture if you wait too long before serving.
Other Classic Dessert Recipes To Try
No wonderful dinner party would be complete without a delicious sweet dish to wrap the evening with. Here are some of our all-time favorite confections that we’re sure you and your guests will love, too:
Triple Chocolate Mousse Cake
Wild Berry and Mascarpone Parfait
Blueberry Buttermilk Pie
Classic German Chocolate Pie
Southern Chess Pie
Classic Fruit Tart
Italian Ricotta Cheesecake
New York-Style Cheesecake
These are all classic and wonderful in their own right. But, in the meantime, isn’t this dish of sweet yumminess catching your eye?
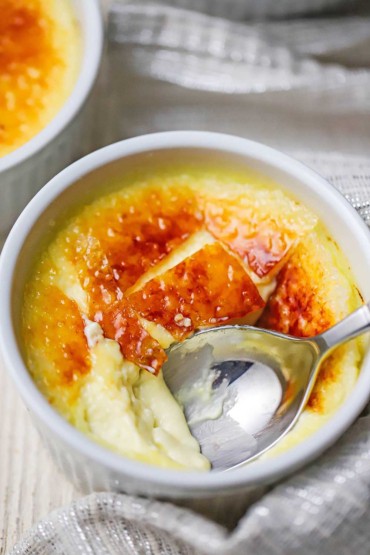
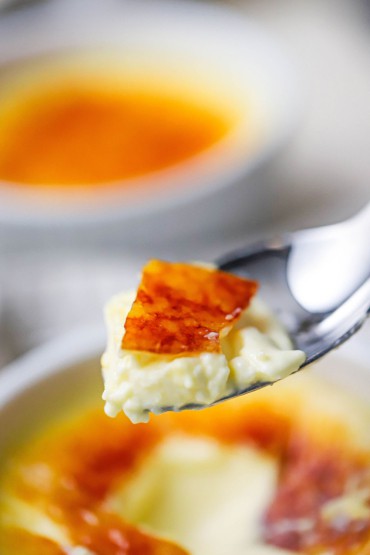
There is just something so satisfying about crème brûlée. The combination of creamy custard topped with a brittle sugar layer is just divine.
And the brilliant thing is so much of the preparation can be done a day in advance.
You love ordering it at fancy restaurants, now you can make it at home. Your family and friends will be so impressed! And they’ll never know how easy it was for you to prepare!
Ready to make the best dessert in town? Go for it!
And when you make it, be sure to take a picture, post it to Instagram, and tag @HowToFeedaLoon and #HowToFeedaLoon!

Crème Brûlée
Video
Equipment
- Four to Six 6-ounce ramekins See NOTES.
- Kitchen torch (with butane) see NOTES.
Ingredients
- 3 cups heavy cream or heavy whipping cream, or double cream
- 1 whole vanilla bean or 1 tablespoon vanilla extract
- 6 egg yolks
- ⅔ cup sugar
- 5 tablespoon extra fine sugar See NOTES
Instructions
- Preheat the oven to 300°F.
- Heat enough water to fill your baking dish (or roasting pan) about one-third full of the water. Bring to a gentle simmer.
- Pour the cream into a saucepan.3 cups heavy cream
- Use about 1 inch of the vanilla bean, and cut down the middle. Scrape the insides out and add to the cream, along with the skin of the bean. Or, add the vanilla extract.1 whole vanilla bean
- Heat the cream until just comes to a simmer, then turn off the heat. Cover with a lid and let rest for 15 minutes.
- Meanwhile, vigorously whisk the egg yolks and the sugar until they are pale yellow, about 3 minutes. Set aside.6 egg yolks, ⅔ cup sugar
- Carefully pour about half of the warm cream into the eggs, whisking constantly. Once fully incorporated, add the remaining cream, still whisking.
- Place 6 ramekins into a baking dish or a roasting pan. Pour the egg/cream mixture through a fine mesh sieve into each ramekin. Carefully pour the hot water into the pan, adding just enough to go up about one-third of the ramekins.
- Bake for 35 to 45 minutes, or until just set. The custard will still be jiggly, but not runny. Let cool in the water bath for about 20 minutes and then remove each ramekin from the pan and place in the fridge for at least 4 hours or up to overnight. (if chilling for more than 4 hours, cover with plastic wrap).
- After the custard is fully set (only slightly jiggly), sprinkle about 1 to 2 tablespoons of the fine sugar over each ramekin of custard.5 tablespoon extra fine sugar
- Use a kitchen torch to quickly (carefully) brown the sugar. They should turn amber in color, but not too dark. (You want to brown the sugar, but not burn it) Give the sugar a minute or two to slightly cool and harden. Then, serve immediately.
Notes
Nutrition
POST UPDATE: This post was originally published in June 2014, but was updated with improved tweaks to the recipe with new tips and photography and a fabulous new video in December 2023!





Alphabet says
Absolutely excellent recipe. Works every time without fail. This recipe made me fall in love with creme brulee.
Kris Longwell says
Awesome!! Thank you for sharing and for the GREAT review! Creme brule is sooooo yummy!
Sherry C says
Chris and Wesley,
This isn’t about the wonderful recipe but about the two of you. One of the things I love most about watching your videos is how very thoughtful you are of each other. There is such kindness in the way you interact and it always makes me happy.
Happy New Year to you both and my wishes for great happiness in the New Year!
Sherry C
Kris Longwell says
Hi Sherry! Well…what a wonderful way to start off the new year! THANK YOU SO MUCH! That means more to us than you can ever know. We hope and pray you have an absolutely wonderful year fill with lots of love, happiness, and yumminess! Please stay in touch!!! xoxo Kris & Wesley
rooth says
Noms! A few years back, one of my best friends went crazy with creme brulee and made every single “flavour” imaginable. You wouldn’t think you could get sick of it but after sampling the 50th one, I was ready to chuck it all in (and on the floor). PS – I’ve just bookmarked around ten recipes on your blog to try later!
Wesley Loon says
Isn’t it delish! Can’t wait to see what you think of the other recipes…thanks for stopping by!