


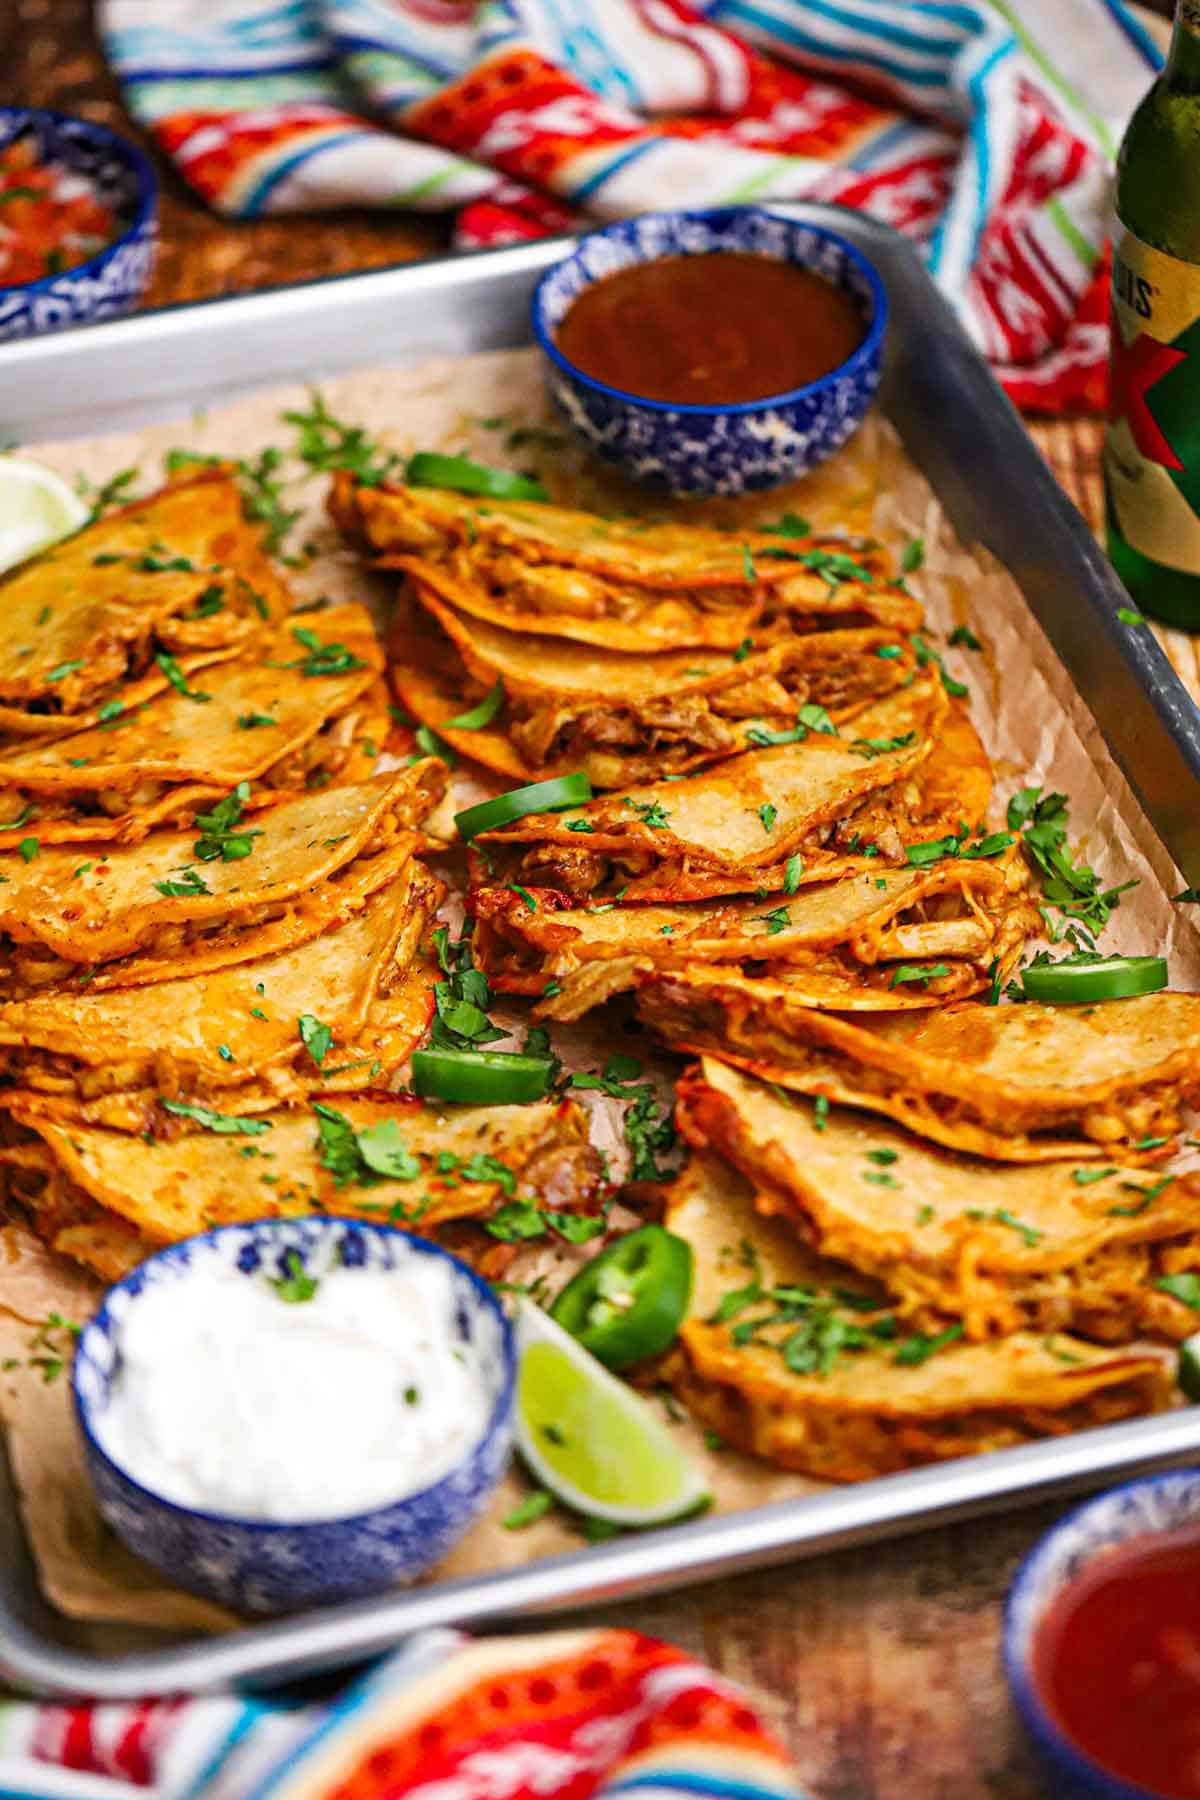
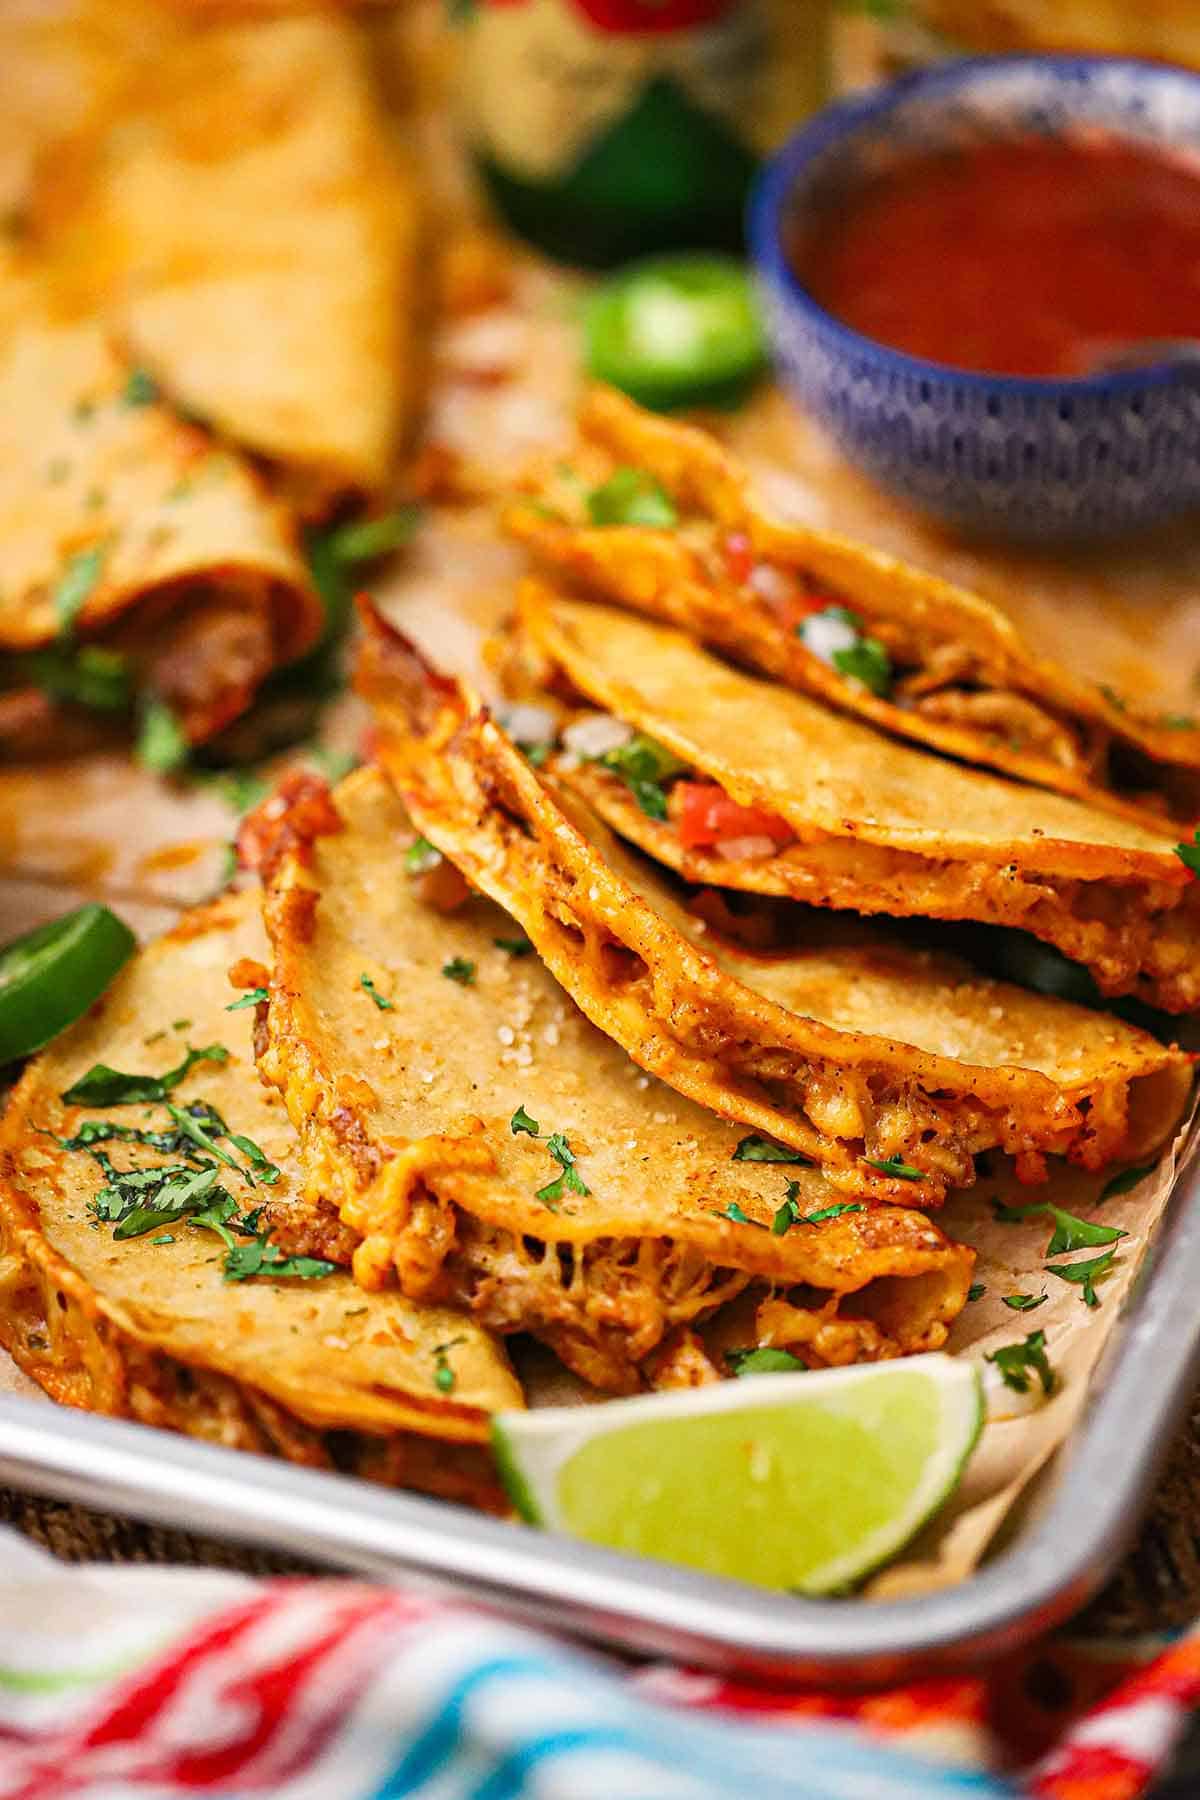
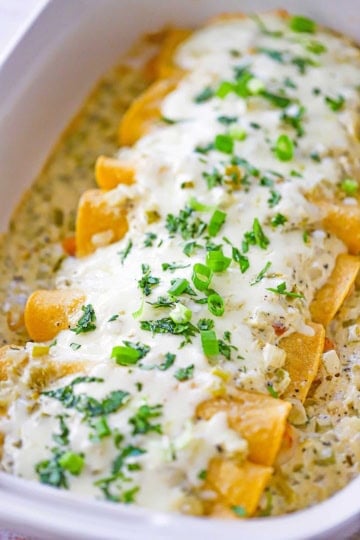
Elevate your next taco night with these Crispy Baked Chicken Tacos, featuring tender chicken smothered in an easy homemade red enchilada sauce. Baked in oil-brushed white corn tortillas until perfectly golden and blistered, these tacos offer a satisfying crunch and a stunning, restaurant-quality presentation.
Jump to:
🌶️ The Ingredients
This recipe harmoniously combines tender chicken with a bold, aromatic sauce, a crisp, golden base, and a vibrant array of fresh, zesty garnishes, resulting in a perfectly balanced and colorful meal. Find ingredient notes (including substitutions and variations) below.
📝 Ingredient Notes and Substitutions
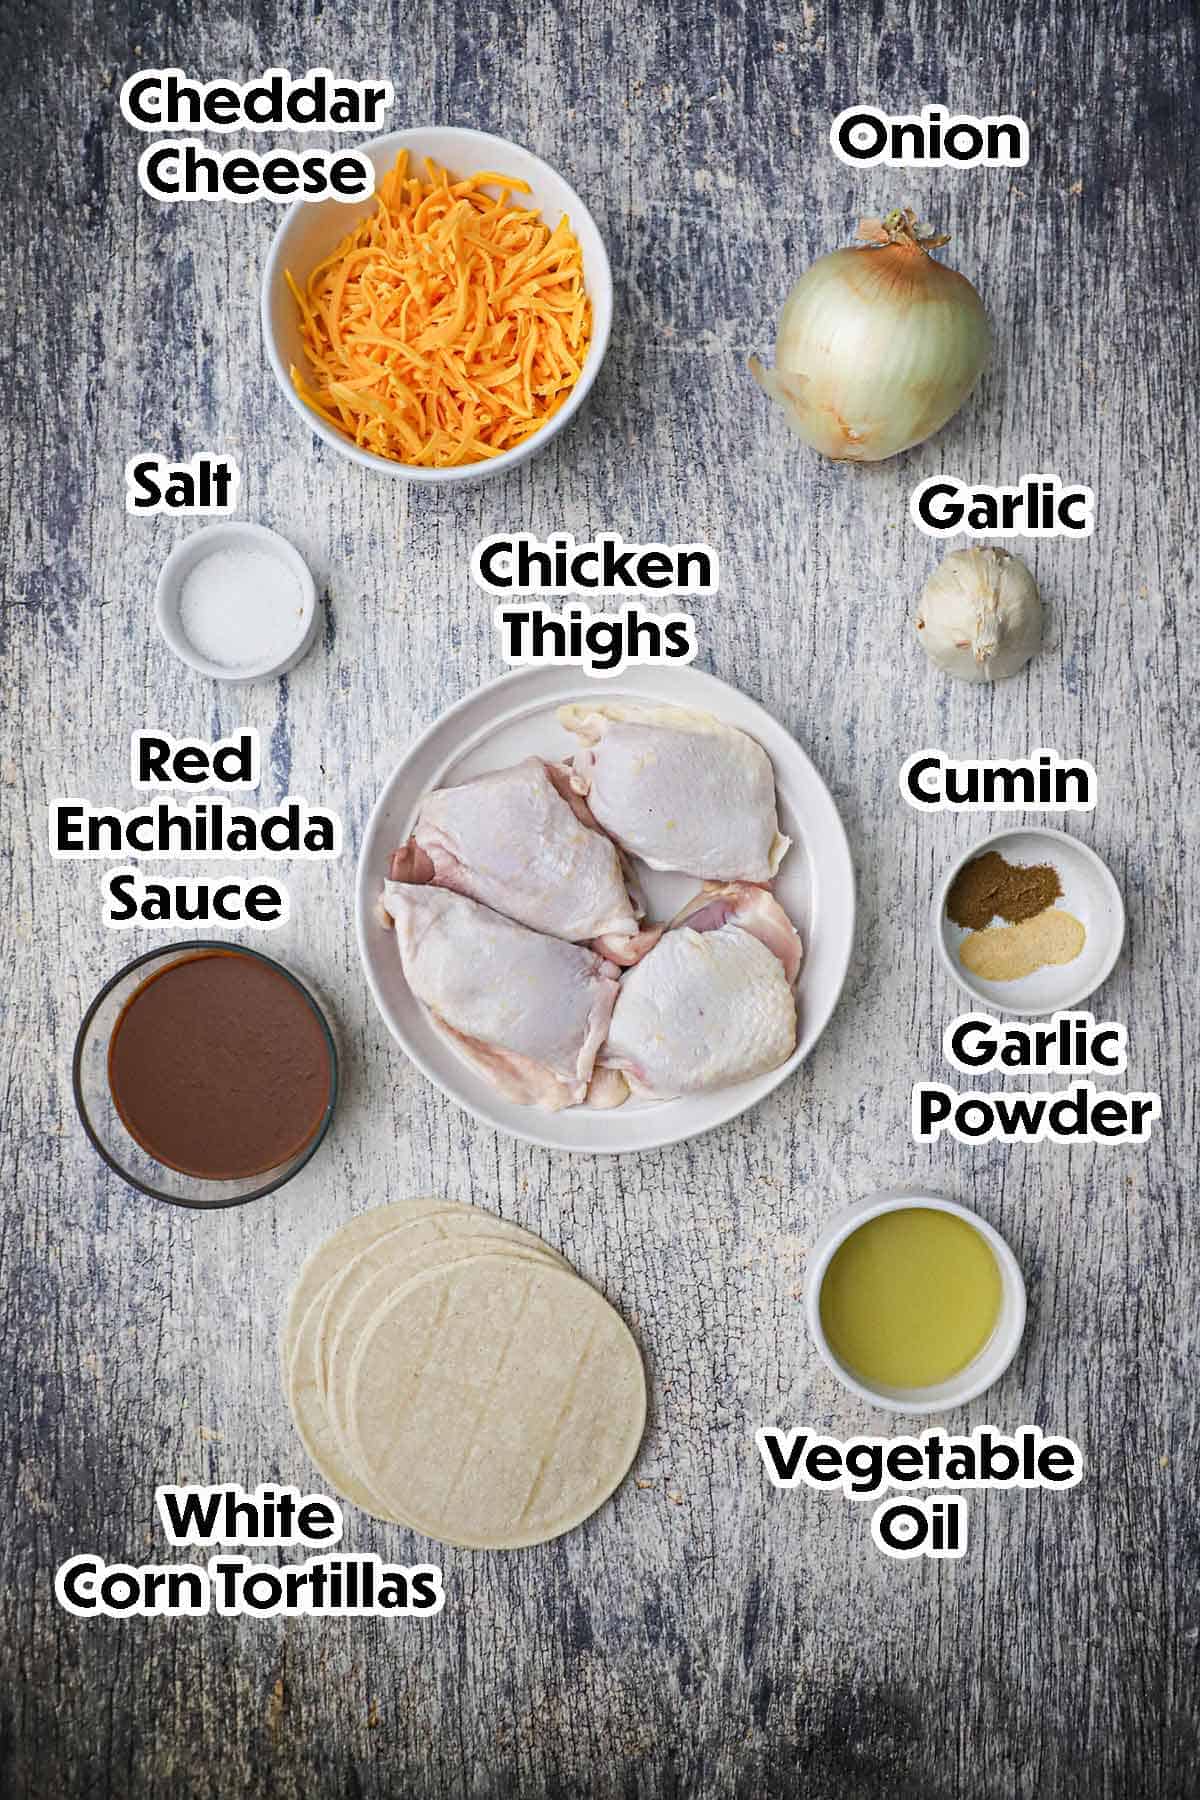
- Chicken Thighs: Poaching the thighs with onion, garlic, and salt ensures the meat stays incredibly juicy and flavorful; however, you can substitute with chicken breasts or a rotisserie chicken if you are short on time.
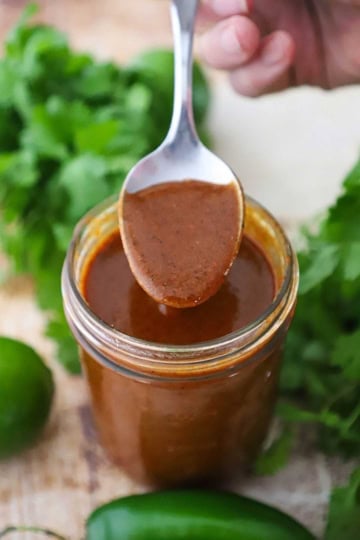
- Easy Homemade Red Enchilada Sauce: This is the flavor powerhouse of the dish, but if you don’t have a batch ready, a high-quality store-bought red enchilada sauce will work in a pinch.
- White Corn Tortillas: These provide a delicate texture and beautiful golden-brown blisters when baked, though yellow corn tortillas can be used for a more robust corn flavor. Flour tortillas can also be used.
- Shredded Cheddar Cheese: Cheddar offers a sharp, bold flavor that stands up well to the red sauce, but you can swap it for Monterey Jack or Oaxaca cheese for a smoother, more “stretchy” melt.
- Vegetable Oil: A neutral oil with a high smoke point is essential for achieving that “oven-fried” crunch; avocado oil or grapeseed oil are excellent alternatives.
- Garnishes & Sides: While cilantro and lime provide essential brightness, feel free to customize your taco bar with Greek yogurt instead of sour cream, or add sliced jalapeños for an extra kick of heat. Pico de gallo and homemade salsa are classic additions.
Refer to the recipe card (with video) below for a full list of ingredients and measurements.
🔥 Tips and Tricks for Perfect Baked Chicken Tacos
- Warm Your Tortillas: To prevent white corn tortillas from cracking when you fold them, always warm them in a damp paper towel in the microwave for 30–45 seconds first; this makes them pliable and easy to work with.
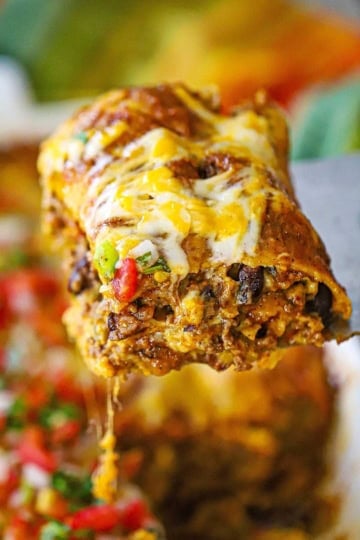
- The “Cheese Shield”: To keep your tacos from getting soggy, place a layer of shredded cheddar on the tortilla before adding the saucy chicken. This creates a delicious, melted barrier that protects the crunch of the shell.
- Don’t Overcrowd the Pan: For the ultimate “oven-fried” texture, give each taco a little breathing room on the baking sheet. Proper airflow ensures the edges get crispy and blistered rather than just steaming.
- The Mid-Bake Flip: For perfectly even browning, use a wide spatula to carefully flip the tacos halfway through the baking time. This ensures both sides are equally golden and crunchy.
- Control the Moisture: Ensure your shredded chicken is well-coated but not dripping with excess sauce. If the filling is too wet, it can make the tortillas difficult to crisp up.
- Garnish for Contrast: For a professional, “visually stunning” look, add your cold toppings (like cilantro, sour cream, and pico de gallo) immediately after the tacos come out of the oven. The contrast between the hot, golden shell and the bright, fresh garnishes makes the dish pop.
👩🏼🍳 How to Make Crispy Baked Chicken Tacos
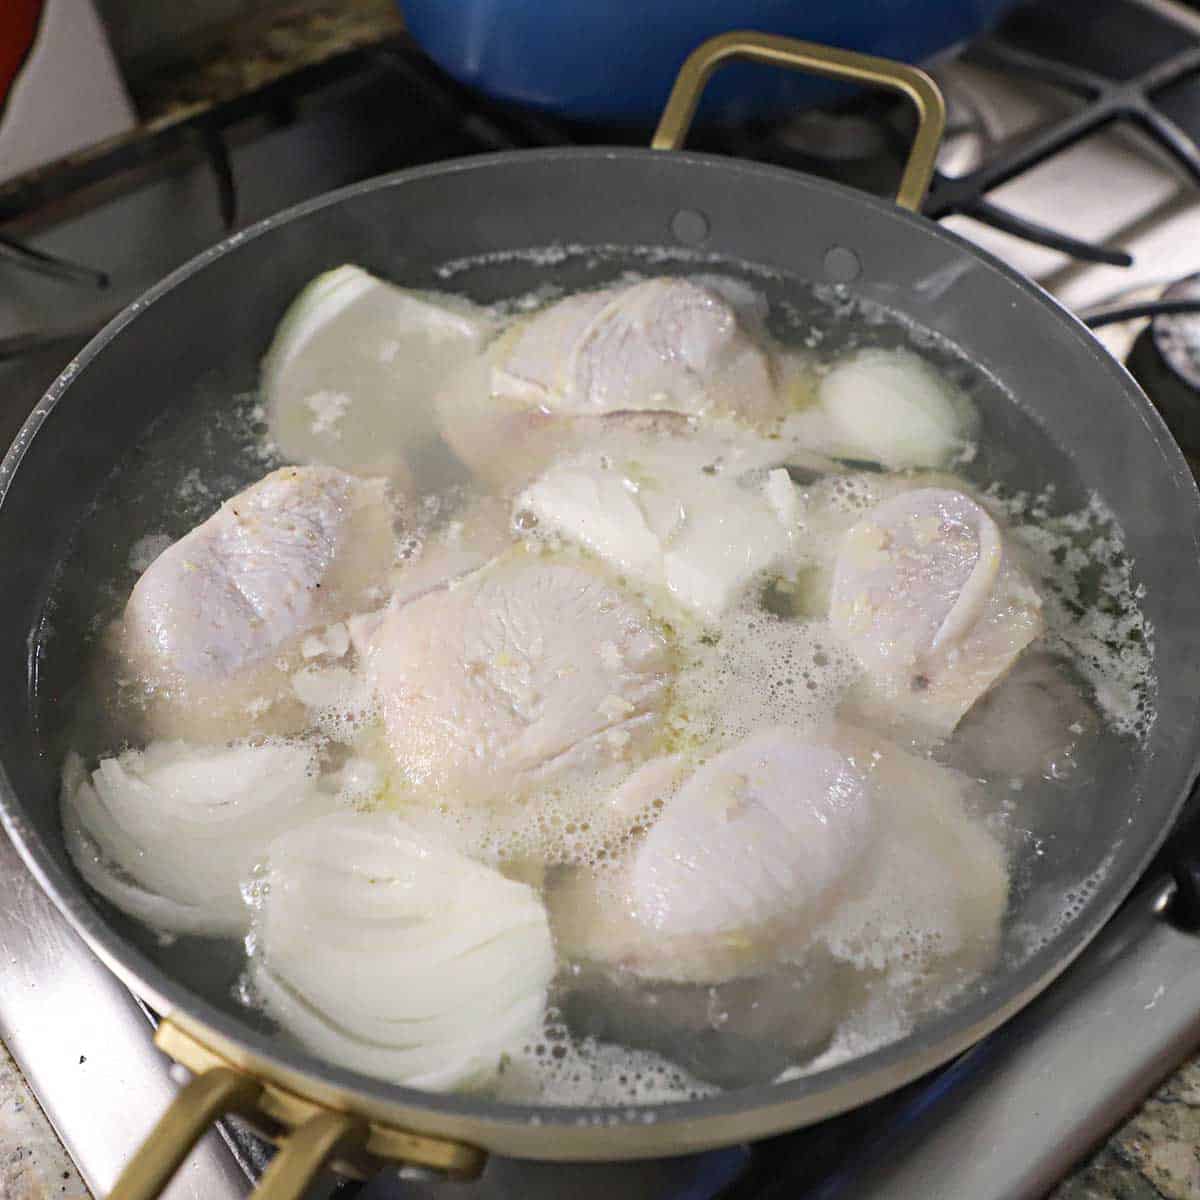
- Step 1: Place the chicken in a skillet with water, onion, garlic, and salt. Bring to a boil, lower the heat, cover, and simmer for 15 to 20 minutes.
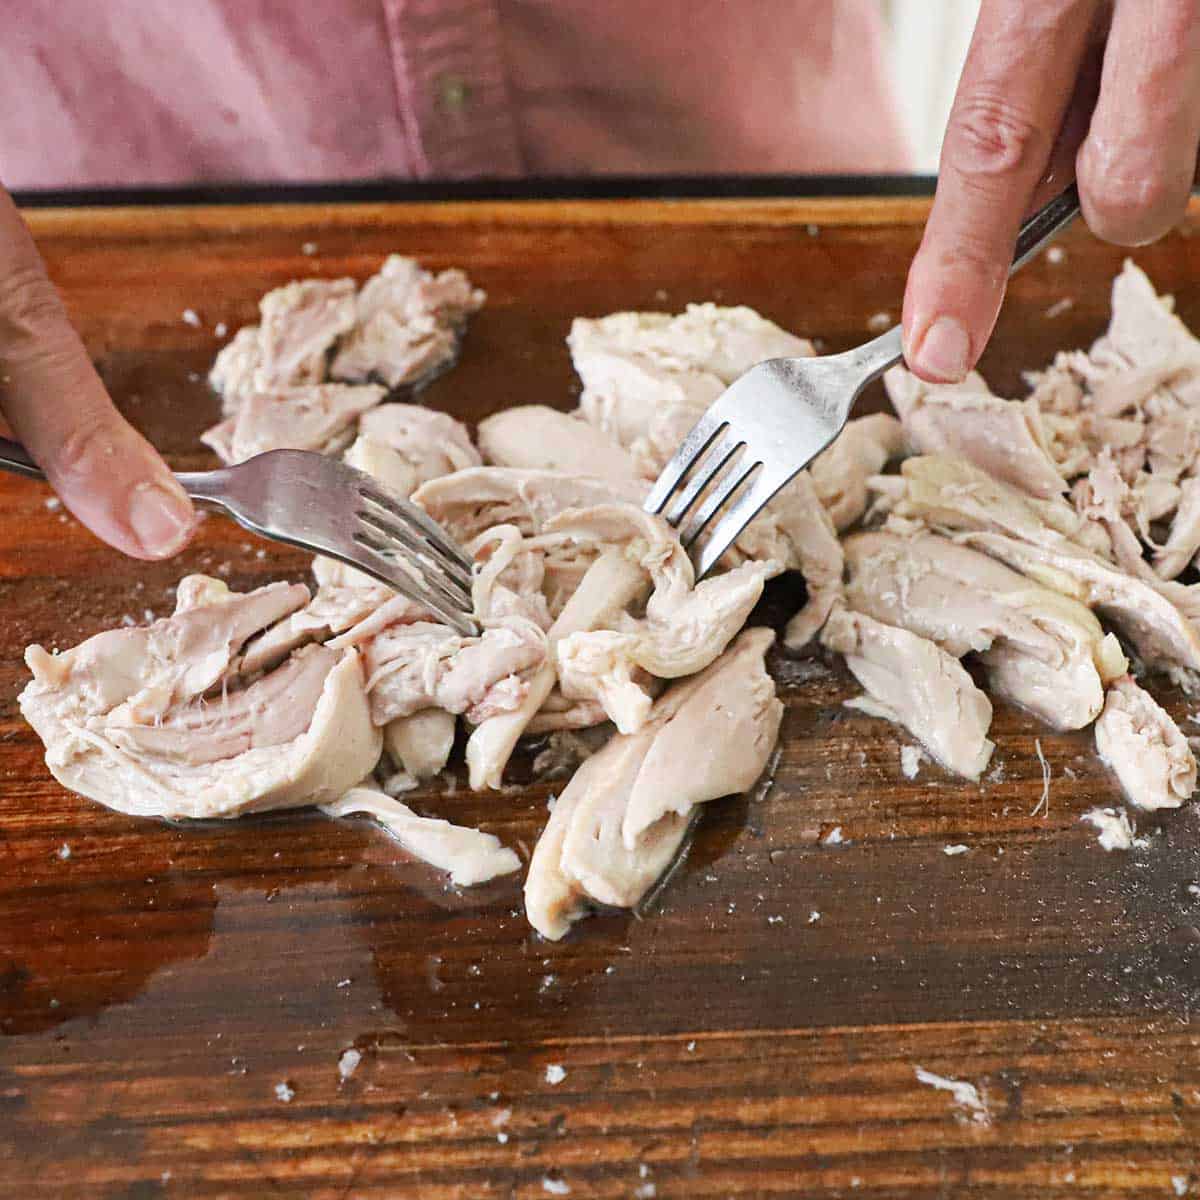
- Step 2: Remove the chicken and let it cool. Remove the skin and then shred the meat with two forks (or your fingers).
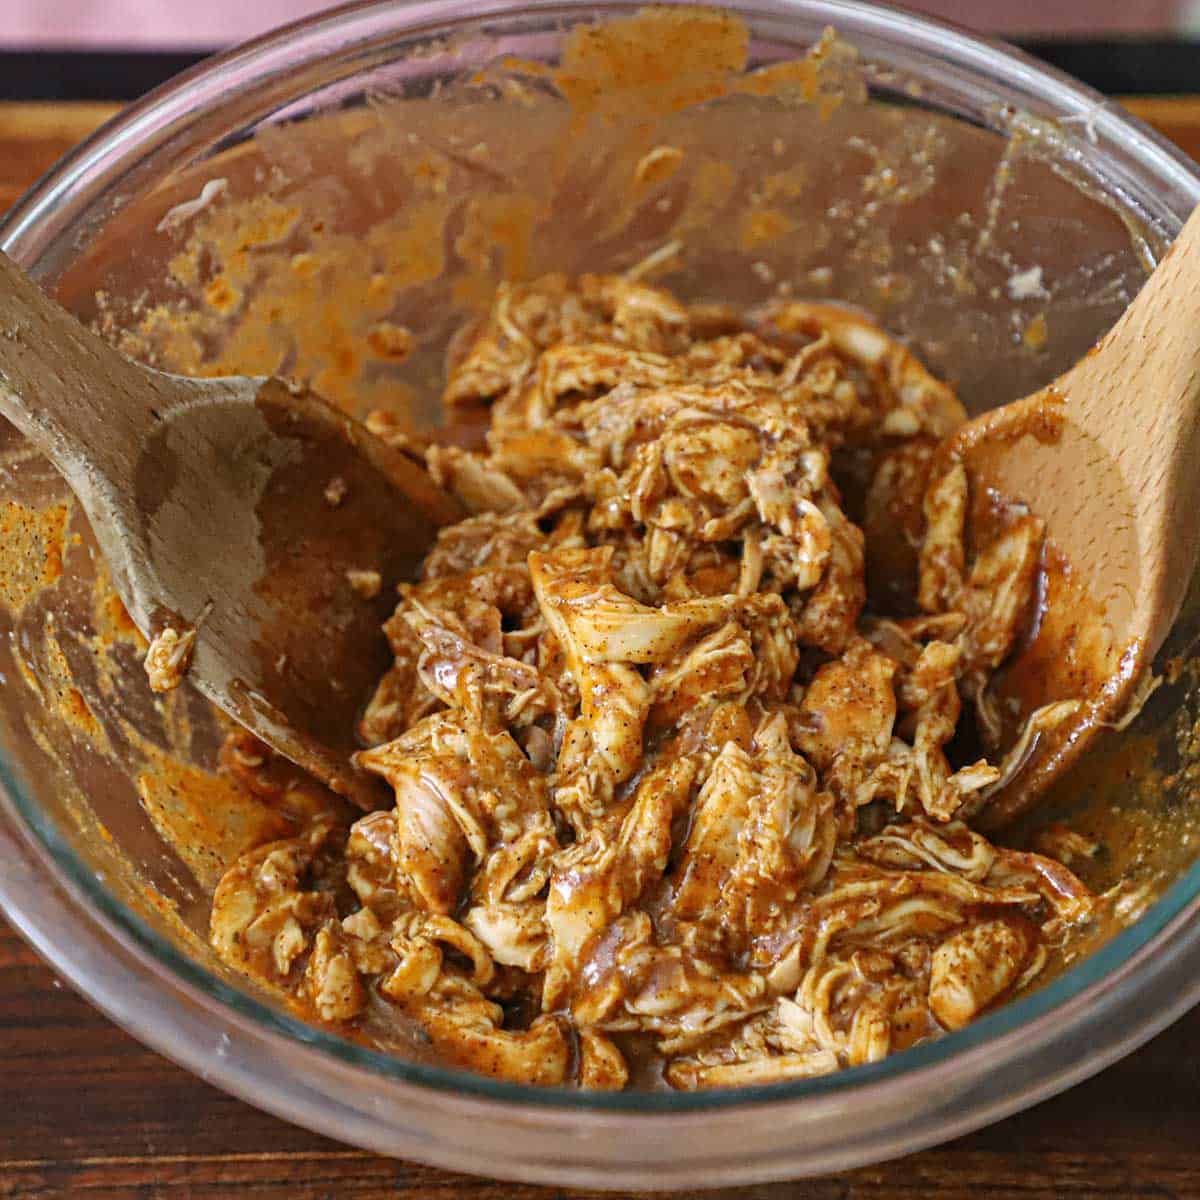
- Step 3: Toss the chicken with the red enchilada sauce, cumin, garlic powder, and salt.

- Step 4: Wrap the tortillas in damp paper towels and warm them in the microwave until pliable. Brush one side of each tortilla with a thin layer of vegetable oil.

- Step 5: Place the tortilla oil side down, and add a small layer of cheese on one half of the tortilla, topped with a small mound of chicken, and another layer of cheese.
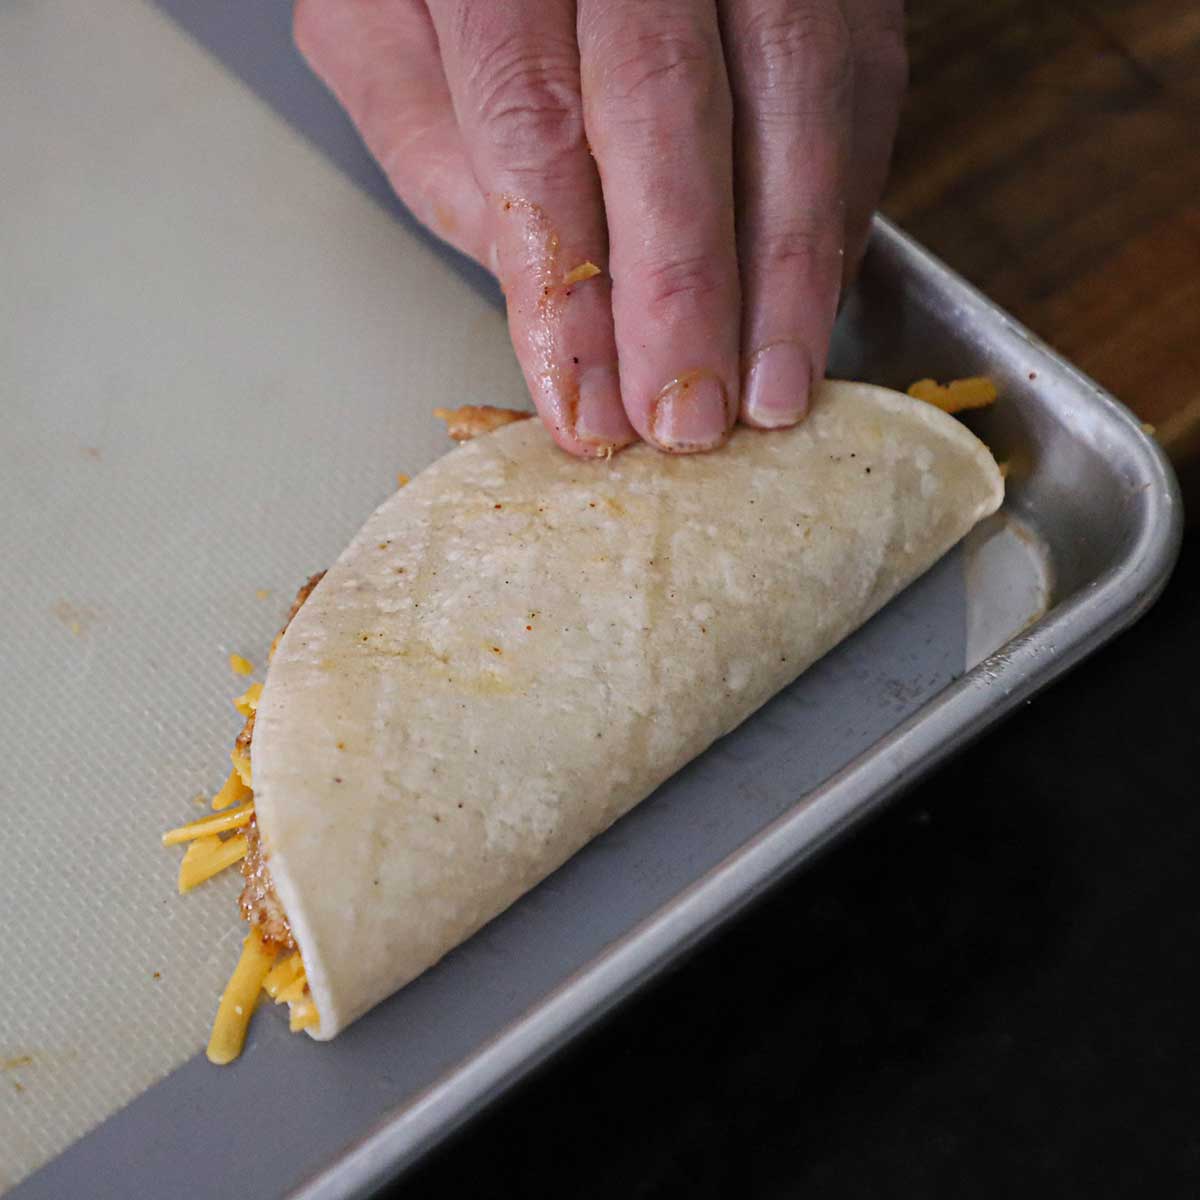
- Step 6: Fold the other half of the tortilla over and press it so it stays in place. Brush a little more oil over the top and add a sprinkle of coarse salt. Repeat with the remaining tortillas.
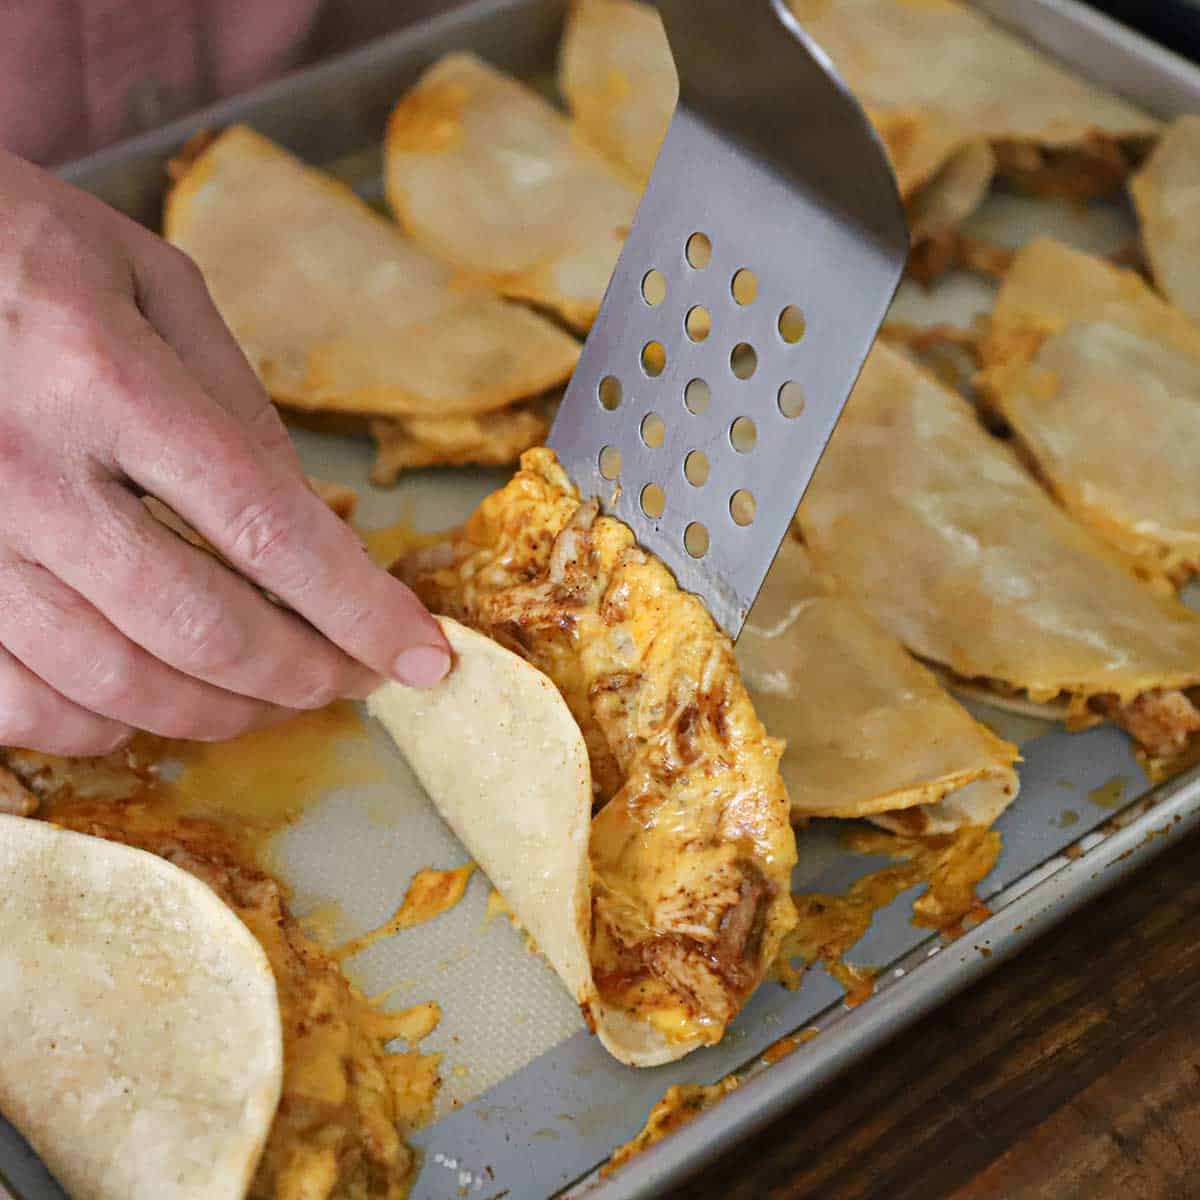
- Step 7: Bake at 425°F for 10 minutes. Remove them from the oven and use a spatula to carefully flip the tacos over.
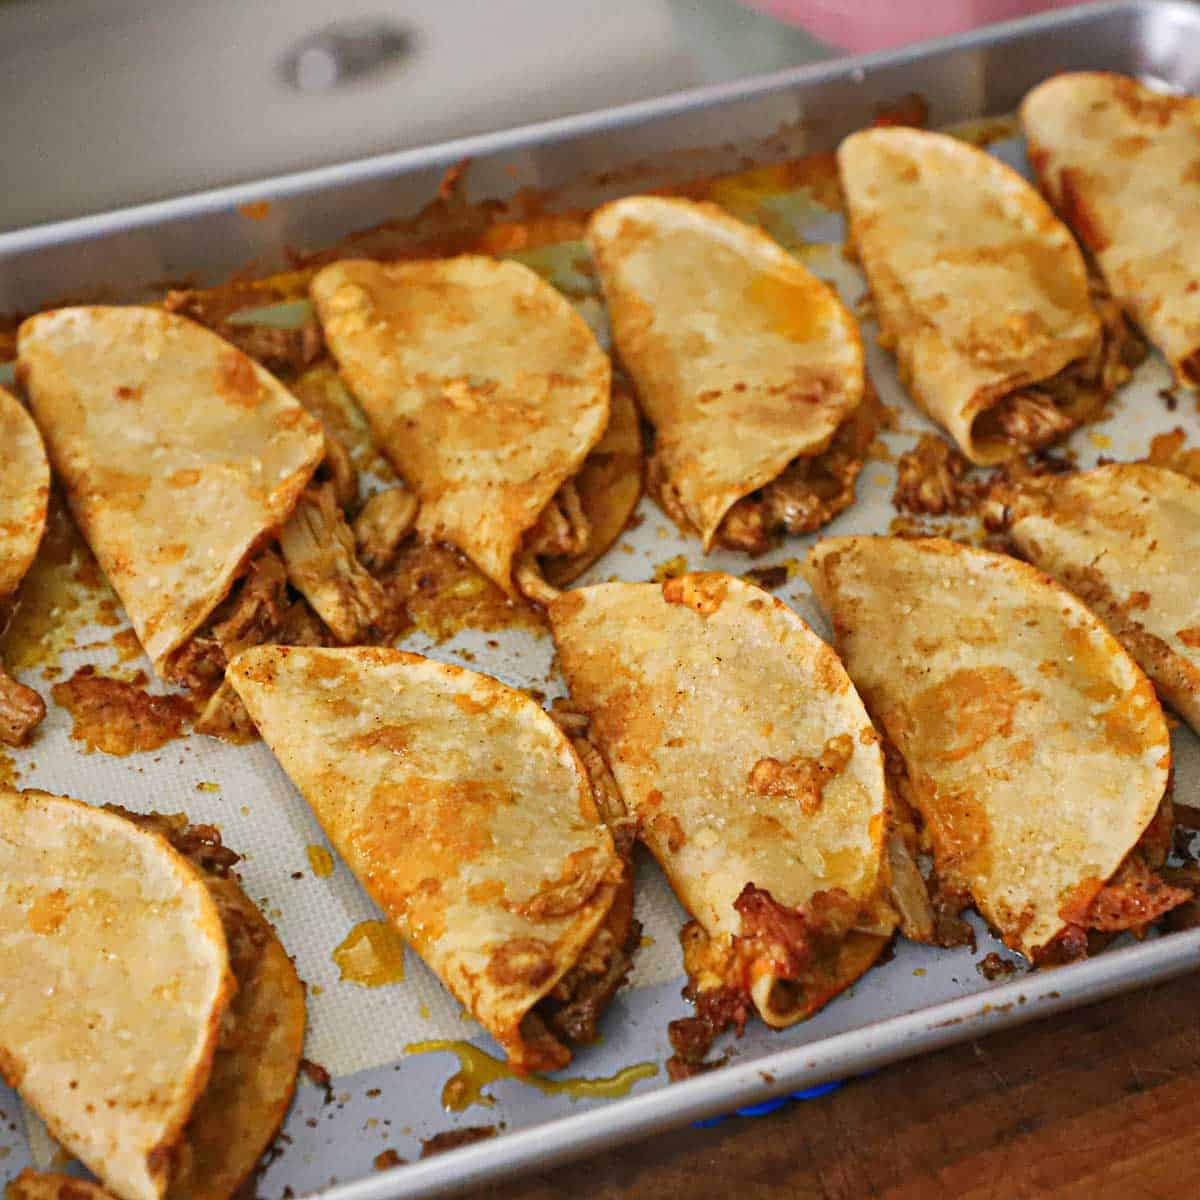
- Step 8: Bake for another 8 minutes, until crispy and dark on the edges. Remove from the oven and let them rest for 1 to 2 minutes. Serve at once with all the fixings!
Expert Tip
Don’t be alarmed if you see a little sauce or cheese escaping onto the baking sheet while they bake! Allowing the tacos to rest for a minute or two after they come out of the oven gives the tortillas a chance to absorb those flavorful drippings, ensuring the base is infused with the rich essence of the red enchilada sauce while still maintaining its signature crunch.
🍽️ How to Serve
- Platter Presentation: Arrange the tacos in a slightly overlapping row on a large wooden board or a bright white ceramic platter to make the golden-brown, blistered color of the tortillas truly pop.
- Dress the Tacos Directly: For a professional look, don’t just serve toppings on the side—scatter the chopped cilantro and spoonfuls of fresh pico de gallo directly over the tacos to create an immediate “visual wow.”
- Create a Dipping Station: Place small, individual ramekins of salsa, sour cream, fresh pico de gallo, and your extra homemade red enchilada sauce around the platter so guests can easily customize their level of creaminess and spice.
- The Finishing Zest: Tuck fresh lime wedges into the gaps between the tacos; the bright green color adds a beautiful contrast, and the citrus juice is essential for cutting through the richness of the cheddar and chicken.
- Serve While Hot: For the best experience, serve these tacos while the cheese is still melty and the shells are at their peak “oven-fried” crispness.
🙋🏽♂️ Frequently Asked Questions
You can certainly prepare the shredded meat and the red sauce up to two days in advance. However, for the best results, wait to assemble and put them in the oven until you are ready to eat so the shells stay perfectly crunchy.
To bring back the original texture, place them in an air fryer or a toaster oven at 350°F for about 3–5 minutes. Avoid using the microwave, as it will cause the tortillas to become soft and chewy rather than firm.
Yes, you can swap the corn for flour if you prefer. Just keep a close eye on the oven, as flour tends to brown much faster and will result in a softer, more “quesadilla-like” finish.
The secret is to create a barrier by sprinkling a layer of shredded cheese onto the tortilla before adding the saucy filling. This prevents the liquid from soaking into the base, ensuring the exterior remains toasted and crisp.
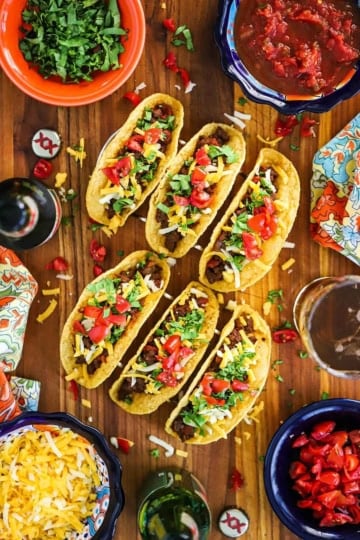
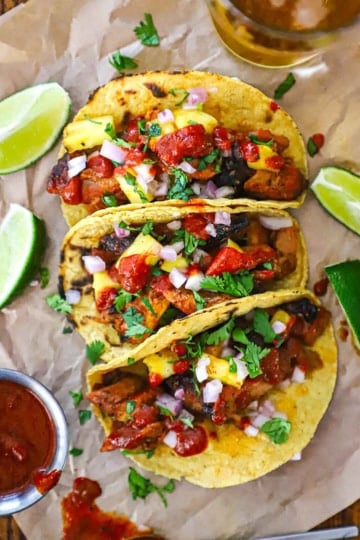
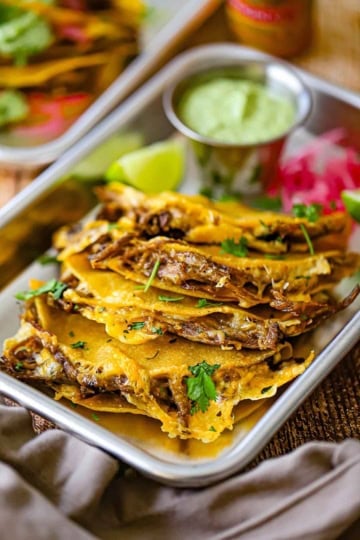
🌮 More Amazing Taco Recipes

Ready to make the best tacos in town? Go for it!
And when you do, be sure to take a photo of them, post it on Instagram, and tag @HowToFeedaLoon and hashtag #HowToFeedaLoon!

Crispy Baked Red Enchilada Chicken Tacos
Video
Equipment
- 1 large skillet with lid for poaching the chicken
- 1 Baking sheet lined with parchment paper (or silicone mat) is ideal, but not 100% required.
Ingredients
For the Red Enchilada Chicken Filling
- 5 chicken thighs skin-on, bone-in
- 1 large onion quartered
- 2 cloves garlic crushed (or minced)
- 2 teaspoon Kosher salt divided
- 1 cup red enchilada sauce click for the easy recipe
- 1 teaspoon ground cumin
- 1 teaspoon garlic powder
For the Tacos
- 12 corn tortillas white or yellow
- 3 tablespoon vegetable oil
- 2 cups cheddar cheese shredded
- sea salt
- fresh cilantro chopped, for garnish
- lime wedges for serving (optional)
- pico de gallo for serving (optional)
- salsa for serving (optional)
- sour cream for serving (optional)
Instructions
Do Ahead – Up to 2 Days
- Make the red enchilada sauce (click the link above)1 cup red enchilada sauce
Prepare the Chicken Filling
- Place the chicken, skin side-up, in a large skillet (with a lid). Fill with water until the chicken is just barely covered. Nestle the onion wedges around the chicken, add the crushed (or minced) garlic, and 1 teaspoon salt. Bring to a boil, lower the heat, cover, and simmer for 17 to 20 minutes.5 chicken thighs, 1 large onion, 2 cloves garlic, 2 teaspoon Kosher salt
- Use a slotted spoon to remove the chicken from the skillet onto a cutting board. Once cool enough to handle, remove the skin. Use two forks (or your fingers) and remove the meat. Shred and place in a large bowl. You should have about 3 to 4 cups of shredded chicken.
- Add 1 cup of the enchilada sauce, cumin, garlic powder, and 1 teaspoon salt. Toss with a wooden spoon until fully coated. Set aside.1 teaspoon ground cumin, 1 teaspoon garlic powder
Make the Tacos
- Preheat your oven to 475°F.
- Wrap the tortillas in damp paper towels and microwave for 30 to 40 seconds (this makes them pliable and easy to bend without cracking).12 corn tortillas
- Lightly brush one side of a tortilla with oil. Place it oil-side-down on the baking sheet (preferably lined with parchment paper or a silicone mat). On one half of the tortilla, add a sprinkle of cheese, a generous scoop of chicken, and another sprinkle of cheese on top. Fold the tortilla over and press down to "lock" the taco. Repeat with the remaining tacos. You should have 12 to 14 tacos.3 tablespoon vegetable oil, 2 cups cheddar cheese
- Brush the tops of the folded tacos with a bit more oil and sprinkle with a pinch of sea salt.sea salt
- Bake for 8 to 10 minutes, until starting to get crispy on the edges of the tortillas. Remove the pan from the oven and use a spatula to carefully flip the tacos over. Return the pan to the oven and bake for another 8 minutes. Remove from the pan and let them sit, untouched, for 1 to 2 minutes.
- Place the tacos on a platter and garnish with chopped cilantro and lime wedges. Serve with pico de gallo, salsa, and sour cream, if desired.fresh cilantro, lime wedges, pico de gallo, salsa, sour cream
Notes
- Shred Your Own Cheese: For the best melt and a truly professional look, shred your cheddar fresh from the block. Pre-shredded cheeses are coated in anti-caking agents (like potato starch) that prevent them from melting smoothly and can result in a “grainy” texture.
- The Resting Period: Allow the tacos to rest for 2 minutes before serving. This brief pause lets the tortillas absorb any flavorful sauce that may have leaked during baking, ensuring every bite is infused with the red enchilada seasoning.
- Don’t Skip the Steam: Warming the white corn tortillas in a damp paper towel is essential. This makes them flexible enough to fold without cracking, ensuring your tacos look beautiful and stay intact.
- Make-Ahead Tip: You can poach the chicken and prepare the red enchilada sauce up to 3 days in advance. Store them separately in the fridge and simply assemble and bake when you’re ready for dinner!
Diane says
Hi Guys! I made these and they were absolutely fabulous. I added a few green chilis to the mix but otherwise followed the recipe exactly. What’s Tex-Mex without a few green chilis LOL. The homemade red enchilada sauce is really something worth making as well. Thumbs up from the hubs. I strained and saved the yummy poached broth to use it in the future. Cant toss that goodness out! Next on the list with be the creamy shrimp enchiladas. Be well my friends 🙂
Kris Longwell says
Diane!! It’s so great to hear from you! Green chilis is always a GREAT addition!!! We always appreciate you letting us know and for the fantastic reviews!!! Keep us posted on those shrimp enchiladas!! We think you’re going to love them!! xo Kris & Wesley
Jennifer Lopez says
I love how baked versions keep things lighter but still really satisfying and crunchy. So good!
Kris Longwell says
Us too!
Elizabeth Lowrie says
I Love Mexician FOODS
Kris Longwell says
Us, too!!!! We hope you try the tacos and when you do, be sure to let us know what you think!
Sharon Williams says
I love your blog. Do you have a cookbook yet. ? I want to buy one. Thank you very much.
Sharon Williams
Kris Longwell says
Thank you so much, Sharon! That means the world to us! We are working on getting a cookbook published! Thanks for your interest and we’ll definitely keep you posted!
Beth says
How many are considered one serving (i.e., are the nutritional facts you included per taco)?
Kris Longwell says
Hi Beth, the nutritional info is for 1 serving, which is 3 tacos. Let us know if you make them and what you think!
Frances Sanchez says
Delicious!
Kris Longwell says
Thank you, Frances!!!
Wesley says
AMAZING!
Kris Longwell says
Woo hoo!!!