

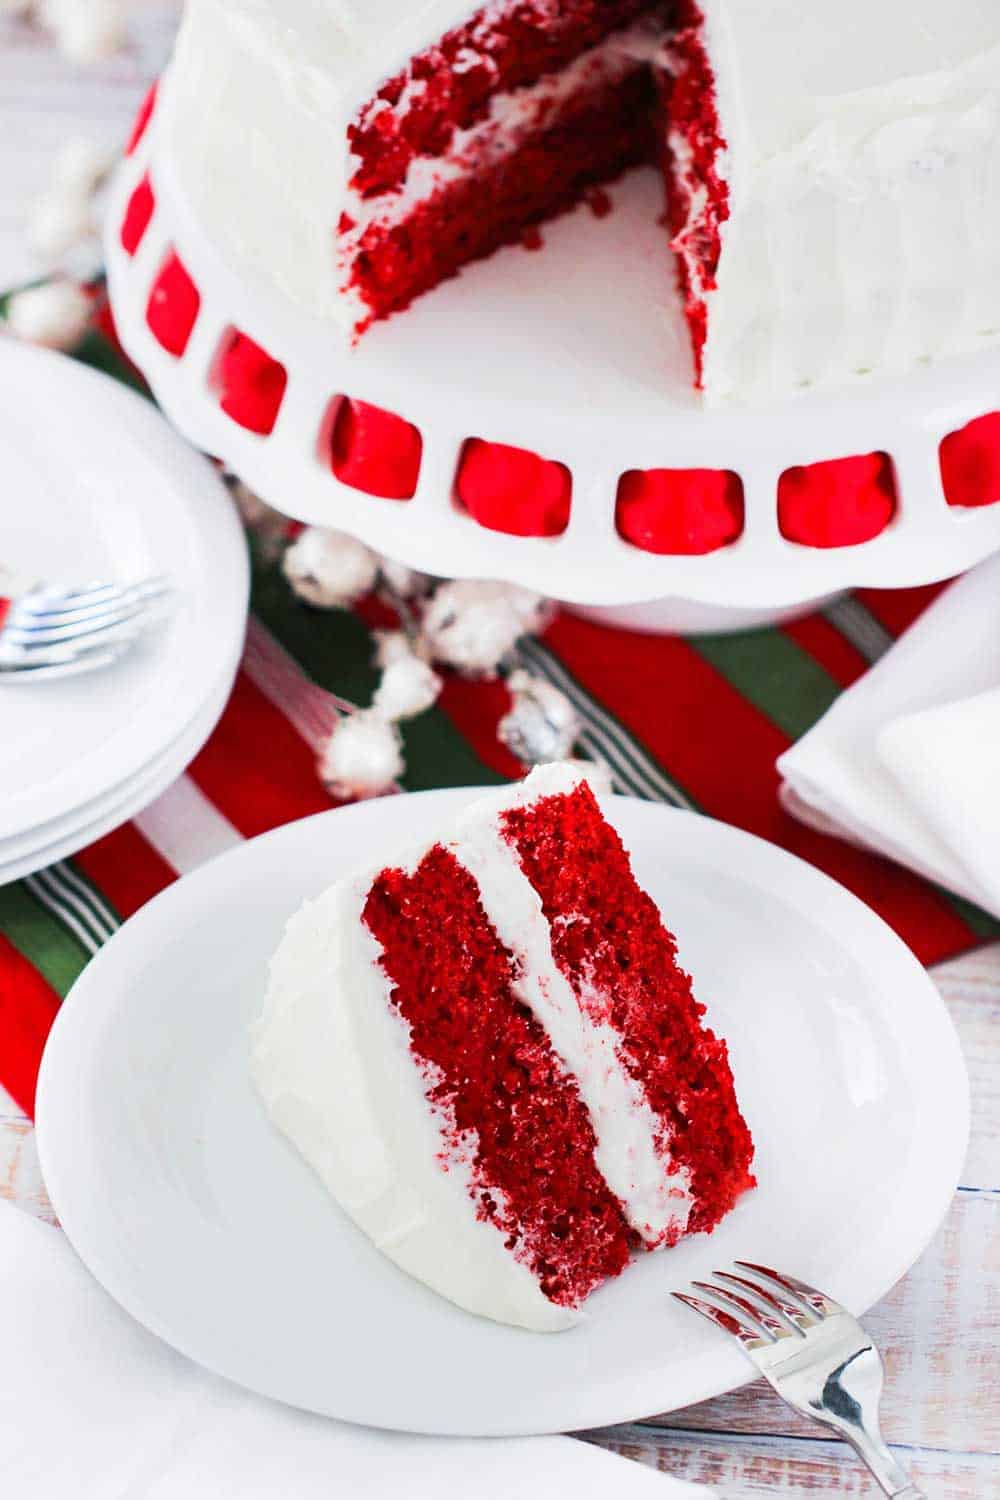
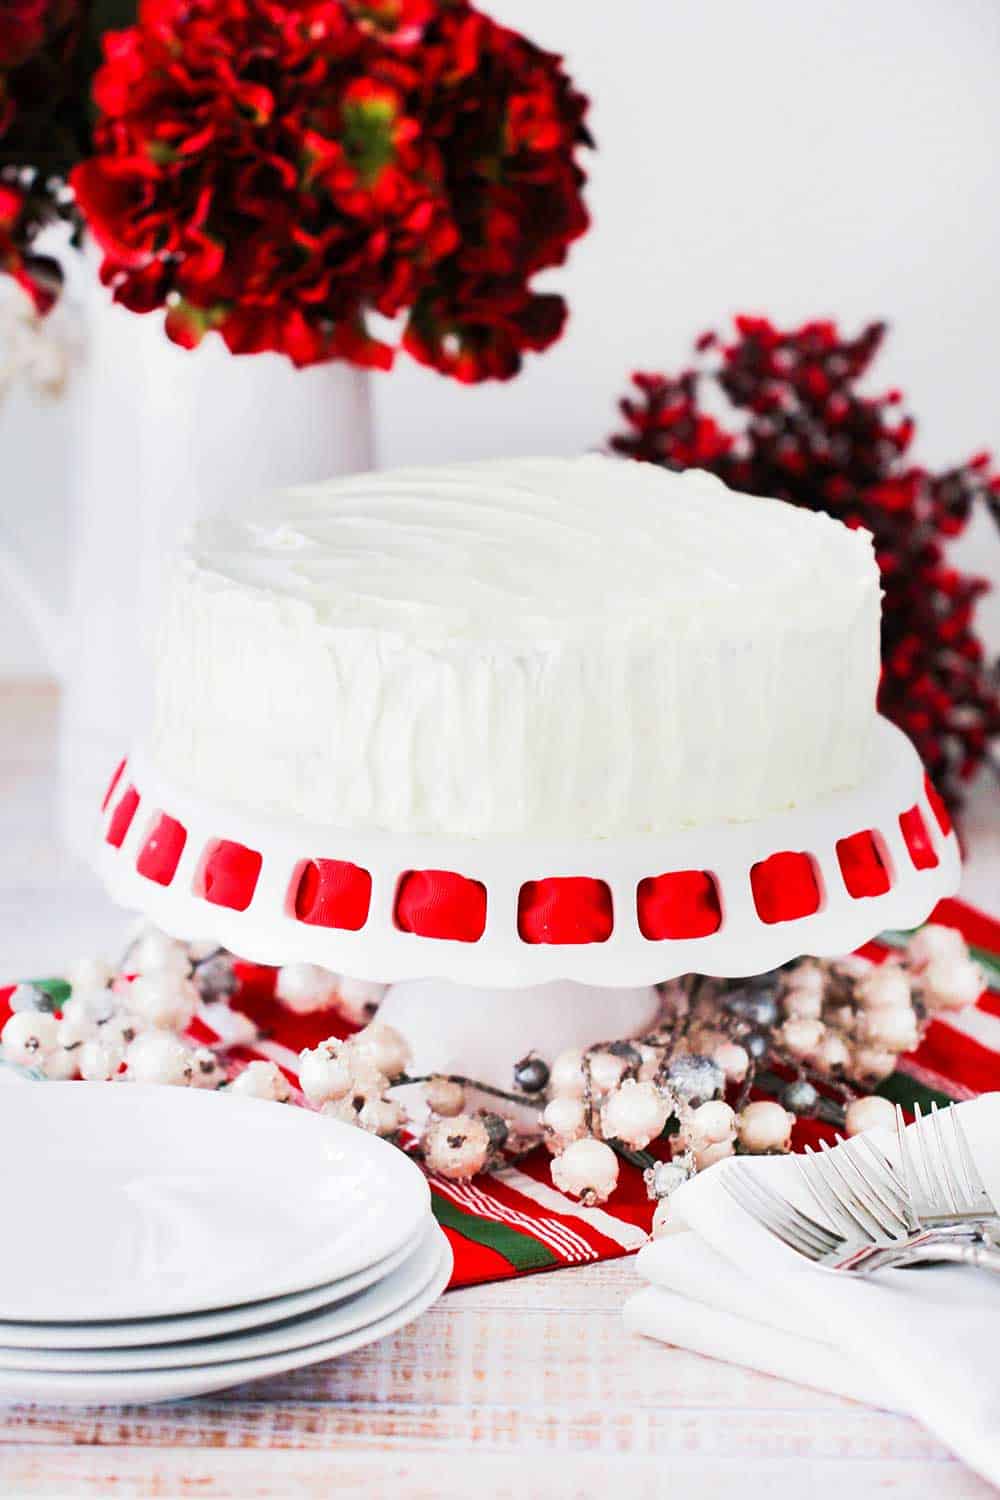
Was there ever a more festive and delicious cake? We’re pretty sure not.
This cake is honestly as delicious as it is stunning in appearance. The perfect holiday dessert. We offer two different types of icing: the traditional cream cheese frosting, and my grandma’s amazing silk sugar icing.
HOW TO MAKE RED VELVET CAKE
Folks, if you’ve been looking for an easy red velvet cake recipe, you’ve come to the right place.
Give yourself an hour or so, and you’ll have this beautiful dessert ready to serve for holiday entertaining, and beyond!
Watch us show you how to make this classic cake in your own kitchen!
PREPARING THE BATTER
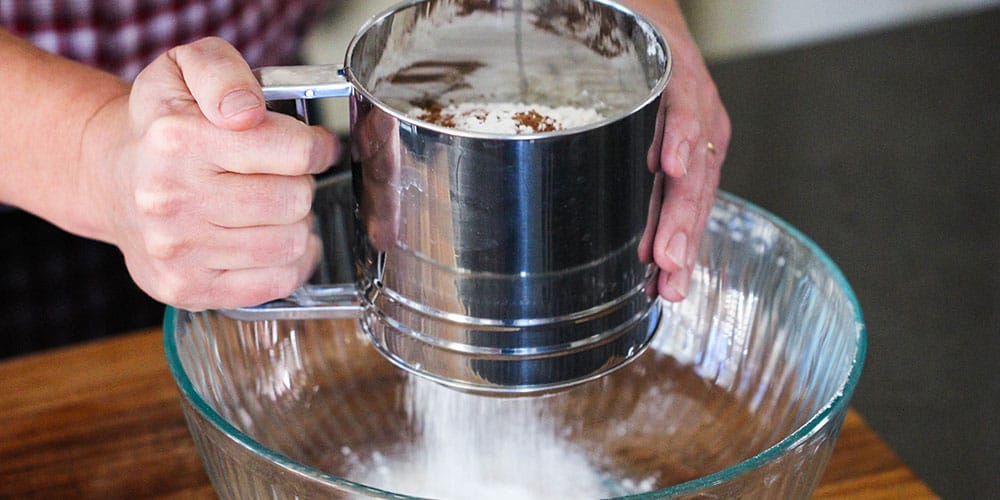
We absolutely love using cake flour when bringing together the batter. It is a much finer flour, with low protein content, which simply means there won’t be as much gluten in the cake. This will result in a moist, yet “spongy” cake.
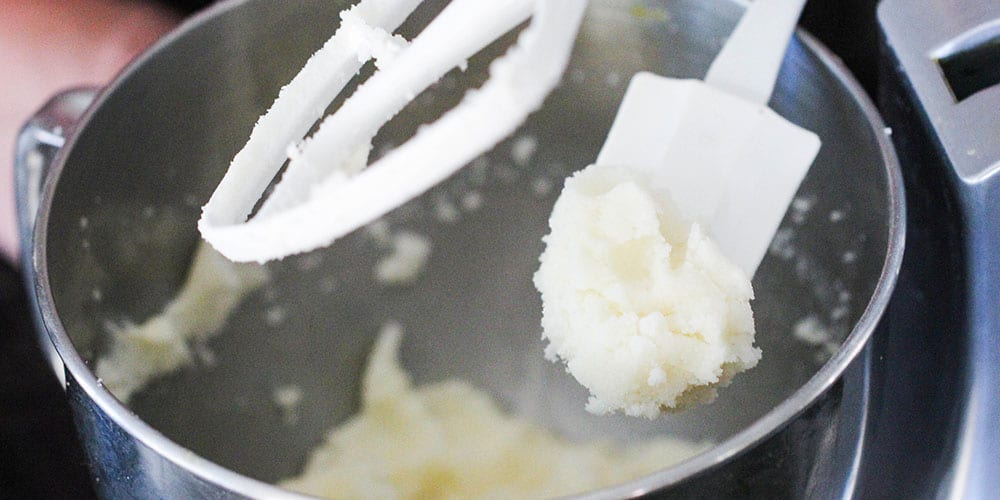
Creaming the butter with the sugar simply means beating the two ingredients together until they are completely incorporated, and a light, pale yellow color. It won’t resemble cream, which can be confusing with the term: “Creaming.” (See middle photo below)
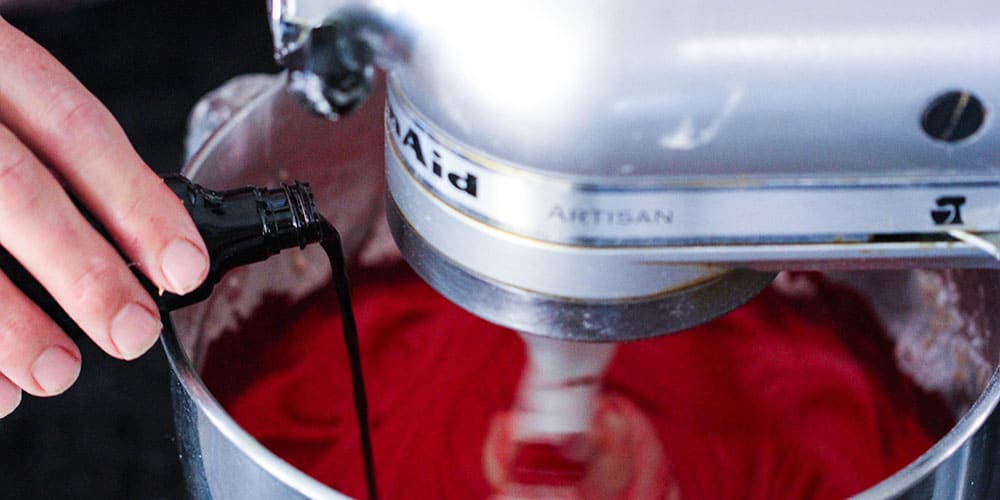
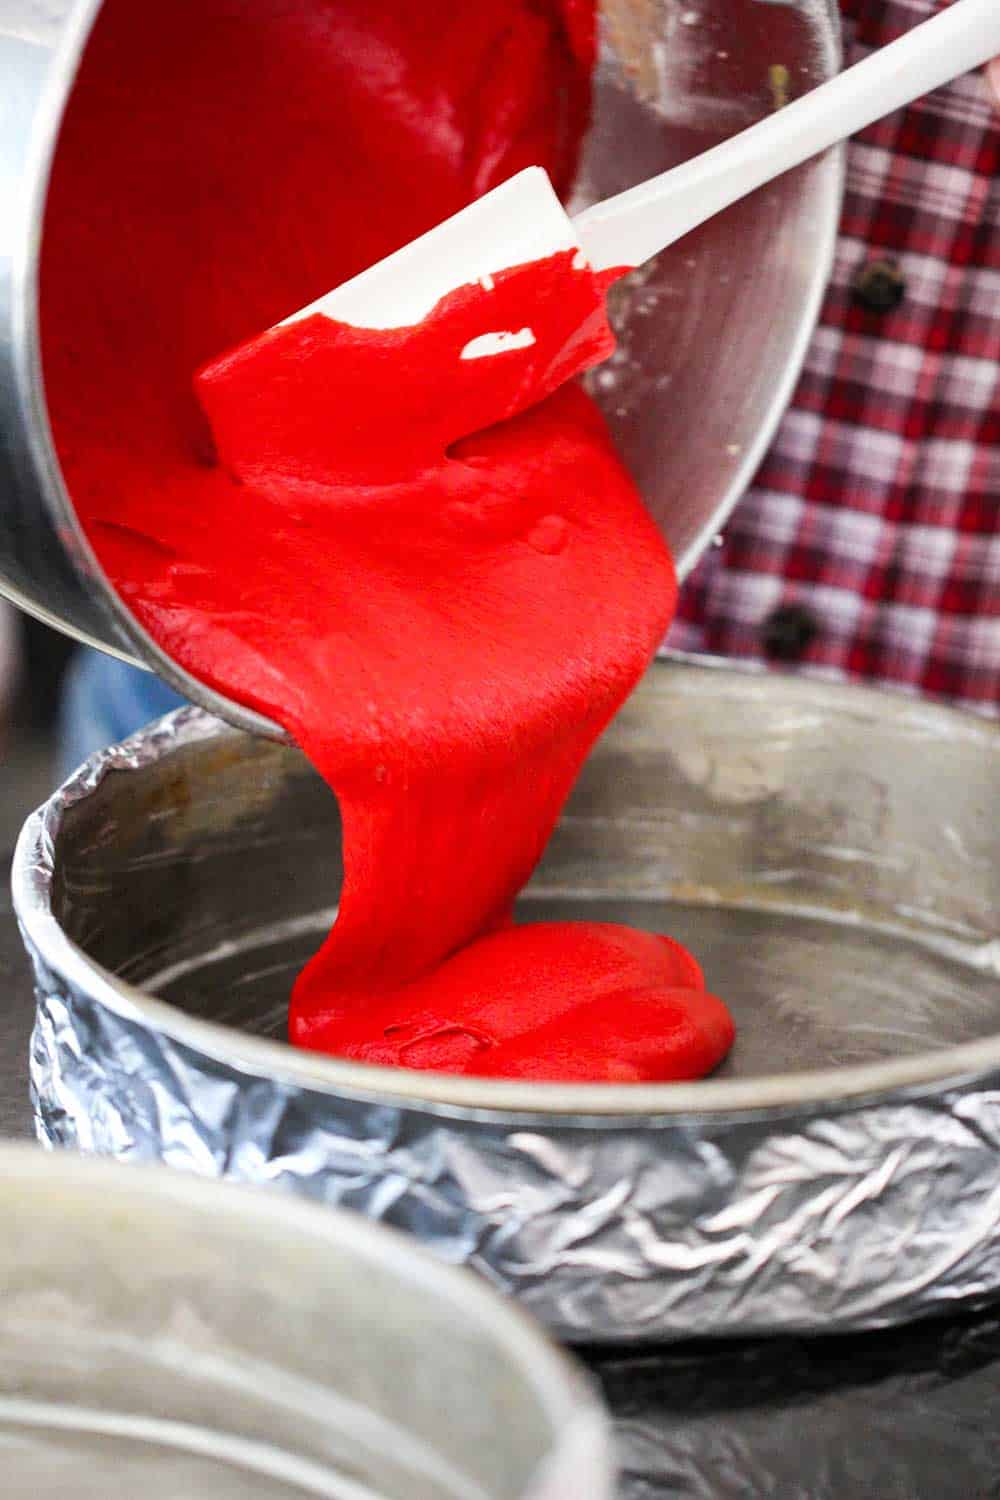
2 ounces of red food coloring is what brings the deep, gorgeous red color.
EXPERT TIP: Sifting the cake flour with the other dry ingredients helps to ensure they are completely combined and reduces a lumpy batter. If you don’t have cake flour, simply use all-purpose flour minus 2 tablespoons, with the addition of 2 tablespoons of cornstarch. The flour won’t still be as fine as cake flour, but the cornstarch inhibits gluten, which will produce the desired cake texture.
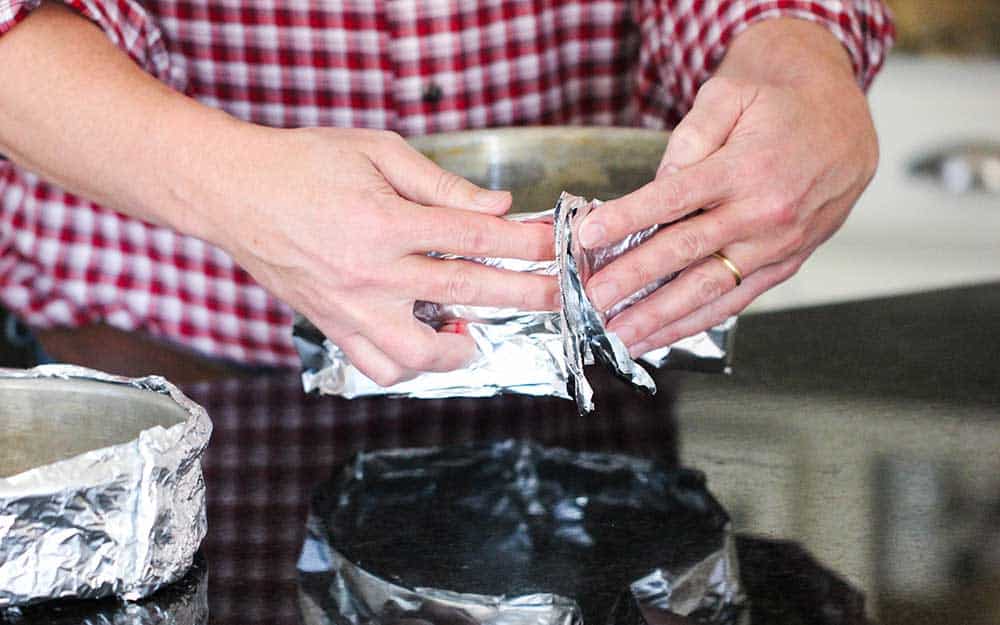
HOW TO MAKE BAKING STRIPS
This technique is not 100% necessary, but it really does allow the cake to bake evenly and prevent the dough from doming (or rising in the middle). Without them, we find that the edges of the cake are somewhat dried out, and the center rises upwards, making for a less flat cake.
Simply take two pieces of foil, about 2 feet in length, each. Now, roll the same length of paper towels (2 sets) and then quickly submerge them in water. Carefully unfold the damp towels and then place them on the foil, one on each piece of foil.
Fold one side of the foil over, lengthwise, halfway. Next, fold the other side over, and seal, forming a strip. Shape the foil strip around the sides of each pan. Where the two ends meet, press them together and then fold to one side. Tuck the excess foil strip on the bottom side of the pan. (See video for reference).
BAKING THE RED VELVET CAKE
Once the batter has come together, it’s time to bake the cake!
We use two 9-inch cake pans to make two layers of the cake. However, for a more dramatic presentation, you can divide the batter evenly in three, or even four pans, for a multi-layered cake!
EXPERT TIP: When finishing the cake with the icing, you’ll want the cake layers to be as flat on top and bottom as possible. The baking strips (as described above) will allow for that. You’ll also want the sides of the cake to be straight up and down, not beveled. To achieve this, you’ll want to bake the cakes in 9-inch straight-edge pans that are at least 1½-inches tall.
REMOVING THE CAKE FROM THE PANS
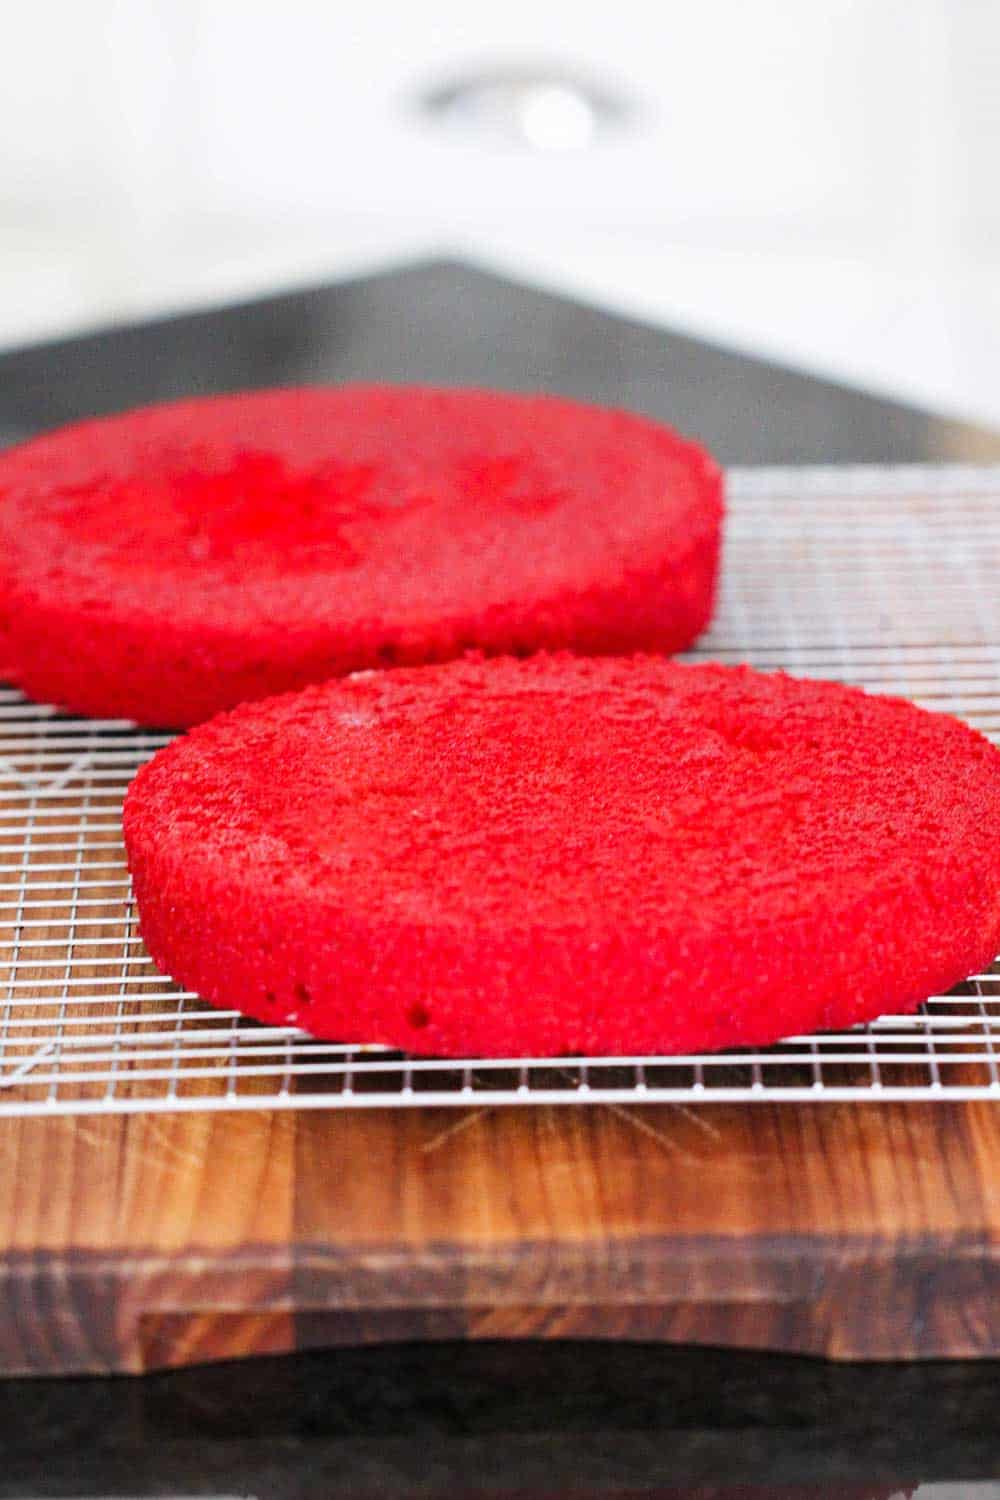
After the cakes are finished cooking, let them rest for about 10 minutes on a baking rack.
Take a sharp knife and carefully run it along the edges of the pan, just to ensure the cake doesn’t stick to the sides. Invert the cakes onto the rack, and use the back end of a knife, or fork, to tap the bottom of the pan all over. Carefully lift the pans from the cakes. If some of the cake sticks a little to the pan, no worries, the icing will cover any blemishes.
EXPERT TIP: Insert a clean toothpick into the middle of the cake when the bake time is nearly complete. If there is still wet batter clinging to the toothpick once removed, the cake needs more time to bake. If it comes out clean (a crumb or two may stick to the toothpick, which is fine), then the cake is ready!
RED VELVET CAKE ICING
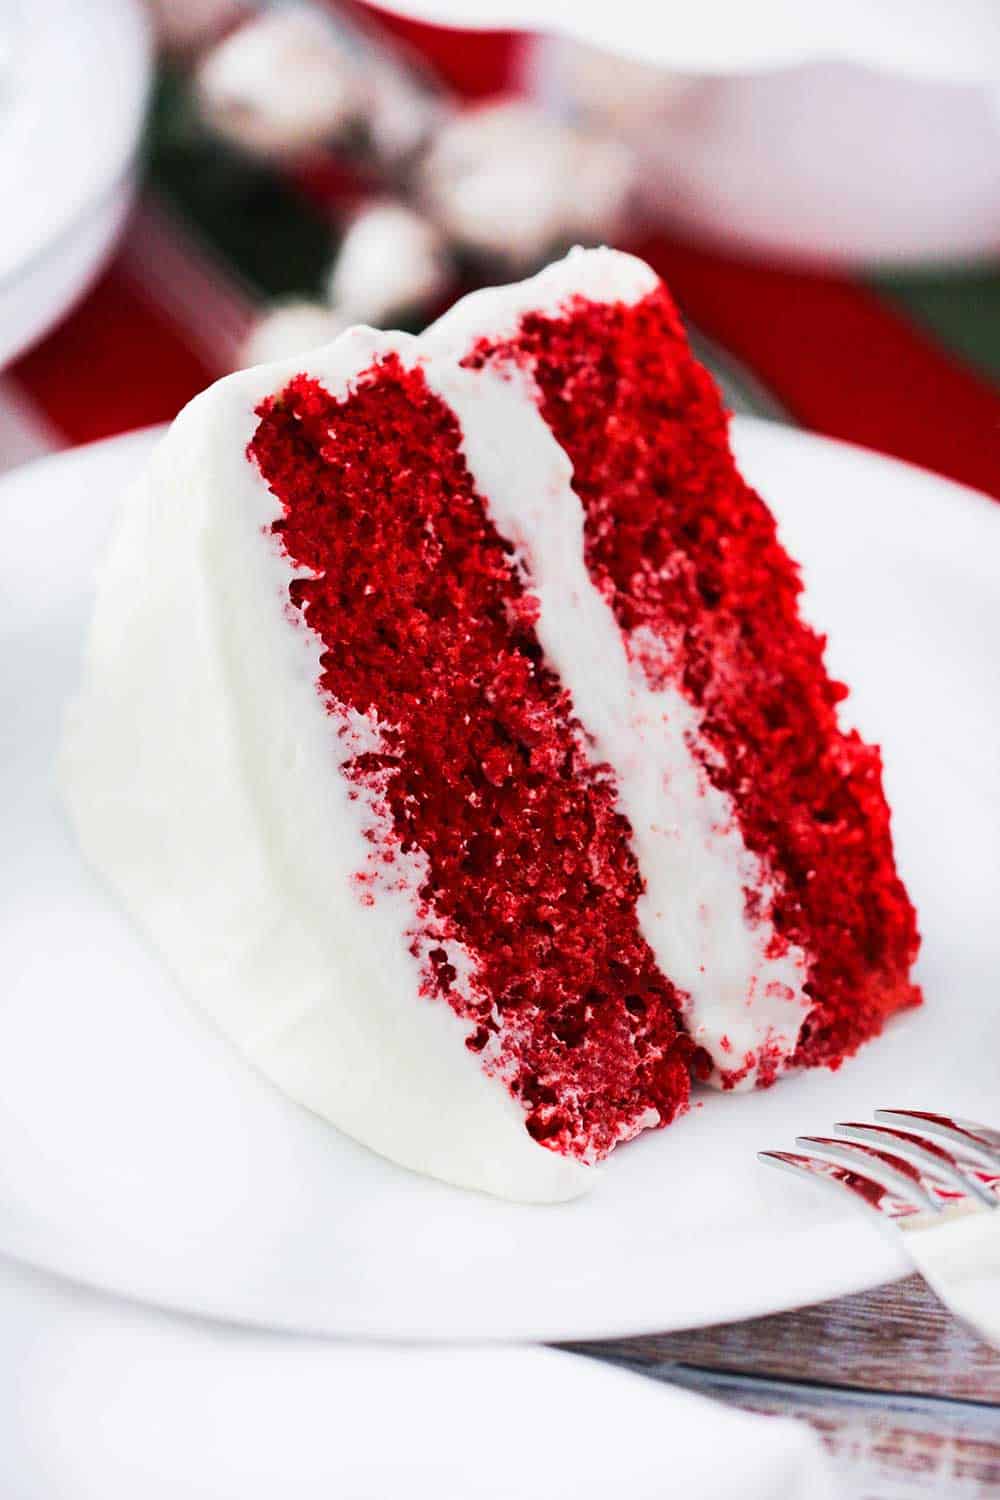
The cake has a touch of chocolate in the batter, which is wonderful. This is the perfect match for a traditional cream cheese icing.
My grandma (Erma Summers) always had red velvet cake every Christmas. It is one of my fondest memories of the holiday and of her. She was as sweet as her icing.
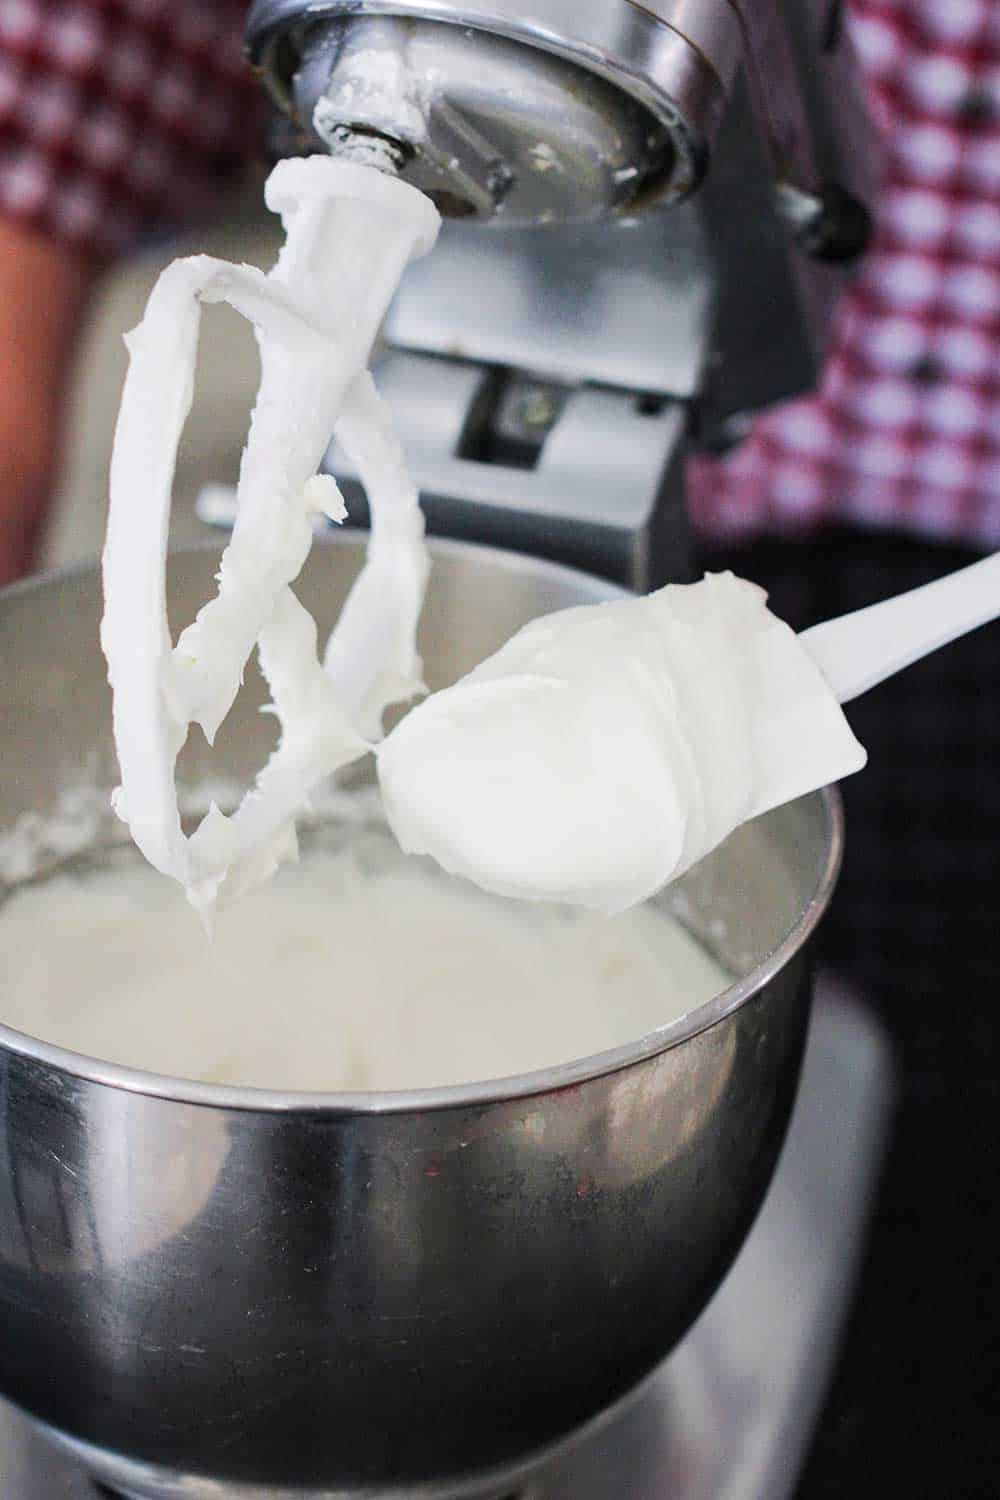
She iced the cake with a silky sugar icing that I have never seen or tasted on any other dessert in my life. It is truly sublime. We’ve included both the cream cheese and the silky sugar recipe in the recipe card.
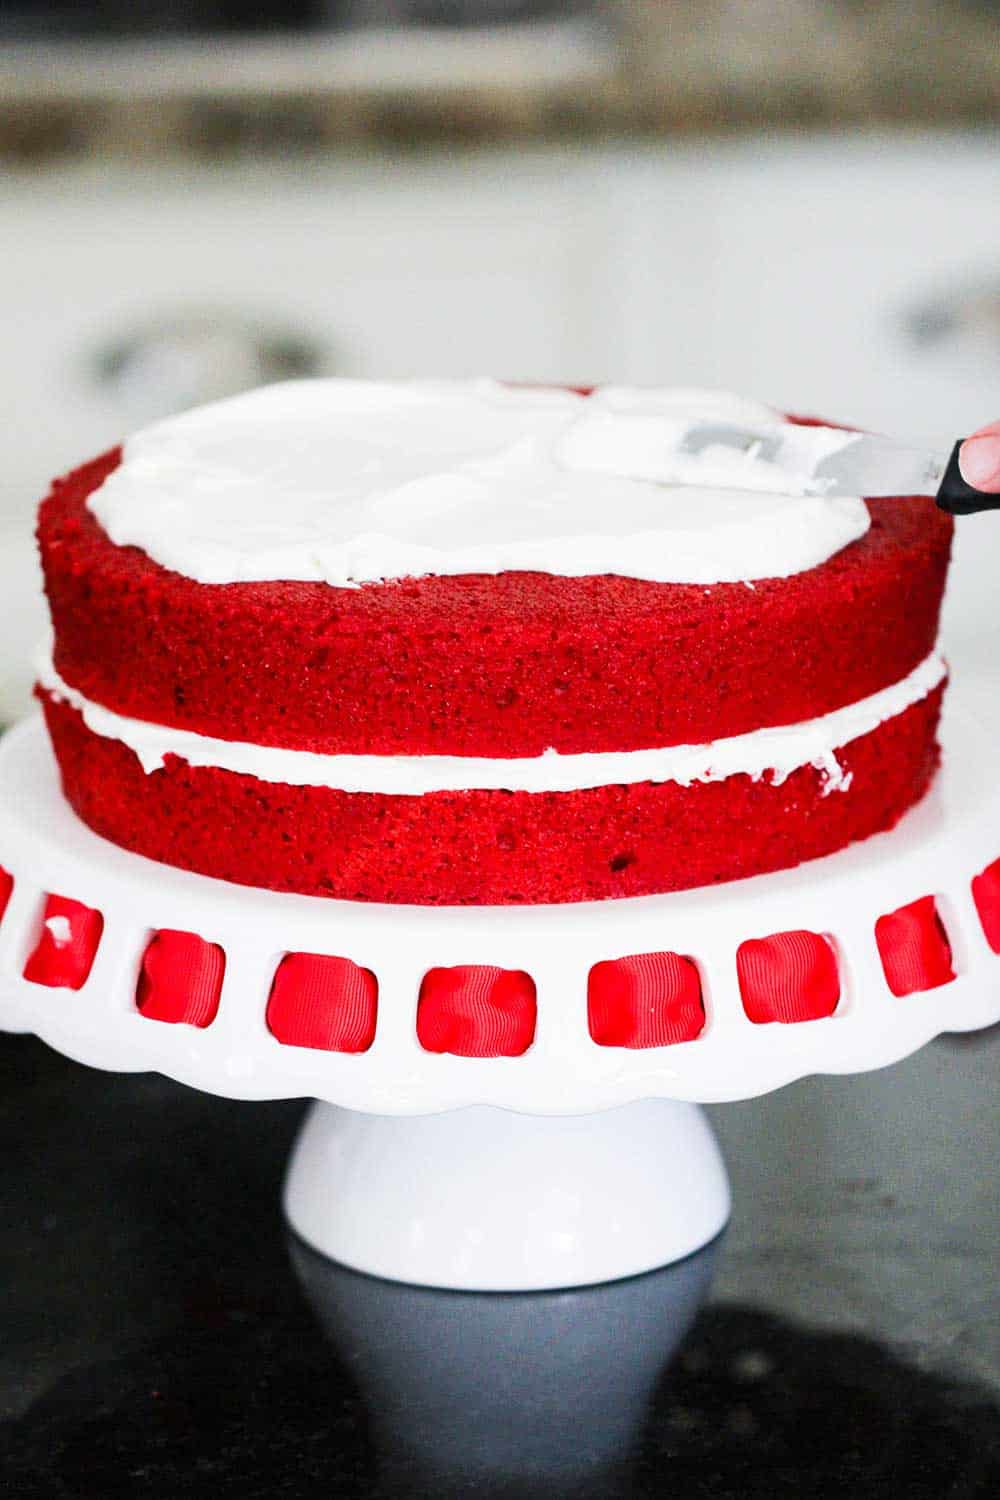
THE ICING ON THE CAKE
We think this cake deserves a good, thick layer of icing, whether it’s the cream cheese or the silky sugar icing.
We recommend starting with a thin layer in the middle, then add another layer. And then follow the same technique for the tops and the sides.
Use a straight edge spreader, if possible, this will reduce the chance for the cake to crumble and mix in with the icing.
THE PERFECT HOLIDAY DESSERT
There are so many reasons to celebrate this glorious cake.
It’s delicious. It’s festive. It the perfect Christmas dessert.
And the cake can be made up to two days before serving, just be sure to keep covered, if possible.
During the holiday season, we also love serving our amazing Holiday Chocolate Toffee, Christmas Gingerbread Cake, and Naughty and Nice Spiced Nuts!
Sometimes instead of serving a red velvet cake, we make a batch of Red Velvet Sandwich Cookies! They are amazing!
But, hands down, our most beloved holiday dessert is this incredible cake! With a cold glass of milk, it just doesn’t get much better than that!
Ready to make the most festive cake of them all this Christmas? Go for it!
And when you do, be sure to take a photo, post it to Instagram, and tag @howtofeedaloon and #howtofeedaloon!

Red Velvet Cake
Video
Equipment
- 2 straight-edge cake pans, with foil strips on the outside (see post and video for explanation)
Ingredients
FOR THE CAKE
- 2 ¼ cups cake flour
- 2 teaspoon cocoa powder
- 1 teaspoon baking soda
- 1 teaspoon baking powder
- 1 teaspoon salt
- 1 ½ cup sugar
- ½ cup unsalted butter 1 stick, softened, plus a little more for greasing the pans.
- 2 large eggs
- 1 cup buttermilk
- 2 oz red food coloring
- 1 teaspoon white vinegar
- 1 ½ teaspoon vanilla
CREAM CHEESE FROSTING
- 8 oz cream cheese room temperature
- ½ cup unsalted butter 1 stick, room temperature
- 3 cups powdered sugar
- 1 teaspoon vanilla extract
- ¼ teaspoon salt
GRANDMA SUMMERS' SILKY SUGAR ICING
- 5 teaspoon flour
- 1 cup milk
- 1 teaspoon vanilla
- ¾ cups softened unsalted butter 1½ sticks - room temp
- 1 cup sugar
Instructions
MAKE THE CAKE
- Preheat oven to 350°F.
- Liberally grease the pans with butter (or shortening), and then dust with flour. Tap the pans to remove excess flour.
- In a medium bowl, sift the flour, cocoa, baking soda, baking powder, and salt together. Set aside.
- In a large mixing bowl, cream (beating on medium) the sugar with the butter until fluffy and a pale yellow, about 3 to 5 minutes.
- Beat in the eggs, one at a time.
- Add ⅓ of the flour mixture. Mix until combined. Next, add ½ of the buttermilk, then another ⅓ of the flour mixture. Next, the other half of the buttermilk, and then the rest of the flour mixture.
- Beat in the food coloring, and vinegar, then add the vanilla
- Spread the batter into the prepared pans.
- Bake for 25 to 30 minutes, or until a toothpick inserted in the center comes out clean.
- Cool on a baking rack for 10 minutes. Use a sharp knife to loosen the edges of the cake from the sides of the pan. Invert the pans and tap on them with the end of a knife or fork to help release the cakes. Carefully remove the pans. Let cool completely on the rack before icing.
CREAM CHEESE FROSTING
- Beat cream cheese and butter in large bowl until smooth.
- Beat in powdered sugar, vanilla, and salt. Continue beating for about 2 to 3 minutes, until smooth and creamy.
GRANMA SUMMERS' SILK SUGAR ICING
- Mix flour, milk, and vanilla in a medium saucepan and cook over medium heat until thick, stirring often.
- Remove from heat, and cool completely in the refrigerator.
- While the mixture is cooling, in a stand mixer (or with a hand mixer), beat 1 ½ sticks of softened butter and sugar.
- Add the cooled flour/milk mixture to the creamed butter-sugar mixture.
- Beat until fluffy. Cool in the refrigerator until ready to frost the cake.
Notes
- 12 ounces cream cheese (1 & ½ bars)
- 12 tablespoon softened butter (1 & ½ sticks)
- 4 ½ cups powdered sugar (aka: confectioner's sugar)
- 1 ½ teasoon vanilla extract
- ½ teaspoon salt
Nutrition
POST UPDATE: This recipe was originally published in December 2014 and was updated with a few improvements to the recipe and new photography and a fabulous new video.


Vickie says
I am in the middle of making Grandma Summer’s white silky icing . I noticed that you have 1 1/2 cups but you also have 1 1/2 sticks. Which one is correct? 1 1/2 cups equals 3 sticks of butter. Please let me know as soon as you can.
Vickie says
Please check, should it read 5 tsp or 5 TBSP of flour. Most recipes for the same amount of flour, milk and sugar require 5 TBSP.
Kris Longwell says
Hi Vickie! It should be 1 1/2 sticks of butter (3/4 cup: NOT 1 1/2 cups). And the 5 tsp measurement is correct. I double-checked my grandma’s actual recipe, which we’ve made many, many times and it is 5 tsp. So sorry for any confusion, and we hope everything turns out okay!!! Let us know!!
Trish says
Thank you for the silky frosting recipe. I have been looking for just that recipe for a long time. This is the best–not too sweet. Your red velvet cake is delicious also, but for me the crowning glory is the silky frosting.
Kris Longwell says
Hi Trish! We are so thrilled you enjoy that frosting, too. It has been my favorite since I was a little kid. Thank you so much for letting us know, that really means so much to us. All the best, Kris & Wesley
Minx McCloud says
Lovely recipe, but I prefer a cream cheese-based frosting. BTW, did you know that traditional red velvet cake is made with the addition of beets? That’s how they did it in the old days and it had a unique taste. Here’s a recipe from AllRecipes.
https://www.allrecipes.com/recipe/246027/red-velvet-cake-with-beets/
Keep the recipes coming. I love you guys!
Kris Longwell says
Thanks, Minx! Happy Holidays!!
Tracy says
Delicious!!! Love you guys
Kris Longwell says
Thank you, Tracy!!!! xoxo Kris & Wesley
recipes says
Hey! Do you use Twitter? I’d like to follow you if that would
be okay. I’m absolutely enjoying your blog and look forward to
new updates.
professionaltutor.net says
I’ve been surfing on-line more than 3 hours as of
late, yet I by no means discovered any attention-grabbing article like yours.
It is lovely worth sufficient for me. Personally, if all webmasters and bloggers
made good content material as you probably did,
the net will be a lot more useful than ever before.