

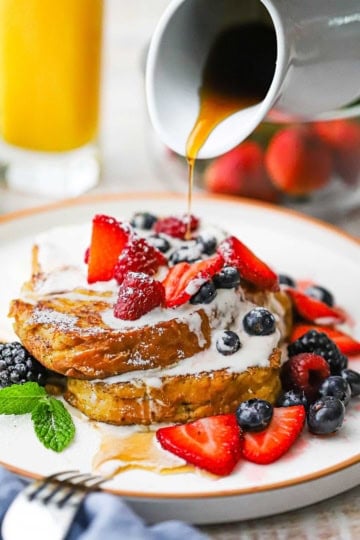
These classic doughnuts will rival your favorite doughnut shop. Perfect for a fun, afternoon project with the kids and during Hanukkah, too!
You can make both the jelly and the custard a day in advance. And then just allow a few hours for the dough to rise, and you’ll be amazed at how easy it is to make authentic jelly-filled and custard-filled doughnuts at home!
VIDEO ALERT: Be sure to check out the video for this recipe in the recipe card. If you like the video, subscribe to our YouTube Channel!
HOW TO MAKE JELLY AND CUSTARD DOUGHNUTS
As mentioned, you can get a jump start on these amazing doughnuts by making the strawberry jelly and the custard a day in advance.
Start your dough a few hours before you’re ready to fry it, which will give the dough plenty of time to proof (or rise).
Watch us show you how to make jelly-filled and custard-filled doughnuts at home!
MAKING THE DOUGH FROM SCRATCH
It may seem daunting to consider making doughnut dough from scratch. But it’s easier than you might think!
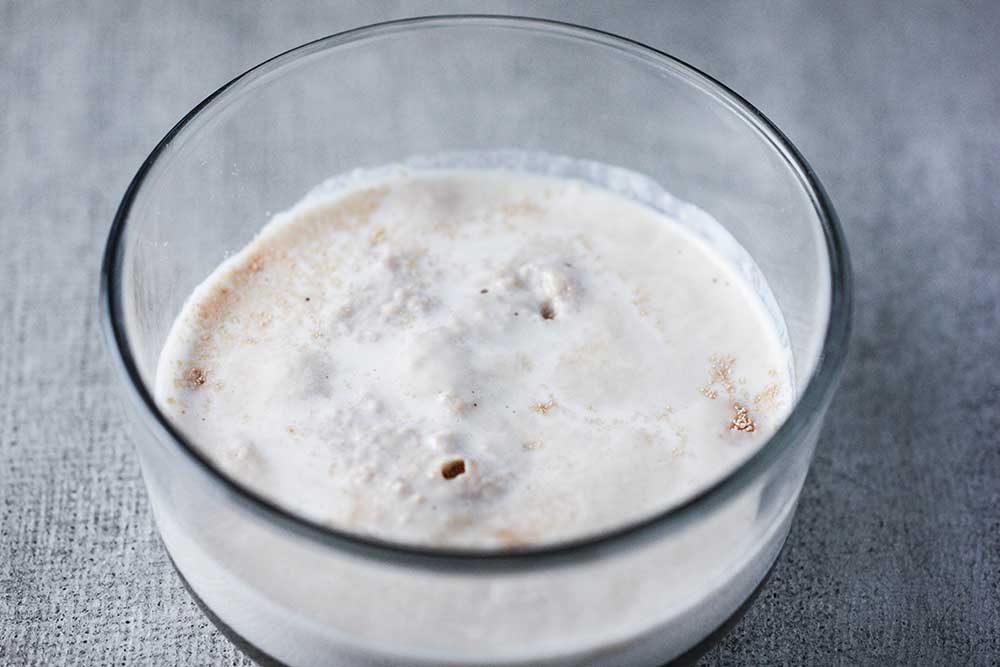
It all starts with yeast. You can go with Instant Rise Yeast or Active Dry Yeast, which is our choice for this recipe. Start activating the yeast in warm milk, about 105°F to 115°F.
EXPERT TIP: Most commercial yeast will have a shelf life of 2 years. Check the packaged date on the package or the container. Although yeast that is two years old will most likely still be just fine, seek out packages with the most recent date. This will ensure your yeast is active.
FORMING THE DOUGHNUT DOUGH
Once the yeast becomes frothy and starts to bubble slightly (after about 10 minutes), it’s time to proceed with making the dough.
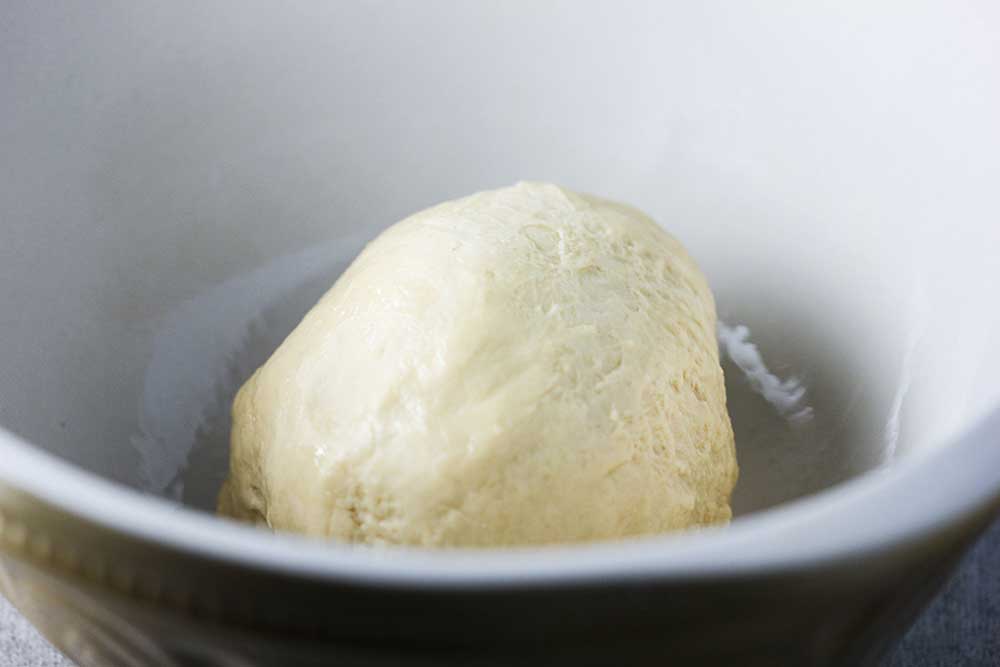
A stand mixer works well, but the following can also be done with a hand mixer, it will just take a little more time, and a little more elbow grease to bring the dough together.
EXPERT TIP: We start off by using our stand mixer paddle attachment to incorporate all the ingredients. The dough will be sticky, but if it’s too sticky to handle, add a little more flour until the dough just starts to pull away from the sides of the mixer with the motor running. Next, we remove the dough, replace the paddle attachment with the dough attachment, return the dough to the bowl, and start the motor again at medium speed. Kneading the dough for 4 to 5 minutes will make the dough elastic, yet still slightly sticky to the touch. Fingers wet with a little water make handling the dough easier.
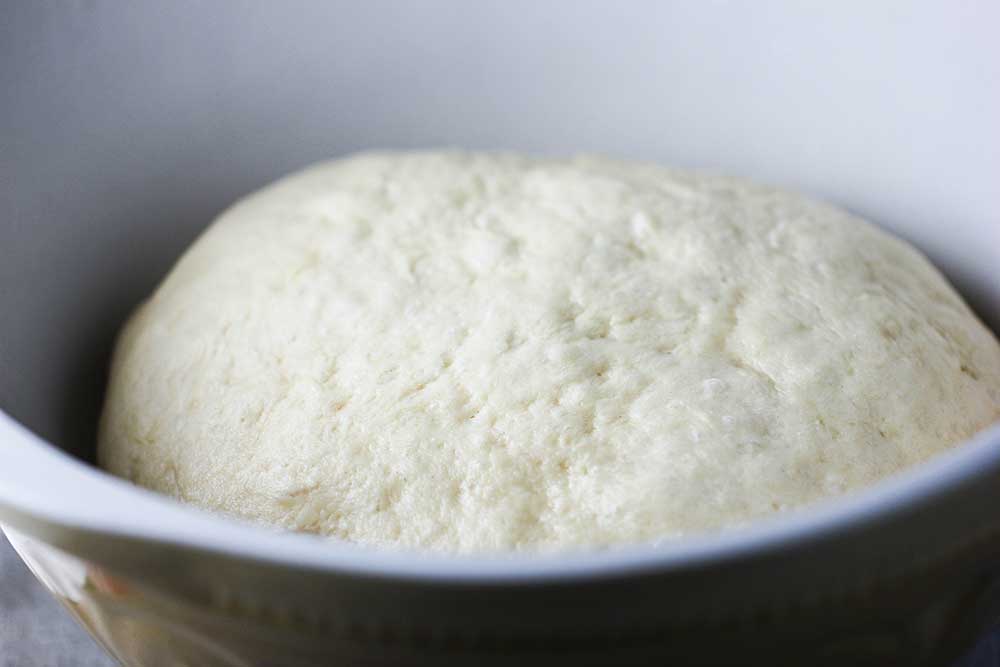
Remove the dough and form it into a ball, smoothing out the edges by pinching the dough downwards. Place in a greased bowl and cover with plastic wrap. Allow the dough to double in size in a non-drafty, warm area.
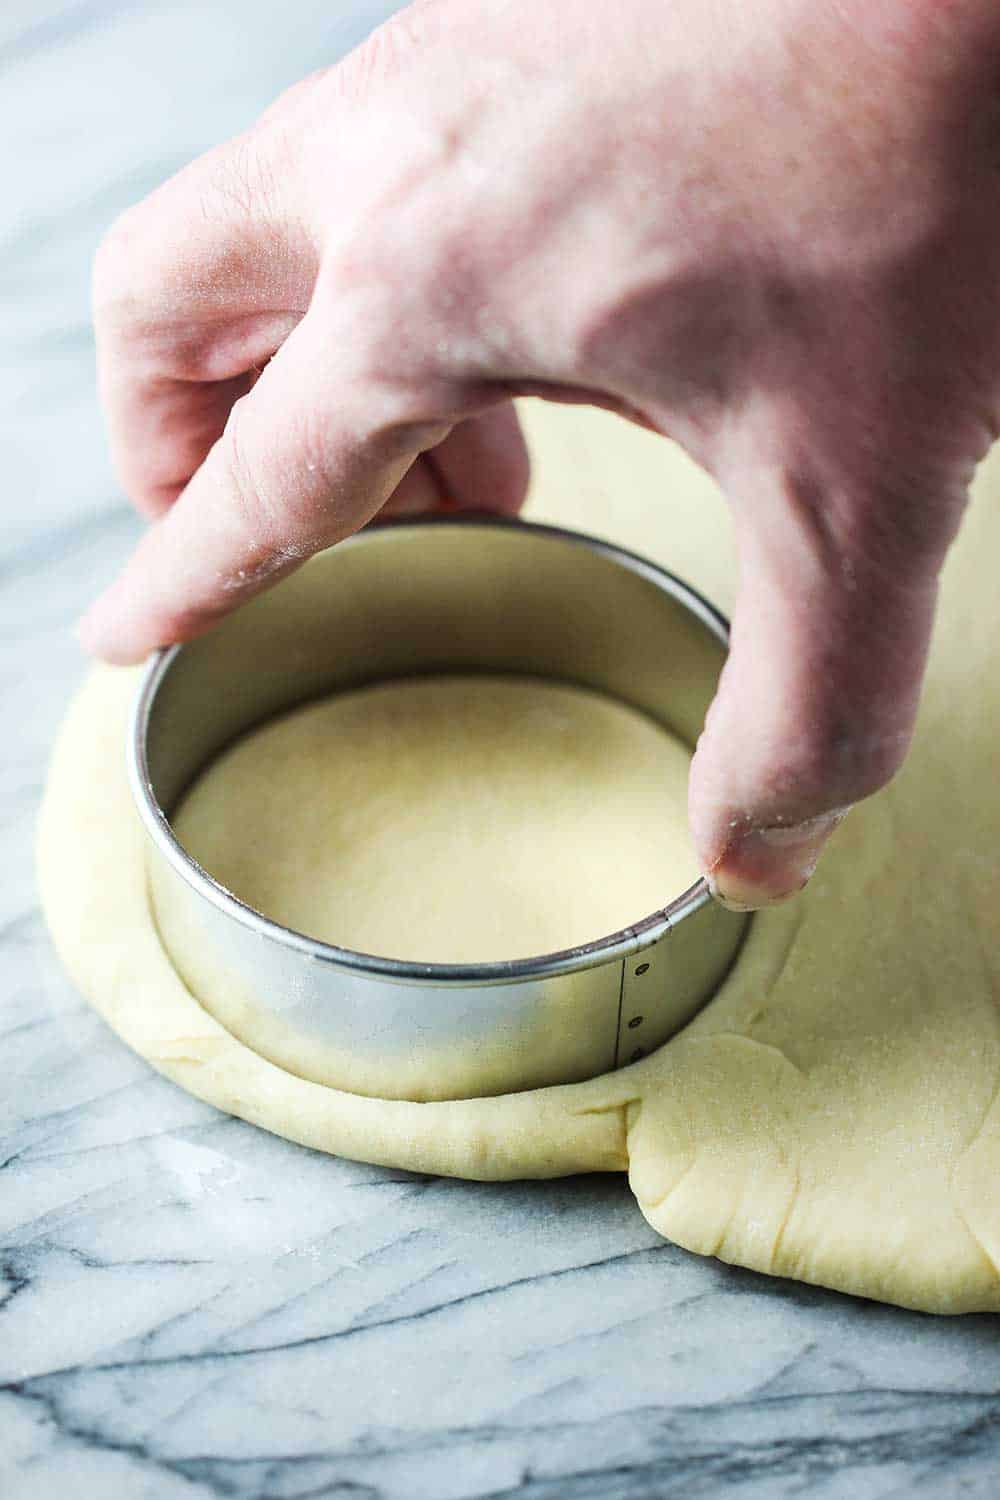
CUTTING THE ROUNDS FOR THE DOUGHNUTS
Once you have turned the dough out onto a lightly floured surface, use your rolling pin to roll the dough out to ½-inch thickness, usually with a 14-inch diameter circle.
We use our trusty 3-inch doughnut cutter to cut out the rounds for the doughnuts.
EXPERT TIP: If you don’t have a 3-inch cutter, no worries! Find a mason jar top or even a drinking glass that’s approximately 3 to 5-inches wide. Once you’ve cut as many rounds as you can, re-roll the dough until smooth, and cut some more out. Depending on the size of your cutter, you should have between 14 to 20 doughnuts!
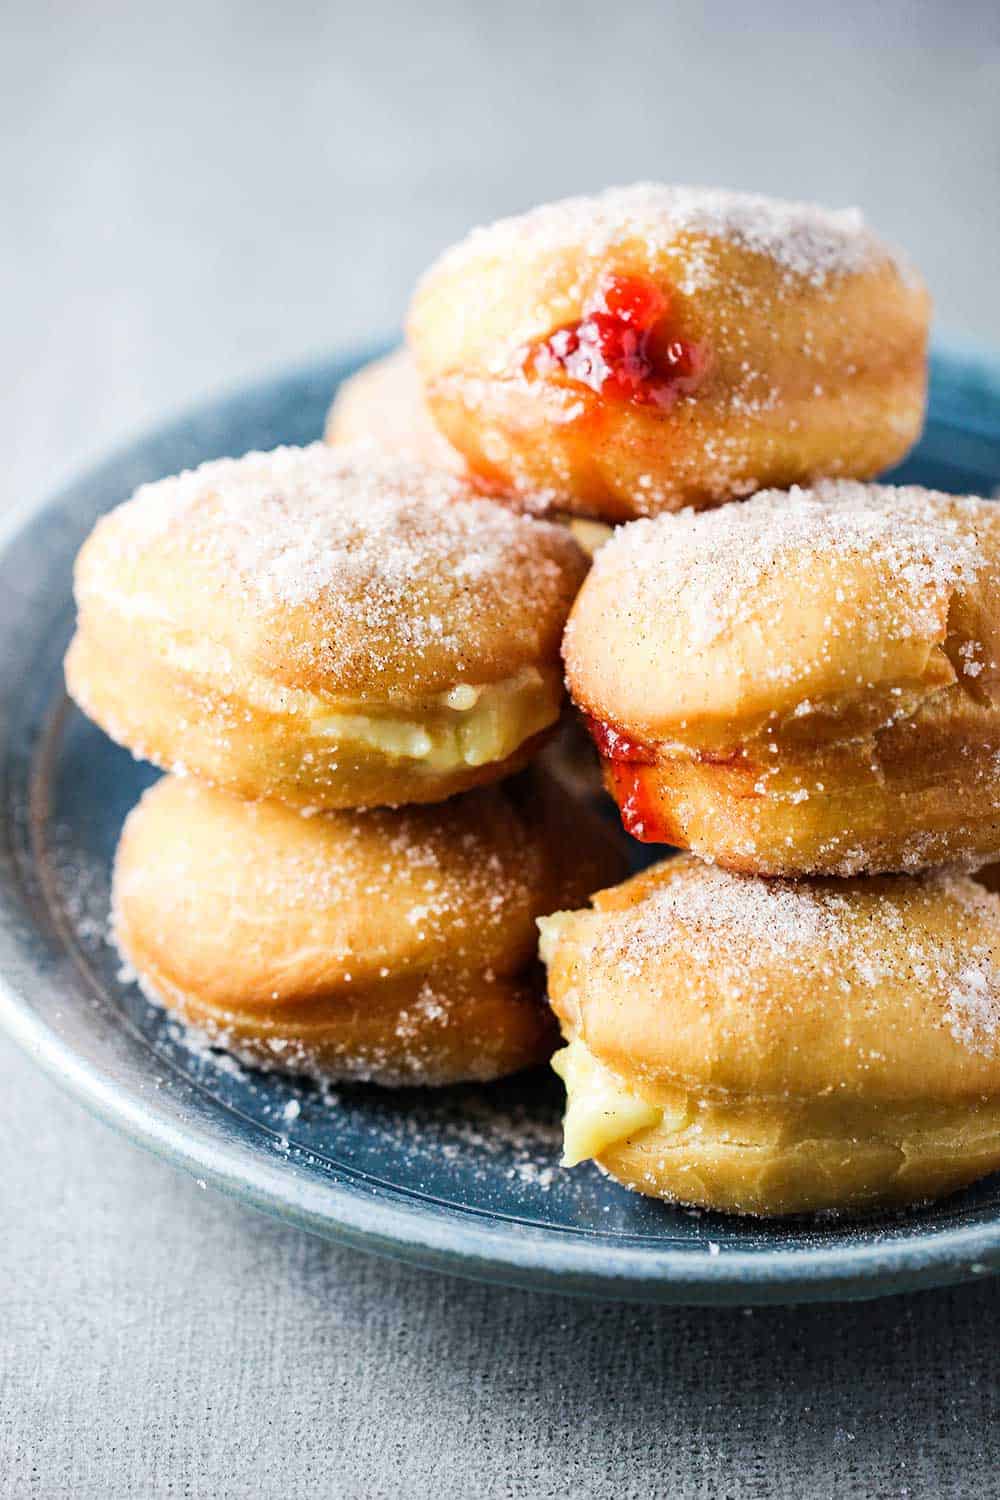
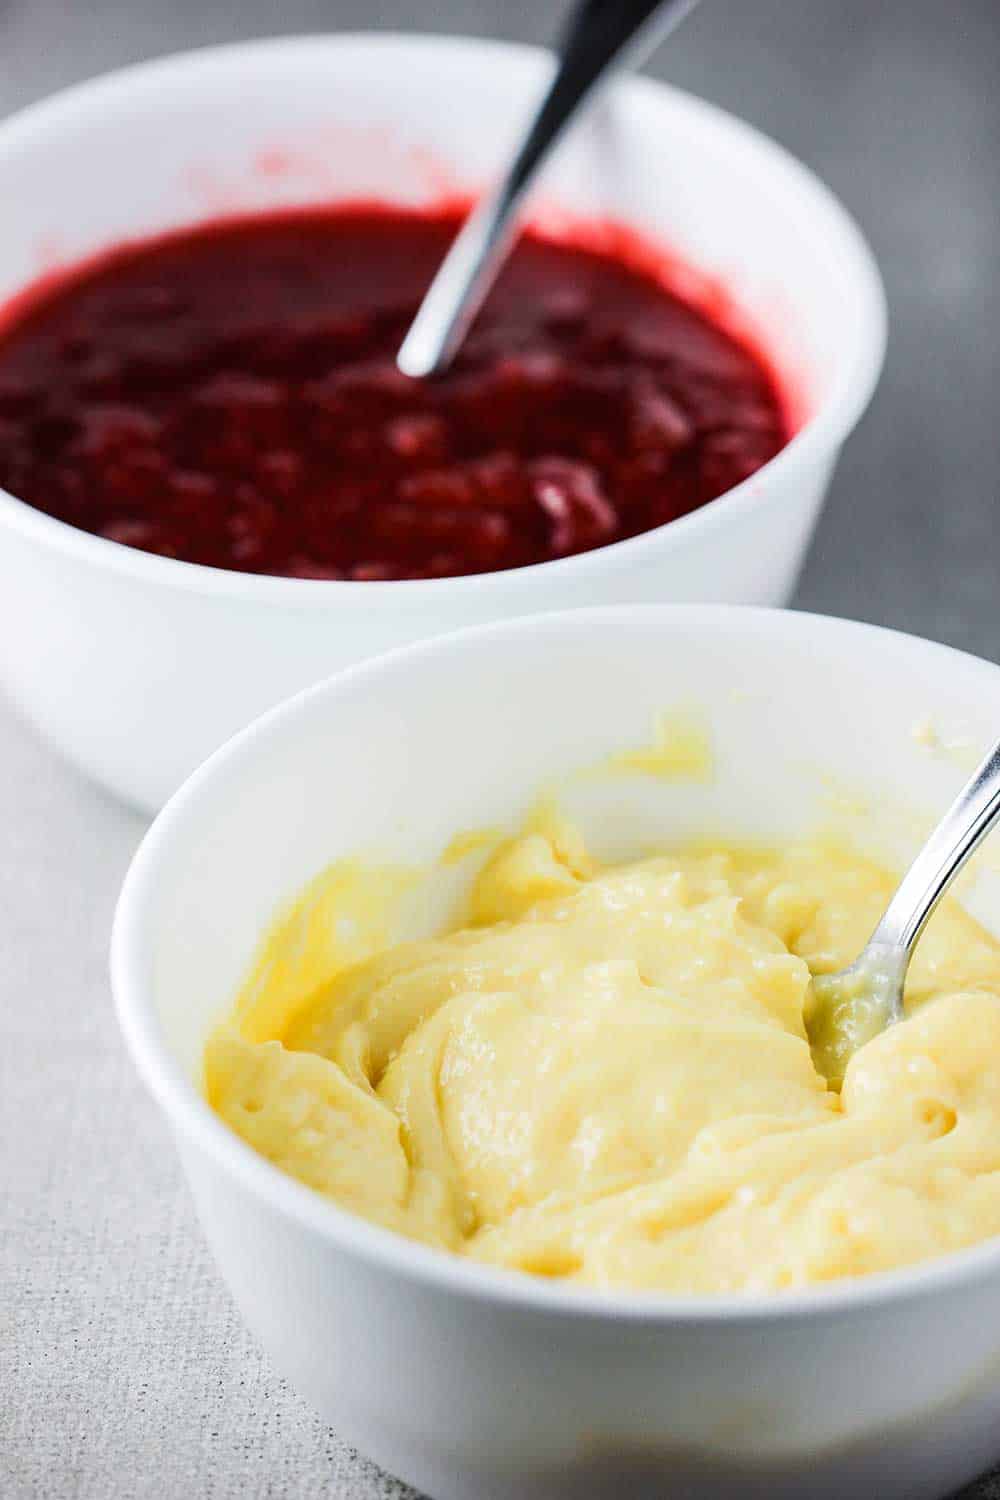
HAVE FUN WITH THE FILLINGS
Fried jelly-filled doughnuts are traditional during Hanukka.
We think strawberry jelly is wonderful, as is the vanilla custard. But you can also cook down blueberries with sugar, or blackberries, or pitted cherries, for another wonderful kind of filling.
EXPERT TIP: Of course, we think homemade is best, but if you are in a pinch for time, a good-quality purchased jam or jelly will work perfectly fine for these jelly and custard doughnuts. A pastry bag with a medium-sized tip makes piping the filling in easy. You can also use a sturdy freezer plastic baggie, just snip one corner and insert a decorating tip. Or, just use a knife to open a hole in the doughnut and spoon the filling in.
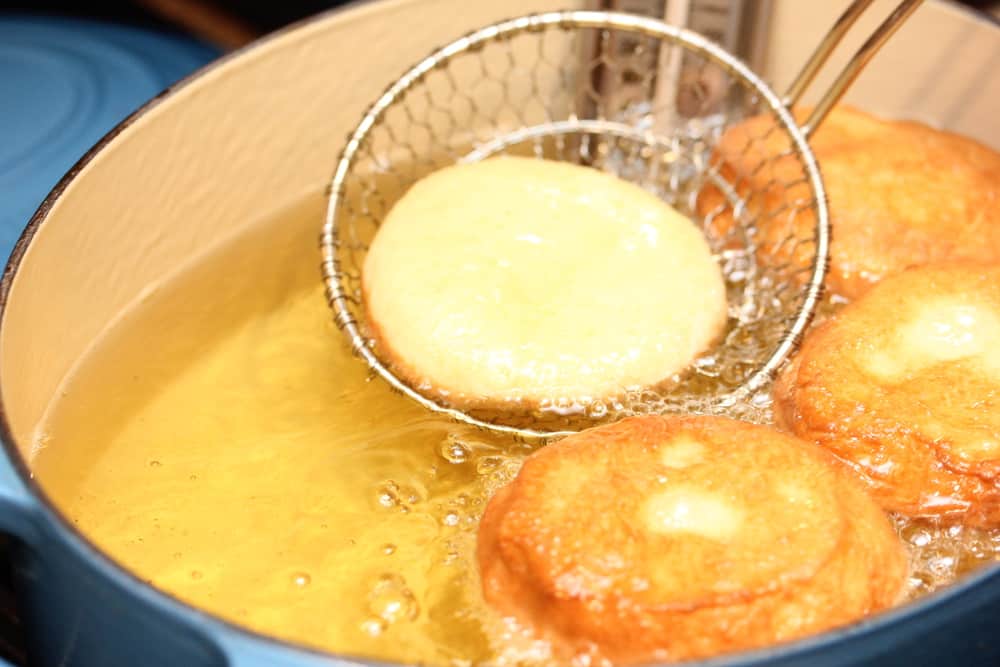
HOW TO FRY JELLY AND CUSTARD DOUGHNUTS
Although baking doughnuts is an option, they just won’t get as fluffy and nicely browned as a quick-fry in oil.
Heat either your deep-fryer, or a sturdy pot filled with 2 to 3 inches of vegetable oil, to 350°F.
EXPERT TIP: Use a couple of forks (or a metal spider) to flip the doughnuts about every 20 to 30 seconds. This will provide even browning all over. They should only take about 3 to 4 minutes to become puffy and golden brown. Be sure to fry them in batches, and as soon as they are done, toss them with some sugar. The hot oil will help the sugar adhere to the cooked doughnuts.
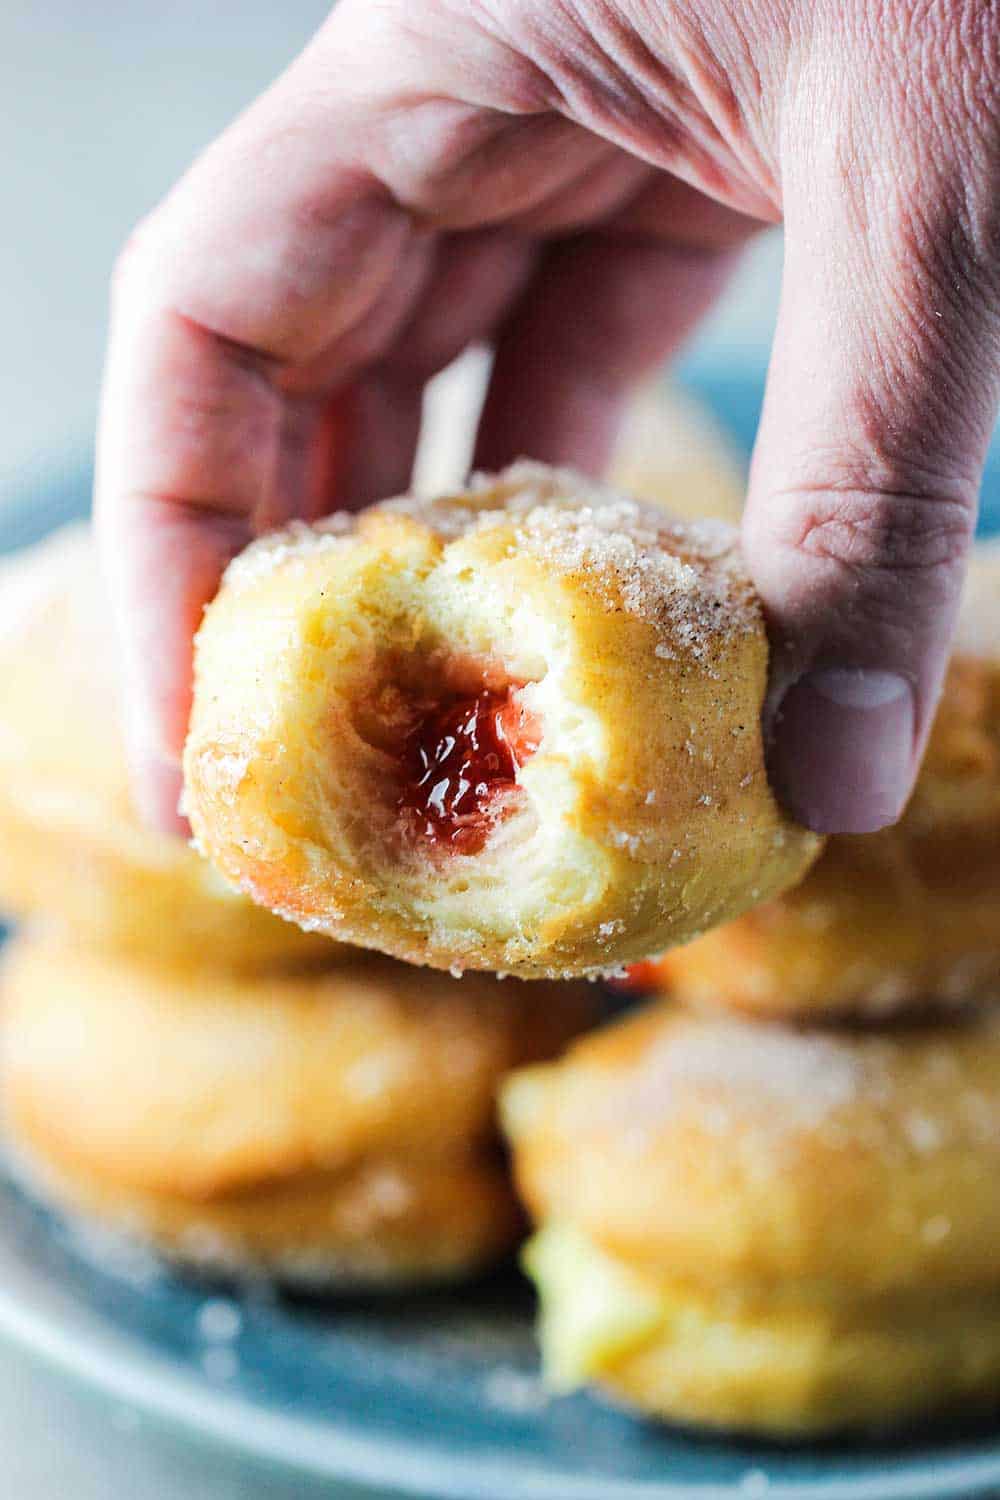
These jelly and custard doughnuts are authentic and so fluffy and delicious.
Perfect for a beautiful Hanukkah feast, or any reason for celebrating life!
With one bite, you’ll understand why we get so excited about these incredible sweet treats.
Want another amazing doughnut recipe? Check out our amazing Apple Cider Doughnuts! YUM!
But in the meantime, make these amazing jelly-filled and custard-filled doughnuts!
And when you do, be sure to take a photo, post it to Instagram, and tag @howtofeedaloon and #howtofeedaloon!

Jelly and Custard Doughnuts
Video
Equipment
- A deep fryer, or sturdy pot with candy thermometer
Ingredients
FOR THE DOUGHNUTS
- 3 teaspoon active dry yeast
- 1½ cups whole milk heated to 105° to 115°F
- 1 cup sugar divided
- 4 tablespoon unsalted butter softened, plus more for greasing
- 1 tablespoon vanilla extract
- 1 tablespoon Kosher salt
- 1 whole egg
- 3 egg yolks
- 4¾ cups flour measured, and then sifted
- vegetable oil for frying
FOR THE STRAWBERRY JELLY FILLING
- 2 lbs strawberries fresh, hulled and roughly chopped
- 3½ cups sugar
- ¼ cup lemon juice
FOR THE VANILLA CUSTARD
- 2 cups whole milk
- ½ cup granulated sugar
- 1 egg lightly beaten
- 2 eggs yolks
- ¼ cup corn starch
- 2 tablespoon unsalted butter
- 1 teaspoon vanilla extract
Instructions
TIME TO MAKE THE DOUGHNUTS
- Sprinkle yeast over the warmed milk and let sit until foamy, about 10 minutes. Once foamy, stir to dissolve.
- In a stand mixer fitted with a paddle attachment, beat together ½ cup sugar and butter until fluffy, about 3 to 4 minutes.
- Add yeast mixture, vanilla, salt, egg, and yolks and beat until combined.
- With the motor running, slowly add flour and beat until all ingredients are incorporated. At this point, the dough will be somewhat sticky. If too sticky to handle, add more flour, 1 tablespoon at a time, until it the dough just starts to pull away from the sides of the bowl with the mixer running.
- Remove the dough and replace the paddle attachment with the hook attachment, return the dough to the bowl, and mix on medium for 4 to 5 minutes. The dough will still be somewhat sticky, but more elastic. Remove from bowl, and with slightly wet fingers, form the dough in a ball.
- Transfer to a lightly greased bowl and cover loosely with plastic and set in a warm place until doubled in size, about 1½ to 2 hours.
- On a lightly floured surface, roll dough into 1 14" round about ½" thick.
- Using a 3" ring cutter, cut dough into rounds, gathering up scraps, and re-rolling to cut more rounds. You should end up with 16 to 20 rounds.
- Transfer rounds to parchment paper-lined baking sheets, about 1" apart.
- Cover loosely with plastic wrap and/or dry kitchen towel, and set in a warm place until doubled in size, about 30 more minutes.
- Heat 2 to 3-inches oil in a 6-qt. Dutch oven until a deep-fry thermometer reads 350°F. Or, heat your deep fryer to 350°F.
- Working in batches, carefully place the doughnuts in the hot oil and fry, flipping every 20 to 30 seconds, until puffed and golden, about 3 to 4 minutes.
- Quickly add the fried doughnuts into a bowl with the remaining ½ cup of sugar and toss to coat. Place the doughnuts on a baking pan or platter.
MAKE THE STRAWBERRY JELLY FILLING
- Place the strawberries in a medium-large saucepan and use a masher to crush them until almost all liquid.
- Add the sugar and lemon juice and cook over medium heat until the sugar is dissolved.
- Increase heat to high, and bring the mixture to a full rolling boil.
- Boil, stirring often, until the mixture reaches 220°F on a candy thermometer.
- Pour into a heat-proof bowl and refrigerate until using. (Can be made a day in advance).
MAKE THE VANILLA CUSTARD
- Stir together the milk and ¼ cup of the sugar in a large saucepan.
- Bring to a simmer over medium heat.
- Meanwhile, in a medium-sized bowl, whisk together the egg yolks and beaten egg.
- In another small bowl, mix together the remaining sugar (¼ cup) and corn starch. Now, stir them into the egg until smooth.
- When the milk comes to a simmer, remove from heat and slowly drizzle it into the egg-mixture bowl in a thin stream - mixing as you pour to fully combine.
- Return the mixture to the saucepan on the stove, and slowly bring to a simmer, stirring constantly. If lumps appear, keep whisking and stirring, they will smooth out.
- When the mixture thickens, remove it from the heat.
- Stir in the butter and vanilla, mixing until the butter is completely blended in. Pour into a heat-proof bowl and chill until ready to use.
FINISH THE DOUGHNUTS
- Once the doughnuts have cooled, fill a piping/pastry bag, or plastic baggie with the corner snipped, with the jelly or custard.
- Insert the tip into the end of each doughnut and pipe approximately 1 -2 teaspoons filling into them. You can also use a small knife and spoon to do this step, too. Store in air-tight container until ready to serve!
Notes
Nutrition
POST UPDATE: This recipe was originally published in January 2017, but the recipe was tweaked with a few new improvements with new photography, tips and a fabulous video in December 2019!
Carole Hamilton says
Hi Chris & Wesley,
When sifting your flour, sift it on a piece of parchment paper and you can add it to the bowl without spilling it out of your bowl.
Carole
Susan says
Absolute Best Doughnut Recipe/Video!
Kris Longwell says
Thank you, Susan!!! We love making doughnuts and these are soooooo good! We hope you have great success with them! Stay in touch! Best, Kris & Wesley
Batya says
Hi. My daughter is allergic to milk, do you think I can use a plant based milk for the whole milk?
Kris Longwell says
Hi Batya! Absolutely! Use the same amount that the recipe calls for. We’d recommend using a variety that doesn’t have too distinct of a taste, otherwise, it will the taste will overpower the doughnut. Soy milk is a good option, but almond milk would work, too! Hope this helps and let us know if you make the doughnuts and what you (and your daughter) think of them. We love them so much!!! Best, Kris & Wesley
Cathy says
Any suggestions for the strawberry filling if I don’t have a candy thermometer?
Kris Longwell says
Hi Cathy…actually, it’s pretty easy to eye-ball for this recipe. Once it starts to thicken, you’re good. Let it cool and it will thicken even more. The consistency, regardless if it’s thick or not as thick, will be delicious either way in these doughnuts. Let us know if you try them and how they turn out!! Best, Kris & Wesley
Desy says
This is so delicious.
My friends keep asking me to make this donuts all the time. Do you know how to make just 1/2 recipe? How many egg should i put for 1/2 recipe?
Nami says
I love this video and am going to make this this weekend. If I make the dough the night before, how long do I need to leave it in the fridge for it to rise?
Kris Longwell says
Hi Nami!! Awesome!! You’re going to love these doughnuts! If you let the dough sit in the fridge overnight, you’ll be fine. Maybe in the morning, place it in a warm (not too warm!), non-drafty place. Let us know if you have any other questions and definitely let us know how they turn out!! Have fun!!
Vera says
Hi Kris I went back and checked and there is no video with mine so I do not know what is going on .. All I get is the pictures on the way down to the recipe . ..I love watching you guys but with no video its not to interesting .. I am very sorry that it didn’t come through for me .. Maybe if you were to post it again, just maybe it would work Thank you Vera
Vera says
I am very disappointed that you didn’t show a video for making the doughnuts,,.This is the second time that there is no video of you 2 guys ,, What is wrong ???
Kris Longwell says
Hi Vera, not sure why you’re not seeing the videos. There is one in the body of the post and one at the end of the recipe card. You can always see our latest videos on our YouTube Channel, too.