Roasted Chicken Stock
Servings: 12
Calories: 40kcal
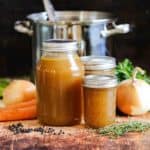
This recipe for roasted chicken stock delivers such a deeply flavored broth for your favorite soups, gravies, or any recipe calling for stock/broth. Be sure to save those poultry bones and freeze until ready to make this incredible stock!
Print Recipe
Equipment
- Large roasting pan.
- Large stock pot (preferably 12 to 16 quart) - or a couple smaller pots
Ingredients
- 3 to 4 lbs chicken bones or turkey, roughly broken down
- 3 onions quartered, skins left on
- 2 large carrots roughly cut, no need to peel
- 3 stalks celery roughly cut
- Kosher salt
- Black pepper freshly ground
- 2 tablespoon olive oil
- 4 sprigs thyme fresh
- 1 bunch flat-leaf parsley fresh, stems only
- ¼ cup peppercorns whole, black
Instructions
- Pre-heat oven to 450°F.
- Place bones, onions, carrots, and celery in a large roasting pan. Generously sprinkle salt and pepper all over. Add the oil and toss until well coated.
- Place in the oven and roast for 40 minutes, stirring the contents of the pan once after 20 minutes.
- Transfer the roasted bones and vegetables to a large stock pot. Add enough cool water to cover by 2 inches.
- Add 2 cups water to the roasting pan and use a spatula to scrape up bits that are stuck to the bottom of the pan. Pour into the stock pot. (If the bits are extremely burnt and charred, skip this step)
- Add the thyme, parsley stems, and peppercorns to the pot.
- Simmer over medium heat for 4 hours, skimming any impurities that may appear on the surface.
- Carefully strain the stock into another large pot through a fine-mesh seive. Discard the solid items.
- If desired, strain again through a very fine mesh Chinoise, or colandar lined with cheese cloth.
- Place in the refrigerator and let cool for 4 hours, or overnight. Use a large spoon to skim off congealed fat that has formed on the surface of the stock.
- Use at once, or store in airtight containers. Store in the refrigerator for up to 1 week, or freeze for up to 3 months.
Video
Notes
You can also use a turkey carcass, or turkey bones, or a combination of chicken and turkey. Or, just use all chicken bones.
Be sure to stir the bones and veggies at least once during the roasting process. This will help to eliminate burnt bits on the bottom of the pan, which you don't want when you deglaze the pan with water before adding to the stock pan. If you do have overly-burnt bits, then skip the de-glazing step.
If you prefer your stock to be salted, add salt, 1 teaspoon at a time, after you have strained the liquid. Taste and add more until desired seasoning is reached.
We like to strain the stock twice. Once through a regular colander, and then a second time through a fine-mesh sieve, Chinoise, or colander lined with cheesecloth. This second straining isn't 100% necessary, but ensures a smooth and silky stock.
To prevent messy spillage, we place a pot in a large pan, or sink, before pouring the stock through the strainer. Just in case some of the stock doesn't make it into the 2nd pot, the pan will catch the spillage.
We divide the stock into several different containers, usually about 2 to 3 cups each. This way, you only have to thaw the amount you need for your next recipe, rather than thawing out the entire batch, which will most likely be more than you will need.
Keep stock in the refrigerator for up to 1 week and in the freezer for up to 3 months.
Nutrition
Calories: 40kcal | Carbohydrates: 4g | Protein: 1g | Fat: 2g | Saturated Fat: 1g | Sodium: 20mg | Potassium: 131mg | Fiber: 1g | Sugar: 2g | Vitamin A: 2466IU | Vitamin C: 10mg | Calcium: 22mg | Iron: 1mg