

There are so many wonderful dishes that are of Mexican origin. This one is unique and truly one of our favorites.
We love brunch and we love Mexican cuisine. This dish is a huge celebration of both. We have served this alongside our Chile Rellenos Stuffed with Queso for an absolutely gorgeous and incredibly delicious Mexican brunch. You can make the chips and sauce well in advance, making the final assembly fast and easy!
HOW TO MAKE CHILAQUILES FROM SCRATCH
This dish can absolutely be made in stages and as mentioned, makes the final preparation so easy.
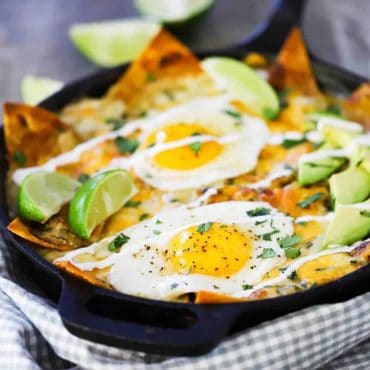
The flavors are so bright and vibrant and the presentation is gorgeous when you bring it to the table.
HOMEMADE CORN TORTILLA CHIPS ARE EASY TO MAKE
Corn tortilla chips are a key ingredient in authentic chilaquiles.
And making them from scratch is so much easier than you might think.
EXPERT TIP: If you don’t have a deep fryer, simply add enough vegetable oil to a sturdy skillet (cast-iron) or pot (Dutch oven) to reach a depth of about an inch to 2 inches. Bring the oil to 350°F to 365° and then simply fry the cut tortillas. We go with packaged yellow corn tortilla and cut them into quarters. As soon as the oil stops simmering around the tortillas, they should be ready. Sample one from the first batch to make you’re timing is correct before continuing.

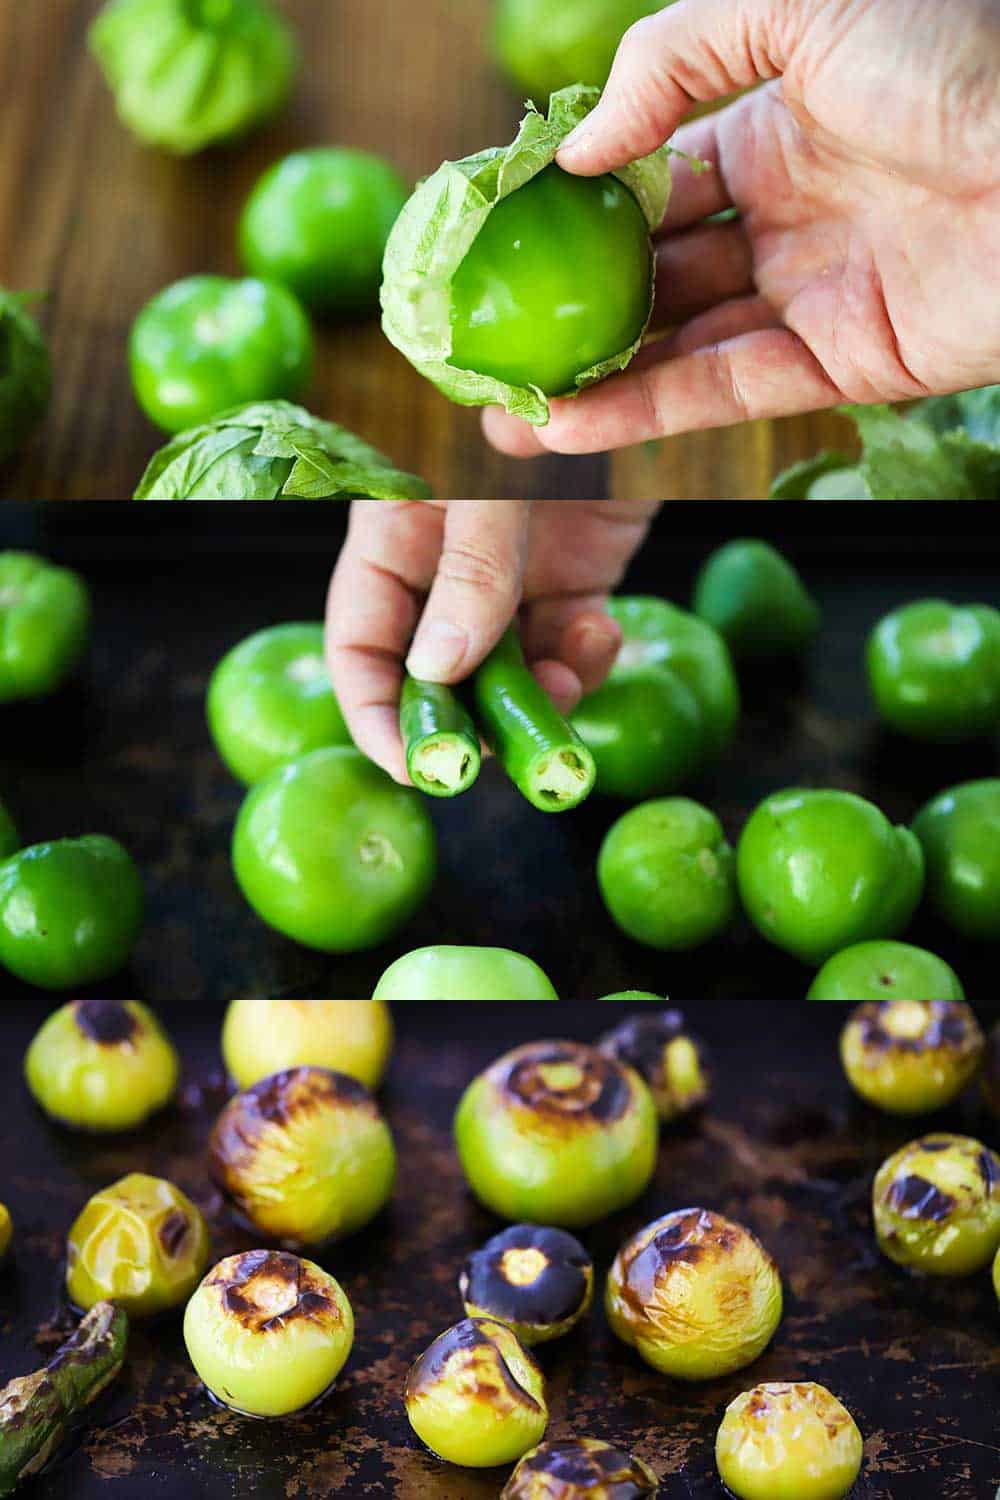
Tomatillos are a key ingredient for the salsa verde sauce. They can be found in the produce section of most well-stocked grocery stores.
We love to add a couple of serrano peppers to the mix to add a little heat.
EXPERT TIP: Roasting the vegetables deepens the flavor and adds incredible taste to the sauce. Turn your broiler onto HIGH, and then roast them for about 5 minutes, about 4 inches from the heat. Carefully remove the pan from the oven and use tongs to turn the vegetables over. Return them to the oven and broil for another 5 minutes. Their skin will get dark and charred in places, which is what you want.
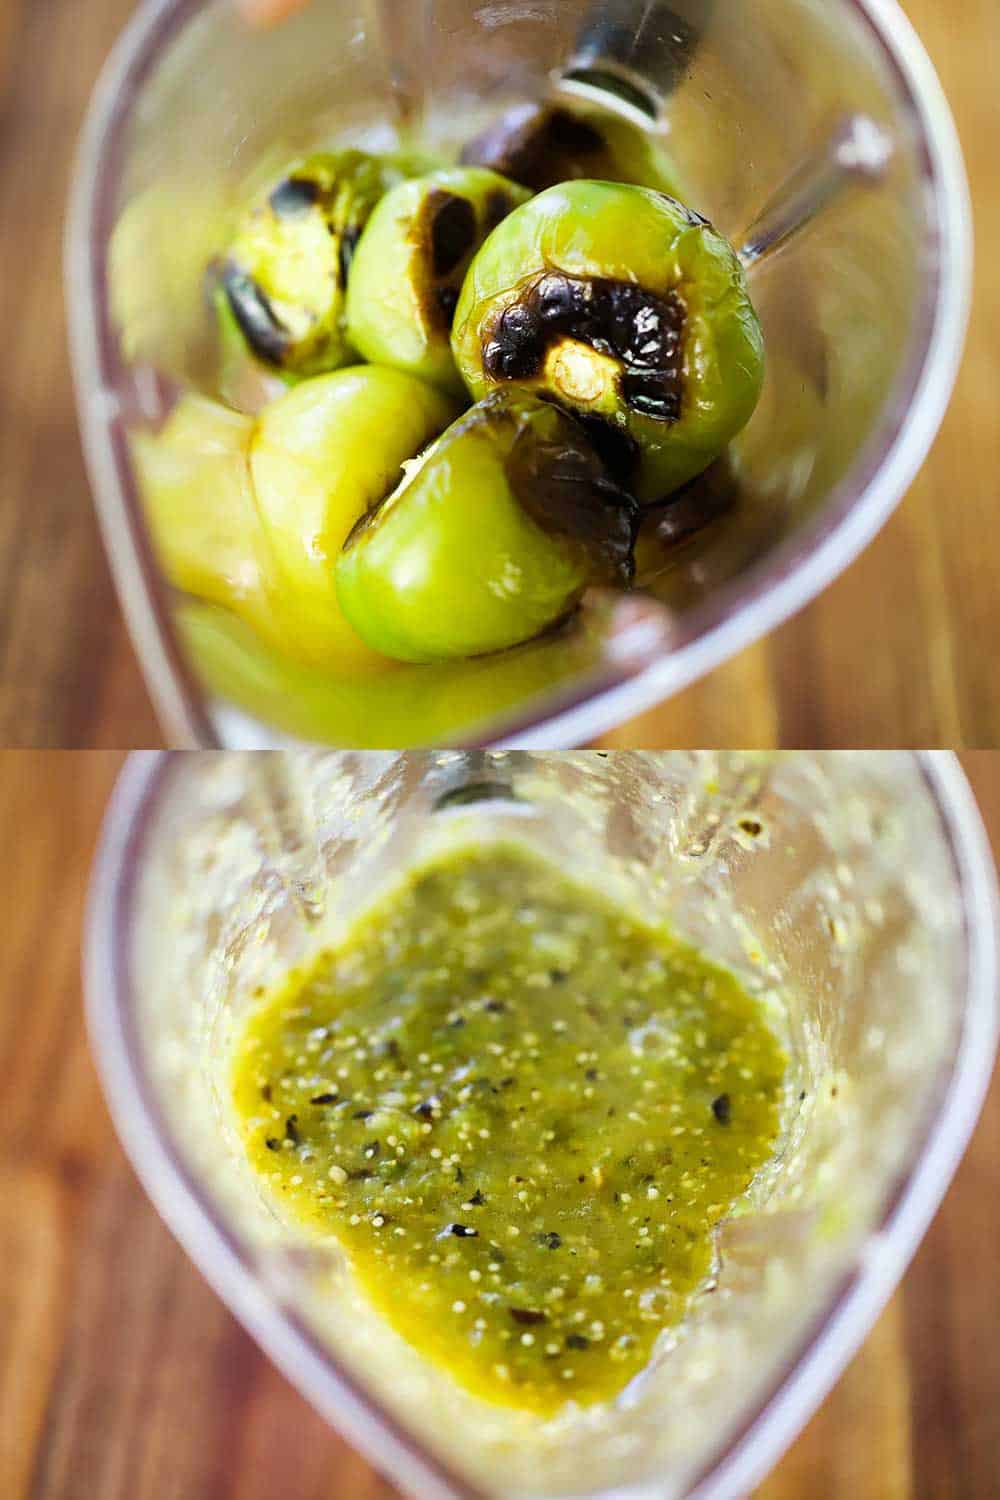
PURÉEING THE VERDE SAUCE
After roasting the peppers, it’s time to get them ready for the skillet.
We use our blender to quickly purée them, but you could also do this in your food processor.
For safety, it’s a good idea to let the peppers cool a bit before transferring them to your blender or food processor.
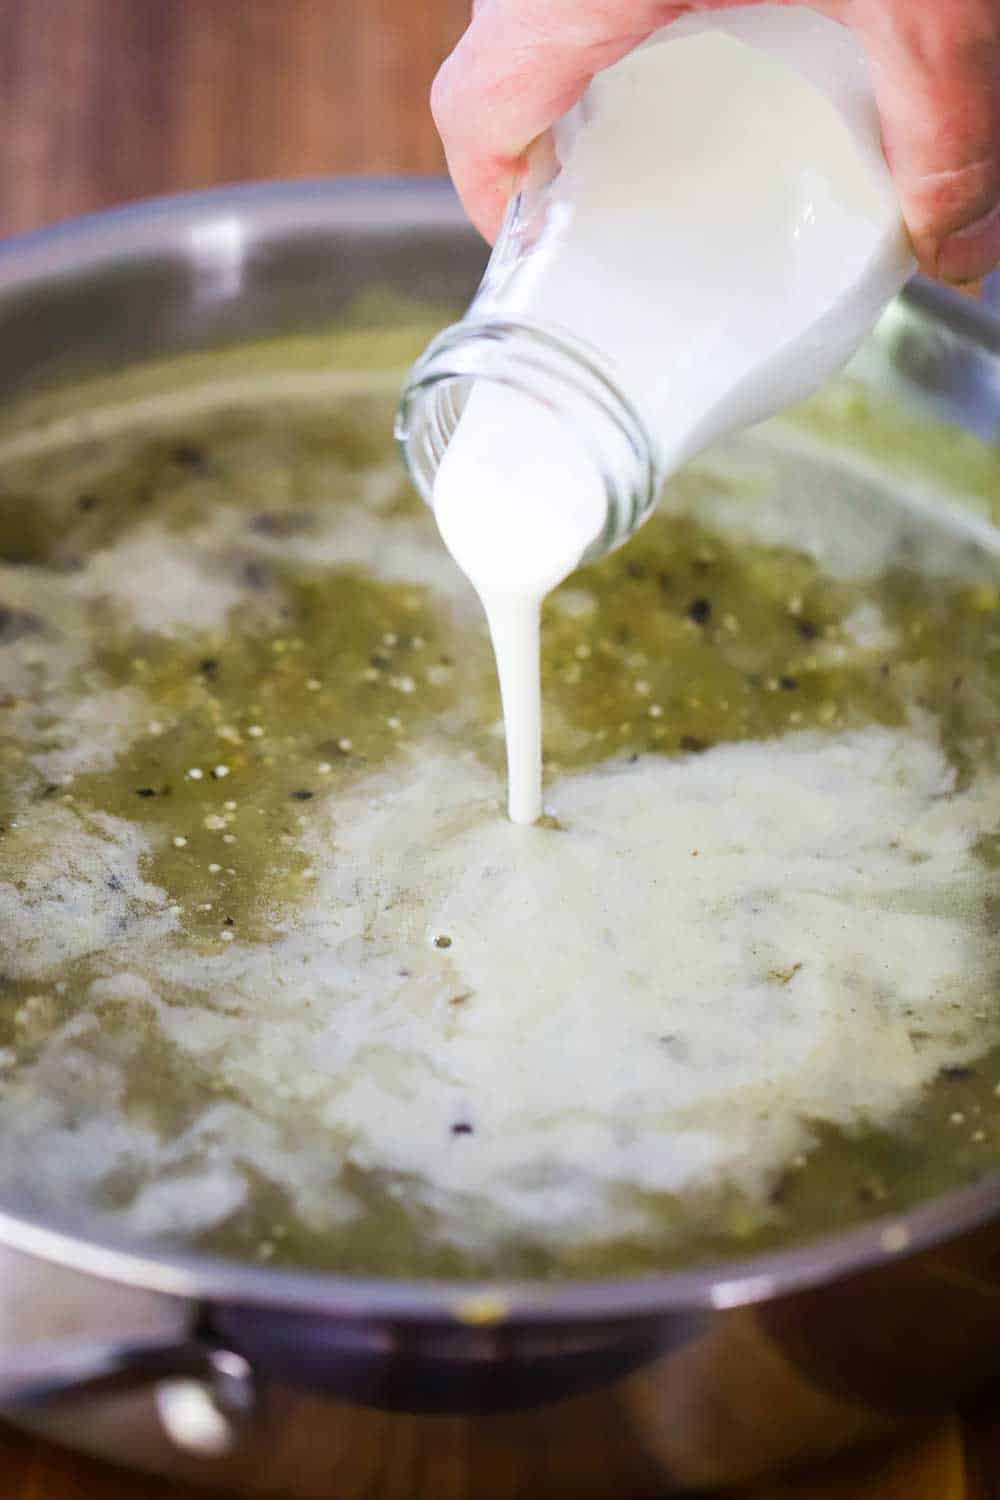
Now to the skillet, the sauce goes.
Bring to a boil and then add good-quality chicken stock. Let that simmer until slightly thickened, about 5 minutes.
Mexican crema, crème fraîche, or even just heavy cream adds a luxurious texture to the sauce that is wonderful.
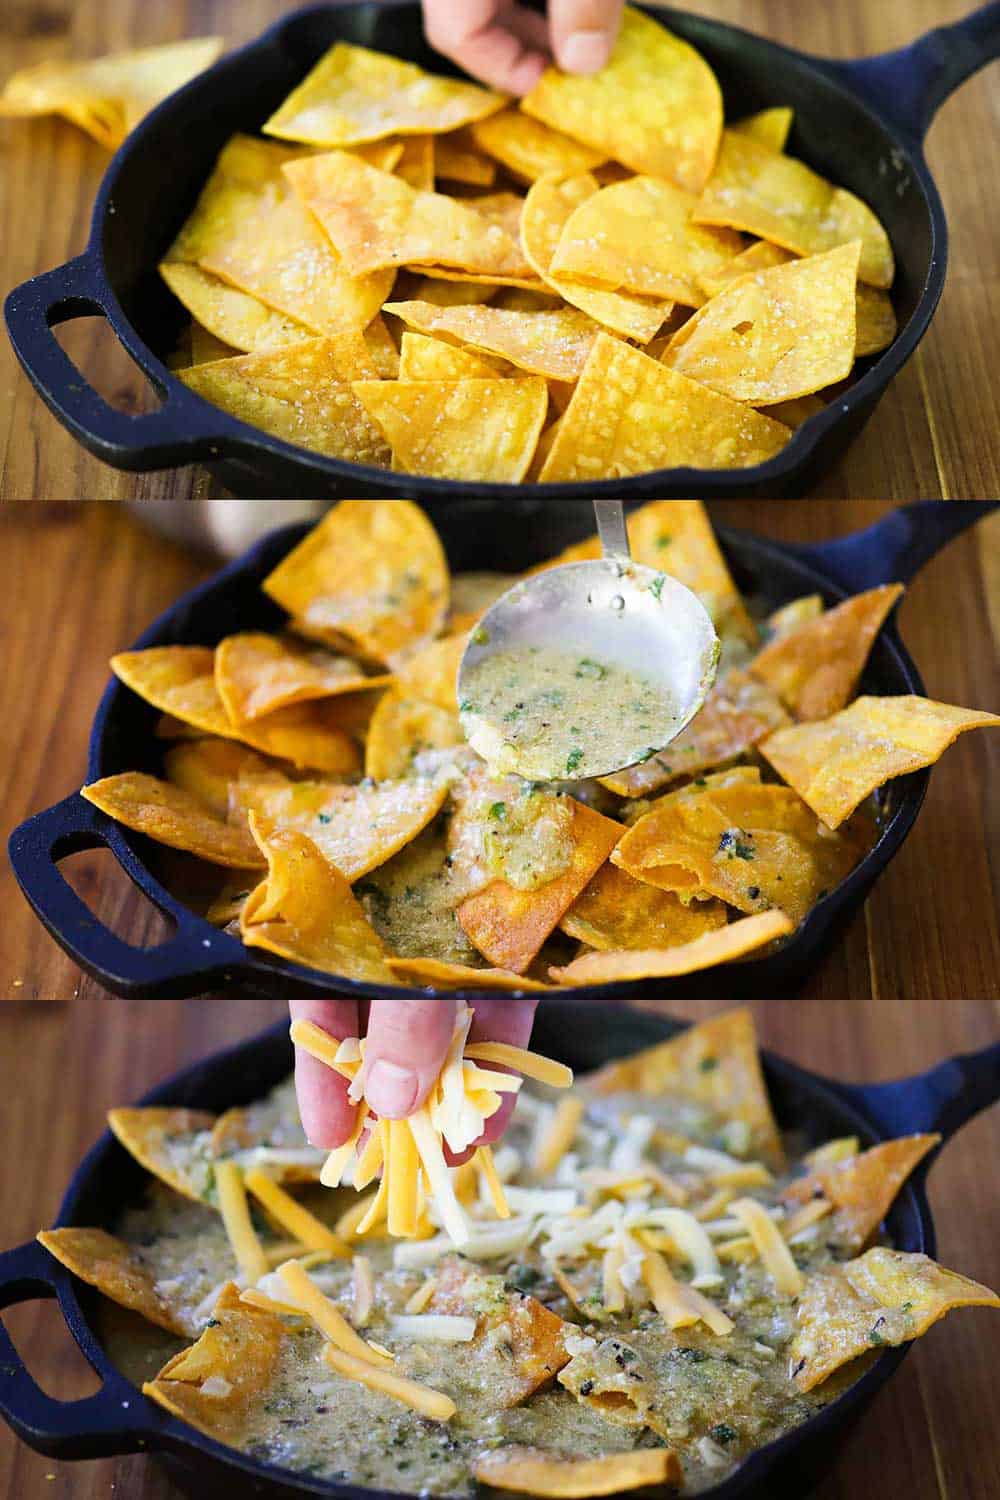
LAYERING THE CHILAQUILES
We love using our 10-inch cast-iron skillet for baking the dish, but you can also use a 12-inch cast-iron skillet. A 9″x13″ baking dish works perfectly well, too.
Choose a good melting cheese, such as Mexican Chihuahua, or Monterey Jack, cheddar, or a combination of these.
EXPERT TIP: When building the dish, first give the chips a gentle press into the pan or dish. Save some chips for filling the sides of the pan. We love to have crispy edges to the finished chilaquiles, which delivers wonderful texture and taste. After adding the sauce to the chips, use a wooden spoon to move the chips around so they all get coated.
This dish is definitely best when served piping hot right from the oven. Though it’s still delicious to munch on later in the day, the texture of the casserole loses some of its wonderful texture as it completely cools off.
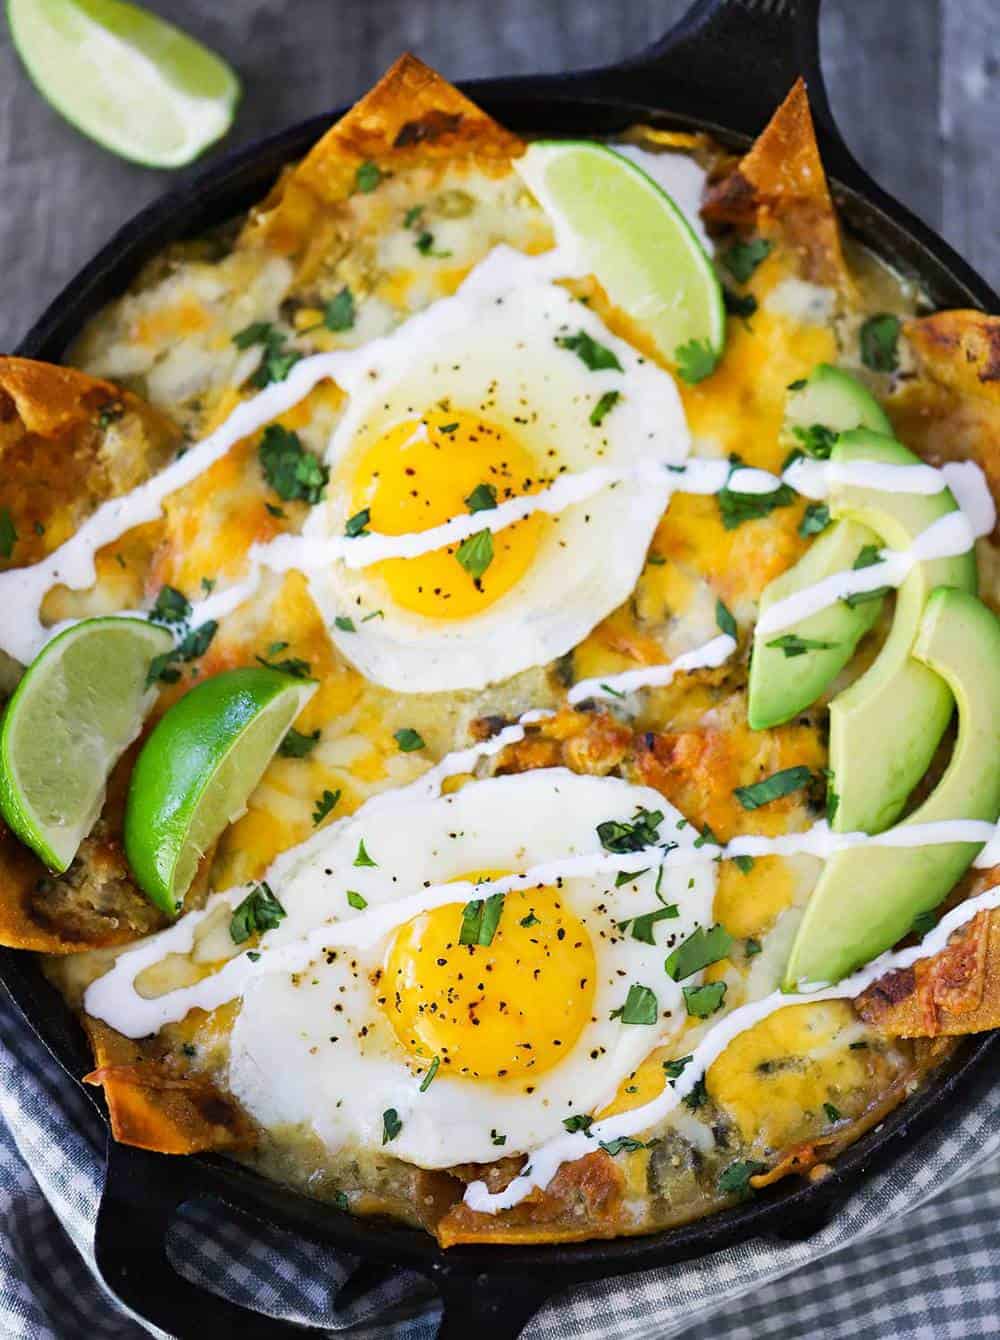
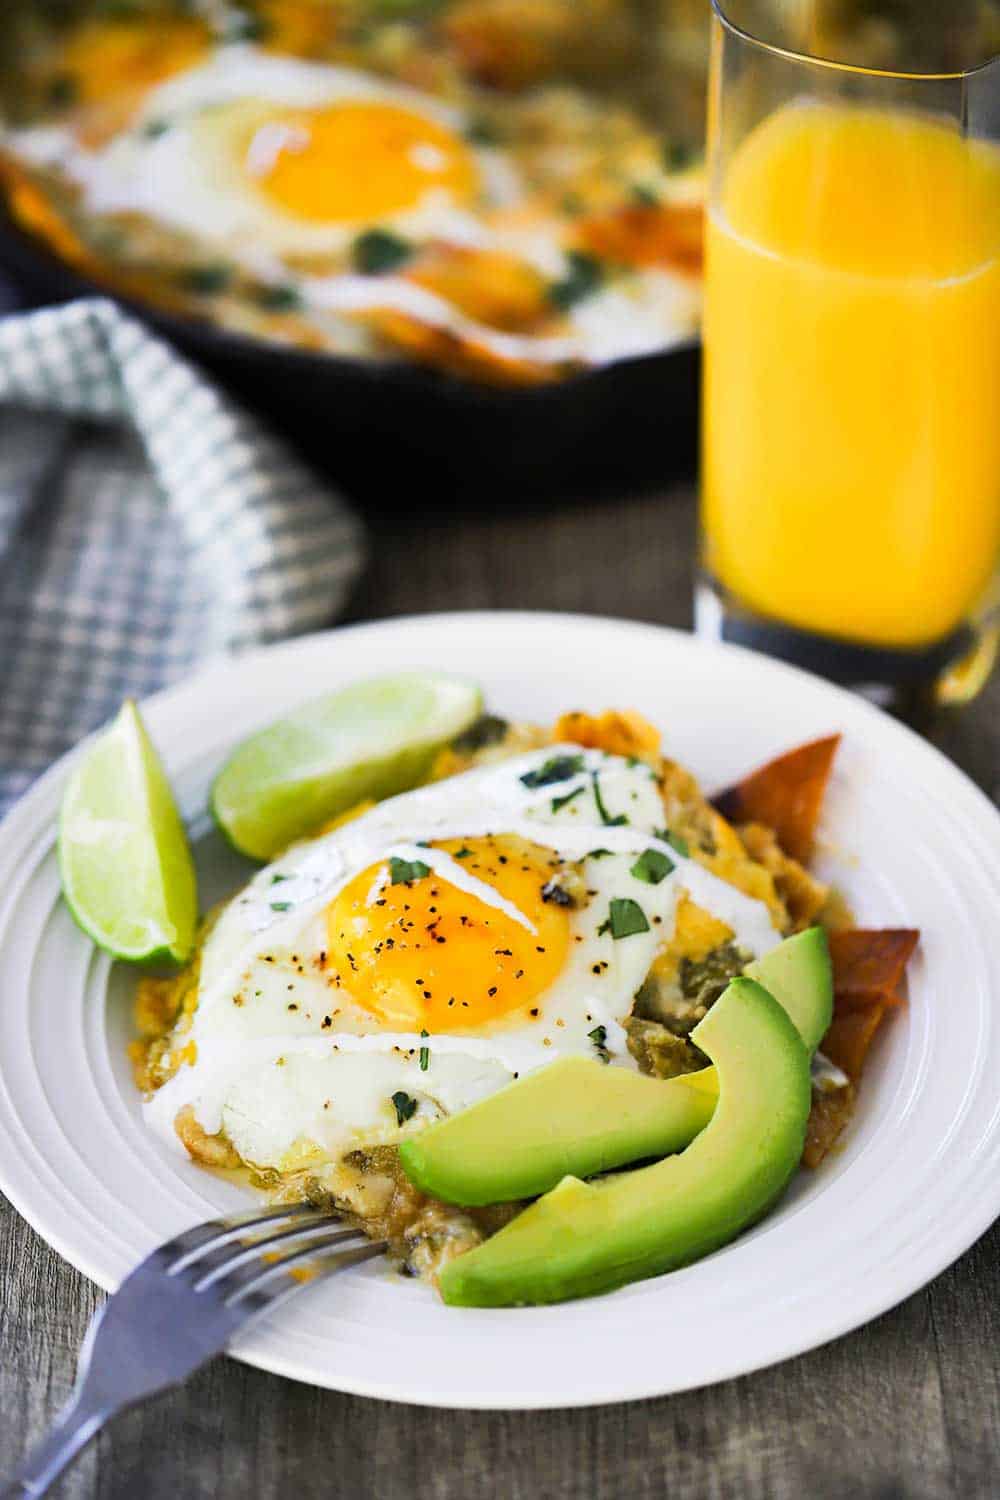
Garnishes are really important in making the perfect chilaquiles. Be sure to have:
- Fried eggs, sunnyside up
- Chopped cilantro
- Sliced avocado
- Lime wedges
- Extra cream, for drizzling
- Hot sauce (optional)
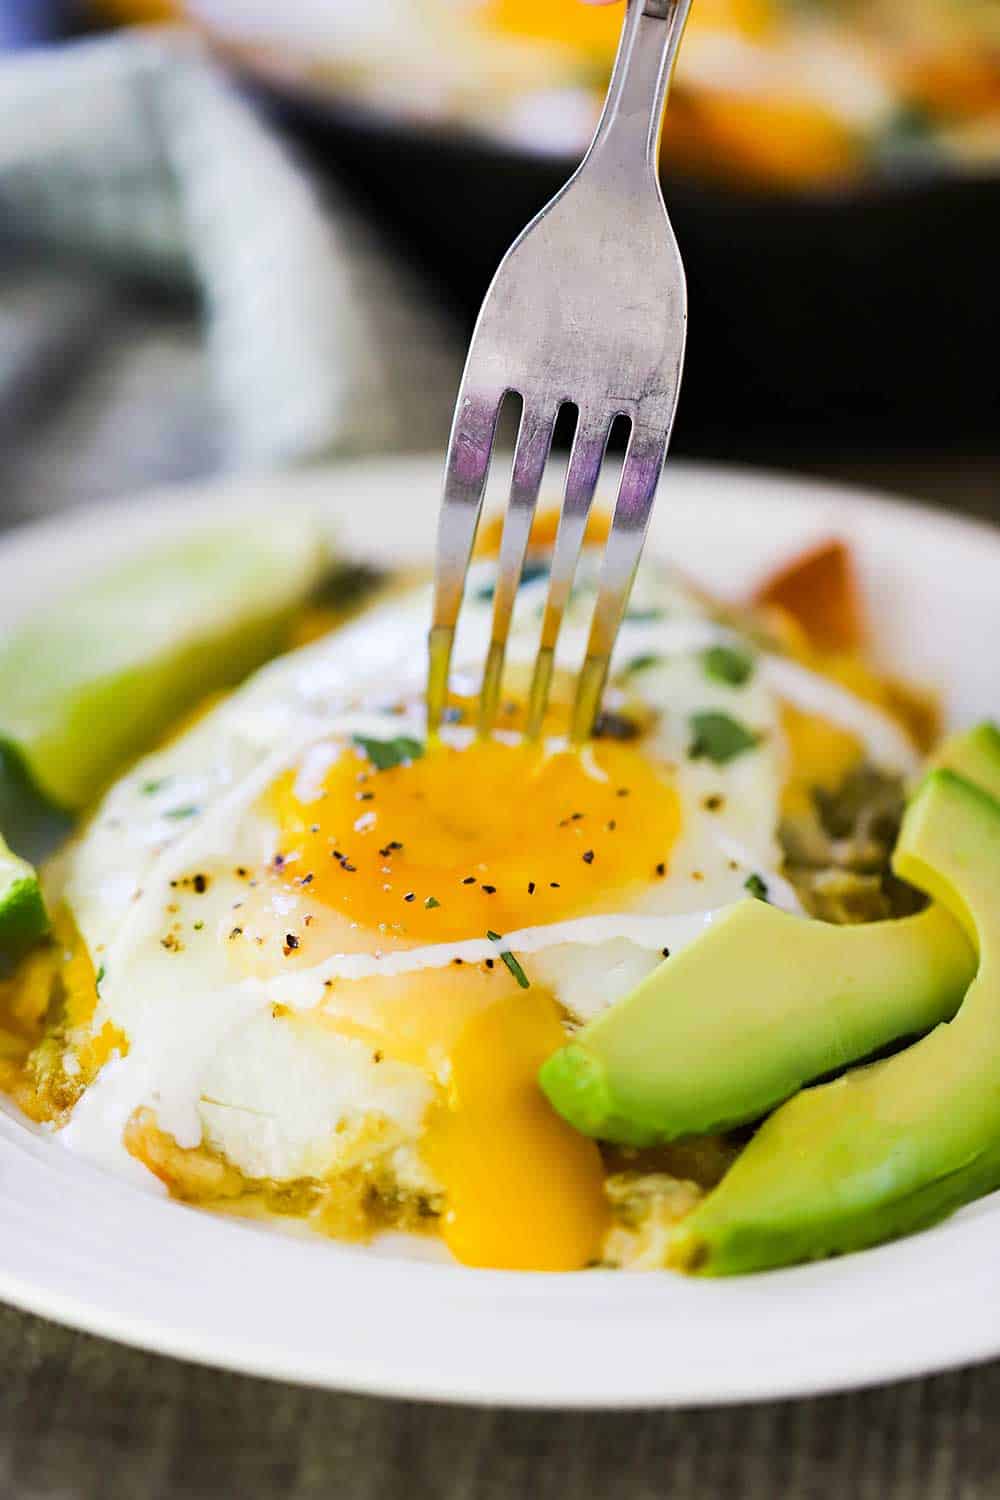
We use our amazing 10″ Non-Stick Sardel pan for cooking the “sunny side up” egg perfectly.
PERFECT FOR A CINCO DE MAYO BRUNCH
This dish is so incredibly festive, and is great year-round, but especially for a Cinco de Mayo brunch!
Once you pierce that perfectly cooked egg and watch that yummy yolk run down your perfectly prepared chilaquiles, you know you’re in for something special.
This is one of our favorite brunch dishes to prepare, and we’re pretty certain you’re going to have so much fun making it yourself and then serving to loved ones!
Ready to make the best Mexican brunch dish in the world? Go for it!
And when you do, be sure to take a photo, post it on Instagram, and tag @howtofeedaloon and hashtag #howtofeedaloon!
Chilaquiles
Equipment
- Deep fryer, or sturdy skillet filled with 1 to 2-inches of vegetable oil
- Blender or food processor
- 10" or 12" cast-iron skillet, or 9"x13" baking dish (for baking the chiaquiles)
Ingredients
- Vegetable oil for frying
- 15 corn tortillas quartered
- 2 tsp Kosher salt divided
- 20 tomatillos husks peeled off and the stems removed (if stems are visible)
- 2 serrano chiles stems removed
- 2 tbsp olive oil
- 1 cup onion chopped
- 4 cloves garlic minced
- 2 cups chicken stock or vegetable stock
- ¾ cup Mexican crema or heavy cream, plus more for garnish
- ¼ cup cilantro fresh, chopped, plus more for garnish
- 1¼ cup Monterrey Jack cheese grated
- 2 tbsp unsalted butter
- 4 large eggs
- Salt and pepper to taste
- 1 avocado peeled, pit removed, and thinly sliced, for garnish
- 2 limes cut into wedges, for garnish
- hot sauce for garnish
Instructions
- Preheat oil in deep-fryer, or oil in a sturdy skillet, to 365°F.
- Working in batches, fry the corn tortilla triangles until just golden and crisp, about 2 minutes. Once the chips stop sizzling in the oil, they should be done. Drain on paper towels and immediately sprinkle with Kosher salt. Set aside.
- Meanwhile, preheat your broiler to HIGH.
- Place the tomatillos (outer skins removed) and stemmed serranos on a large baking dish. Place under the broiler, about 4 inches from the heating element. Remove from the oven after 5 minutes, and use tongs to gently flip the vegetables over. Return to the oven and broil for another 5 minutes. Remove from the oven. The vegetables will be soft and charred in places.
- Turn off broiler and preheat oven to 400°F.
- Carefully transfer the roasted tomatillos and peppers to your blender or food processor. Blend (or process) until puréed, just a few seconds.
- Heat the oil over medium-high heat in a large skillet or saucepan. Add the onion and cook until soft and translucent, about 3 to 5 minutes. Add the garlic and cook for another 30 seconds, stirring occasionally.
- Carefully add the tomatillo/pepper purée to the onion mixture and bring to a simmer. Add the chicken stock and 1 tsp of salt and bring to a boil. Let simmer for about 5 minutes, until thickened somewhat. Turn off the heat and stir in the cream and cilantro.
- Meanwhile, place the chips in a cast-iron skillet, or baking dish, and gently press down. Leave a handful of chips to place around the edges of the dish just before baking.
- Carefully pour the verdi sauce over the chips. Use a wooden spoon to move the chips around, trying to cover as many of the chips in the sauce as possible. Top with the cheese, and then snuggle in the remaining chips along the perimeter of the dish, allowing some of the chips to stick up above the chilaquiles.
- Place in the oven for 15 minutes, until cheese is melted and bubbling around the edges.
- Meanwhile, melt the butter in a non-stick skillet and then gently add the eggs. Sprinkle with salt and pepper and cook until the yolk is just starting to set, about 1 to 2 minutes. Carefully slide the cooked eggs onto a large plate.
- Remove the chilaquiles from the oven and top with the prepared eggs.
- Garnish with additional chopped cilantro, avocado slices, lime wedges, Mexican crema, and hot sauce, if desired. Serve at once.
Video
Notes
Nutrition
POST UPDATE: The recipe was originally published in September 2014, but was updated with improved tweaks to the recipe with new tips, photography, and a fabulous new video in April 2020!
Chris and Wesley
This is one of my family’s favorites…We frequent Mazatlan, but current situation…not traveling. I love this recipe!! We frequently eat all the chilaquiles we can get at our time share in Mexico and missing it. This recipe brought us back to Mexico. You have nailed it. Next, on the menu is Bibimbap. Also, we were camping last week and I was able to make Chilaquiles for brunch and mahi mahi tacos for dinner…on a camp stove, so easy. Love both of you and your delicious recipes!!
Hi Patience! We can’t tell you enough how happy your message made us! We are crazy for chilaquiles, too! And that’s awesome that you’re going to make the Bibimbap! It’s really delicious and we hope you enjoy it. Thanks again for letting us know and keep us posted on future recipes you make!! All the best, Kris & Wesley
I just found your “Chilaquiles” recipe and video. You guys are AWESOME! ❤️ How can I subscribe?
Hi Rebecca!! We are so glad you found us and we found YOU!! Woo hoo!! Let us know if you make the chilaquiles and what you think!! We just added your email to our subscriber list! Now, you’ll get a new recipe every time it gets published!! Thanks so much and stay in touch!! All the best, Kris & Wesley